After a manual transfer process, if you used to have your application in the previous hosting provider's Softaculous interface, you will not see it at HostArmada. Our team does not know if you formerly used Softaculous or if they should import the application for you. Unless you explicitly inform us to do it, there is no way of knowing, thus this article will aim to give you insight on how you can do this on your own should you be faced with a similar situation.
Importing Multiple Manual Installations
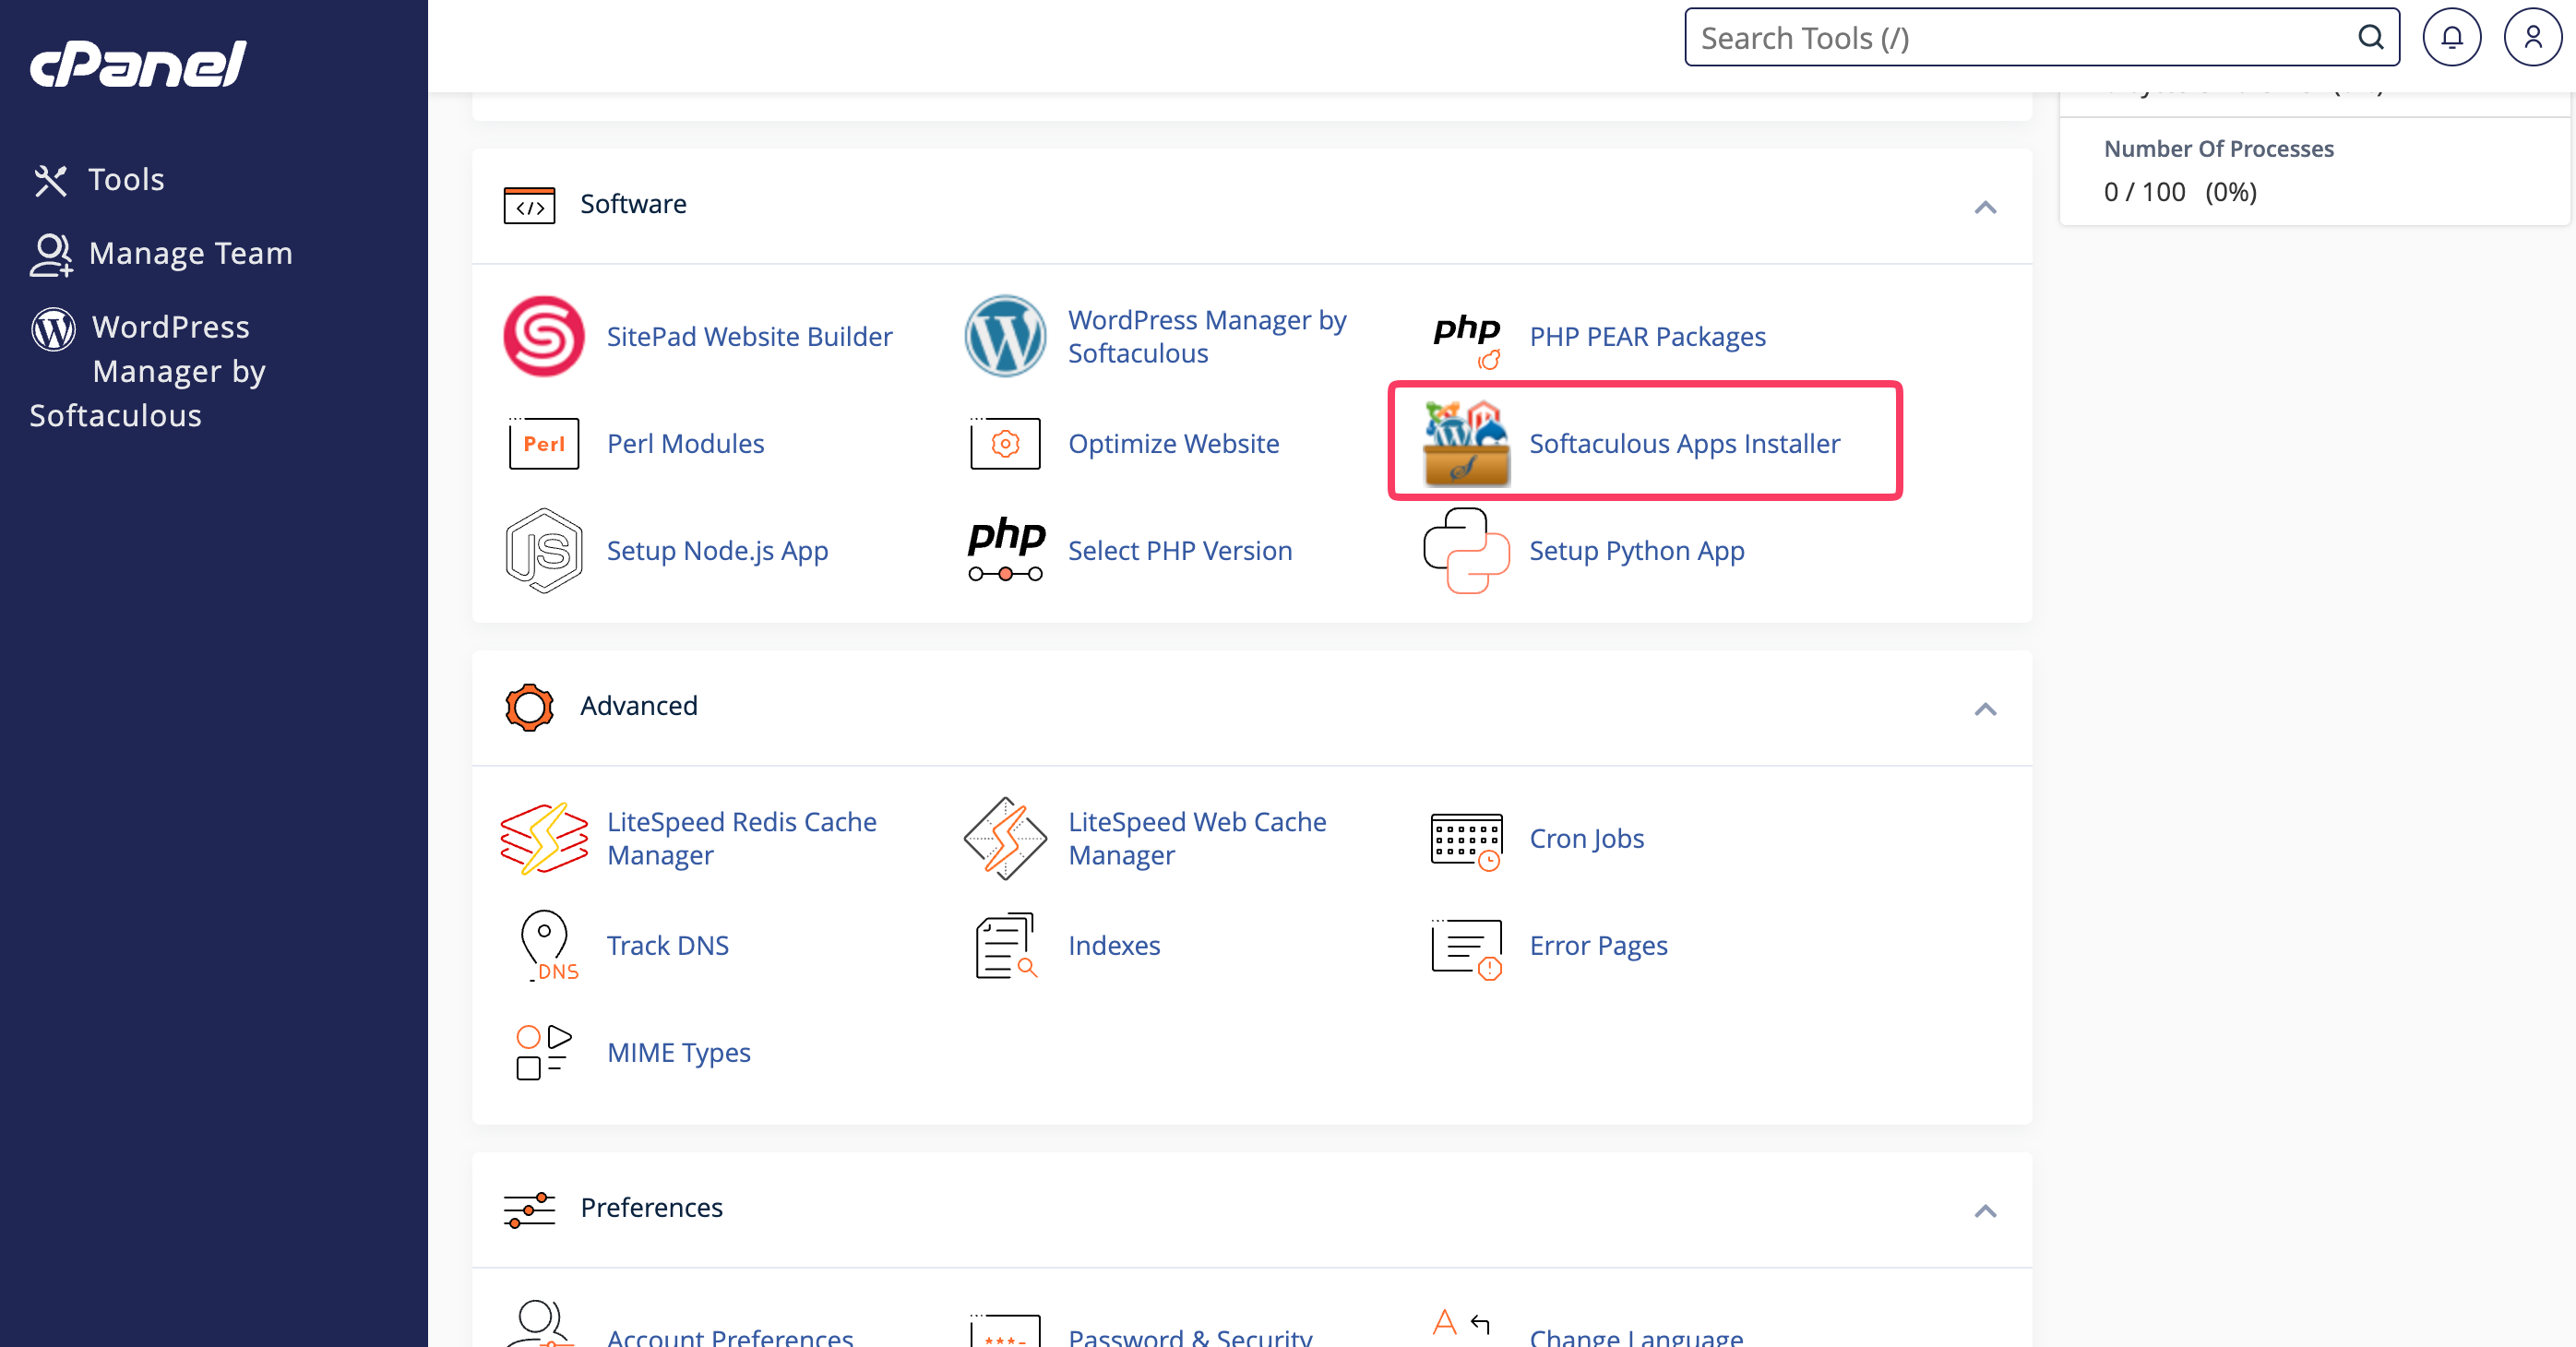
- Log in to your cPanel account and navigate to the Software section. Click on the Softaculous Apps Installer icon.
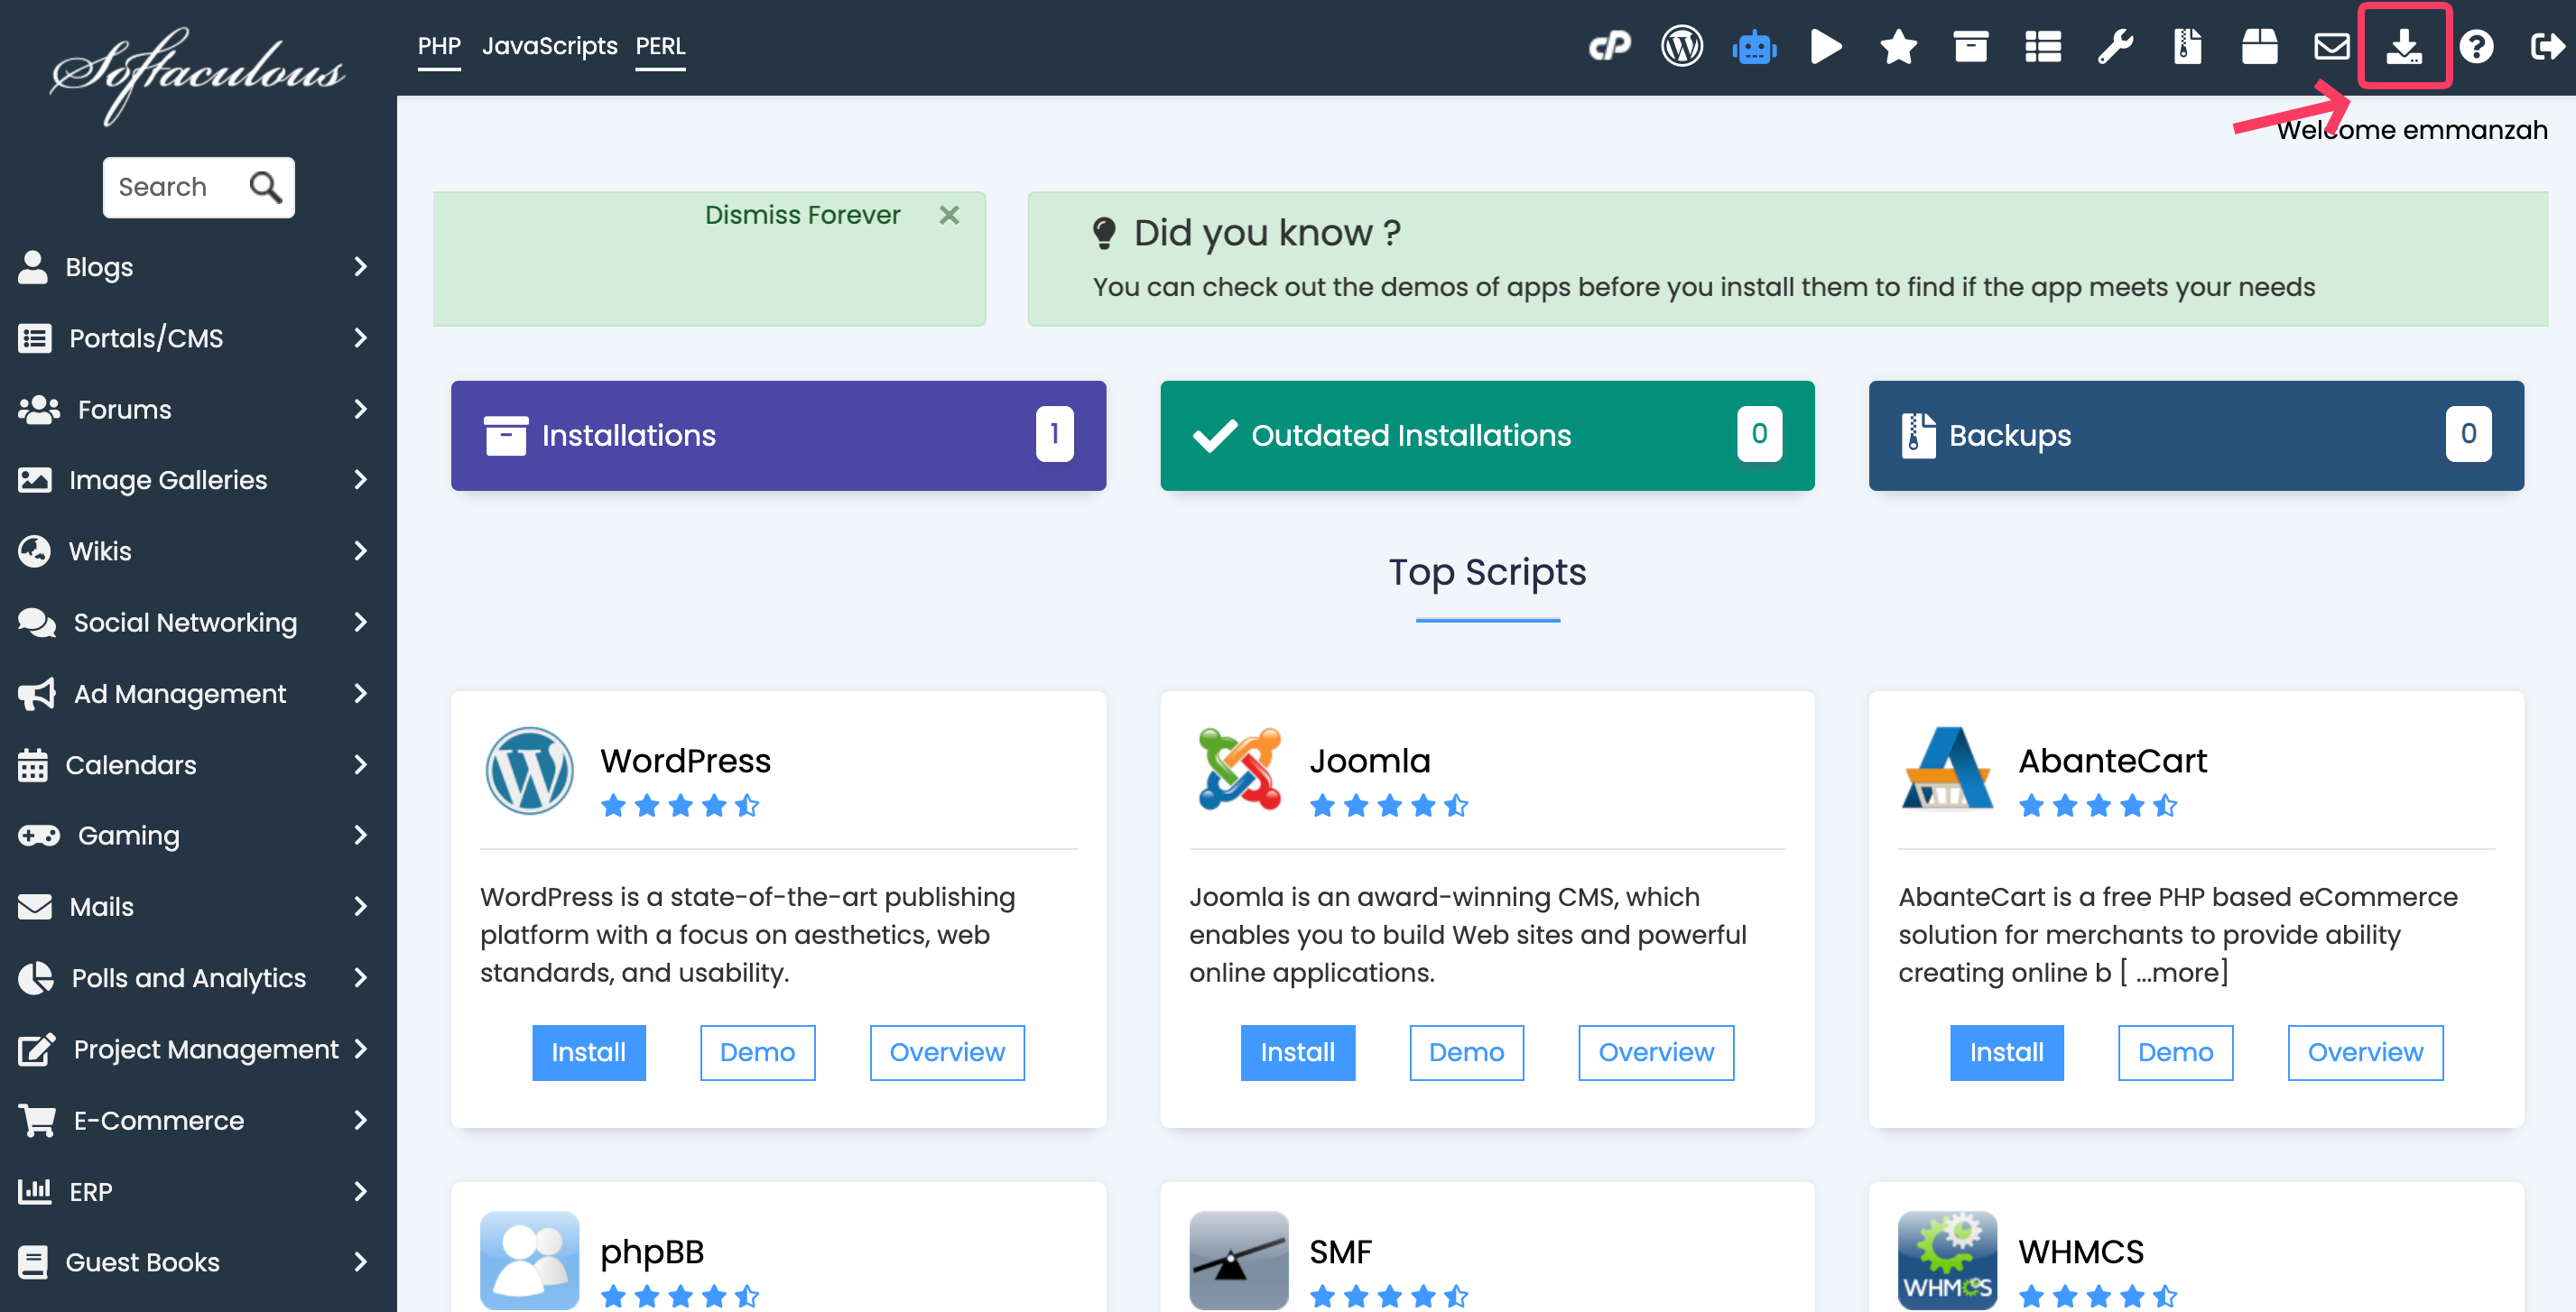
- When you are redirected to the Softaculous page, press the icon resembling a down-pointing arrow on a hard disk in the top-right corner of the screen.
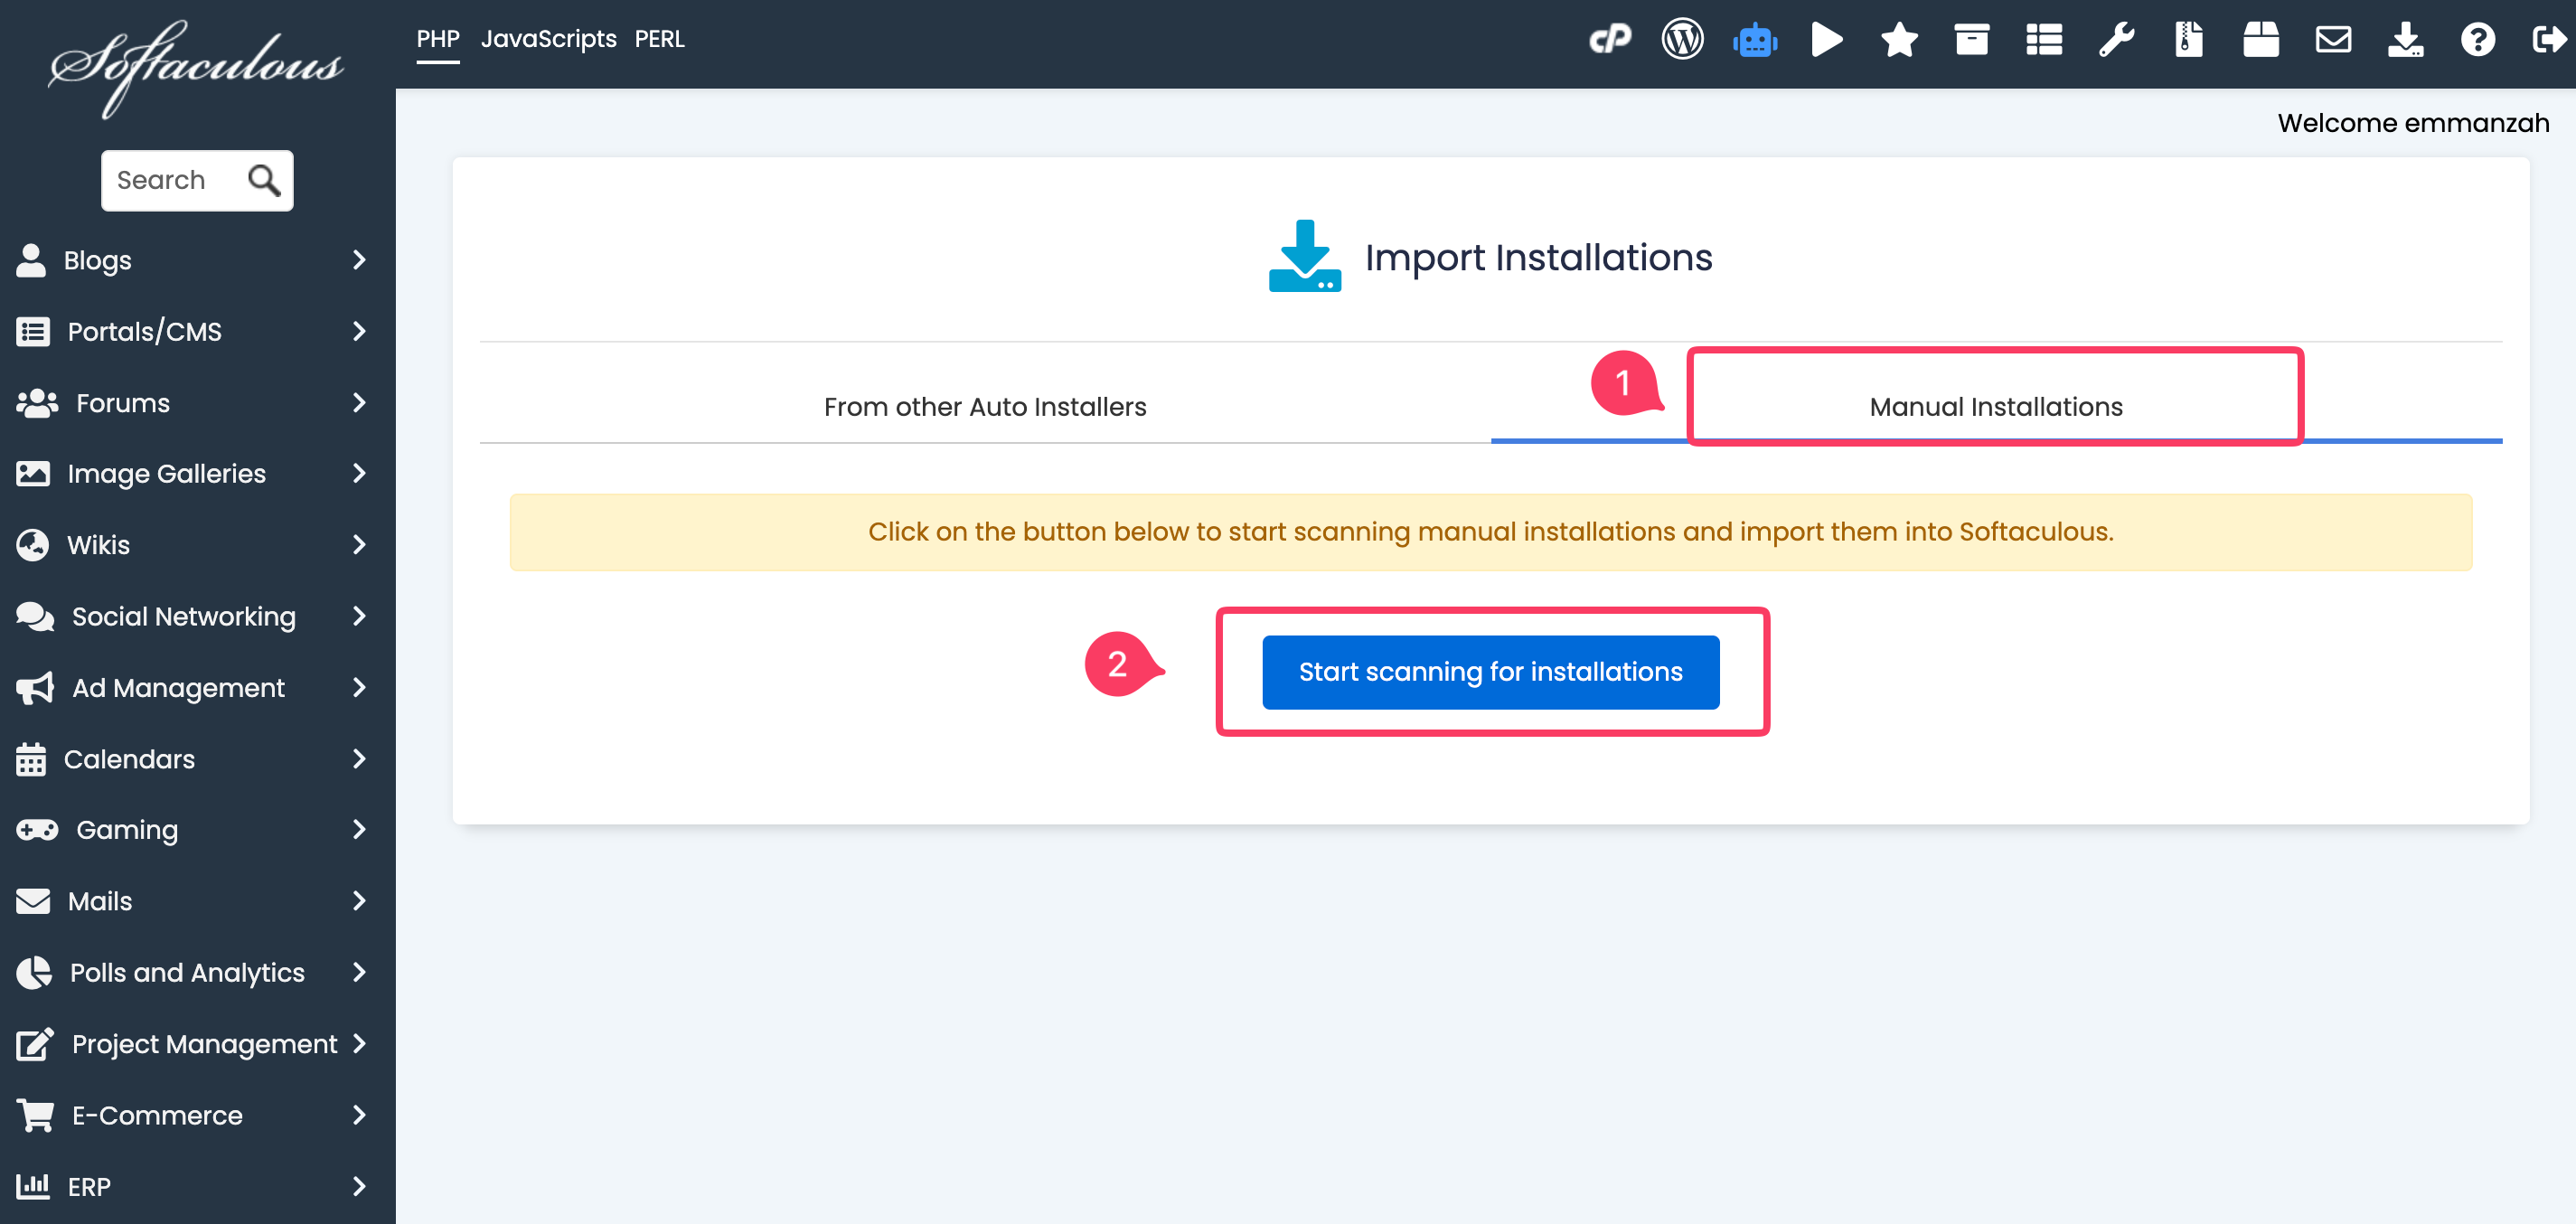
- After clicking, you will land on the Import Installations page, and you will notice two tabs on it: "From other Auto Installers" and "Manual Installations". Please click on the "Manual Installations" tab.
- Now click on the Start scanning for installations button so it can scan your account for applications.
After a few seconds, Softaculous will locate all your applications that are not present within its interface and import them.
Importing an Individual Manual Installation
If you want to import an individual installation, please follow these steps instead:
- Log in to your cPanel account and navigate to the Software section. Click on the Softaculous Apps Installer icon.
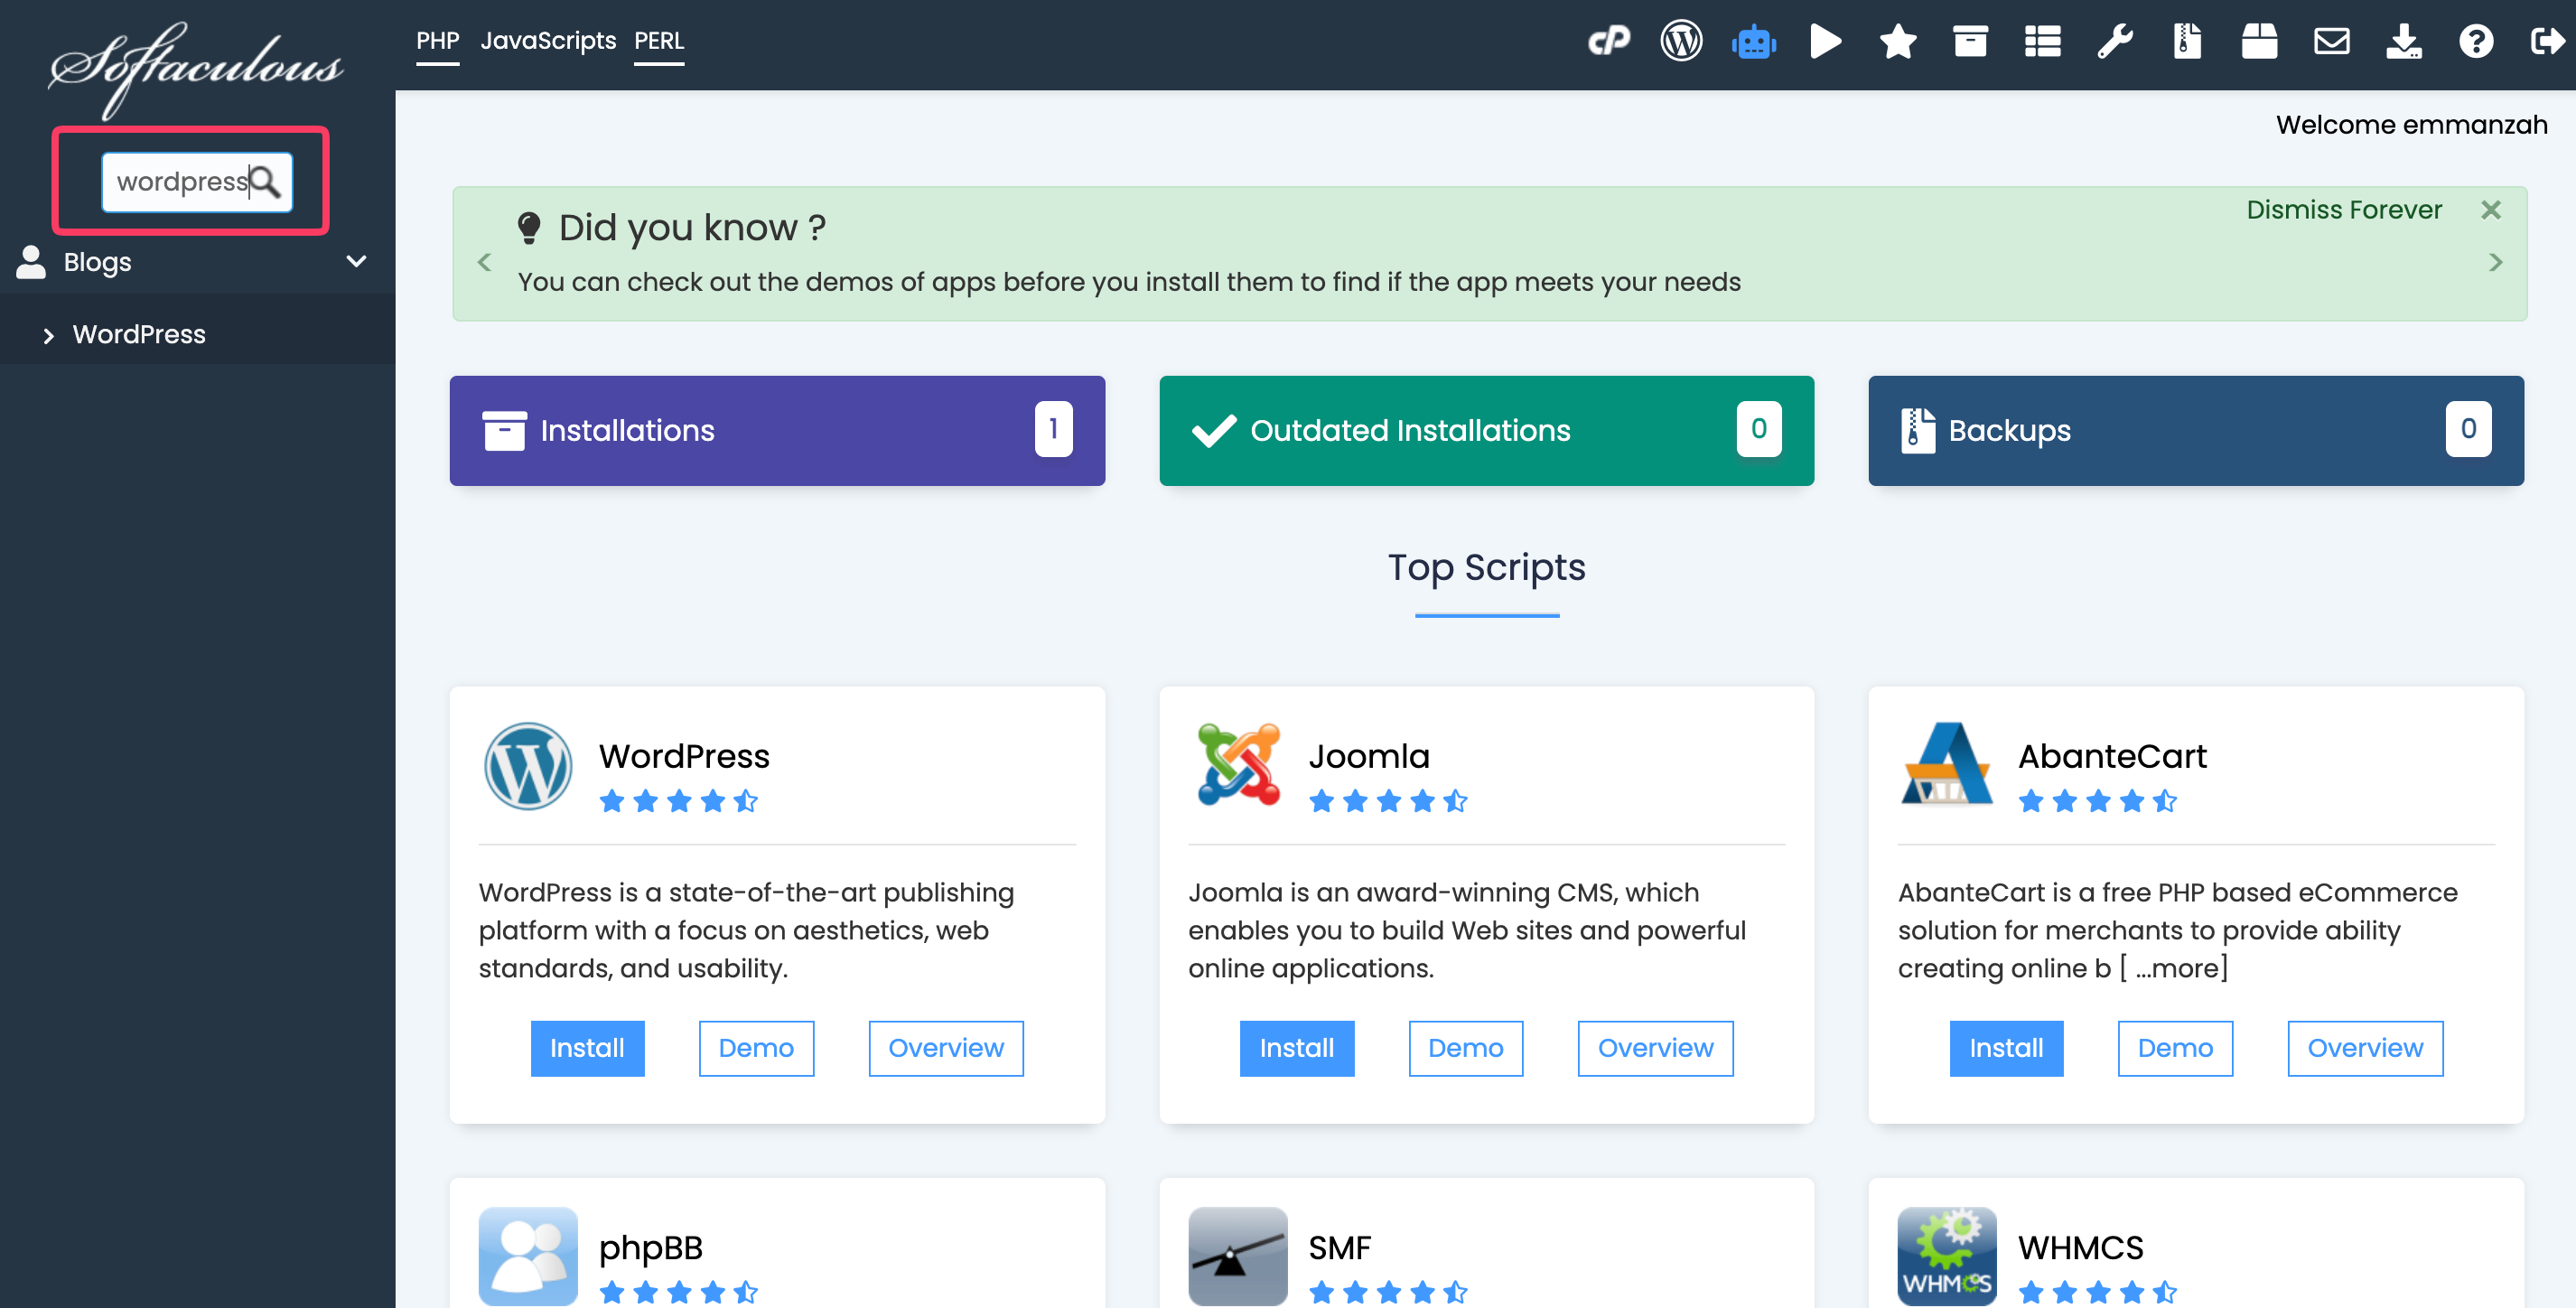
- When you are redirected to the Softaculous page, use the search field in the top-left corner to find the application you are using. When you type the name in the text field, you will receive the result directly beneath it. Click on it.
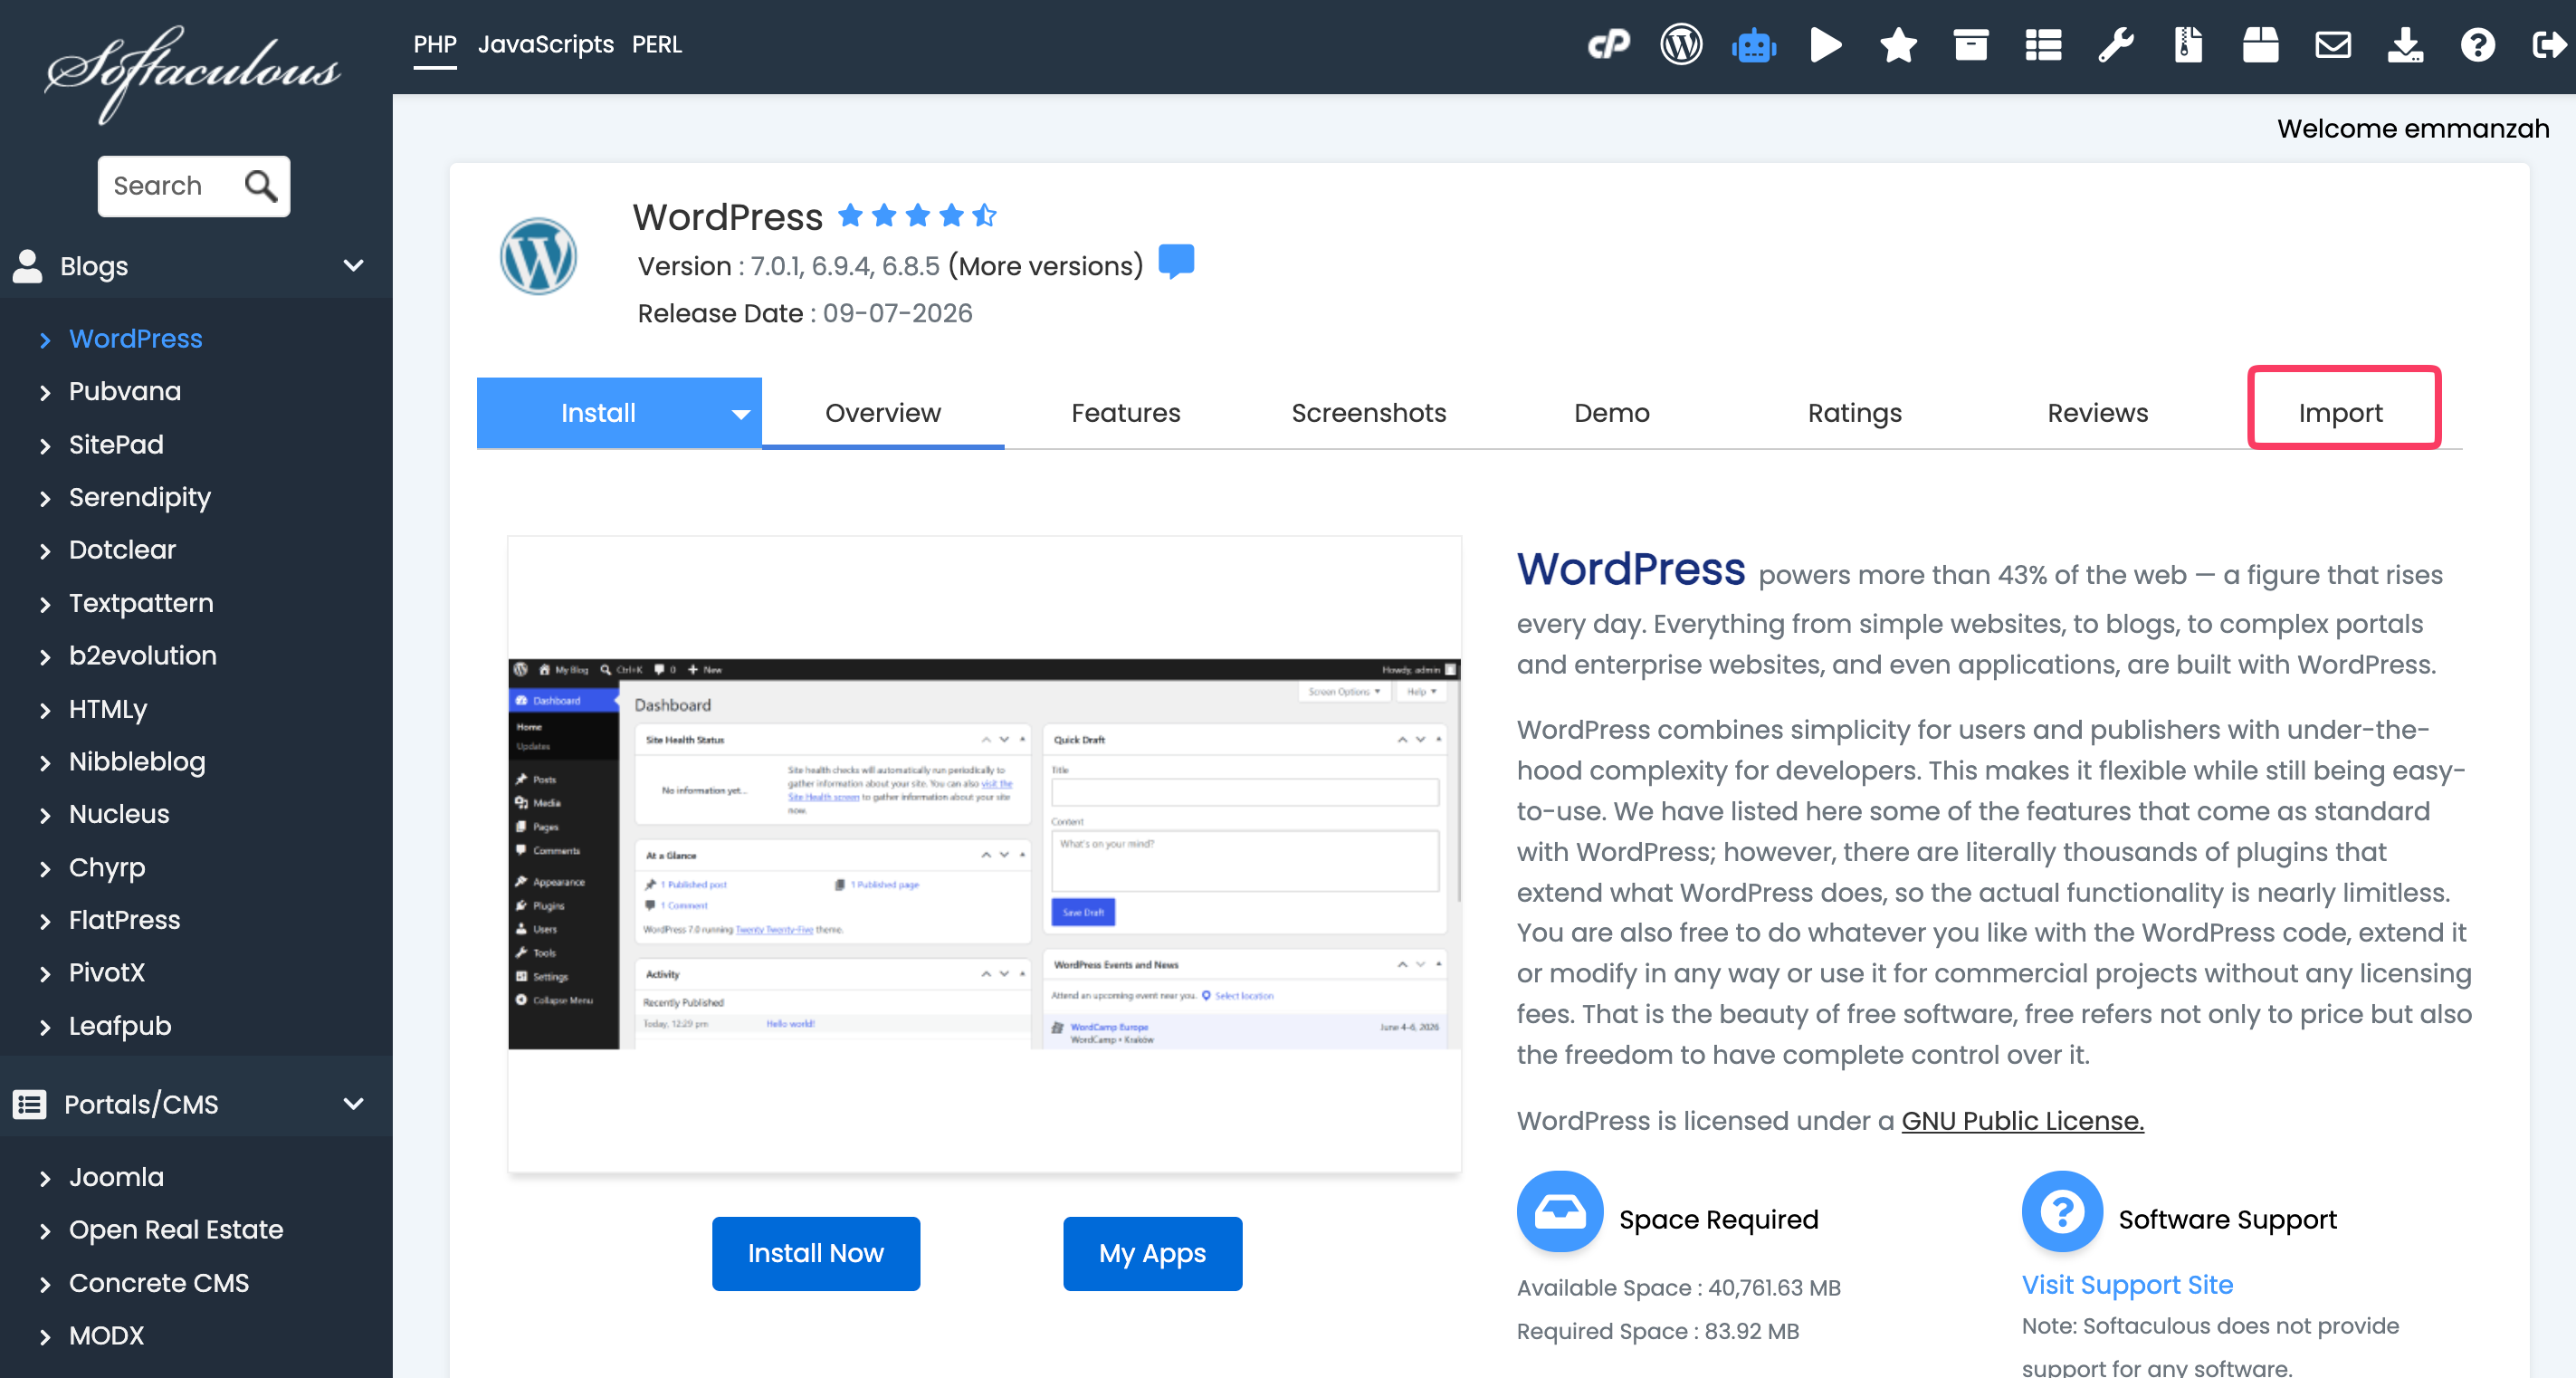
- You'll be redirected to the application's page. Click on the Import tab, which will be located on the right side of the screen.
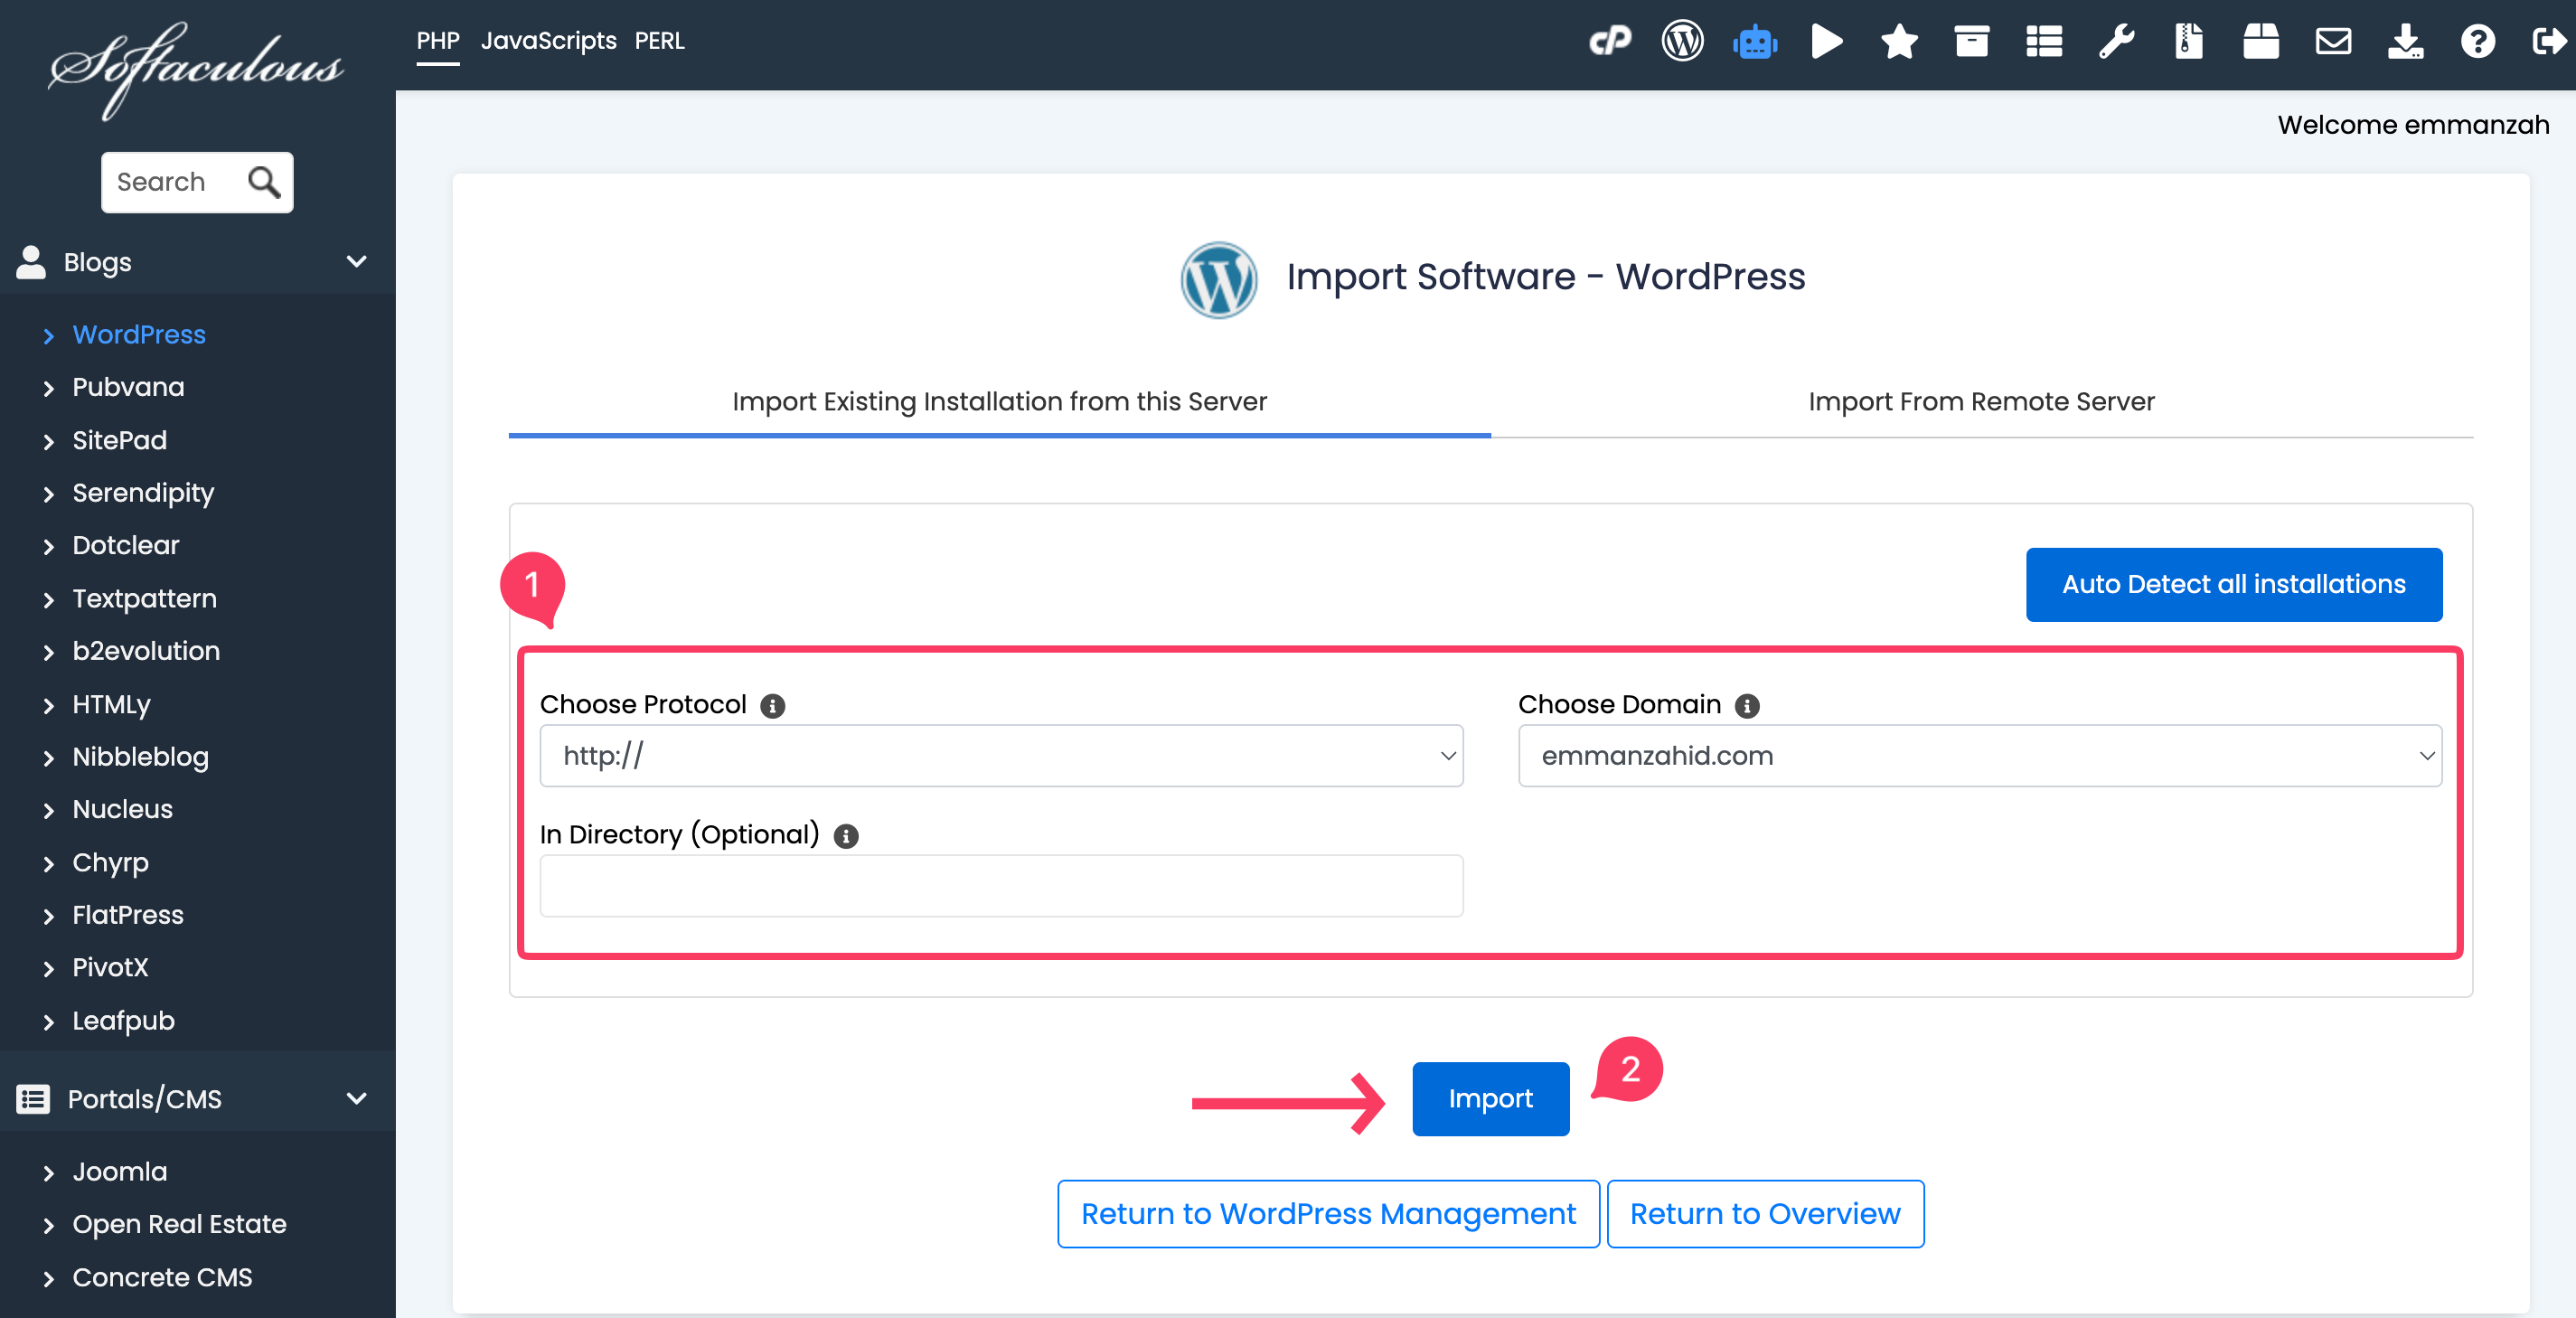
- Once you get redirected there, you will find the following text fields:
- Choose Protocol: Select your protocol - HTTP or HTTPS. Be sure to have an SSL installed for your domain should you choose HTTPS.
- Choose Domain: Select your domain name from the dropdown menu.
- In Directory (Optional): In this field, you should define a subdirectory, e.g. '/blog', in case your WordPress installation should be placed in a subfolder.
- After the information is submitted, click on the Import button.
Once the import process is complete, you will see a message confirming that you have successfully imported the application.
