
Ghost is a new open-source platform shaping up to be the best choice in terms of creating a blog. The ease of access, beautiful look and intuitive dashboard is a perfect match for newcomers looking to get into blogging and old school bloggers that want to try something fresh and take their skills to a new level! In this tutorial, we are going to look at the way you can install the Ghost software on all of the HostArmada hosting plans. Let's get started!
The Ghost blogging platform is built using JavaScript and, more specifically - NodeJS. Unlike a typical JavaScript program, which is executed in the client’s browser, NodeJS is a runtime JavaScript environment, executed on a server hosting the application, and then delivered to the visitor’s browser.
On HostArmada, we fully support NodeJS so that we can incorporate this robust application within our midst, allowing our clients to use it and develop amazing blogs! To simplify the entire installation process, we have installed ghost-cli on our shared servers, which is a command-line utility that helps you install and manage your blog.
This tutorial assumes that you have already added the domain for your Ghost blog inside your cPanel. If you have not done that yet, please check our How to Manage Addon Domains n cPanel tutorial and add it before going further.
To start the process, please connect to your account using SSH and navigate to the directory where you want to deploy Ghost. If you are not aware of how to do that, we have a comprehensive knowledge base article explaining the Basic Linux Commands.
We are going to go through the process with you and provide screenshots on every step to avoid confusion. Here is what you are going to see upon logging in through SSH.

Now that you have logged in, please navigate to the correct directory! In the case of this tutorial, we are installing Ghost at ghost.hostarmadatutorials.com, and its root directory is located inside the home dir of the cPanel. Therefore the command we need is:
cd ghost.hostarmadatutorials.com
Now that you have landed in the correct folder let us start the installation!
During the installation process, we will go over the method of either selecting SQLite or MySQL. Both RDBMS, however, the way they work is different and it really comes down to personal preference.
To start the installation process of Ghost with SQLite, you need to execute the following command:
ghost install local --url domain.com/sub-domain.com
Replacing the “domain.com/sub-domain.com” with either the domain or subdomain you wish to install Ghost onto.
After typing in the command, press the “ENTER” key on your keyboard to initiate the installation. Once this is done, please allow it a few moments to be completed.
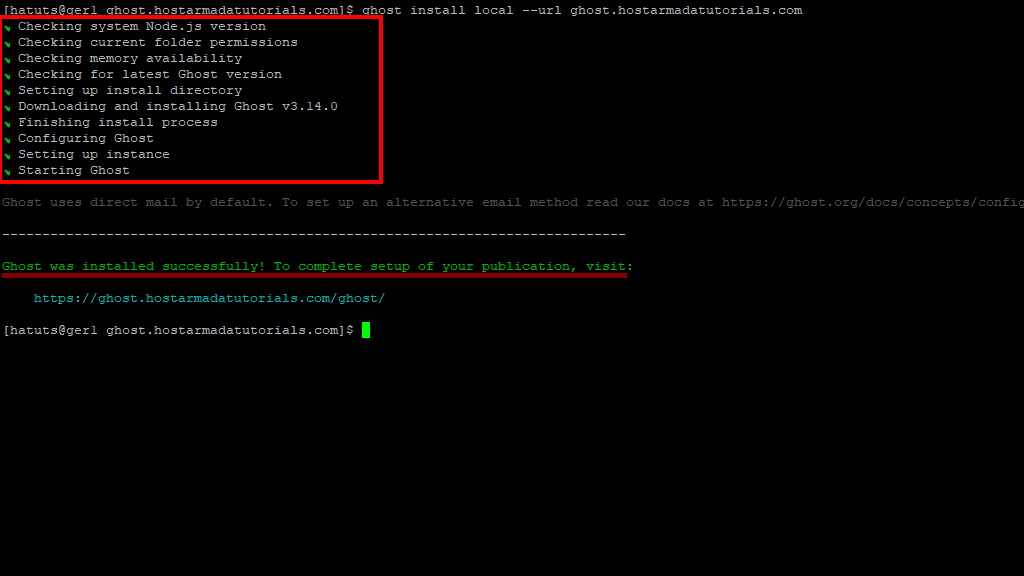
When done, a changelog will be displayed along with a message indicating Ghost was successfully installed.
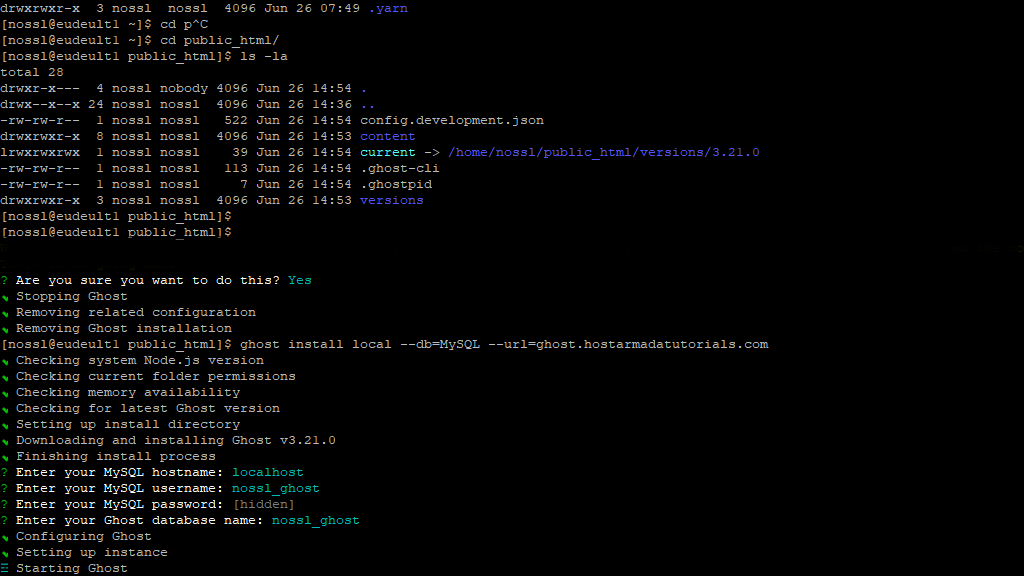
Before you proceed further with the installation, please be sure to create a MySQL database. If you are not sure how to do so, please check our How To Create a MySQL database in cPanel tutorial. While you create your new database, please save the details as you are going to need them during the installation.
Once the database is created, start the installation process by adding an extra parameter to the aforementioned command, which will enable Ghost to use MySQL:
ghost install local --db=MySQL --url=domain.com/sub-domain.com
You have to replace the “domain.com/sub-domain.com” string with either the domain or subdomain you wish to install Ghost onto.
We hope you have saved the database details as advised earlier, as you are going to need them now:
After the installation process is finished, there is one more thing you need to do before being able to access the site. You need to create a .htaccess file and add a rule, which “tells” Apache, which port is the application working on and makes it accessible under the domain name you need. To create the .htaccess file and immediately open it for editing, please type in:
vim .htaccess
Then press the “ENTER” key on your keyboard.
If you are not comfortable editing your .htaccess file using SSH, please check our knowledge base article on What is a .htaccess file and where can I find it? It is going to show you two other methods that you can use.
After you have opened the .htaccess file, please copy this code snippet and paste it inside:
Options +FollowSymLinks -Indexes


IndexIgnore *


DirectoryIndex


# Add headers to all responses.

<IfModule mod_headers.c>

  RequestHeader set X-Forwarded-Proto https

</IfModule>


<IfModule mod_rewrite.c>


RewriteEngine on


# Simple URL redirect:

RewriteRule ^(.*)$ http://127.0.0.1:<port>/$1 [P]


</IfModule>
Replace the “<port>” with the port your application is currently using. This information can be obtained from the config.development.json, located in the same directory where you installed Ghost. To get the port number, please type:
cat config.development.json | sed 's: ::g' | egrep '"\w*":\w'+ | cut -d ',' -f1
Here is an example of the output:

Copy the integer value after the “port”: and replace it in the .htaccess code we provided above. Finally, please save your file and visit your domain. You should see the Ghost installed on the domain!

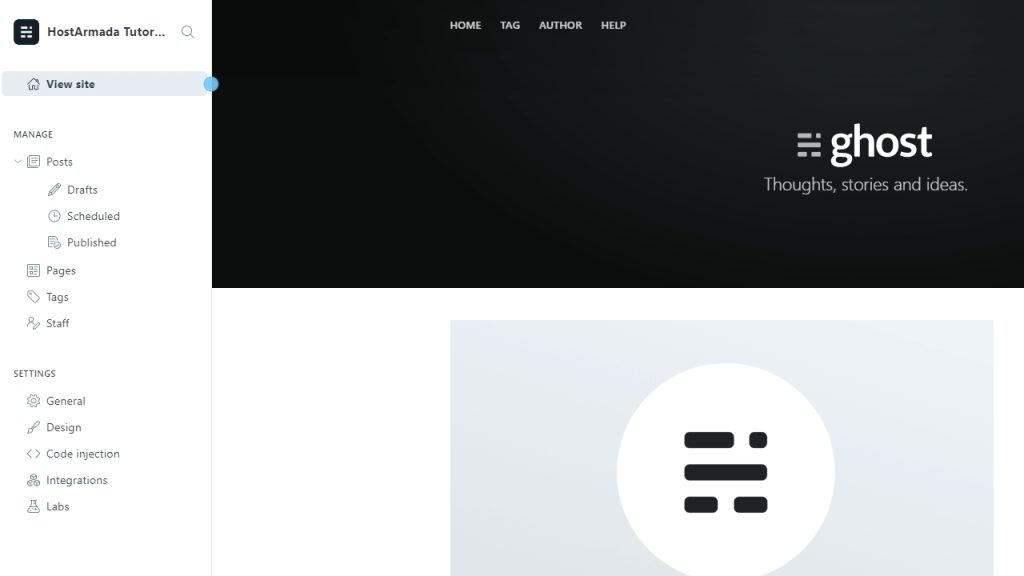
And there it is, your brand new Ghost empowered website. The last thing left to be done is to create your Ghost account.
To start the admin dashboard setup, please go to the following URL domain.com/ghost, however, replace “domain.com” with your domain name.
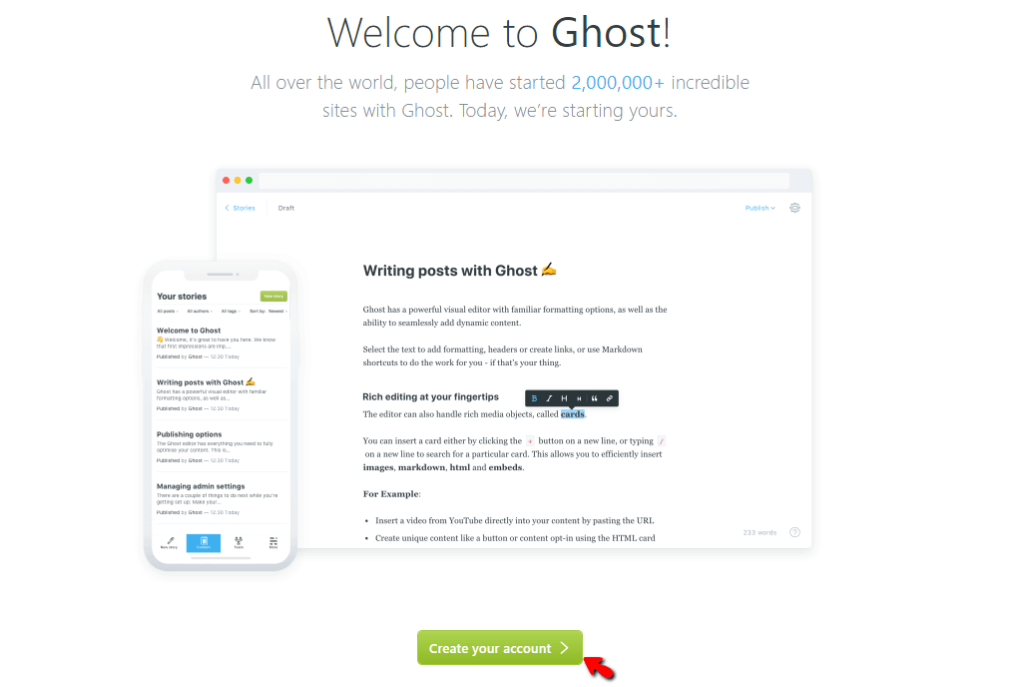
After landing on the setup page, please click on the “Create your account >” button. This redirects you to the account creation page. On this page, you can see four text fields:
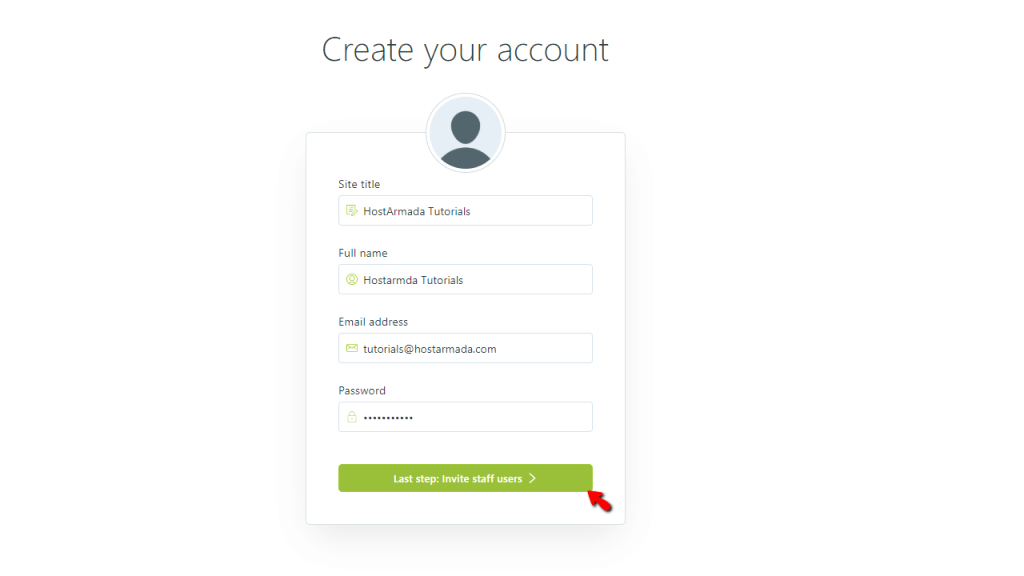
After you are done typing in the requested information, please press the “Last step: invite staff users >” button under the text fields. When this button is pressed, you land on the last page from the setup, allowing you to invite more users to join your site.
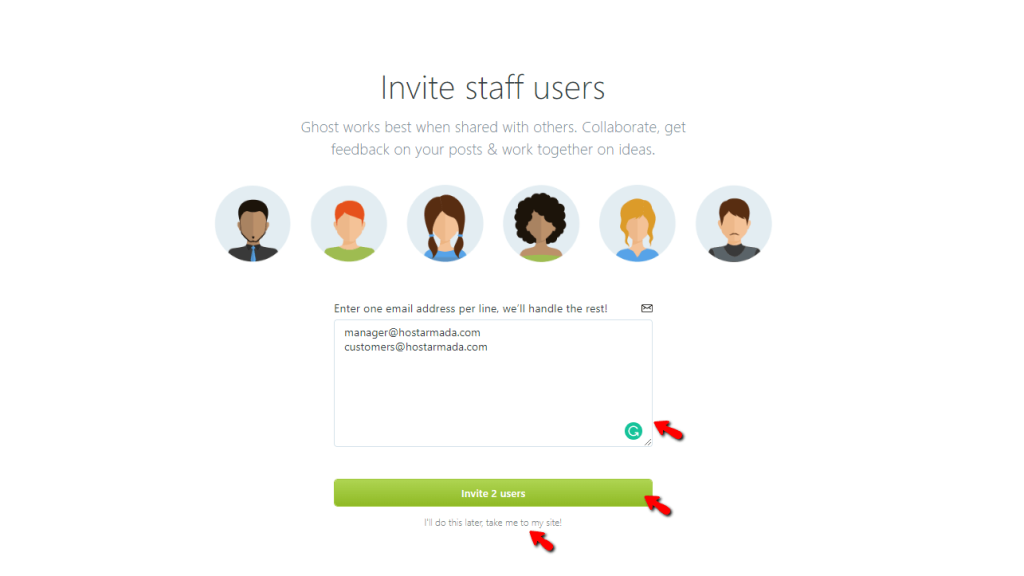
Please use the provided content box and type in the emails of the users you wish to invite to your blog. After you have typed in their email addresses, please press the “Invite X users” button at the bottom.
Alternatively, you can press the “I’ll do this later, take me to my site!” link underneath this button, which skips the process and takes you to your website immediately!
And there you have it! The entire process of installing the Ghost blogging platform on all our Hosting Plans. Hopefully, it was detailed enough to get you started without any issues. If you are having any problems during the installation or this seems too complicated for you, please do not worry. Submit a ticket to our technical team from your Client Area and request a completely free installation service!

Sebahat is a young and bright woman who has become an invaluable part of our team. She started as a Customer Care Representative, mastering that role and, along the way, growing into a tech-savvy individual who is well acquainted with every support layer of the company. Driven by her aim to improve our customers’ experience constantly, she is committed to enhancing the extraordinary support we deliver.
Learn more about Ghost in the other tutorials that we have:
