Adding new admin users and managing their level of access is a useful option to have, especially when using an enterprise-level solution such as TYPO3. Given the vastness of the CMS, you will most likely have individual people managing certain aspects of the site. In this tutorial, we are going to go over the way of creating admin users in TYPO3 and adequately manage them. Let’s begin.
To start adding new users and manage them, you need to log into your admin dashboard first. To do that, please add “/typo3” to your domain name - for example, “mycms.com/typo3” where “mycms.com” is your actual domain.

Accessing the mentioned URL will show a login page, where you have to enter your login credentials to access the backend. We also highly recommend checking our TYPO3 Backend Overview tutorial, which will introduce you to the basics.
Once you have logged into your dashboard, please point your attention to the left, where you will see the Module Menu.
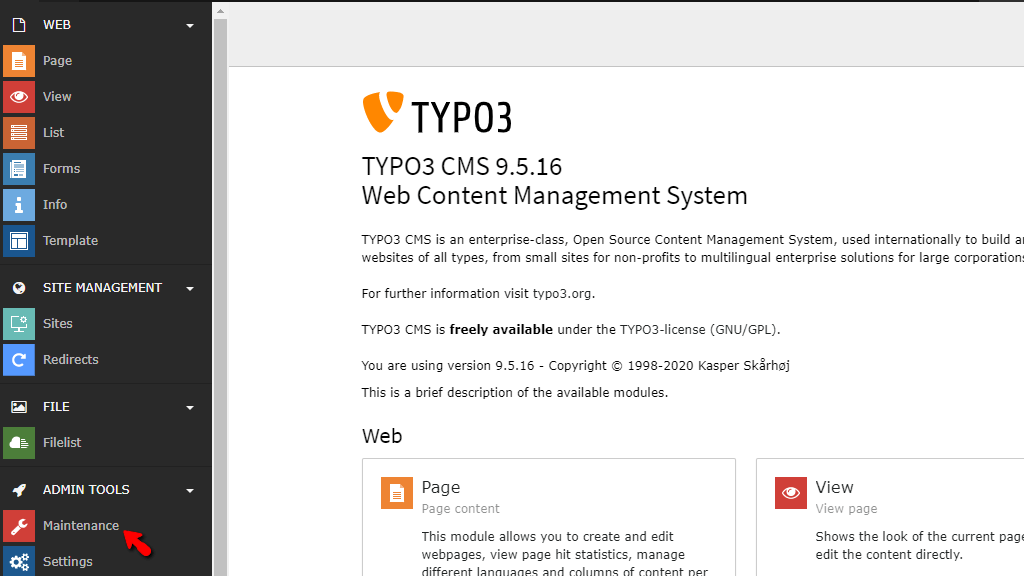
Right under the “Admin Tools” section, you will see the “Maintenance” option. When you click on it, the page will be refreshed, and you will see a couple of panels in the middle of the screen, which will allow you to perform certain tasks.
Please locate the “Create Administrative User” panel and click on the “Create Administrator” button under it.
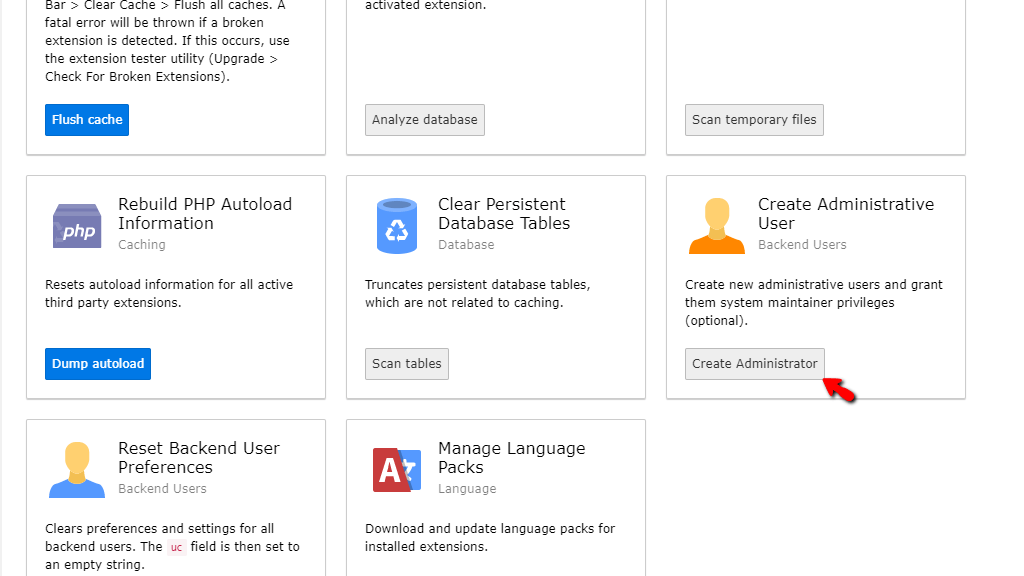
Upon doing that, a pop-up window will appear, allowing you to create a new admin user. You will be required to specify the following details:

After you have entered the required information, please press the “Create administrator user” button, which will be located on the bottom left side of the popup window. The account will become fully active, and the new admin can start utilizing it immediately!
After creating the admin users, they are populated within a list in the “Backend users” page of TYPO3. To access it, please point your attention to the left side of the screen and under the “System” section, click the “Backend users” option.

The middle area of the page will refresh, and you will see the list holding all the admin users on the CMS.
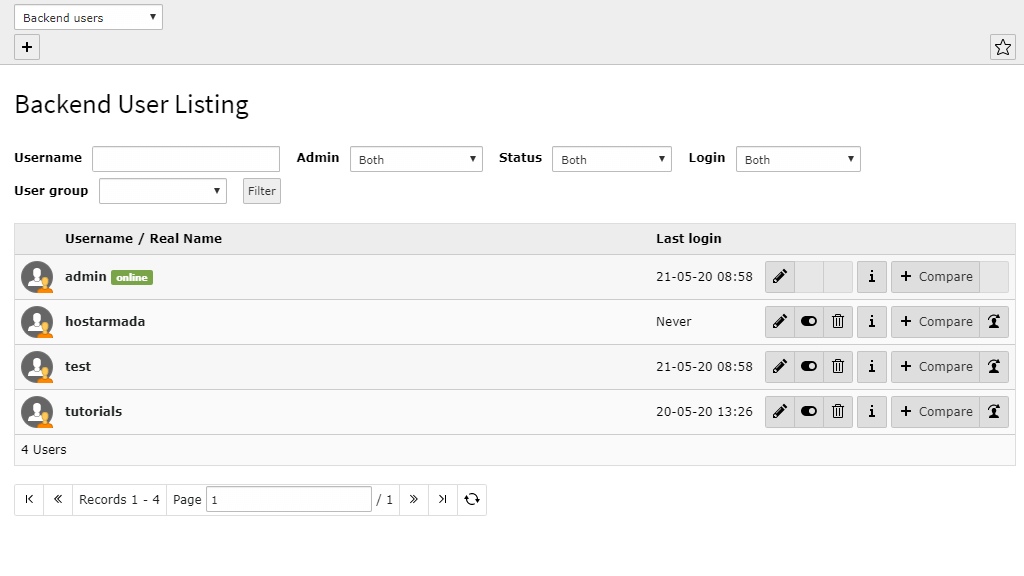
Let’s discuss the page itself and introduce you to all its functionalities. On the top of the page, you will see a section containing a text bar and a few dropdown menus. This is a filter, which will allow you to search for users inside the list.
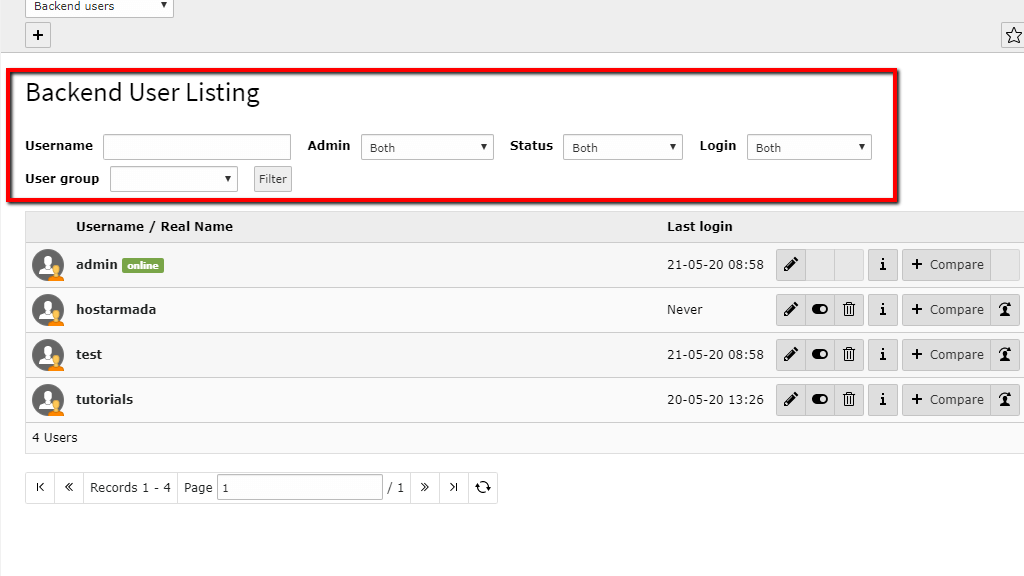
Going down, you will see the actual list of users, populating a table section. Here is all the information within the table.
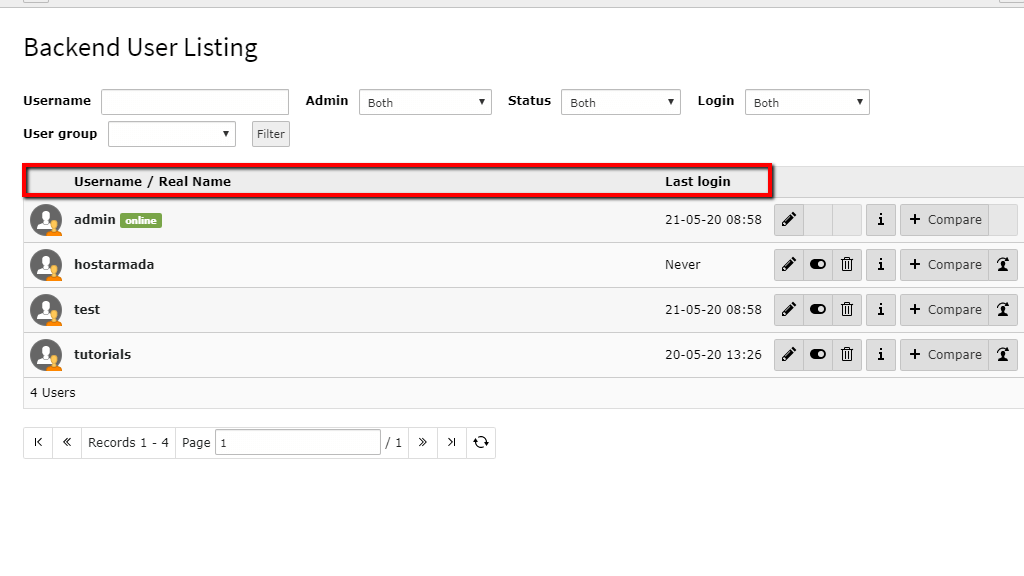
On the very far right of the table, you will see a few icons, each one of them allowing you to manage a certain aspect of the user’s account. Let’s go over them.


Now that you know the layout of the user management page let’s explore the settings under the “Pen Icon”, which allows you to change various information about the corresponding user. To access this area, please click on the “Pen Icon” located on the row of the user you want to alter.
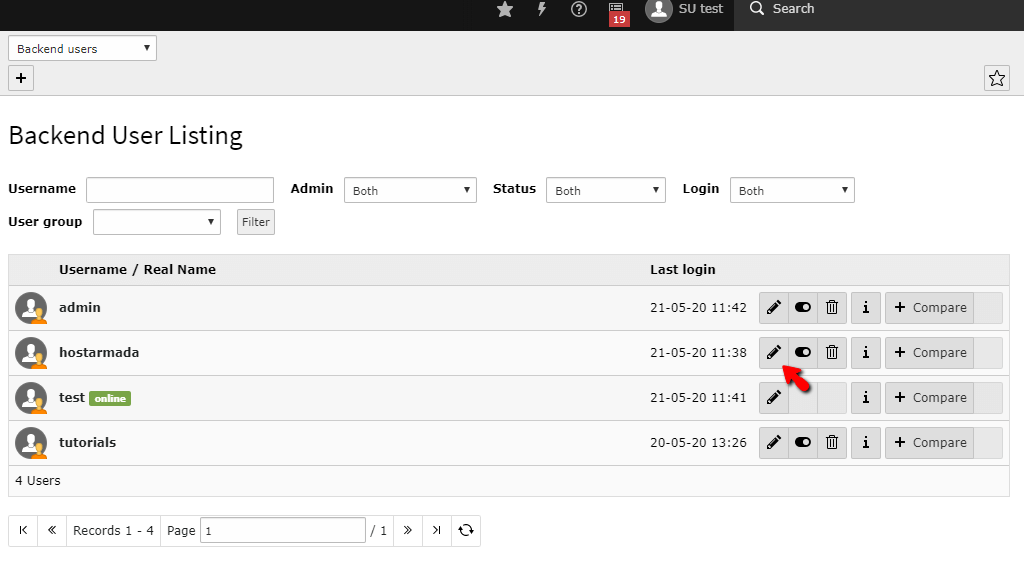
Clicking on the mentioned icon will refresh the page and list additional options for this specific user residing under four tabs.

To keep it consistent, we will review each tab separately, starting with the first "General" tab.
This will be the default tab opened when you access the “Edit User” screen. Let’s go over all of the changes you can perform there.
The “Options” tab is located on the right side of the “General” tab. To access it, please click there. The settings underneath it will allow you to control one of the most powerful features of Typo3 - the mount points.

Let’s go over them and explain what they do.
Next is the “Access” tab. It will allow you to set a window in which the selected user is able to have access to the backend of the TYPO3 CMS.

Clicking inside the “Start” and “Stop” text fields will expand a calendar, allowing you to select a start point and an endpoint for the user’s access.
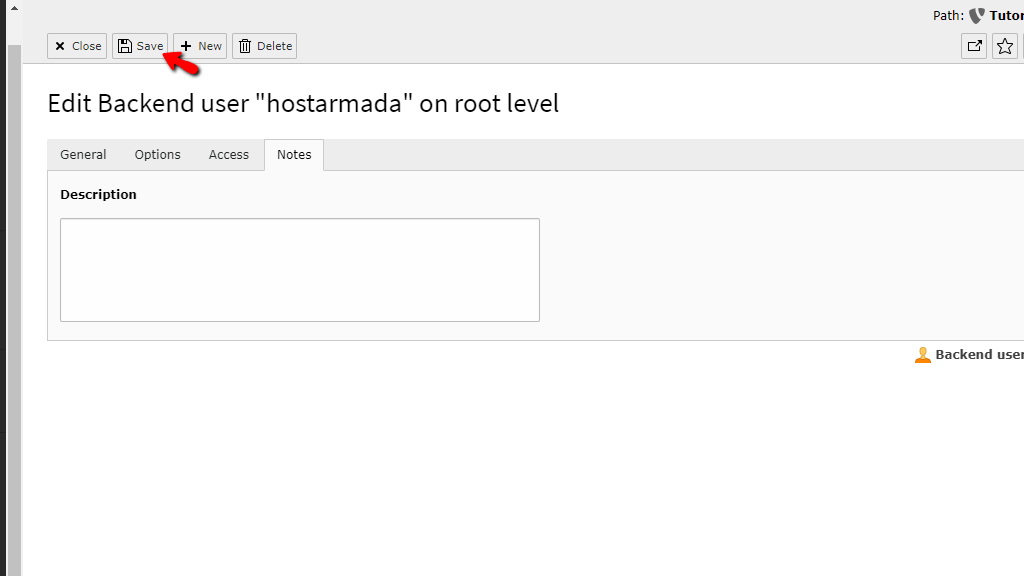
The last tab on this page will be the “Notes” tab.
You will see a content box, under the “Description” heading, allowing you to type anything you believe is important to know about the specific user. For example, you can leave a note, notifying the user that you will be performing maintenance of the backend, and his account will be disabled until it’s over.

Finally, when you have made the desired changes for the admin user, you can save them by clicking on the “Save” button located on the top of the page.
That’s it! The way to create and manage your users in TYPO3. It may seem a bit overwhelming at first as the amount of control you have over the users is quite vast. However, taking your time to understand every aspect of this functionality will surely show a new horizon of possibilities.

Sebahat is a young and bright woman who has become an invaluable part of our team. She started as a Customer Care Representative, mastering that role and, along the way, growing into a tech-savvy individual who is well acquainted with every support layer of the company. Driven by her aim to improve our customers’ experience constantly, she is committed to enhancing the extraordinary support we deliver.
Learn more about TYPO3 in the other tutorials that we have: