
Learn Wordpress
In the blogging world, content is one of the primary sources that attract visitors. Running a blog may seem like an effortless task, but it requires a lot of time and dedication.
An utterly wrong assumption would be to think your job is done when you have created your posts. From time to time, you will come to a point when you will need to change some details to keep everything up-to-date. You may also need to remove altogether some old posts that are obsolete and no longer needed.
Fortunately, WordPress provides great flexibility in terms of maneuvering existing posts. If you are ready, let's explore how to perform these simple tasks.
For a start, we need you to log into your WordPress Admin Dashboard by accessing yourdomain.com/wp-admin and navigate through the left-hand sidebar to Posts > All Posts.

An alternative way to access your existing posts is to directly click on the "Posts" link in the left sidebar.
Now that you have accessed the "Posts" section, you will be presented with a list of all posts created on your WordPress website.
Please navigate through the list and locate the post you would like to edit. Once you find it, hover over it, and you will be presented with two edit options:
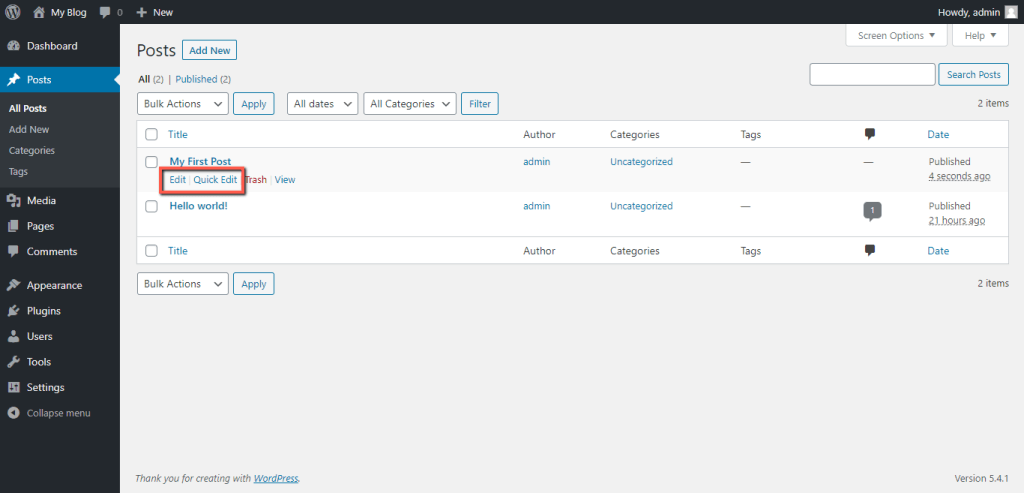
Let's see how each of the edit options works.
When you click on the “Edit” button, you will be redirected to an interface exactly the same as for creating posts. You should be already well familiar with it and know your way around. In case you are not certain of what specific setting controls, please refer to our tutorial on How to create new Blog Posts in WordPress, where you will find a detailed explanation.

Once you perform the desired changes, please make sure to click on the "Update" button to apply them.
On the other hand, the "Quick Edit" option is a real time-saver, and you will find it way more effective in specific situations.
Once it is clicked, you will remain on the same page, and you will be presented with all the settings you can modify. This includes the post title, slug, date of publication, categories, tags, and status. You can also password-protect your post or make it private. You can control the commenting and pinging of the post, and you can change the template it is assigned to.
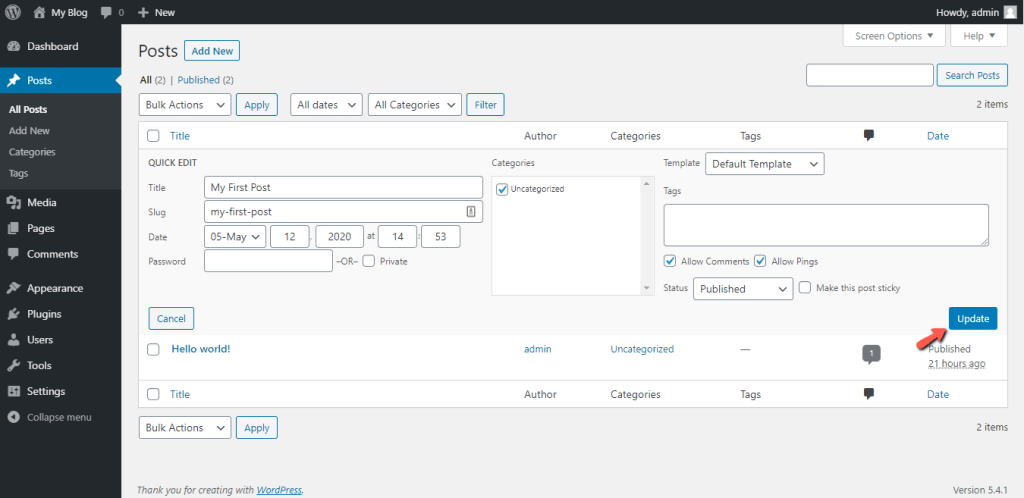
When you perform the desired changes, please make sure to click on the "Update" button to apply them.
Now you are familiar with both methods to modify your posts and you have the freedom to select the most suitable one based on what exactly you would like to edit.
While your website grows, you will get to a point where you will need to remove some old and irrelevant posts.
The first step of deleting a post, it to move it to the trash. To do so, please navigate back to the list of posts and again hover over the post you wish to delete. This time, please click on the "Trash" option.
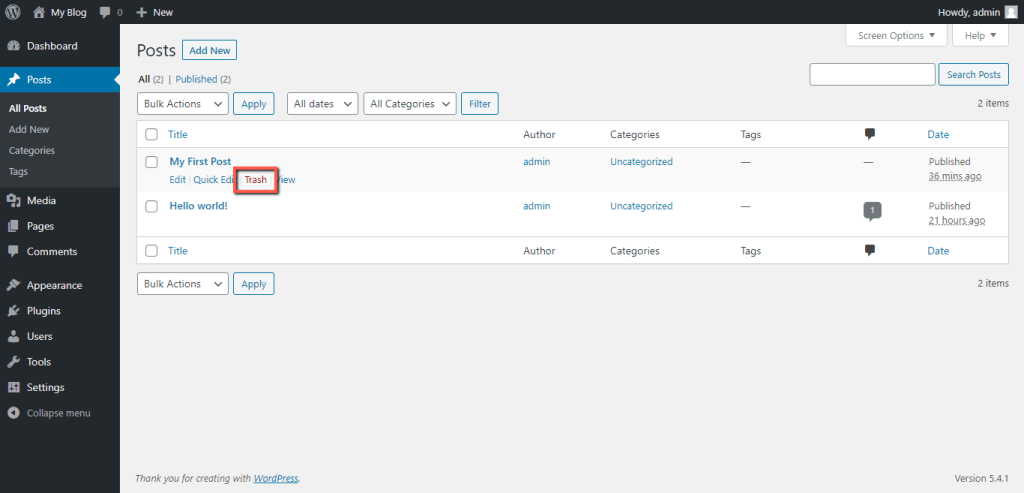
That action will instantly move your post to the trash and get it ready for deletion.
The previous action does not permanently delete posts. They are simply moved to the Trash, where you have the option to restore them if they were removed by mistake or permanently delete them if you are sure they are no longer needed.
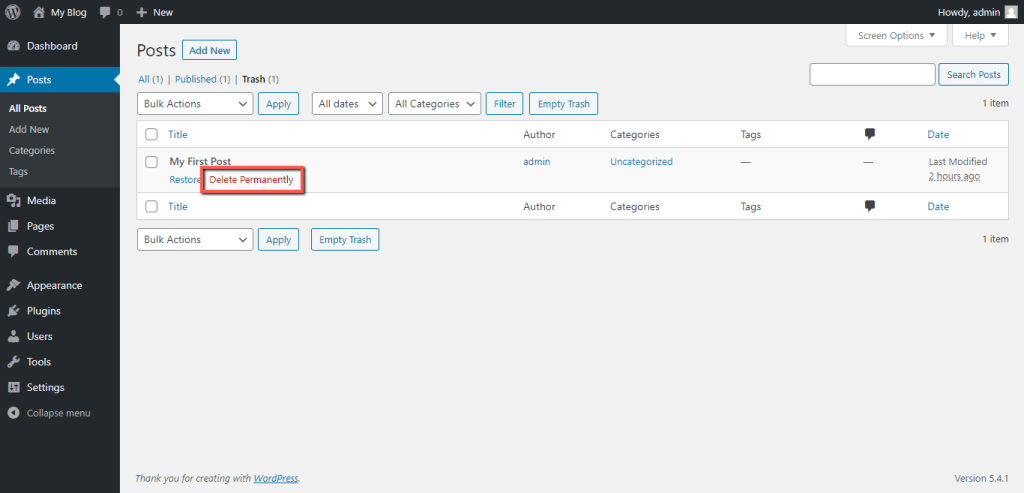
It is time to perform the second required action. First, please click on the "Trash" link at the top of the page.
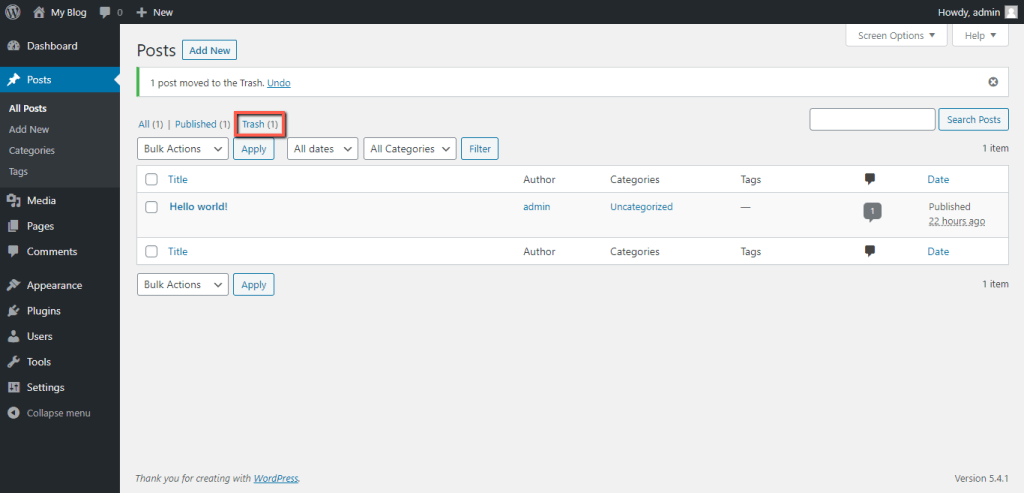
Within the "Trash" section, you will see a list of all deleted posts. To completely remove the desired post, please hover over it and click on the "Delete Permanently" link.
With this done, your post had been permanently removed. Now, this is all great, but it can become extremely overwhelming when you have lots of posts to delete. As you might guess, it will take a good amount of time. To avoid such a time waste, we have dedicated our How to Bulk Delete Posts in WordPress tutorial to guide you on how to effectively remove several posts at once,
Congratulations! You have just learned how to edit and delete an existing Post in WordPress! Editing and deleting posts in WordPress is a handy tip for managing your posts with confidence. With these options, you can upgrade your posts easily and make your website more attractive to customers.

Sebahat is a young and bright woman who has become an invaluable part of our team. She started as a Customer Care Representative, mastering that role and, along the way, growing into a tech-savvy individual who is well acquainted with every support layer of the company. Driven by her aim to improve our customers’ experience constantly, she is committed to enhancing the extraordinary support we deliver.
Learn more about Wordpress in the other tutorials that we have: