
In this tutorial, our main focus will be on the Default Magento Shipping Methods. The application comes with built-in shipping methods that are pre-configured for customers’ convenience. We will guide you through the process of setting up and customize them depending on your store’s needs.
Before we step into configuring the shipping methods you will need to ensure your store’s address is configured correctly. In order to do that, please head to Stores > Configuration.
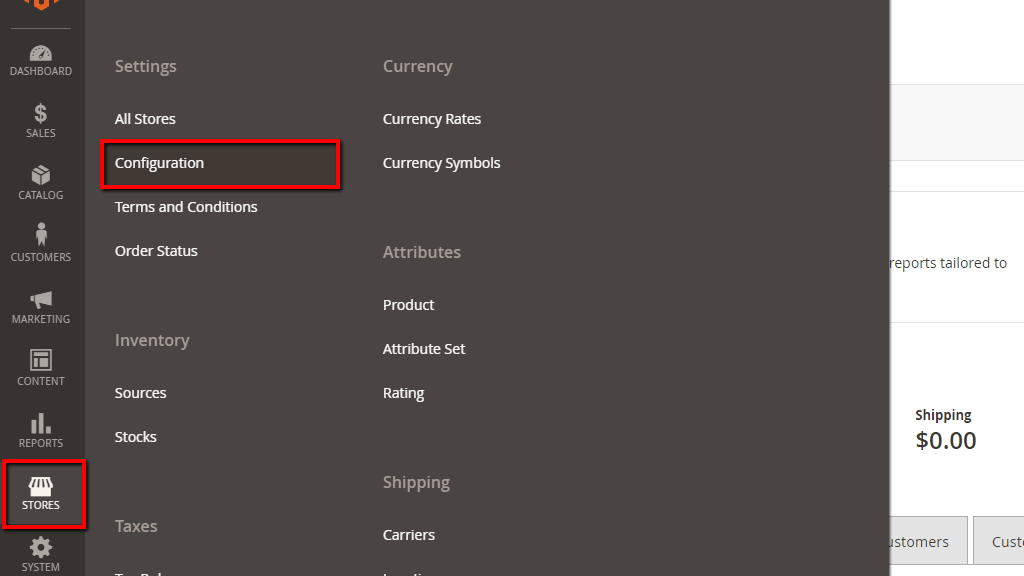
Once you are there, please expand the “Sales” tab and select “Shipping Settings”. Afterward, please expand the “Origin” section.
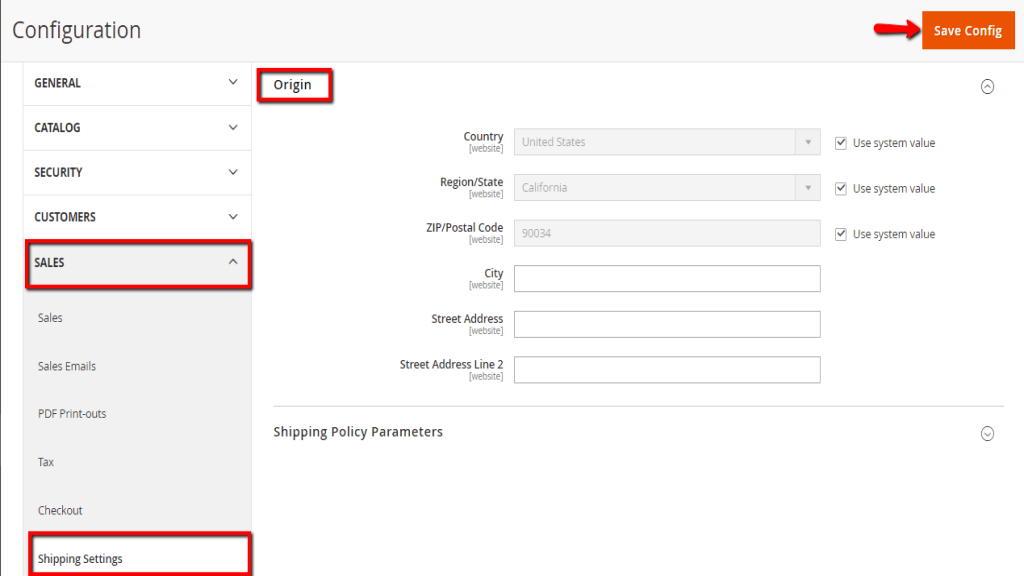
Please enter the accurate address of your store and click on the “Save Config” button in order to save your changes.
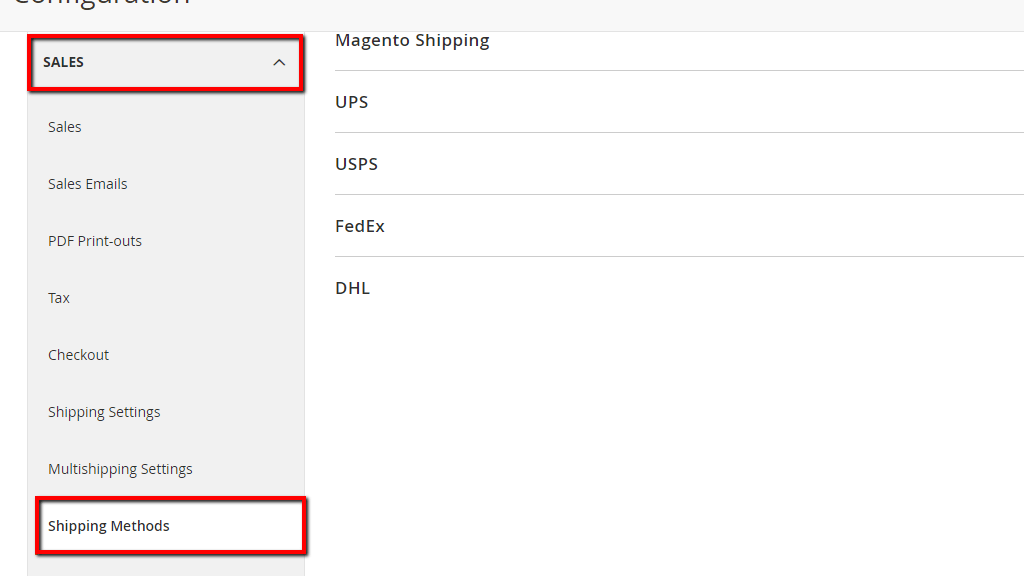
Afterward, please switch to the “Shipping Methods” section available under the same “Sales” tab.
Very well! Now that you are on the right page, we are ready to begin.
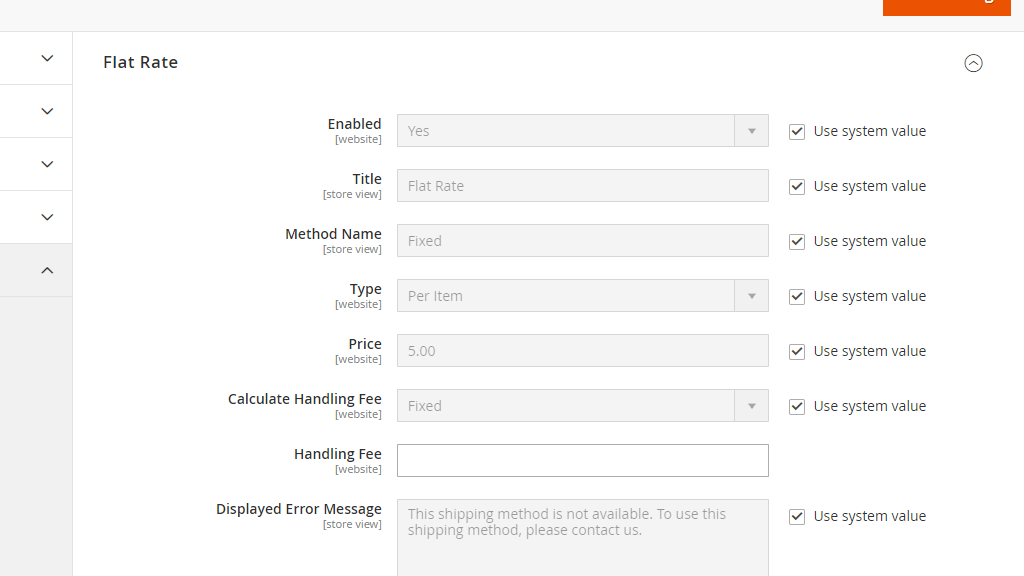
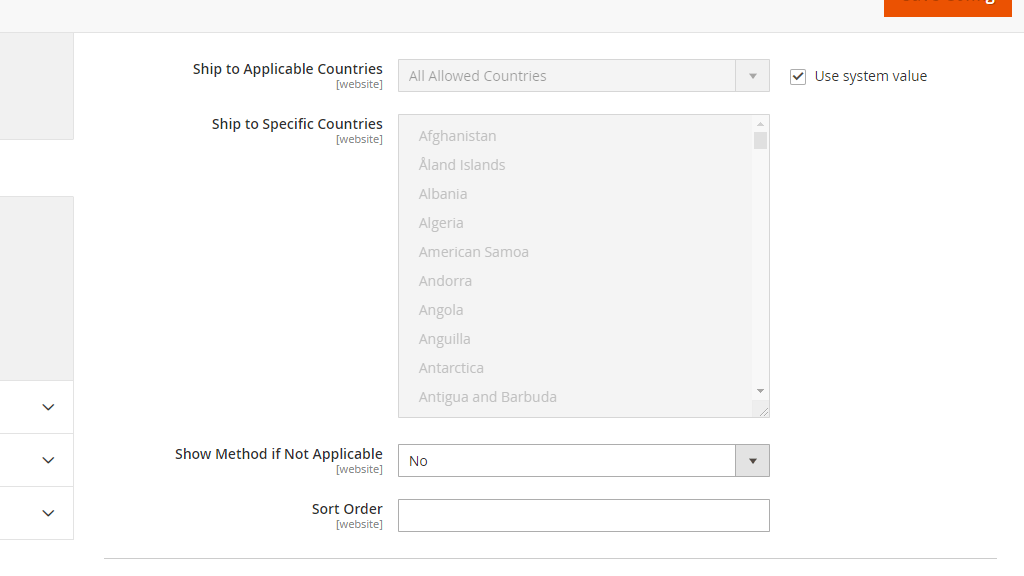
“Flat Rate” is the only shipping method enabled by default in Magento. It allows you to define a fixed rate that will be applied for shipping costs per item or per order. The “Flat Rate” is easily configurable and preferred by many carriers.
The "Free Shipping" method will allow you to configure specific conditions under which you can offer shipping service out of charges to your customers. By default, this method is disabled, if you would like to enable it on your store, please select the “Yes” option from the “Enabled” dropdown menu.
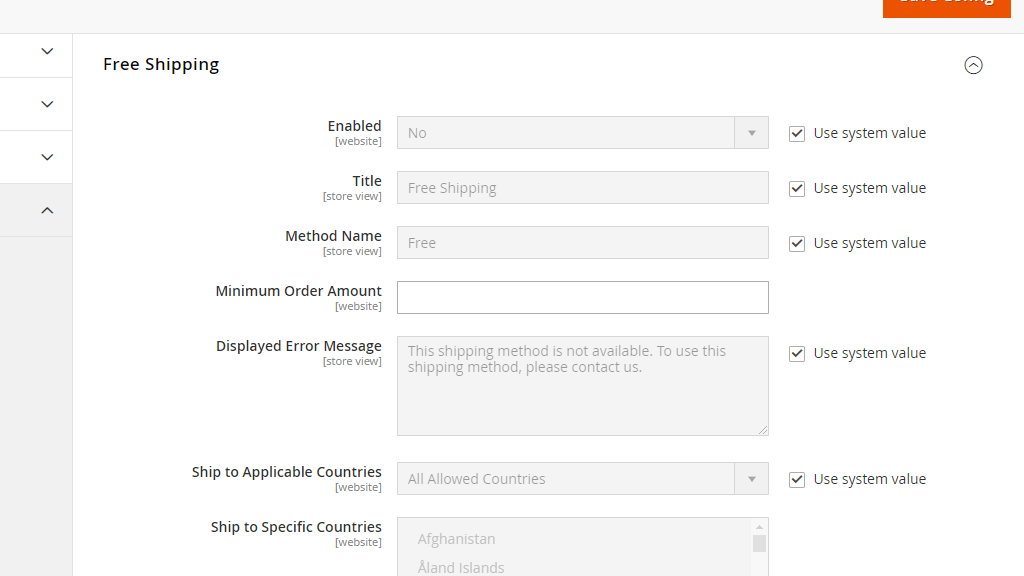
You will notice that all settings are exactly the same as under the “Flat Rate” section apart of “Minimum Order Amount”. This setting will allow you to specify the minimum purchase amount required in order for your customers to benefit from the “Free Shipping” method.
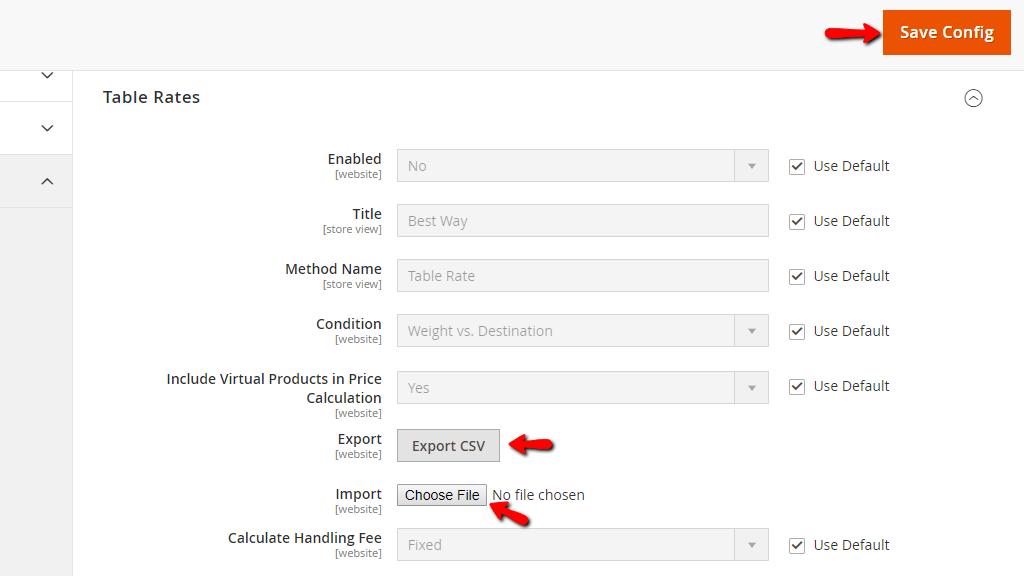
The “Table Rates” shipping method will allow you to set up a variable shipping rate based on combinations of certain conditions. The data needed in order to calculate the exact shipping rate will be listed in a spreadsheet file that needs to be imported to your Magento store. As you will notice this method is disabled by default, if you would like to enable it, please select “Yes” from the “Enabled” dropdown menu.

Similarly to the previous two methods the main settings here are the same. You will notice only two additional settings that were missing in the above examples.
From the “Condition” dropdown menu you will need to select the combination on which the shipping rate calculation will be based. You can select between the following three options:
From the following “Include Virtual Products in Price Calculation” you can determine whether this shipping method will be available for your virtual products.
Once you select the “Condition” a CSV filed (in a specific format applicable to the condition) will be generated. You will need to download this file, manually fill your custom rules and then import it in your Magento store. Before we move to that part, please make sure first to click on the “Save Config” button.
Now you will need to change the “Default Config” to “Main Website”.

Once this is done, please go back to the “Table Rates” section by navigating through the left menu Sales > Shipping Methods. Once you are there, you will notice that two additional options had appeared. You will need to click on the “Export CSV” button in order to download the file. After the download process is completed you will need to locate the file on your local computer and edit it with your preferred spreadsheet program. Once you are ready, you will need to click on the “Choose File” button in order to import the CSV file in Magento.
When the upload process is completed, please make sure to click on the “Save Config” button once again.
You will notice some additional shipping methods listed below on this page. The “Magento Shipping” method requires a Magento Shipping account. Counted from September 24th, 2019 the creation of Magento Shipping Accounts is no longer possible. Apart from the built-in shipping methods, Magento also provides the possibility for Internal Carrier integration including UPS, USPS, FedEx, and DHL. These shipping options will be separately reviewed in other tutorials dedicated to each of them.
At this point, you know how to configure Magento’s default shipping methods. We would recommend you test the shipping methods you have decided to enable on your store and once you confirm everything works properly you will be ready to start shipping products to your customers. We hope you have found our guide useful and easy to follow and we would like to welcome you to contact us in case any questions arise.

Sebahat is a young and bright woman who has become an invaluable part of our team. She started as a Customer Care Representative, mastering that role and, along the way, growing into a tech-savvy individual who is well acquainted with every support layer of the company. Driven by her aim to improve our customers’ experience constantly, she is committed to enhancing the extraordinary support we deliver.
Learn more about Magento 2 in the other tutorials that we have:
