
In our How to install the LiteMage LiteSpeed Cache module in Magento 2 tutorial, you have already learned how to enable it for your store. To get you acquainted with the LiteMage Caching module for Magento 2, we will provide you with a comprehensive overview.
In this guide, we will attempt to cover all it has to over, along with any tweaks or configurations you can apply to get the best out of it. While most of the speed-enhancing features of the module are already baked into its core, there are a few configurations available that should be more correctly referred to as conveniences and are more likely to serve a purpose in a specific situation. Let’s begin!
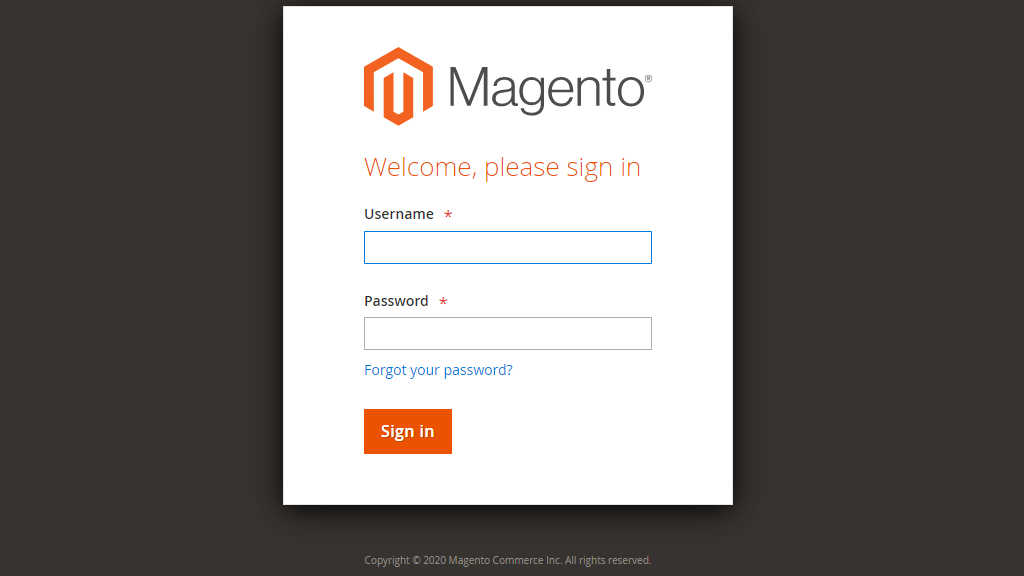
For a start, please log into your Magento 2 admin dashboard. If you are not sure how to do so, please go to your Magento 2’s root directory. Use SSH to navigate there and then execute the command:
cat app/etc/env.php | grep frontName | cut -d '>' -f2
From the command output, please copy the text inside the single quotes. Afterward, go to your browser and enter “yourmagentostore.com/text-inside-the-single-quotes” in the browser URL tab. Please, make sure to replace “yourmagentostore.com” with your actual domain name and the “text-inside-the-single-quotes” string with the text copied from the command. Upon doing that, the Admin Login page will be launched. To login, please enter your credentials into the corresponding fields.
Once logged, please select the “Stores” option on the side menu located on the left side. Once it is expanded, click on “Configuration”.

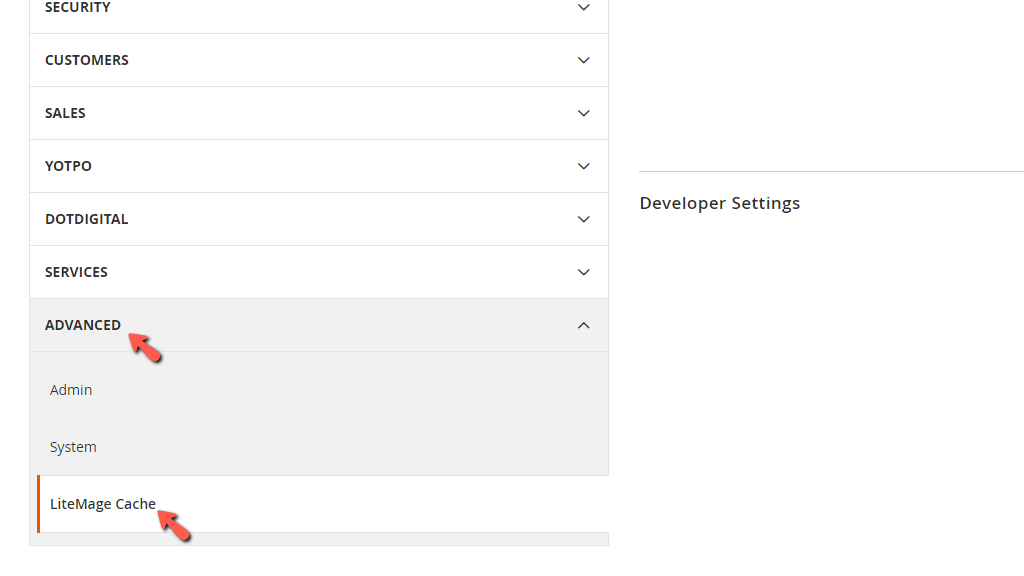
This action will redirect you to the configuration page. After you land there, scroll down and select the “Advanced” option from the side menu located on the left. This will present three more options, please select “LiteMage Cache”:
This action will redirect you to the configuration page, where you will see all the available options.
Within the Configuration page, you will find the following settings:

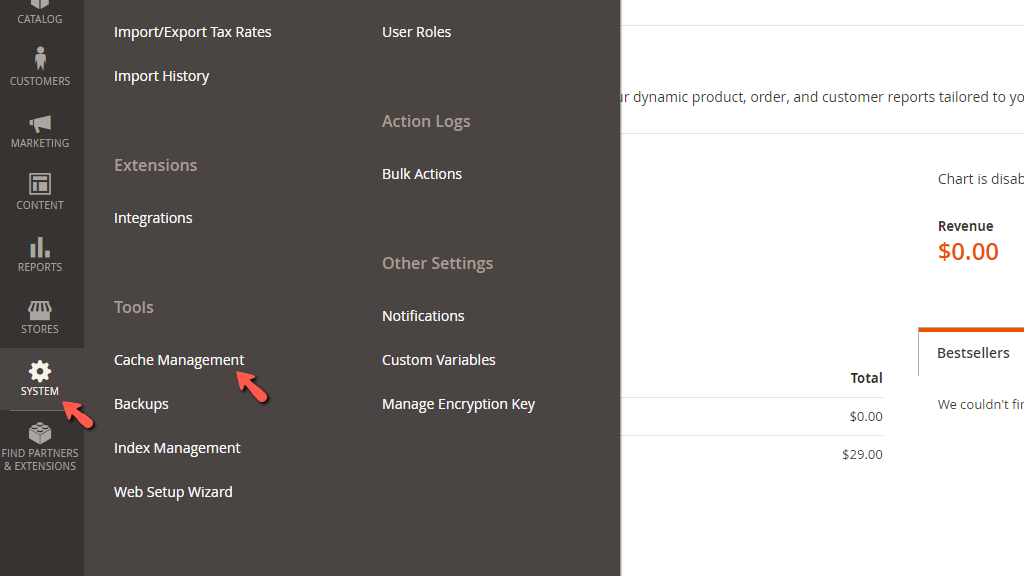
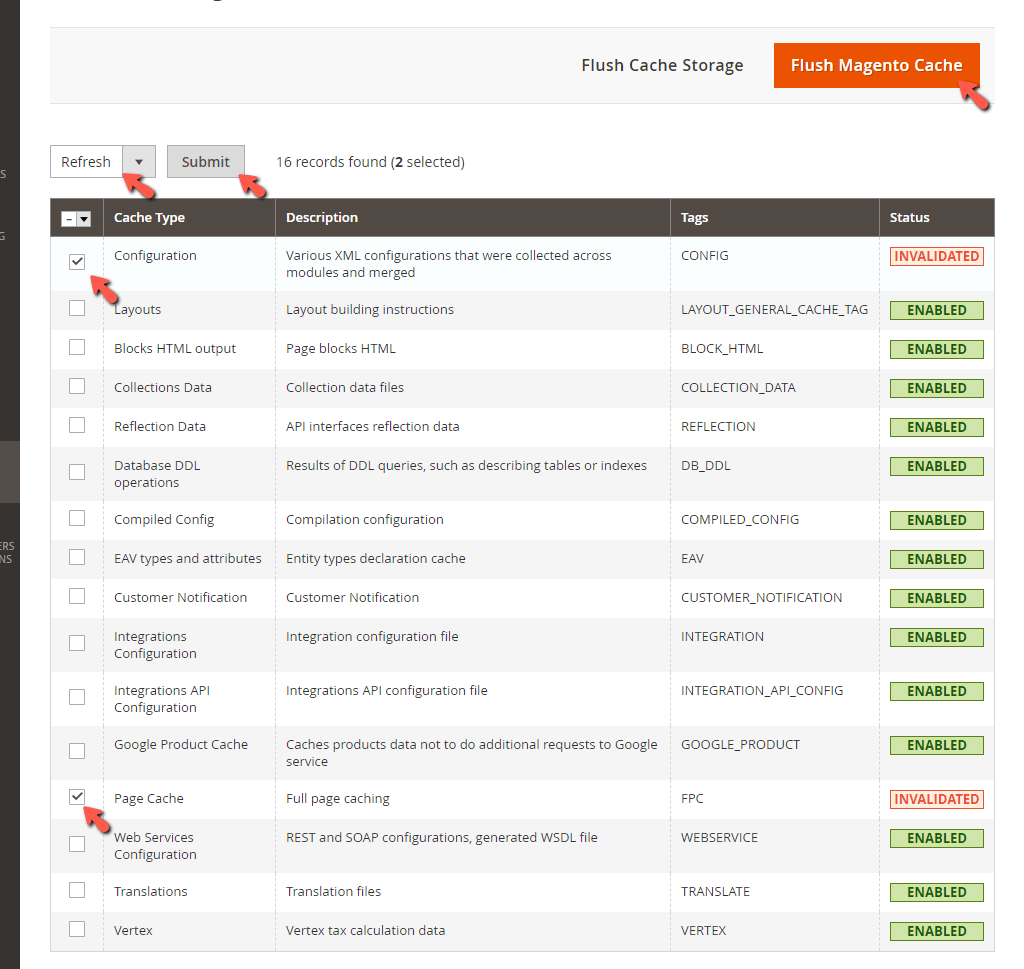
To open the cache management page for the LiteMage module, please use the side menu and click on the “System” option. Upon doing that, another menu will be expanded, please select the “Cache Management” option from it.
After landing on the cache management page, you will notice a table section containing all the Magento 2 caching types. In order to make sure that the LiteMage module is working, the “Page Cache” has to be enabled.

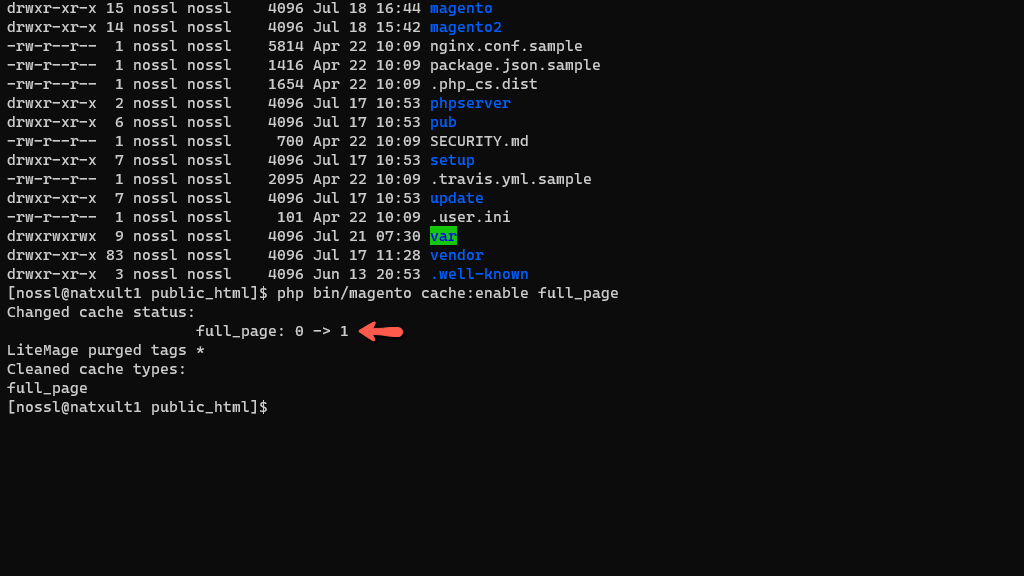
In case it is currently disabled, you have to enable it. If your Magento 2 site is in production mode, you will not be able to do this from your dashboard. We recommend using SSH in this situation to enable the cache without switching to development mode. After logging in, please navigate to your Magento 2 root directory and execute the following command:
php bin/magento cache:enable full_page
You should receive the output shown in the screenshot below, indicating the fact that the full page cache has been enabled.
If some of your cache types are invalidated (this could happen when you change some configuration settings within your dashboard), they need to be refreshed or flushed so that the settings can kick in.
To do so, please put a tick inside the checkboxes corresponding to the invalidated cache types and then either use the drop-down menu on the top of the table section and select “Refresh” or use the “Flush Magento Cache” button on the top right side of the screen.
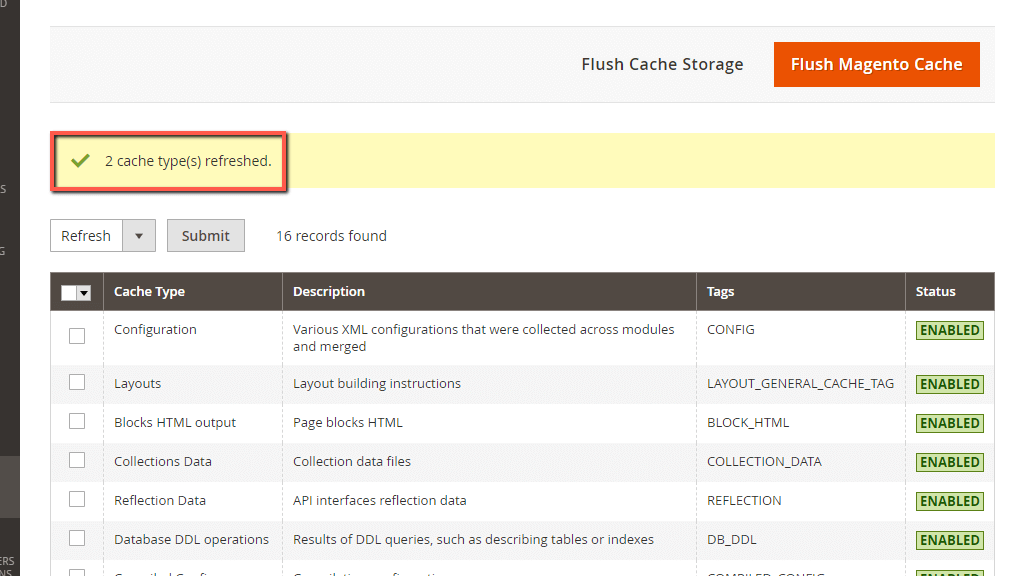
Here is the result if everything went through properly:
Lastly, this page can also give you information about the LiteMage module Usage. To check this, please scroll to the bottom, and you will see the “LiteMage Cache Status (LiteSpeed Web Server)” section and underneath a table section:

There you have it! The overview of the LiteMage plugin, along with its configuration options. We hope that you have a better understanding of how it works and how you can manage it. In case you have experienced any sort of difficulties during the installation or configuration of the module, please make sure to escalate the request to our Technical Support Staff by submitting a ticket from your HostArmada Client Area.

Sebahat is a young and bright woman who has become an invaluable part of our team. She started as a Customer Care Representative, mastering that role and, along the way, growing into a tech-savvy individual who is well acquainted with every support layer of the company. Driven by her aim to improve our customers’ experience constantly, she is committed to enhancing the extraordinary support we deliver.
Learn more about Magento 2 in the other tutorials that we have:
