
In the following tutorial, our focus will be on the WooCommerce Advanced Settings. We will guide you on how to expand your control over your Online Store and take the most advantage of the powerful tools available here. We will show you that even though the settings are "Advanced" configuring them is not such a "hard nut to crack". In order to avoid any confusion, we would like to point out that the "Advanced" tab was introduced within WooCommerce 3.4. replacing the prior versions’ "API" tab.
If you are ready to begin, please log in to your WordPress Admin Dashboard and navigate through the left menu bar to WooCommerce > Settings, then select the "Advanced" tab from the top menu bar.

Now that you are on the "Advanced" settings page, you will notice that it is split into five subtabs. In the following lines of this guide, we will separately review each of the subtabs and clarify all the available settings.
Under this subtab, you will find the settings that will allow you to control your default pages, checkout endpoints, and account endpoints. We will be reviewing each of the sections separately in order to outline their specifications and explain all the available settings in detail.
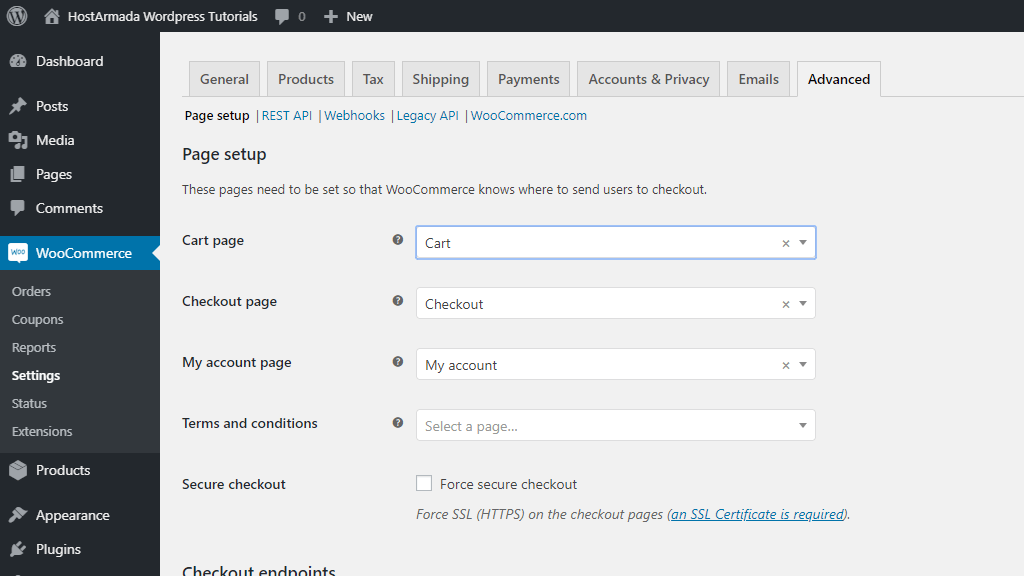
Under this section, you will be able to select the destination of your main pages. WooCommerce will create shortcuts for these pages in order to properly configure them in your Online Store and link them to your "Home page" so your visitors will be directed to the right destination when they access them. If you have used the WooCommerce Setup Wizard the pages will be already set as shown in the screenshot example below.
Under this section, you will be presented with the checkout process endpoints. These endpoints will be included in your checkout URL in order to handle specific action. The purpose of these endpoints is to reduce the number of pages and amount of content by handling multiple requests under the same page.
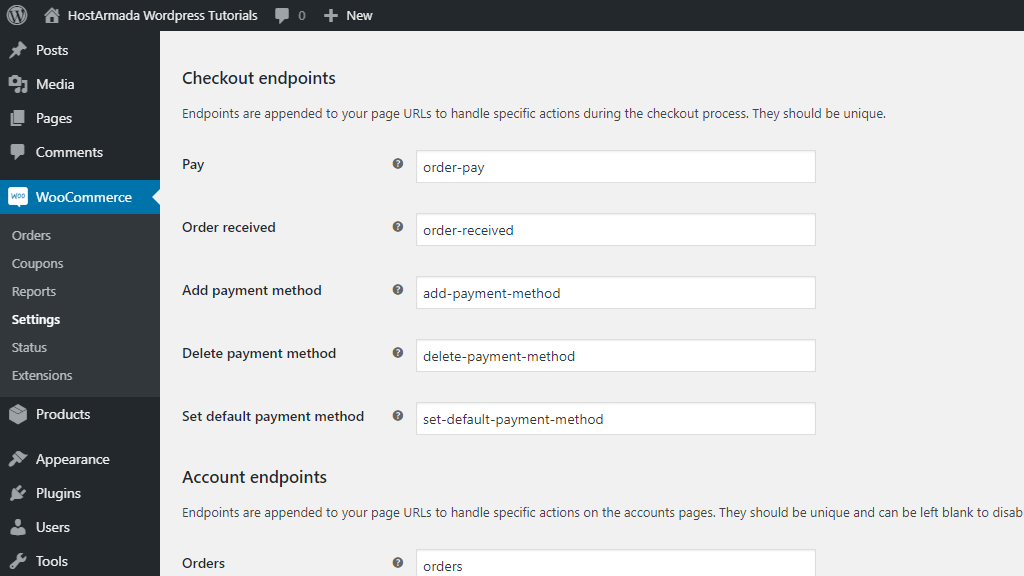
As you will notice the listed "Pay", "Order received", "Add payment method", "Delete payment method", "Set default payment method" endpoints are already configured by WooCommerce. If you would like to set up your custom endpoint values, please make sure they are unique in order to avoid interference and issues during the checkout process.
Under this section, you will find the endpoints related to your Online Store’s "My account" page. These endpoints will be included in your "My account" URL to handle specific actions. For example, if your customer would like to review a specific order the URL will appear as yourdomain.com/my-account/view-order/.

Similarly to the previous section, you will notice that the "Orders", "View order", "Downloads", "Edit account", "Addresses", "Payment methods", "Lost password", and "Logout" endpoints are already configured by WooCommerce. However, if you prefer to set up your custom values, please make sure they are unique and not included anywhere on your website in order to avoid any possible interference.
Once you ensure you are ready with all the settings, please make sure to click on the "Save changes" button and you will be all set to move forward.
In this section, we will review the WooCommerce REST API which is a powerful part of WooCommerce and will allow external apps to interact with your website data and make CRUD (Create; Read; Update; Delete) operations available from anywhere. The "REST API" will allow you to manipulate your WooCommerce data from any technology stack you want, such as mobile apps or native apps.
Before we begin, please make sure that the WordPress permalinks are enabled (WordPress Admin Dashboard > Settings > Permalinks).
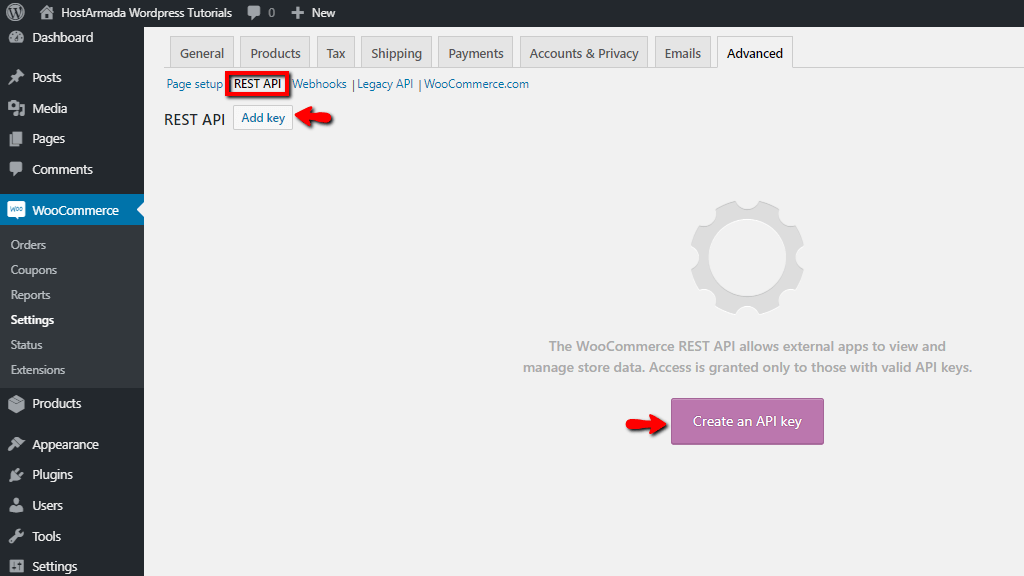
The "REST API" is based on a key system which controls access. The keys are linked to specific users on your site. If you are accessing the "REST API" page for the first time, you will be prompt to create a new key by the purple "Create an API key" button. In order to add your new key, you can either click on it or you can click on the "Add key" button at the top of the page - both options will take you to the "Key details" page.

Here you will need to enter your key details in the given three fields:
Then just click on the "Generate API key" and WooCommerce will automatically create your new key.
After your key is successfully generated you will be provided with your "Consumer key", "Consumer secret", "QRCode" and a "Revoke key" option.

Please make sure to copy and save your "Consumer key" and "Consumer secret" as they will not be visible later on. You can enter these keys in the application that will be using the "REST API". The "QRCode" is particularly useful for mobile apps as it will allow you to directly scan it and add the keys, avoiding the whole typing/pasting process. From the red "Revoke key" button you can restrict access to your website’s data for any application using this key.
Simply put webhooks are just HTTP requests sent to a certain URL usually in response to an event. The common use of webhooks is for data that changes. You can configure a webhook that will trigger an action on one website as a result of an event happening on your website. Webhooks can be configured with any third-party services and APIs as long as they are supported. For example, you can configure a webhook that will automatically post an update to a third-party website (i.e. Facebook, Twitter, etc.) whenever you add a new product.
Now let’s see how to add and configure a new webhook from WooCommerce.
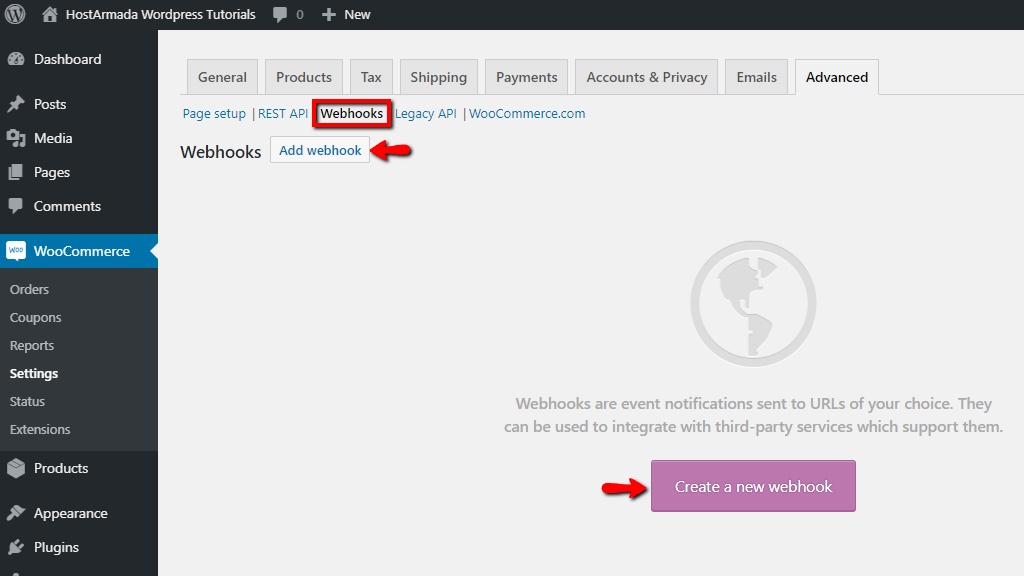
If you are accessing the "Webhooks" subtab for the first time you will be prompted with a purple "Create a new webhook" button. You can either click on it or click on the "Add webhook" button at the top of the page.
Afterward, you will be presented with the "Webhook data" page where you will need to configure the webhook settings.
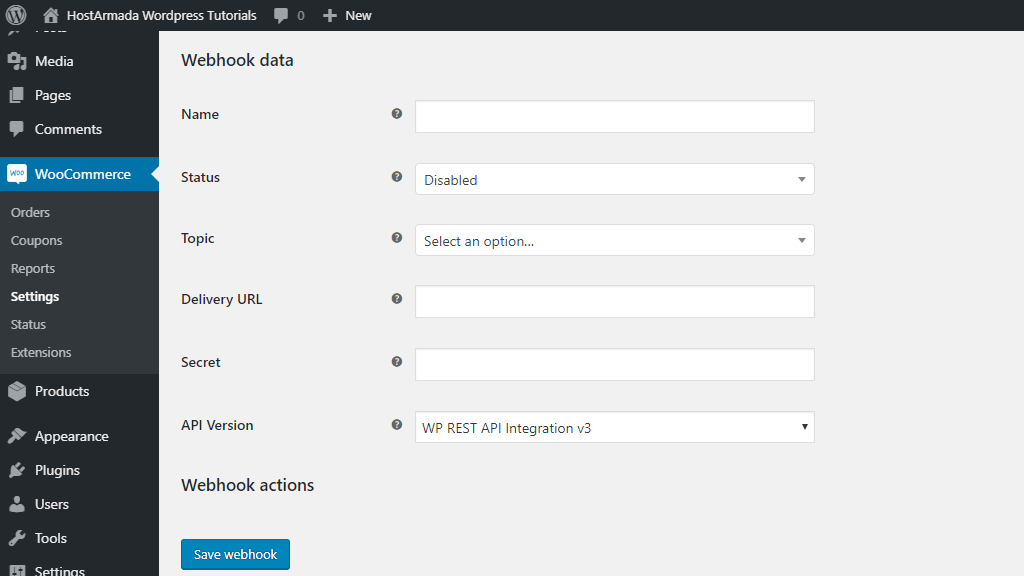
Once you are ready, please make sure to click on the "Save changes" button and your new webhook will be successfully set up.
If you have saved the webhook in "Active" status it will start checking for the particular event right away. When you access the webhook again you will be able to see the logs. Alternatively, you can check the logs by going to WooCommerce > Status > Logs. You can see all the entries showing when it was triggered and the response from the party it is integrating with.
The "Legacy API" is deprecated and expected to be removed soon. The new alternative of the "Legacy API" is the "REST API" which is enabled by default and we have previously reviewed in this guide.
Under this last "WooCommerce.com" subtab, you will be able to control whether WooCommerce is allowed to track your usage data. The purpose of the data tracking is to gain more accurate information for the number of stores using WooCommerce, how WooCommerce is installed and used. Additionally, that data will be used to better troubleshoot issues possibly caused due to specific features and updates.
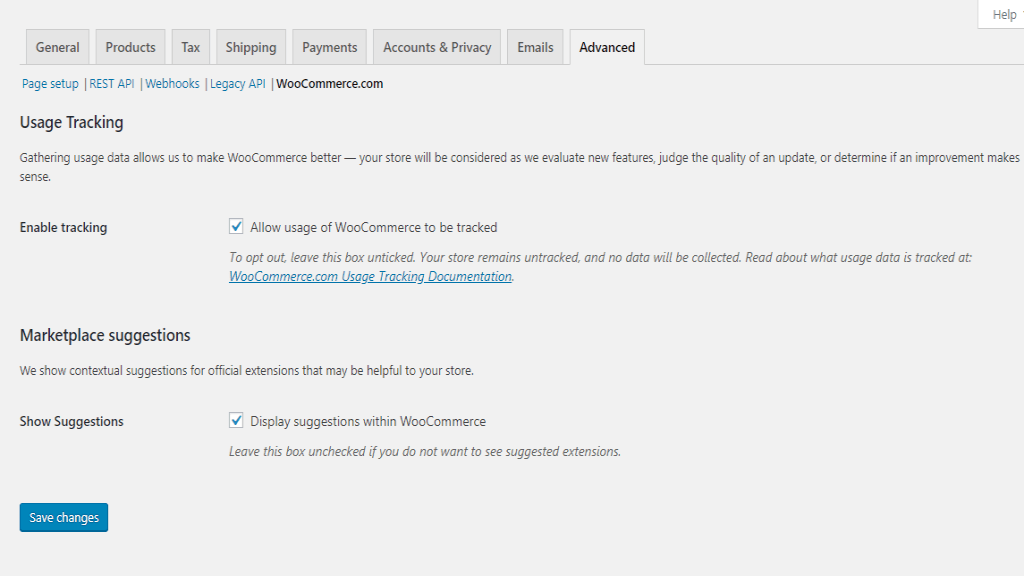
If you leave the "Enable Tracking" checkbox ticked, WooCommerce will track information such as your site URL, admin email address, your active payment gateways and shipping methods, active plugins, MySQL version, PHP version, etc. In case you do not feel comfortable knowing such information will be retrieved by WooCommerce you can always disable the tracking by un-ticking the checkbox.
The second "Show Suggestions" checkbox will allow you to control whether official extensions considered as helpful for your Online Store will be suggested within WooCommerce. If you prefer not to see those suggestions, please make sure to un-tick the box.
Finally, please make sure to click on the "Save changes" button and you will be all set.
Well done! At this point, you have all of your WooCommerce Settings successfully configured and you are ready to move forward and start selling online. We hope you have found our guide useful and easy to follow. In case you happen to experience any difficulties following our instructions, please do not hesitate to contact our Support Team for further guidance.

Sebahat is a young and bright woman who has become an invaluable part of our team. She started as a Customer Care Representative, mastering that role and, along the way, growing into a tech-savvy individual who is well acquainted with every support layer of the company. Driven by her aim to improve our customers’ experience constantly, she is committed to enhancing the extraordinary support we deliver.
Learn more about WooCommerce in the other tutorials that we have:
