
The main focus of this tutorial will be on the built-in WooCommerce Email Settings. We will guide you on how to configure the mail settings and modify the email templates. Learning how to properly manage your email settings will result in gaining control over the communication with your customers and will positively increase their satisfaction and trust in your services.
In order to begin, please log in to your WordPress Admin Dashboard and head to WooCommerce > Settings then switch to the "Emails" tab.

Now, as you are at the right place we are ready to further review the email notifications and how to properly configure your settings.
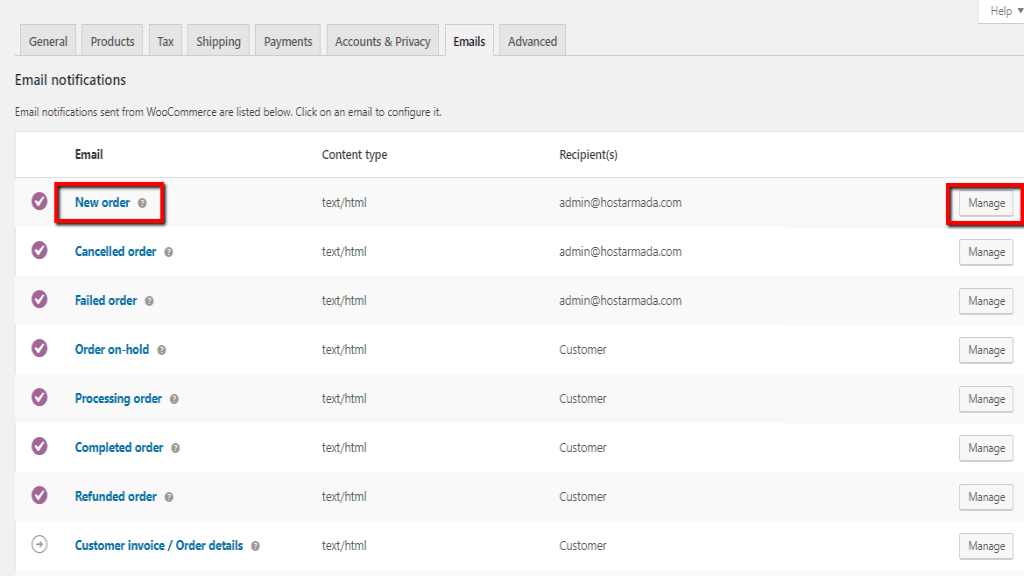
The first thing you will notice on this page is a list of the email notifications WooCommerce can send to you and your customers. You will be able to individually customize and configure each of these email templates.

From this list, you can review the email title, the content type, and the email recipients. The templates where the "Recipient(s)" is listed as your admin email address are intended for you as a store owner. While the rest of them where the "Recipient(s)" is listed as "Customer" are intended for your customers.
Generally, all the templates have the same fields to configure, therefore we will give you a head start by reviewing the first "New Order" template settings. Afterward, you will have the fundamental idea of how to configure the rest of them.
Each template can be customized by clicking either on the email title or on the right "Manage" button.
Then you will be presented with the following screen containing the configuration settings for the given template. Let’s take a peek and clarify each of the settings.

At the bottom right corner of the page, you will notice two additional settings: "Copy file to theme" and "View template". If you would like to override and edit this template, please click on the "Copy file to theme" button which will copy this email template under your theme (yourtheme/woocommerce/emails/admin-new-order.php) and will allow you to perform enhanced customization. If the template was already copied, then the "Copy file to theme" button will be converted to "Delete template file". The "View template" button will allow you to review the template, and it case it was already copied to your theme folder to also edit it. Please note that if your intention is to edit the templates directly from WooCommerce it is strongly recommended to ensure you have a backup copy.
Finally, once you are ready, please do not forget to click on the "Save changes" button in order to record the customizations you have made. As we have mentioned earlier the rest of the templates have the same settings and you can easily customize them by following the instructions above.
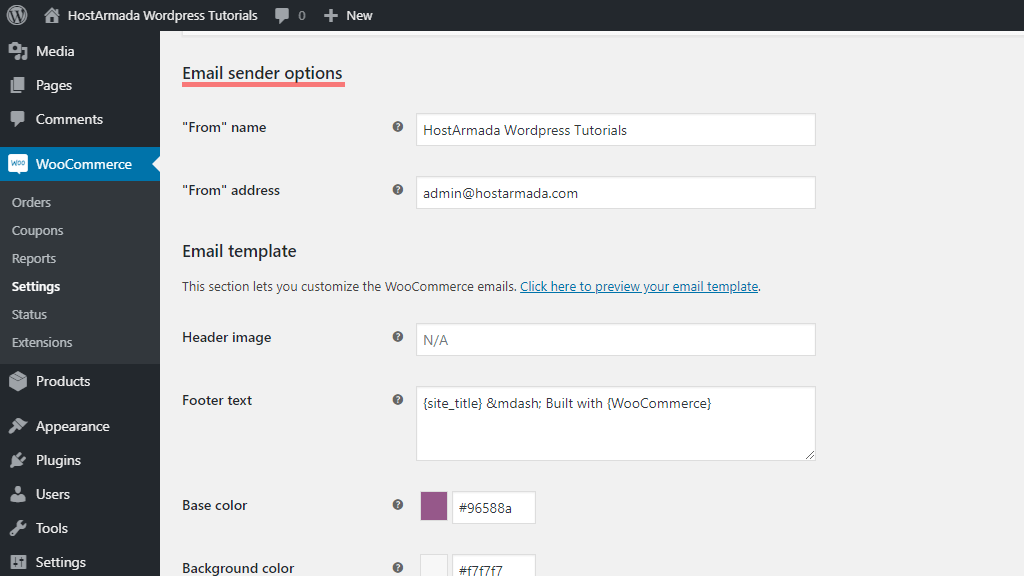
Scrolling down below the list of templates will take you to the "Email sender option" section where you will need to configure only two options related to the email sender. These settings are important as they will determine how your email sender information will be displayed in your customers’ mailboxes. They are pretty straight forward and you will probably manage to figure them out without our help, but let’s review them anyway.
Under this final section, you will find the settings that will allow you to customize how your WooCommerce emails look. The style of this template will be applied to all the emails you send through WooCommerce.
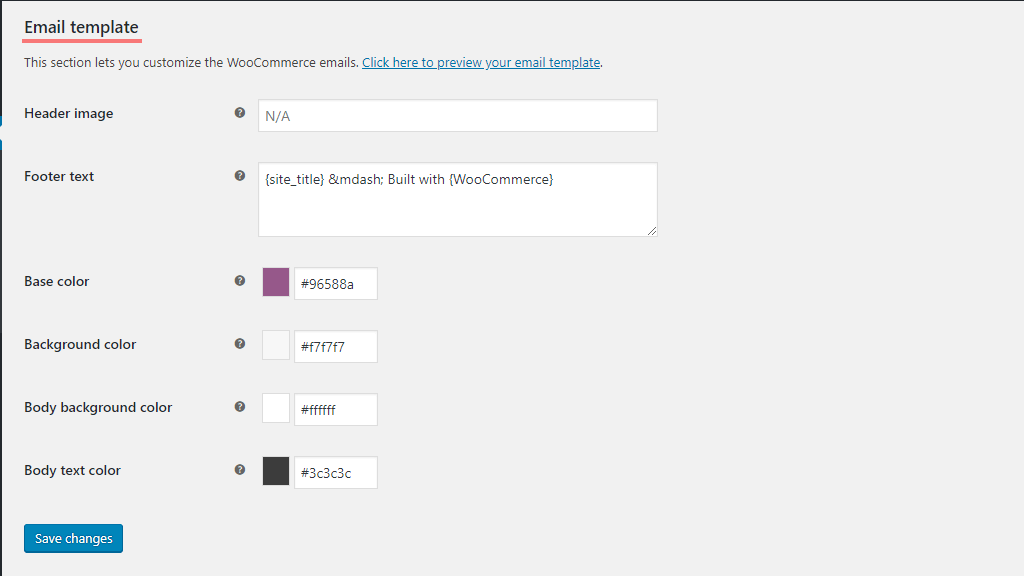
Before you save your changes you can preview how your email template will look by clicking on the blue "Click here to preview your email template" text which will redirect you to a new page and present you with an example of your WooCommerce email template.
If you are pleased with the look of the template and you are sure the rest of the settings are correct, please make sure to click on the "Save changes" button at the very bottom of the page.
As we discussed in the first section, there is a possibility to perform more complex customization of your WooCommerce email templates than the settings offered here. Compared to doing it template by template as shown in the previous example you can also do it in bulk. You will be able to do that from your website files directory. You will have to copy the emails folder (woocommerce/templates/emails) into your themes folder (yourtheme/woocommerce/emails).
Here we would like to take a moment to congratulate you on learning how to handle your WooCommerce Email Settings and thank you for trusting our guidance. We hope you found the tutorial useful and easy to follow. As always, in case something was not entirely clear or you happen to experience any difficulties you are welcome to contact our Support Team.

Sebahat is a young and bright woman who has become an invaluable part of our team. She started as a Customer Care Representative, mastering that role and, along the way, growing into a tech-savvy individual who is well acquainted with every support layer of the company. Driven by her aim to improve our customers’ experience constantly, she is committed to enhancing the extraordinary support we deliver.
Learn more about WooCommerce in the other tutorials that we have:
