
phpMyAdmin has a broad toolkit up its sleeve allowing you to perform all sorts of operations with a database. Some of them include creating a database table, renaming a database, copying a database, and changing a database collation. In this article, we will be discussing the “Operations” tab and how you can use it to perform the mentioned tasks.
Before you can access the PHPMyAdmin functionality, you need to log into your cPanel account with us. To do so, please check our tutorial on How to access the cPanel service.
Once logged in, please navigate to the “Database” section and click on the “phpMyAdmin” icon.

Clicking on the result redirects you to the “PHPMyAdmin” feature, In the left sidebar, you can see a list of all your databases.

Please select the database which you want to alter using the functions in the “Operations” tab.
When you have selected your database, please switch to the “Operations” tab located in the top navigation menu.

After landing on the page, you can see a couple of sections. We are going to go over all of them in the paragraphs to come.
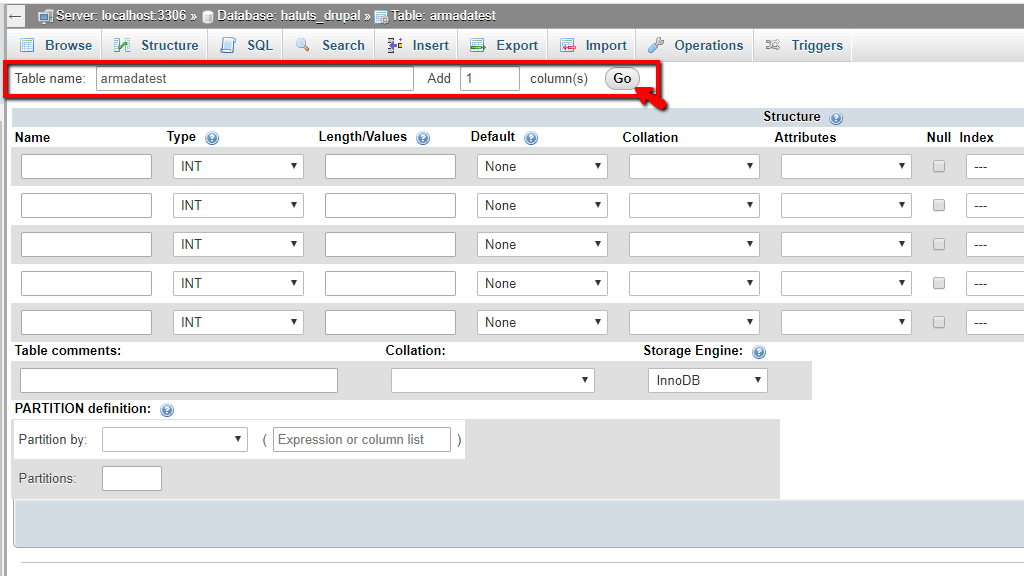
Using the functionality under the “Create table” section, you can add additional tables to your database. To do so, please type in the database table name within the first field. In addition to that, you can manipulate the number of columns it has by entering the desired value in the second field.

After you have entered the name and the number of rows, please press the “Go” button located on the far right side of the section to populate your new table.

Once you are redirected to the page, at the top, you can see two text fields. They allow you to change the name and add more rows to the current table.
If you need to use it and alter the name and row counter, please hit the “Go” button to save your changes.
Underneath these text fields, you can see a big table section containing a lot of text fields, dropdown menus, and checkboxes. We are going to cover most of the columns there so you can understand what kind of information you need to enter.
Finally, when you are done with the table allotment, please press the “Save” button located on the right side of the screen.

After you have created the table, you may want to insert data inside. To do so, please open the new table, which is going to be displayed on the left or middle side of the screen. If you click on the database itself from the database list on the left side of the screen.

When you have entered the desired data in the fields, please press the “Go” button located on the bottom right side of the page to save the changes. Clicking on the “Browse” tab at the top navigation menu shows the newly inserted record.
The functionality under the “Rename database to” section allows you to rename your database.

Please type in the new database name into the text field and click on the “Go” button located on the far right side of the section. This prompts a window, asking you to confirm the change. After doing so, the screen refreshes, you get a success message, and the change is done.
Technically what happens is that phpMyAdmin DROPS the existing database, creates a new one, and then imports the old database inside it.
Utilizing the functionality under the “Copy database” section lets you copy a database to a different database, and it has quite a wide variety of choices on how exactly you want to do it.

Please type in the location where you want to copy the database to (a new database or existing database) inside the text field located under the “Copy database to” label. Afterward, you have quite a few choices underneath. Let us briefly go over them.
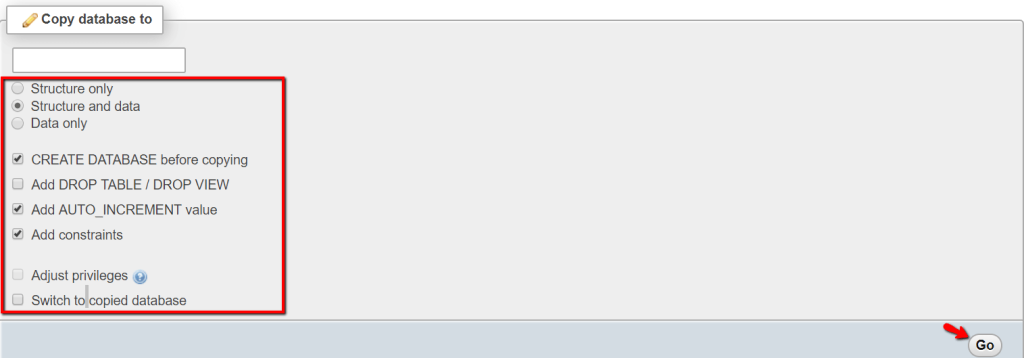
After you adjusted everything, as per your needs, please click on the “Go” button located on the bottom right side of the section.
The last functionality we are going to go over under this tab is located under the “Collation” section. It allows you to alter the collation of the entire database.
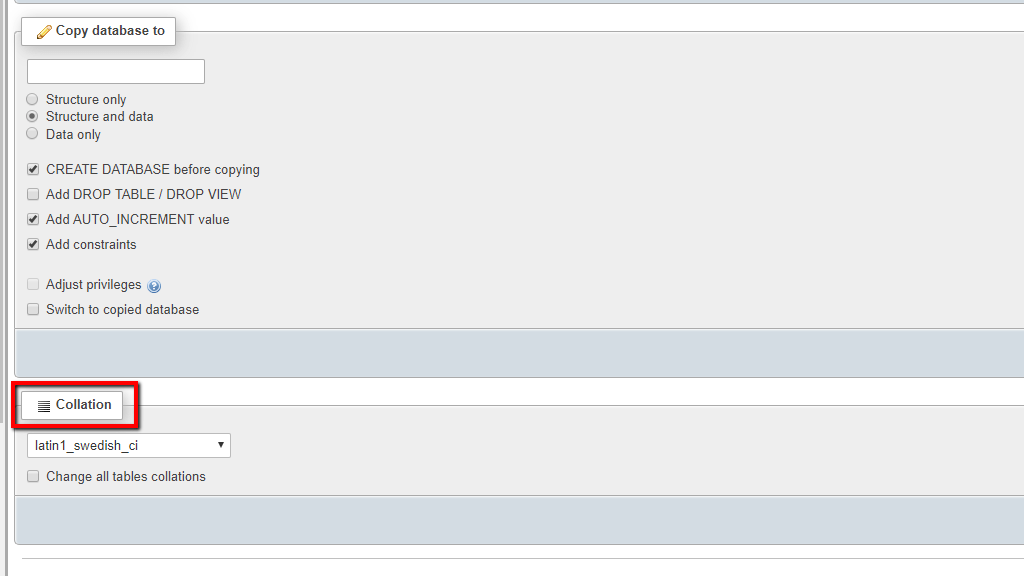
To select a new collation, please use the dropdown menu, located under the “Collation” label. Additionally, you have the option to apply the new collation to all the tables as well. This is done by putting a tick inside the checkbox beneath the dropdown menu.

When you have chosen the collation, please press the “Go” button located on the bottom right side of the screen.

And there you have it! All the information about the “Operations” tab tightly packed under this tutorial. If you face any technical issues while using it, please do not hesitate to contact our technical team over the ticketing system in our Client Area.

Nikola is an accomplished tech-savvy extraordinaire with over six years of experience in the web hosting field. He started as a customer care representative and quickly rose the ranks to become a support supervisor and, eventually - the head of the technical department in HostArmada. His deep understanding of the client's needs, combined with his technical knowledge, makes him the perfect man to create the ideal harmony between client satisfaction and professional problem-solving. You will often find him creating helpful tutorials, articles, and blog posts that help existing customers get around.
Learn more about cPanel in the other tutorials that we have: