
A MySQL trigger is a stored code sequence that the database server executes each time your database triggers a specific event within the table. Examples of such events are the UPDATE, INSERT, or DELETE statements. Standard usage of a MySQL database trigger involves performing a check whenever a piece of content is inserted inside a table or a re-calculation of a value associated with a table update. This tutorial will explain how to create a database trigger using the phpMyAdmin service in your cPanel. Let us get started!
Before you can access the PHPMyAdmin functionality, you need to log into your cPanel account with us. To do so, please check our tutorial on How to access the cPanel service.
Once logged in, please navigate to the "Database" section and click on the "phpMyAdmin" icon.

Clicking on the result redirects you to the "PHPMyAdmin" feature. In the left sidebar, you will see a list of all your databases.

Please select the database for which you want to create the MySQL trigger.
Once you have selected the database, phpMyAdmin will list all its tables in the middle of the screen.

From the bar on top, please click on the "Triggers" tab. This action takes you straight to the page, which allows you to add database triggers.

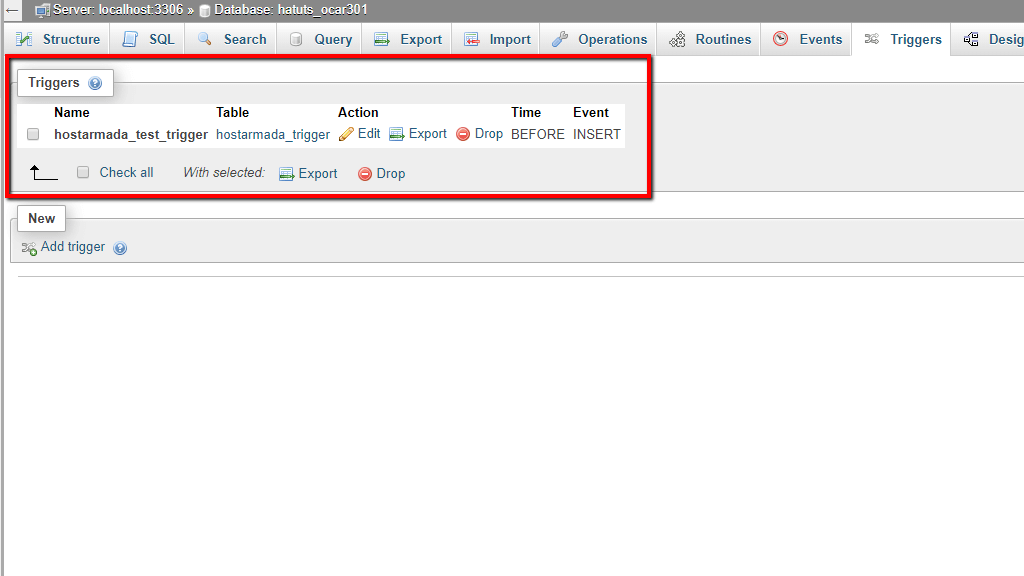
On the top, you can see the "Triggers" section where phpMyadmin will show all the existing database triggers. If there are none created, like in our case - it will be empty. Please click the "Add trigger" button located under the "New" section to add a MySQL trigger.
This action will show a popup window, which allows you to configure your new database trigger.

Below, we are going to cover the majority of the options provided in the popup window.
After you have configured your trigger, please press the "Go" button to create it.

When you create the database trigger, phpMyAdmin will display it under the "Triggers" section within the "Triggers" tab.
On the row where phpMyAdmin placed the MySQL trigger, you can see three buttons. Let's go over all of them.
And there you have it! The way you can use phpMyAdmin to create database triggers. If you face any technical issues with this functionality, please do not hesitate to contact our technical support staff over the ticking system in your Client Area.

Nikola is an accomplished tech-savvy extraordinaire with over six years of experience in the web hosting field. He started as a customer care representative and quickly rose the ranks to become a support supervisor and, eventually - the head of the technical department in HostArmada. His deep understanding of the client's needs, combined with his technical knowledge, makes him the perfect man to create the ideal harmony between client satisfaction and professional problem-solving. You will often find him creating helpful tutorials, articles, and blog posts that help existing customers get around.
Learn more about cPanel in the other tutorials that we have:
