
It is of utmost importance to keep your SSL certificates renewed when they are about to expire as the consequence of the expiration would mean the complete inaccessibility of the sites that are utilizing them. The WHM control panel has the “Manage AutoSSL” feature that provides free SSL certificates for your domains. Not only that but those certificates that are about to expire or are insufficient to provide the expected level of security will be renewed or respectively replaced. Without further ado, let’s get right into this tutorial.
As with all other WHM control panel features you need to first log into the WHM service for your VPS or Dedicated Server. If you are not sure how to do that, please check our How to Access WHM tutorial. After you have logged in, please use the search field on the left side of the page and type “Manage AutoSSL”.

When the single result presents itself below the search bar, click on the “Manage AutoSSL” link in order to be redirected to the desired page.
When you land on the “Manage AutoSSL” page, you will see a brief description of the feature on the top of the page. Underneath, you will see a blue box containing information about the current AutoSSL provider and the “Run AutoSSL for All Users” button.
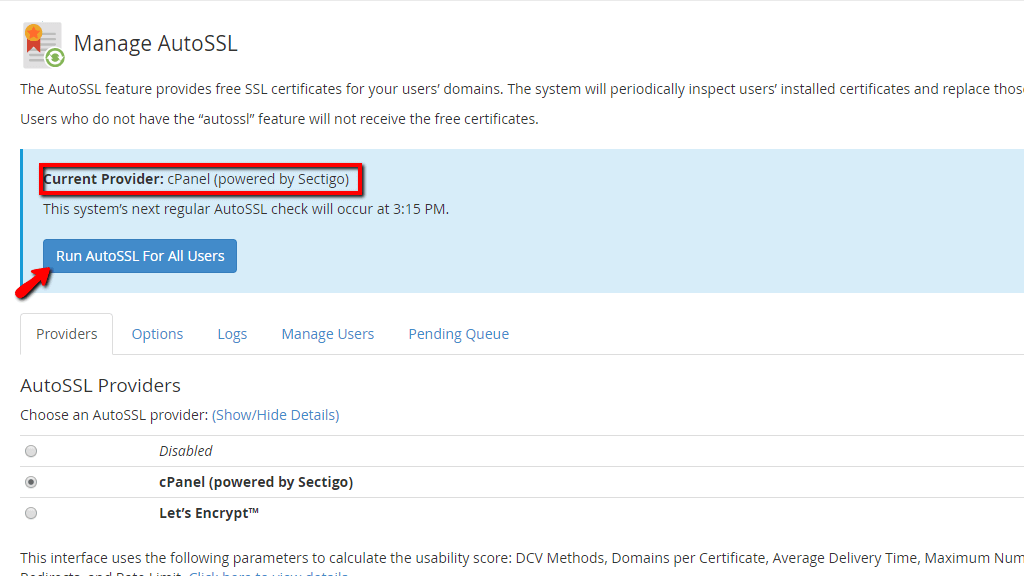
Please press the “Run AutoSSL For All Users” button in order to apply the AutoSSL feature for all of the users utilizing the functionality.
Below this blue bar section, you will see five tabs - “Providers”, “Options”, “Logs”, “Manage Users”, and “Pending Queue”. The one chosen by default will be the “Providers” tab so let’s discuss it first.
In this tab, you will be able to select the AutoSSL provider for your server. At this point, WHM supports only two providers - cPanel (powered by Sectigo) and Let’sEncrypt™.
In order to select a provider, please use the radio button located on the left side of each of the listed providers. If you want to disable this feature, please select the “Disabled” option.
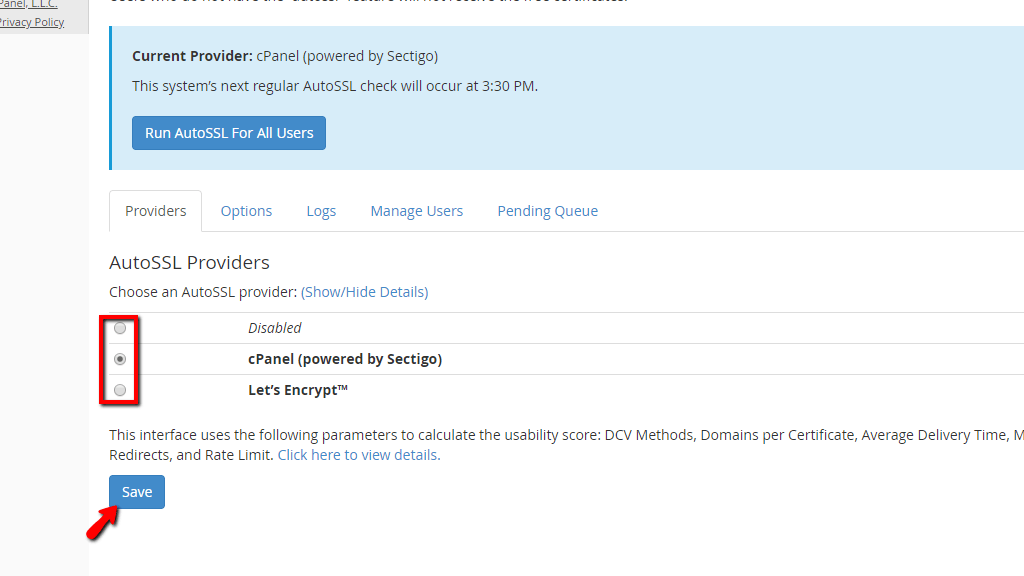
When a provider is selected or if the AutoSSL service is disabled, please press the “Save” button located on the bottom of the page to save your settings.
In order to access this tab, please click on the “Options” tab located on the right side of the “Providers” tab.
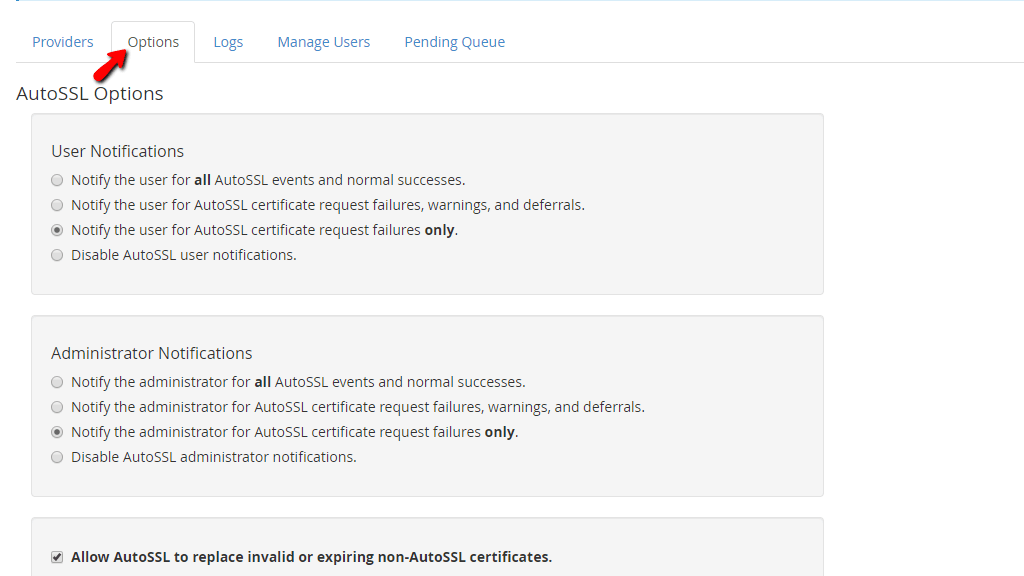
When you land on the “Options” tab, underneath you will find the “AutoSSL Options” heading, and below that you will see three sections. The first one is “User Notifications”. Here are the options it provides:

In order to select one of the options, please use the radio button located on the left side of each option.
The second section is the “Administrator Notifications” section. Below you will find the options it contains:
To select an option, please use the radio button located on the left side of each of the available options.
The last section in this tab has a checkbox inside it. When selected, it will replace ALL invalid or expiring non-AutoSSL certificates, regardless of the CA that issued them, 3 days before they expire. Please, DO NOT select it unless you completely understand and agree to the consequence it can bring. It will not respect the certificate even if it is an Extended Validation(EV), Organization Validation(OV), or Domain Validation(DV) SSL certificate.

When you have chosen all the desired options on this page, please press the “Save” button located at the bottom of the screen.
This tab may be accessed when you press on the “Logs” tab located on the right side of the “Options” tab.

When redirected there you will see an “AutoSSL Logs” heading and below, a content box containing all the AutoSSL provider logs that go back 30 days. In order to review a given log, please select it by clicking on the log itself and then press the “View Log” button, located under the content box.

This log will help you track down issues related to SSL certificates not renewing or issuing properly.
In order to access this tab, please click on the “Manage Users” tab located on the right side of the “Logs” tab.

When you are taken there, on the top you will see a search field. You may use it to filter out the users to whom you would like to perform changes regarding the AutoSSL functionality.
Under this search field, you will find a table section populated with the users on the server. You will also find the following AutoSSL options:

In order to select an option from this list, please use the radio button located underneath the “Toggle AutoSSL” column.
In order to gain access to this tab, please click on the “Pending Queue” tab located on the right side of the “Manage Users” tab.
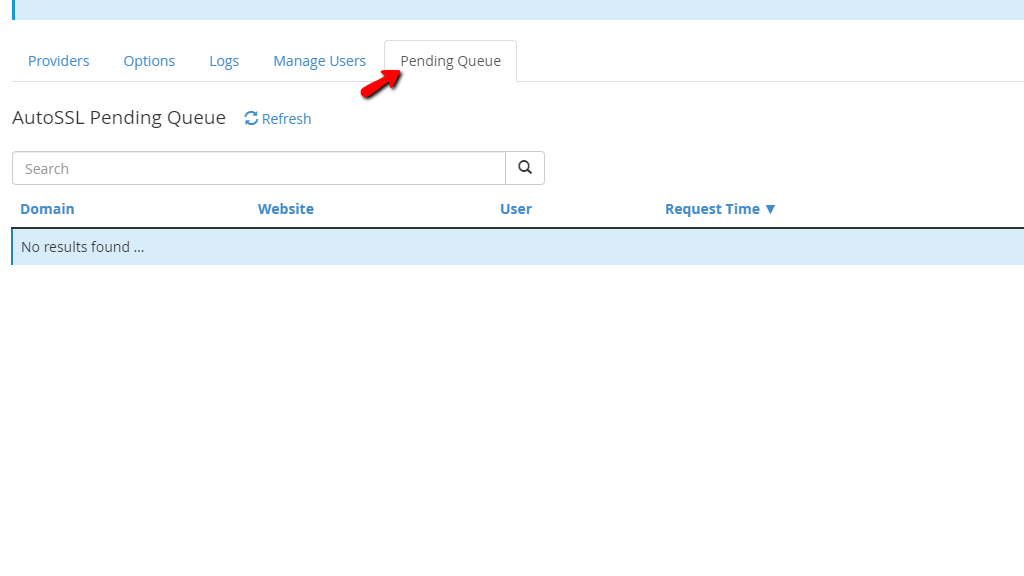
Inside you will typically find the status and the details of the pending AutoSSL jobs on your server. There is a search bar underneath the “AutoSSL Pending Queue” label, which you can use to filter the currently running jobs, based on the domain or user.
There you have it! All of the important details surrounding the “Manage AutoSSL” feature in the WHM control panel. It is a really neat functionality that with very little effort can guarantee that all of your SSL certificates will be renewed when they are about to expire. If you are having issues with this feature or you are unable to configure the AutoSSL to your liking, please give our Technical Support a try. They are 24/7 available through the ticketing system in your Client Area.

Sebahat is a young and bright woman who has become an invaluable part of our team. She started as a Customer Care Representative, mastering that role and, along the way, growing into a tech-savvy individual who is well acquainted with every support layer of the company. Driven by her aim to improve our customers’ experience constantly, she is committed to enhancing the extraordinary support we deliver.
Learn more about WHM in the other tutorials that we have: