
Learn WHM
Knowing the hardware your server is using can be very handy, especially if your projects have specific necessities in terms of resources and you want to be sure you are getting what you are paying for. The feature we are going to talk about in this tutorial is the “Server Information” which will allow you to check the specific information about your server’s processor, RAM, Disks, operating system, etc. Without any further ado let’s get right into it!
First, you need to log into the WHM service for your VPS or Dedicated Server. If you are not sure how to do that, please check our How to access the WHM service tutorial. After you have logged in, please use the search bar on the left side of the page and type “Server Information”.
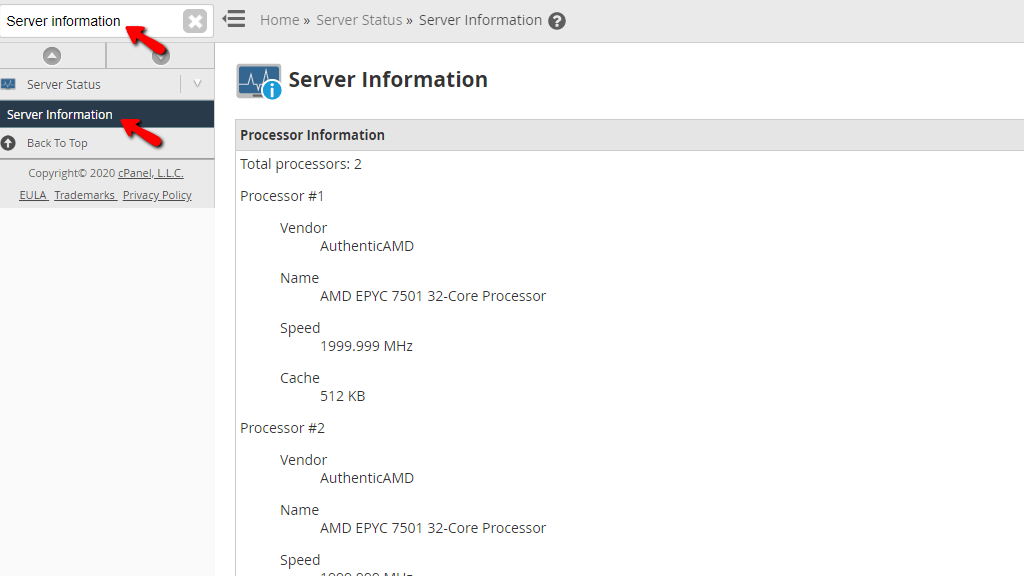
When the functionality shows up below the search bar, please click on it so you can be sent to the “Server Information” page.
Upon landing on the page you will immediately notice the “Processor Information” section.
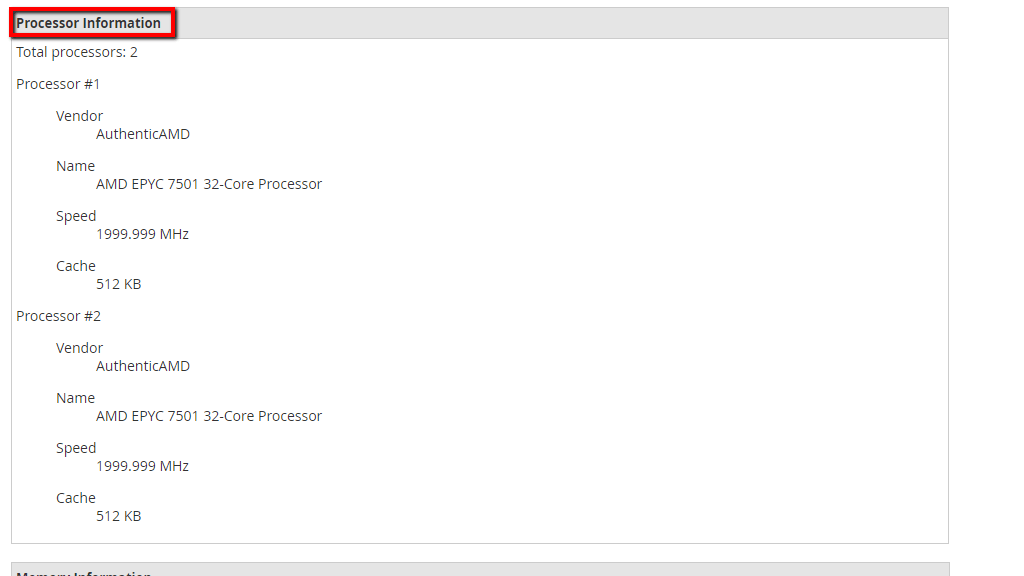
At the very top of the section, you will see the total number of processors on your server. Bellow that you will find lines of text separating each processor with the label “Processor #” and underneath, the following information about the processor.
The second section that follows is “Memory Information”.
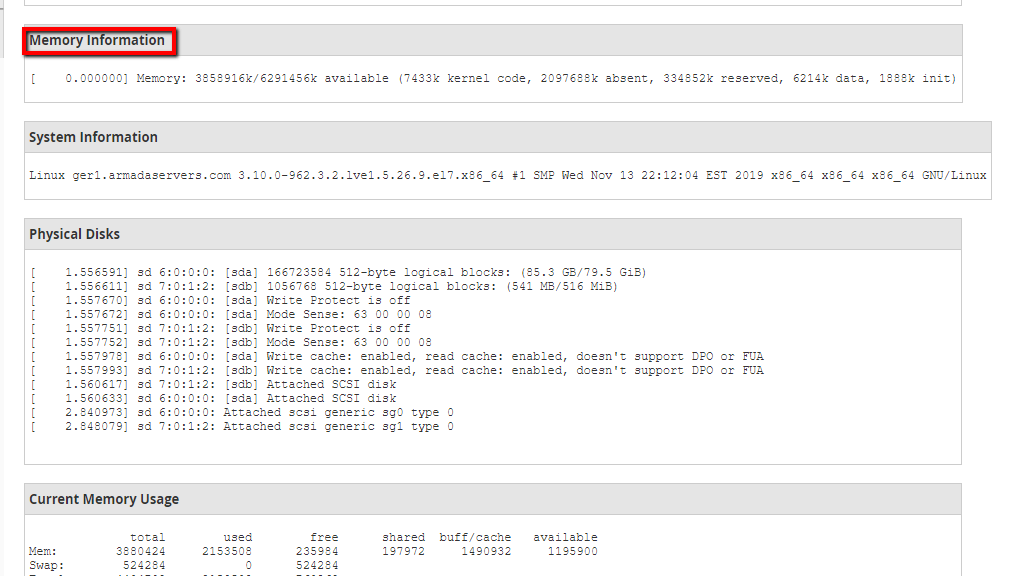
It will hold information about the RAM availability of your server and how much of it is reserved for the kernel along with the rest of the services working on the server.
The third section contains the “System Information” where you may see information about the operating system and its version. Additionally, you will also see the server’s hostname, the manufacture date of the kernel, and its chipset.

The next section will display information about the server’s physical disks. What should be most relevant to you in this section is the first two lines which should look similar to:
[ 1.556591] sd 6:0:0:0: [sda] 166723584 512-byte logical blocks: (85.3 GB/79.5 GiB)
[ 1.556611] sd 7:0:1:2: [sdb] 1056768 512-byte logical blocks: (541 MB/516 MiB)
This means that the server has two disks attached to it - one of them is the main disk where everything is currently mounted, while the other one is the swap.

The second to last section will display the information about the current memory usage on the server. The thing you should pay close attention to in this section is the line containing information about the swap memory.

Your server should never be using memory from the swap so if you notice the number on the “Swap“ row under the “used” column raising, please submit a ticket to our Technical Support staff so they can take a closer look, as your applications might need more memory than the server has as they are utilizing parts of the swap.
The last section is the “Current Disk Usage“. There you will find information about your disk’s total “Size”, the “Used” disk space, and how much it has “Available”. In addition to that, you will be able to see a percentile representation of this under the “Use%” column and the mount point under the “Mounted on” column.

There you have it! A really basic guide about this pretty straightforward feature in the WHM control panel. If you are having trouble reading any of the information provided, please, feel free to submit a ticket from your Client Area and ask our Technical Team to take a closer look.

Sebahat is a young and bright woman who has become an invaluable part of our team. She started as a Customer Care Representative, mastering that role and, along the way, growing into a tech-savvy individual who is well acquainted with every support layer of the company. Driven by her aim to improve our customers’ experience constantly, she is committed to enhancing the extraordinary support we deliver.
Learn more about WHM in the other tutorials that we have: