Learn TYPO3
On certain occasions, you might not be able to install applications automatically. Whether your hosting provider does not support an automatic installer, such as Softaculous, or you simply prefer to stick to the old-fashioned method. Knowing how to perform manual software installation comes in handy in such situations.
We are going to step-by-step guide you on how to install the TYPO3 CMS using an installation archive downloaded to your local computer. At the end of this tutorial, you will not only have a website empowered by TYPO3, but you will know the fundamentals of installing web applications manually.
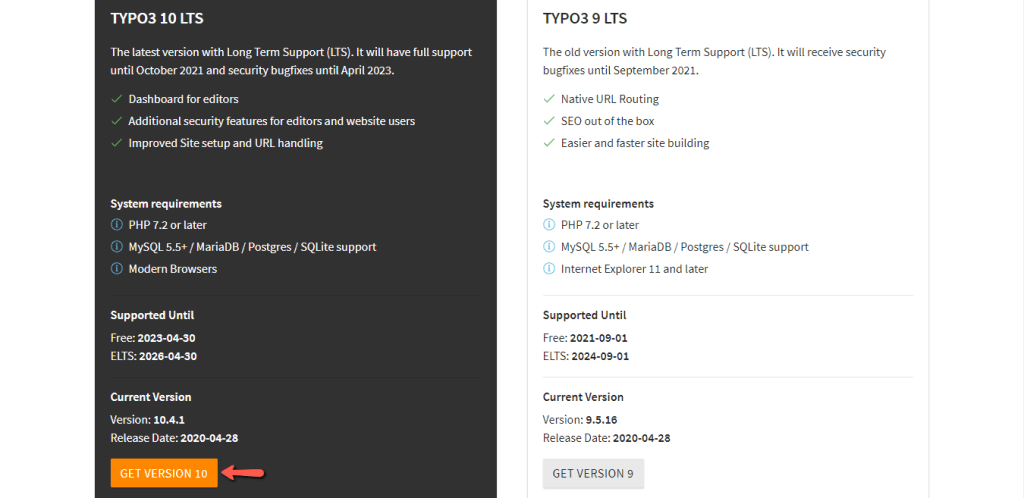
Your very first step is to download the required installation files from TYPO3's official website. This link takes you directly to the application download page, where you can see a list of the current TYPO3 versions.
We strongly recommend that you always choose the latest available version unless another one is strictly required. Once you locate the desired version, please click on the corresponding "DOWNLOAD VERSION X" button.
Upon doing that, you are redirected to the version overview page, and you can see several download method options. For the purpose of our guide, we stick to the standard .zip/tar.gz format download, which is the last option. However, if you feel comfortable, please do not hesitate to proceed with one of the more advanced methods.
Once the section is expanded, the available file formats are listed. We are going to select the .tar.gz compression format instead of the .zip. Naturally, the .tar.gz file is always going to be smaller in size; thus, we recommend you to choose it whenever you can. However, if you prefer to proceed with the .zip format, you are more than welcome to do so.

Please click on the corresponding link to initiate the download process and allow it the necessary time to be successfully completed.
Now that you have the required files on your local computer, it is time to upload them to your web hosting account. There are two methods you can follow to complete this task, and they are both relatively straightforward.
Regardless of which method you find more convenient and decide to follow, you need to pay close attention to the directory under which you are located while uploading/extracting the files as this determines the directory under which TYPO3 is going to be installed.
If you want TYPO3 to be installed directly onto your domain name (i.e., yourdomain.com), make sure to upload the files to the root folder (Typically, this is the public_html directory). Alternatively, if you wish TYPO3 to be installed in a subdirectory (e.g., yourdomain.com/blog), you need to create the subfolder and upload/extract the files into it.
There is another critical thing to mention. Once you extract the archive, you end up with a new folder called "typo3" under which the actual installation files are located. It is vital to move all the data from this folder one directory back, i.e., directly under the directory where the installation should take place. If this is NOT done, you end up with a web address such as yourdomain.com/typo3, and we firmly believe this is not something you want.
Now that we got it all clear, let's review each of the methods, and you can decide which one to follow.
The first method is to directly upload and extract the archive file using the "File Manager" tool integrated into your cPanel account. You can find step-by-step instructions on how to upload and extract files in our guide based on How to manage the files of your hosting account using the File Manager feature. For your convenience, we include direct links to each of the sections:
The second method is to extract the archive file on your local computer and upload the files to your web hosting account using your favorite FTP Client. In our tutorial series based on FTP Services, you can find detailed instructions on how to upload files using various FTP Clients.
TYPO3 requires a database to function properly and store your website data. Therefore, you need to create a fresh, new one to be assigned to the software during the installation process. That can be done within a few clicks via the "MySQL Database Wizard" tool integrated into your cPanel account. You can find step-by-step instructions in our guide on How to create MySQL Database via cPanel.
While you are creating the database, please make sure to keep the database name, username, and password on file as you are doing to need them later on while setting up the application.
When the database is created you have to ensure the charset encoding is set to utf8. You can verify that using the phpMyAdmin tool integrated into your cPanel account. In case you need to change it you can do so by utilizing the Collation operation. Detained instructions on this matter you can find in our Operations with Databases in phpMyAdmin tutorial.
Once your new database is created and the charset encoding is utf8, you are ready to step into installing TYPO3.
Now that you have completed all the required steps, you are finally ready to install TYPO3. Please open your favorite web browser and enter the URL address of your website. This action automatically launches the Installation Wizard.
In the first step, you are prompted to create a new empty file titled "FIRST_INSTALL". That has to be done in the root directory of TYPO3 on your web hosting account. You can create the required file using the File Manager tool in your cPanel or using an FTP Client. Please bear in mind the file name is case sensitive. Therefore, make sure to use capital letters only.
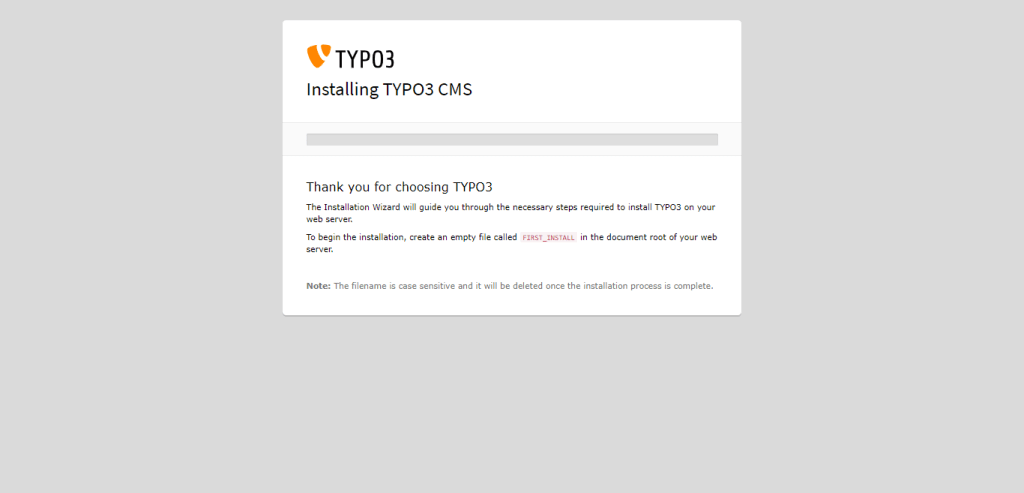
When the file is created, please go back to the Installation Wizard and refresh the page. This action automatically initiates the installation. You are presented with a progress bar indicating the state of the installation. This first step initiates a check to confirm that your web hosting environment meets TYPO3's system requirements. If no issues are encountered, you are able to click on the "No problems detected, continue with installation" button located right below.
In case there is incompatibility with the server environment detected, warning messages with resolution instructions are displayed. If that happens, please escalate the request to our Technical Support Department.

In the second step, you need to configure the database details. We hope you have kept your database details like we previously suggested, as you need them now. Please enter your database username and database password into the corresponding fields. Leave the rest of the fields as they are, unless otherways required.
When ready, please click on the "Continue" button.

In the third step, please select your database from the first "Use an existing empty database:" dropdown menu.
When done, click on the "Continue" button.

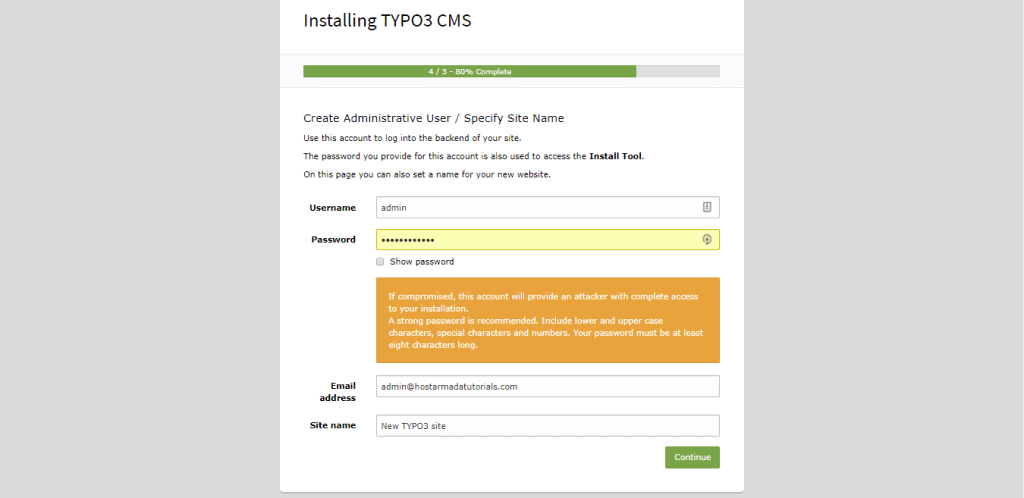
In the fourth step, you have to define your site details and administrator account login credentials:
When ready, please click on the "Continue" button.
In the final fifth step, the installation is being processed. Once it is initiated, please allow a few moments to be completed.
When this is done, you are prompted with an "Installation Complete" message.
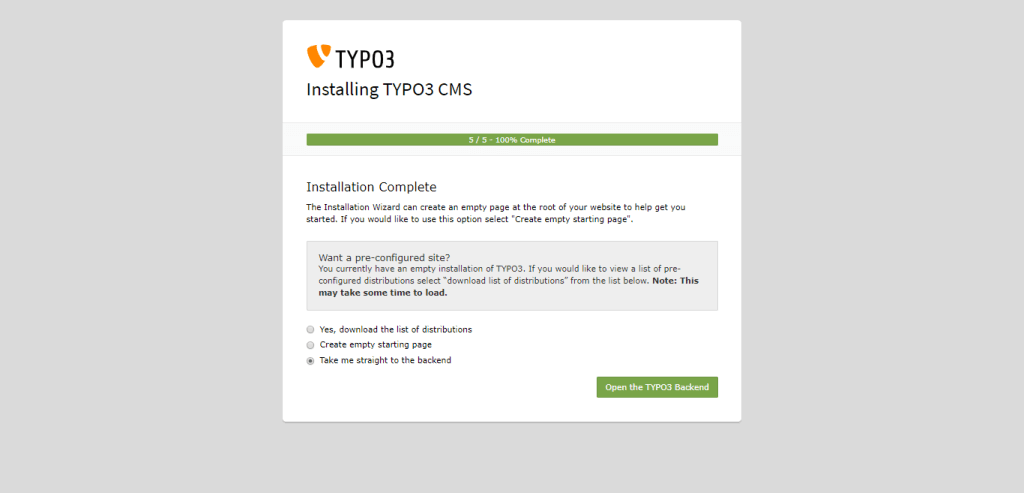
Now, TYPO3 is successfully installed, and you are ready to start exploring your brand new website. You can directly go to your administrative area by clicking on the "Go to the TYPO3 Backend" button.
We would like to congratulate you on successfully completing this task. We hope our instructions were clear and easy to follow. In case you have experienced any difficulties, please make sure to contact our Technical Support Team by submitting a ticket request from your HostArmada Client Dashboard. They will gladly handle the installation for you.

Sebahat is a young and bright woman who has become an invaluable part of our team. She started as a Customer Care Representative, mastering that role and, along the way, growing into a tech-savvy individual who is well acquainted with every support layer of the company. Driven by her aim to improve our customers’ experience constantly, she is committed to enhancing the extraordinary support we deliver.
Learn more about TYPO3 in the other tutorials that we have: