
If you have decided WooCommerce is the right solution for your Online Store, we strongly believe that you will find the information in the following guide extremely useful. In order to properly set up your WooCommerce website and ensure it is functioning correctly, you would want to thoroughly configure its basic settings. In the following lines, we will cover the entire process of configuring each component of the WooCommerce General Settings.
If you are ready to begin, the first step we will need you to take will be to log in to your WordPress Admin Dashboard and navigate through the vertical left menu bar to WooCommerce > Settings.
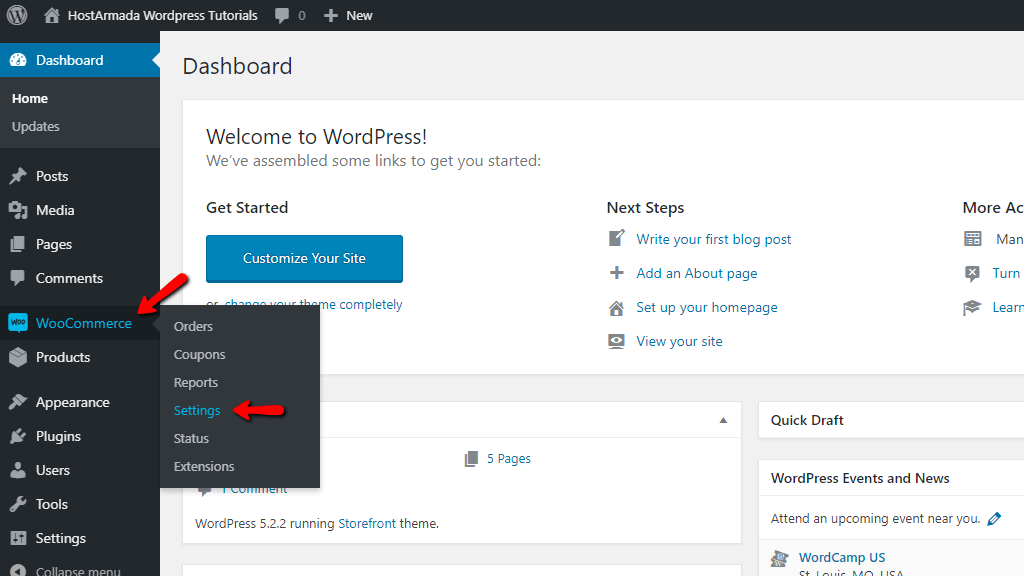
Once you access the Settings page, at the very top of it, you will locate all available WooCommerce Settings that will help you manage your store in an easy and efficient way.

As appropriate, we will review all WooCoommerce Settings sections one by one in separated guides by starting with the General Settings in this tutorial.
As you will see the General Settings tab is split into three main sections: Store Address, General Options, and Currency options. Now, let’s review each one separately.
In this section, you will have to specify the location in which your business is based and operating. Please note that entering accurate information is essential as default tax rates will be determined according to the local government regulations of the specific country.
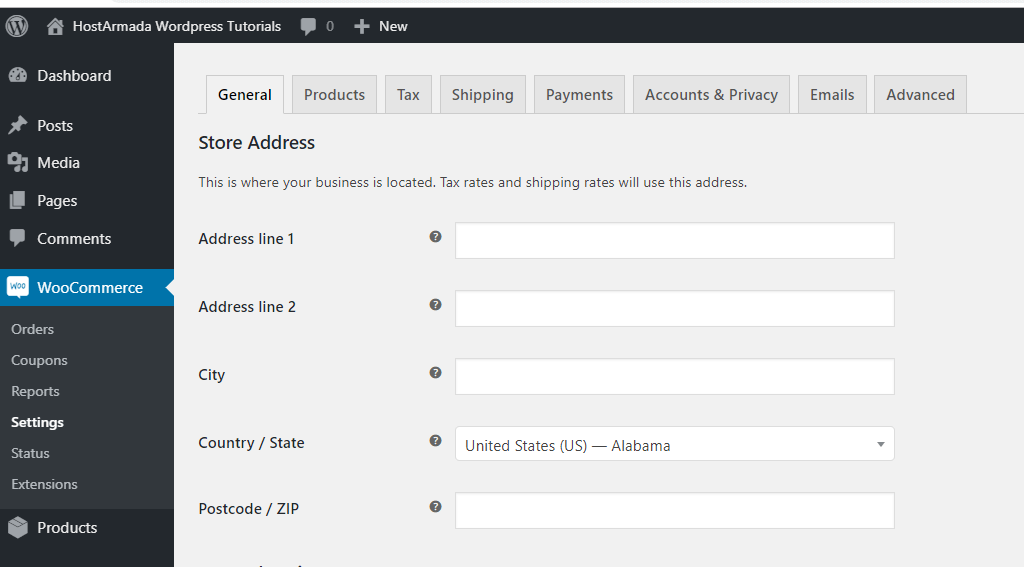
You will be able to select your Country/State from the dropdown menu and you will have to fill your Address, City, and Postcode/ZIP information into the empty fields.
In this section, you will be able to configure the main settings related to your selling preferences. Now, let’s review each of the options in detail in order to better explain all your possibilities.
As you have probably guessed, this option will allow you to select which countries you are willing to sell to. By default, the selected option is “Sell to all countries”, however by clicking on the dropdown menu you can review the additional two options.
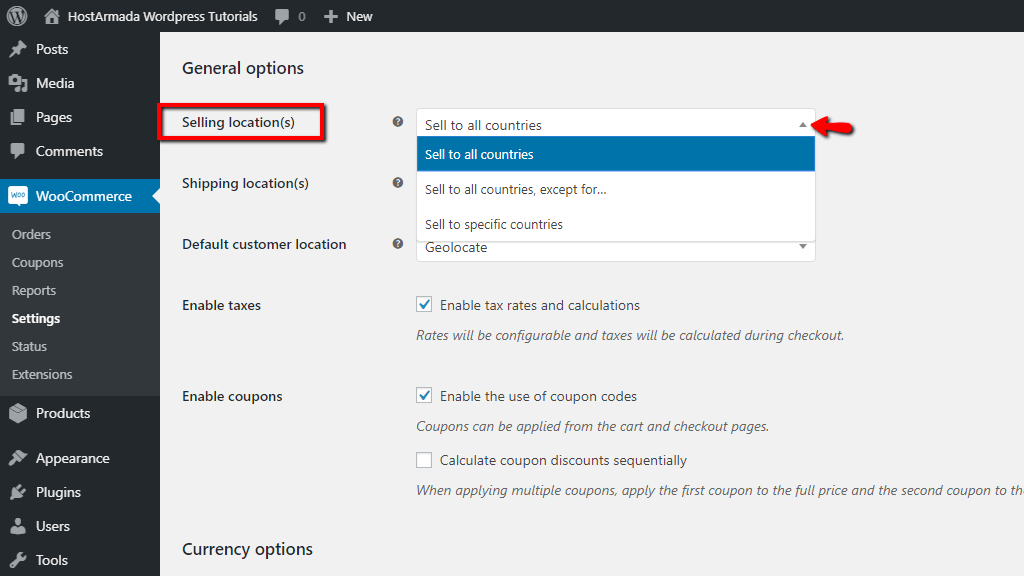
Here you need to take into consideration all aspects of your interests and decide the most suitable option for your business. In case you would like to restrict certain countries from being able to purchase from your website, you will have to select the “Sell to all countries, except for…” option. Respectively, if you would like to market particular countries, you will have to select the “Sell to specific countries” option. In both cases, you will be presented with an additional field where you will need to select the specific countries in question.
For example, let’s say you would like to sell to the U.S. and the U.K. only - In the additional “Sell to specific countries” field, you will need to either select the countries from the dropdown menu or manually enter their names into the empty bar.

In case everything is properly set up, you will be seeing the included and respectively discluded countries listed into the additional field.
Similarly to the Selling Location(s) option, this option will allow you to select which countries you would like to ship your products to. Once again you can choose the option you prefer from the dropdown menu.
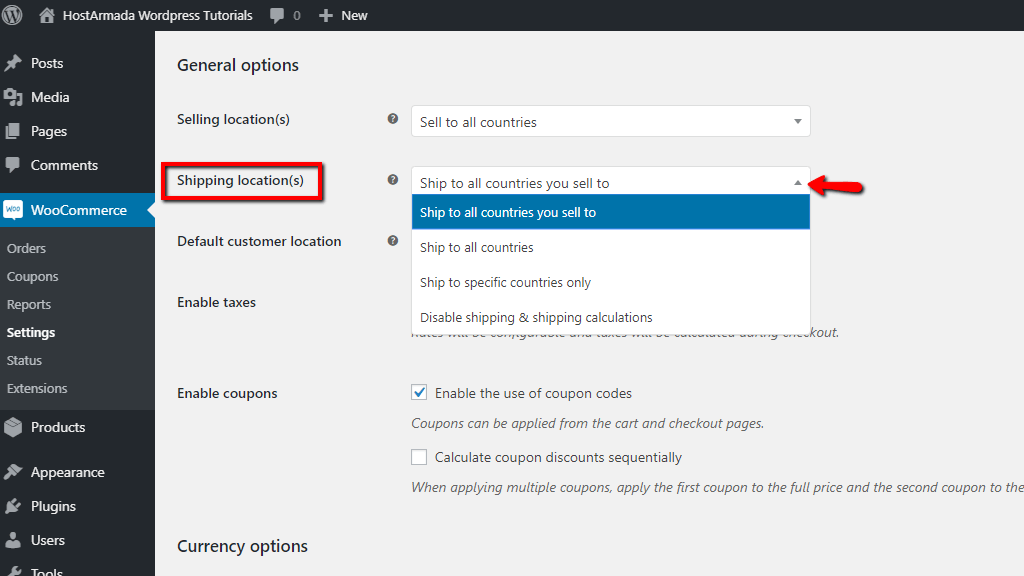
The main difference you will notice here is that you can entirely disable the shipping option by selecting “Disable shipping & shipping calculation”. With a risk to repeat ourselves, we would like to mention once again that you need to take into consideration all aspects of your interests and decide the most suitable option for your business.
This option will help you to configure your preferences for determining your customers’ locations while they are visiting your website. The customer's location will be used in order to appropriately calculate taxes and shipping rates.
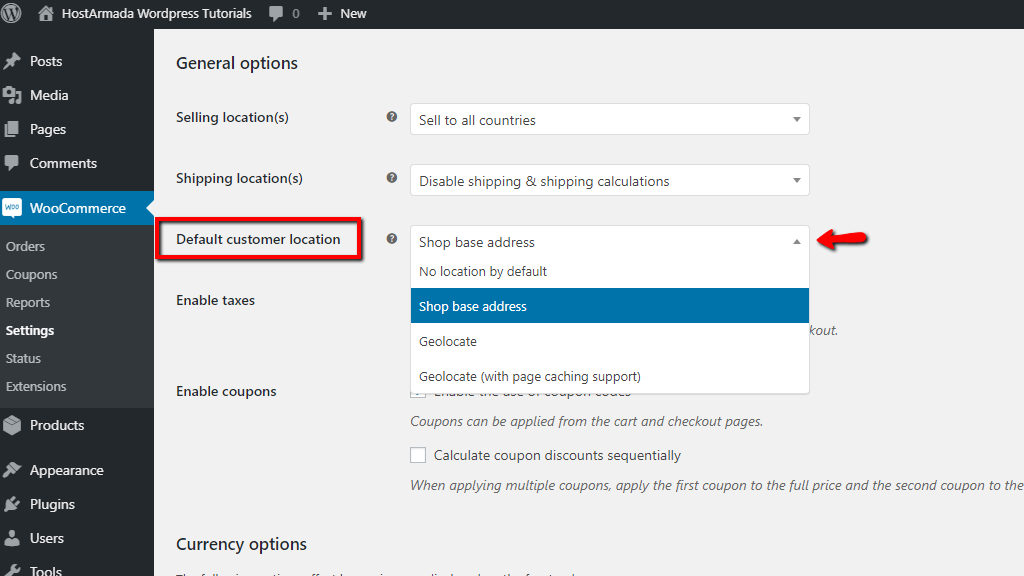
As you will see WooCommerce provides four options:
With this option, you can either enable or disable taxes on your WooCommerce Online Store. Please note that in case the “Enable taxes” option is unticked in your WooCommerce General Settings, the Tax Settings tab at the top of the page will NOT be displayed, and therefore configurable.
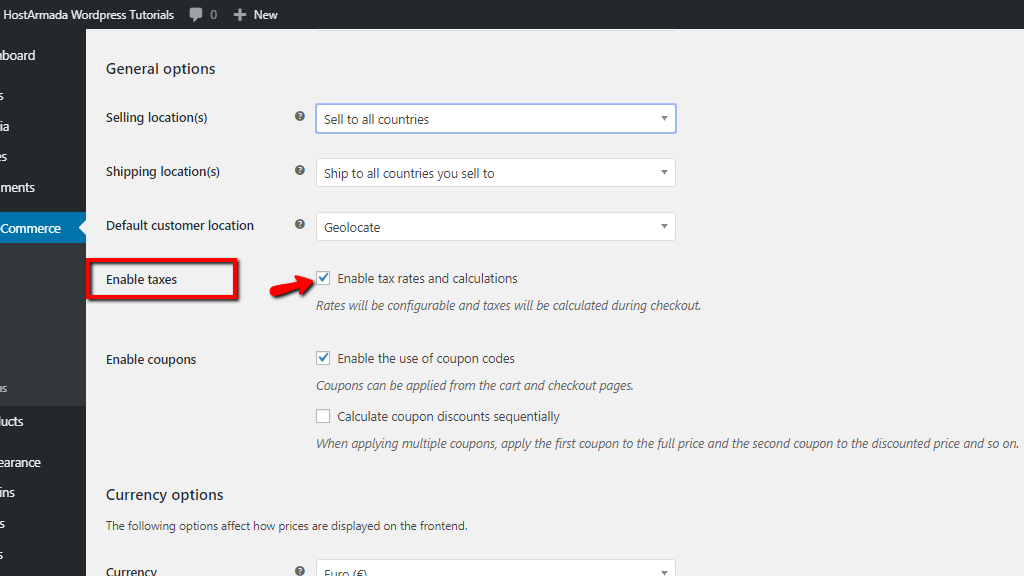
We would like to welcome you to review our How to configure WooCommerce Tax Setting guide for further instructions on setting up your Tax preferences.
In this last section, you can configure your Coupon code preferences. You will be presented with the following two options:
“Enable the use of coupon codes” - This option will allow your customers to apply coupon codes while they checkout or directly from their shopping carts.
“Calculate coupon discounts sequentially” - This option will set a calculation algorithm that will measure each additional coupon (after the first applied) based on the already discounted price.

In this last section of the General Settings tab, we will guide you on how to configure your currency preferences and display options. We will explain the options one by one in the following lines, so please continue reading.
From the Currency dropdown menu, you will be able to select the default currency your store will be operating with. Please note that your selection will determine the currency your product prices will be displayed with and the currency your payment gateways will accept and process.

The Currency Position option allows you to select your preferences on where exactly you would like the currency symbol to be positioned.

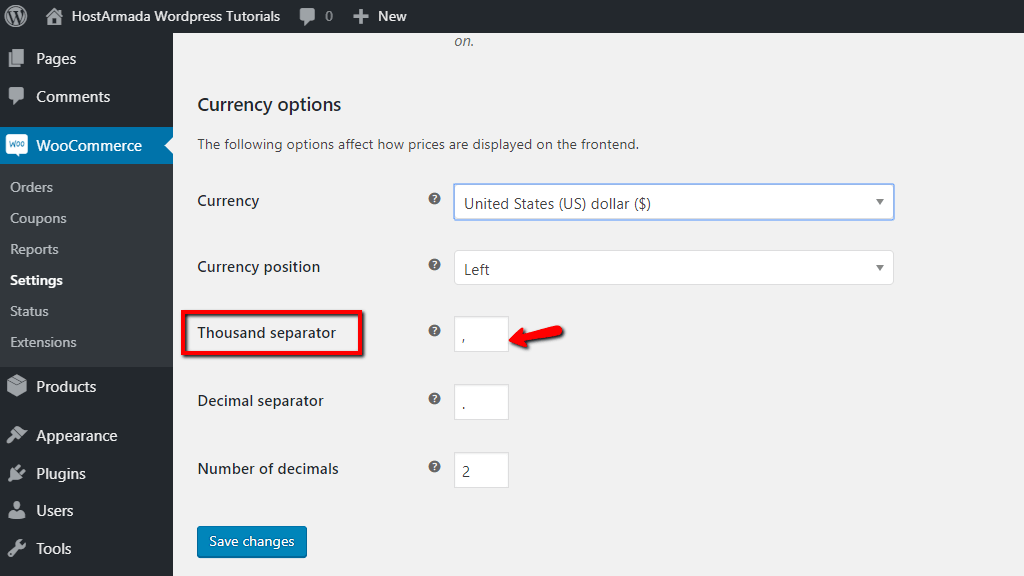
This option will allow you to select your preferences on the thousand separator symbol on your displayed prices, e.g. 1,000 or 1.000.
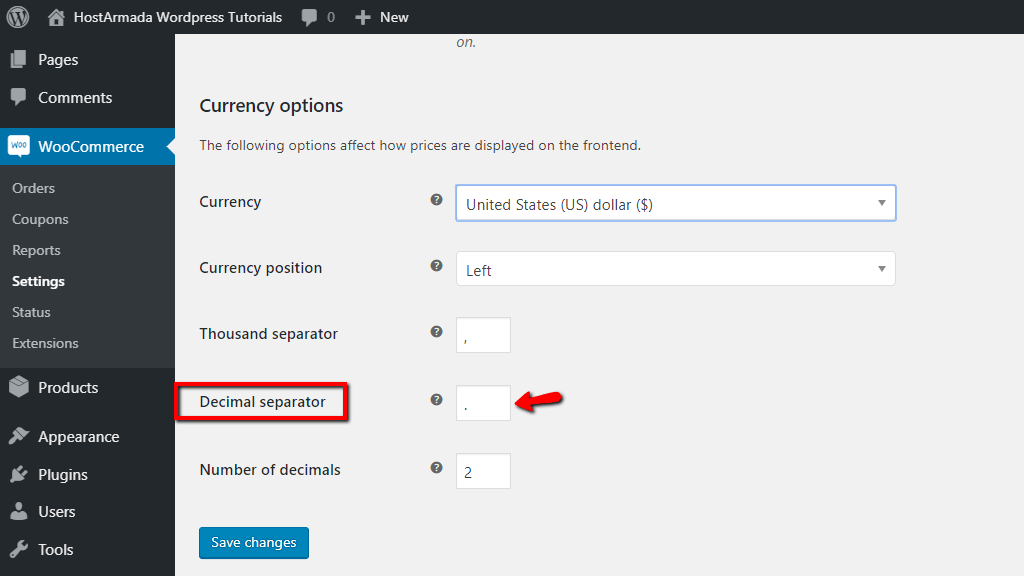
Similarly to the Thousand Separator, the Decimal Separator will allow you to select your preferences on the decimal separator symbol on your displayed prices, e.g. 99,99 or 99.99.
This last option will allow you to specify how many decimal points will be shown on your display prices. For example, if you select the Number of decimals option to be 2, your price will be displayed as 100.00, whereas if you select it to be 0, your price will be displayed as 100.

At this point, you have completed the configuration of your Online Store’s General Settings - all that have left to be done is saving your preferences. Please make sure to click on the blue “Save changes” button in order WooCommerce to successfully record all the settings you have configured above.
Congratulations, now you are one step ahead with the configuration of your WooCommerce shop.

Sebahat is a young and bright woman who has become an invaluable part of our team. She started as a Customer Care Representative, mastering that role and, along the way, growing into a tech-savvy individual who is well acquainted with every support layer of the company. Driven by her aim to improve our customers’ experience constantly, she is committed to enhancing the extraordinary support we deliver.
Learn more about WooCommerce in the other tutorials that we have:
