
Monitoring and tracking customers’ activities is a crucial part of the efficient management of any Online Store. Being well informed regarding the productivity of the store, the effectiveness of current campaigns, best-selling products, loyal customers is essential for store owners. WooCommerce, on its hand, comes with a powerful built-in Reports module that makes analyzing store performance possible. In this guide, we will take a closer look at all the information that can be acquired.
If you are ready to begin, please log in to your WordPress Admin Dashboard and head to WooCommerce > Reports from the left menu bar.

Under the “Reports” page you will find detailed summaries about your orders, customers, stocks, and taxes. Now, let’s review each of the sections.
From the default “Orders” section you will be able to review your gross and net sales, top-selling items, sales by categories, most used coupons, and product downloads. By default, you will be presented with a report for the past seven days. You can also review the details for “This month”, “Last month”, past “Year”, as well as by specific date selected from the “Custom” field. Selecting any of these options will automatically recalculate the report summary.
Please, note that only orders set as “Processing”, “On hold”, and “Completed” are considered as sales and are included in the reports.
Under the default “Sales by date” subsection you will be presented with a sales stats colon on the left as well as a sales diagram on the right.
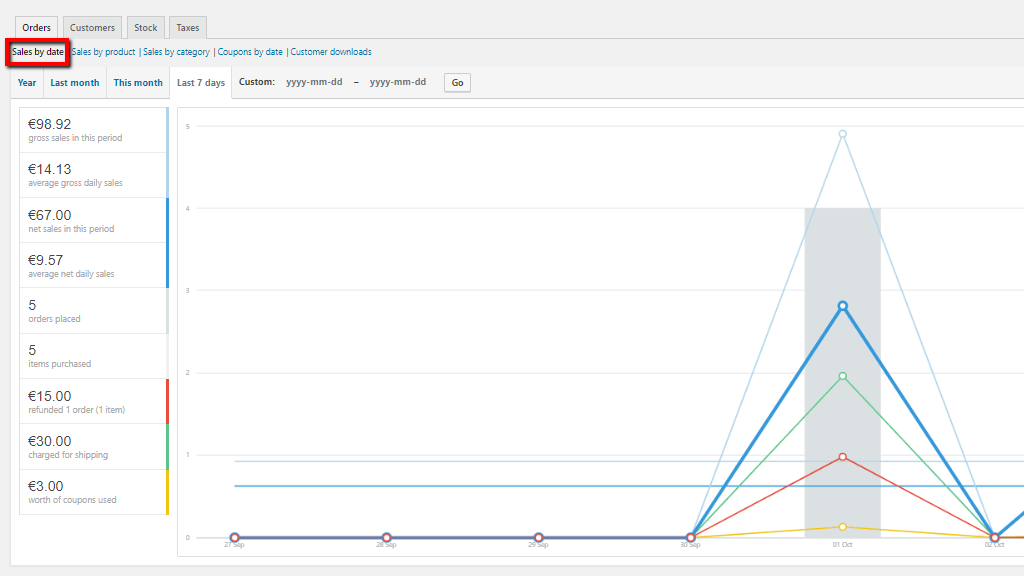
Starting from the top you will see listed the “gross sales”, “average gross daily sales”, “net sales”, “average net daily sales”, “orders placed”, “items purchased”, amount of “refunded orders”, amount “charged for shipping”, and “worth of coupons” used. Next to each of the stats, you can see a color line that represents the particular stat under the graphic. If you hover over a specific stat you will notice that it will be highlighted in purple under the diagram.
Under the second “Sales by product” subsection you will be able to review your “Top sellers”, “Top freebies”, and “Top earners”. By default, the report is shown for the last 7 days, however, you can also pull up a report for another period by selecting it from the periods’ bar.

The “Top sellers” stat will show your most sold items, “Top freebies” stat will show your top fee items and the “Top earners” stat will show the products you have earned the most from. From the “Product search” field you will be able to look for specific products.
If you select a given product you will be presented with additional information, such as total earned from this product, total purchases, as well as a diagram representing the sales data.
Under the following “Sales by category” subsection you can review the sales reports by categories.

You will be able to select specific categories by typing them under the empty field or click on the “All” button in order to select all your categories. Afterward, please click on the “Show” button in order to pull up the report.

You will see all the selected categories listed in the left colon as well as the total sales amount generated per category. You will notice that each category has a specific color that represents it under the diagram.
Under the next “Coupon by date” subsection you will be able to review the discount in total and the number of coupons used in total for the selected period.

You will also be able to “Filter by coupon” in order to review separated reports for each of them, check your “Most popular” coupons, and see the coupons giving the “Most discount”.
Under the last “Customer downloads” section you will be able to review the logs related to your downloadable products. Each downloadable product has a unique ID making possible its tracking and recording logs. These logs will provide information regarding the time of the download, the product, the files downloaded, the order number, the type of user, as well as the user’s IP address.
Now, please switch to the second “Customers” tab where you will be able to find information about the number of sign-ups for the select period, comparison between existing and guest account purchases and list of your registered customers.
As the name suggests, under this subsection you will be able to find information about how many of the orders had been submitted from existing accounts compared to guest accounts. If you hover over the blue circle you will see how many orders in total have been submitted. You will also be able to see how many customers signed up for the selected period.
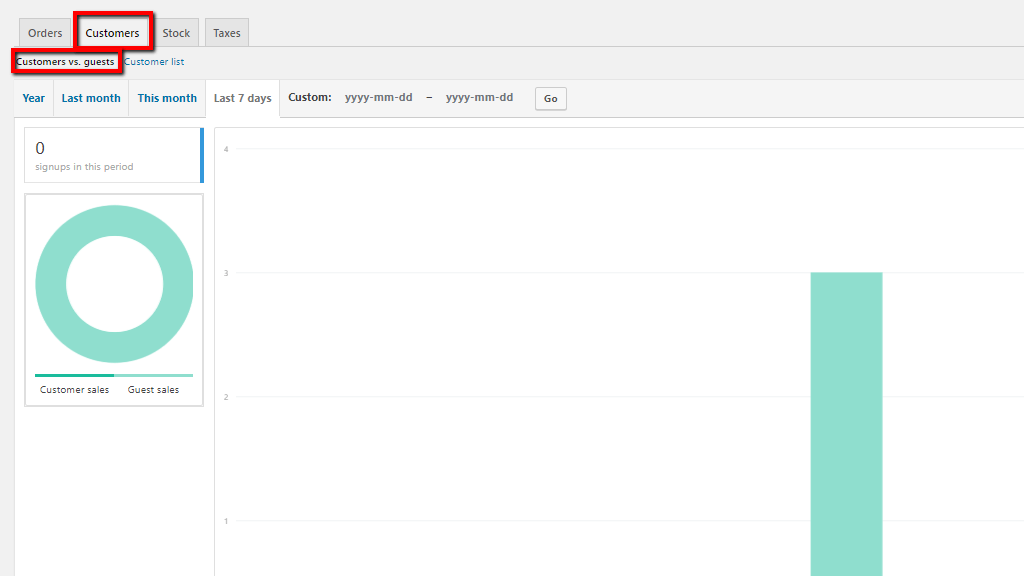
Similarly to the examples in the previous sections, each customer type has a specific color that represents it in the graphic.
From this subtab, you will be able to see a list of all your registered customers, from the most recent to the oldest.

From this list, you will be able to see your customer’s “Name”, “Username”, “Email” addresses, “Location”, the number of “Orders”, the total amount of “Money spent”, as well as the time and number of the “Last order”. Under the last “Actions” colon, you will have four quick action buttons. From the first “Reload” button you will be able to refresh the stats. The second “Pencil” button will allow you to edit the user. The third “Eye” button will take you to the “Edit order” page. The last button will allow you to link other orders to this customer.
Under the “Stocks” section, you will notice three subsections: “Low in stock”, “Out of stock” and “Most stocked”.
Under the default “Low in tock” subsection you will be presented with a list of all your products that are currently low in stock.

You will see the name of the “Product”, whether it has a “Parent” product, the quantity of the “Units in stock”, the stock “Status”, and under the “Actions” colon you will find two quick buttons to edit and view the product.
The second two subsections work just the same. Under the “Out of stock” subsection you will see a list of all your products that are currently out of stock and under the “Most stocked” subsection you will see a list of the products with the most stock quantity.
Under the last “Taxes” section you will be able to review the reports of your taxes for this month, the last month, the last years, as well as a custom selected date. Please note that the “Last month” period report is listed by default if you need to review another period you can select it from the periods' bar.
Under the default “Taxes by code” subsection you will see all the taxes listed per state.
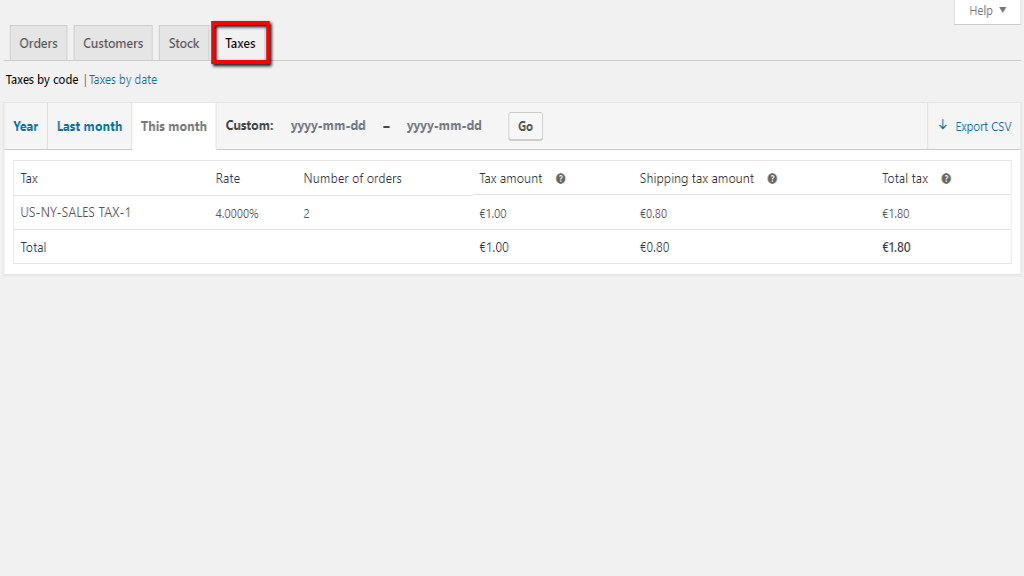
Under the list, you will be presented with the “Tax” name, tax ”Rate”, “Number of orders”, the “Tax amount”, “Shipping tax amount” and the “Total tax” amount.
Under the last “Taxes by date” subsection you will be able to review your taxes sorted in a time period.

You will see the “Period”, the “Number of orders”, ”Total sales”, “Total shipping” amount, “Total tax”, and your “Net profit”.
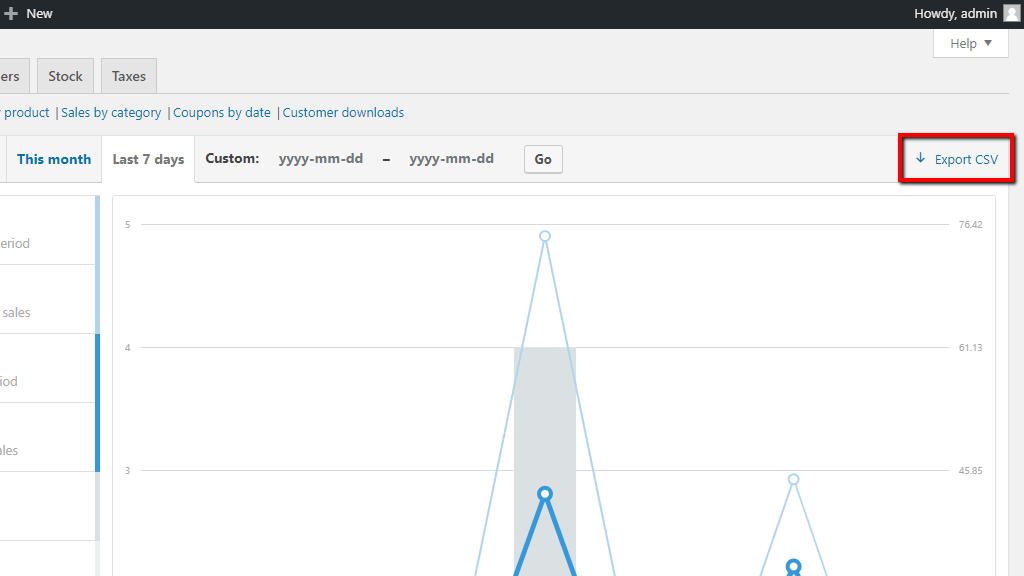
At the right corner of each of the report pages, you will find the “Export CSV” button which will allow you to download a copy of your reports in a CSV file format and use it as needed.
Now that we have reviewed all the WooCommerce Reports available for your Online Store you have learned how to interpret those reports and you have gained more control over the management of your store. We hope you have found our guide useful and easy to catch up with. In case something was not clear enough, please do not hesitate to contact our Support Team.

Sebahat is a young and bright woman who has become an invaluable part of our team. She started as a Customer Care Representative, mastering that role and, along the way, growing into a tech-savvy individual who is well acquainted with every support layer of the company. Driven by her aim to improve our customers’ experience constantly, she is committed to enhancing the extraordinary support we deliver.
Learn more about WooCommerce in the other tutorials that we have:
