Plesk is a powerful and user-friendly web hosting control panel that enables you to manage your websites, domains, emails, and server resources from a single, intuitive interface. It provides tools for installing applications, managing files and databases, setting up security features, and automating server tasks. Designed for both beginners and professionals, Plesk simplifies complex server administration through an intuitive dashboard. It supports various operating systems and web servers, including Apache, Nginx, and LiteSpeed. Overall, Plesk helps streamline website and server management while maintaining strong performance and security.
In this tutorial, we will guide you through the initial Pleks setup after you have finalized the installation process. This will configure the necessary fundamentals to get you started immediately on your web hosting journey.
Let’s begin.
IMPORTANT: Plesk is a licensed application, and to perform this setup, you need to have an active license for your server. If you have purchased this license from HostArmada, you can proceed. Otherwise, please purchase a license from the official Plesk website; otherwise, you will not be able to proceed with the initial setup wizard.
This setup will cover the post-deployment steps for HostArmada’s unmanaged VPS packages of Plesk, if you chose it as your control panel during the package order process, or if you chose to reinstall your server with Plesk later.

To begin, the first thing you need to do is log in to your Plesk backend panel. To do that, you can use the link in your HostArmada unmanaged VPS dashboard, or you can simply type in your IP address/hostname and add a “:8443” to the end, which will look something similar to “https://173.234.137.18:8443/”. You will likely receive an SSL warning, which is totally normal, as you are accessing the Plesk control panel using the server’s IP address, and SSL certificates cannot be installed for IP addresses - only for Hostnames.
You will be required to use your “root” username and password, which were mailed to you once you purchased the server.
Upon logging in, you will be presented with a form where you need to type in the server’s contact information. Here are the text fields you need to fill in:
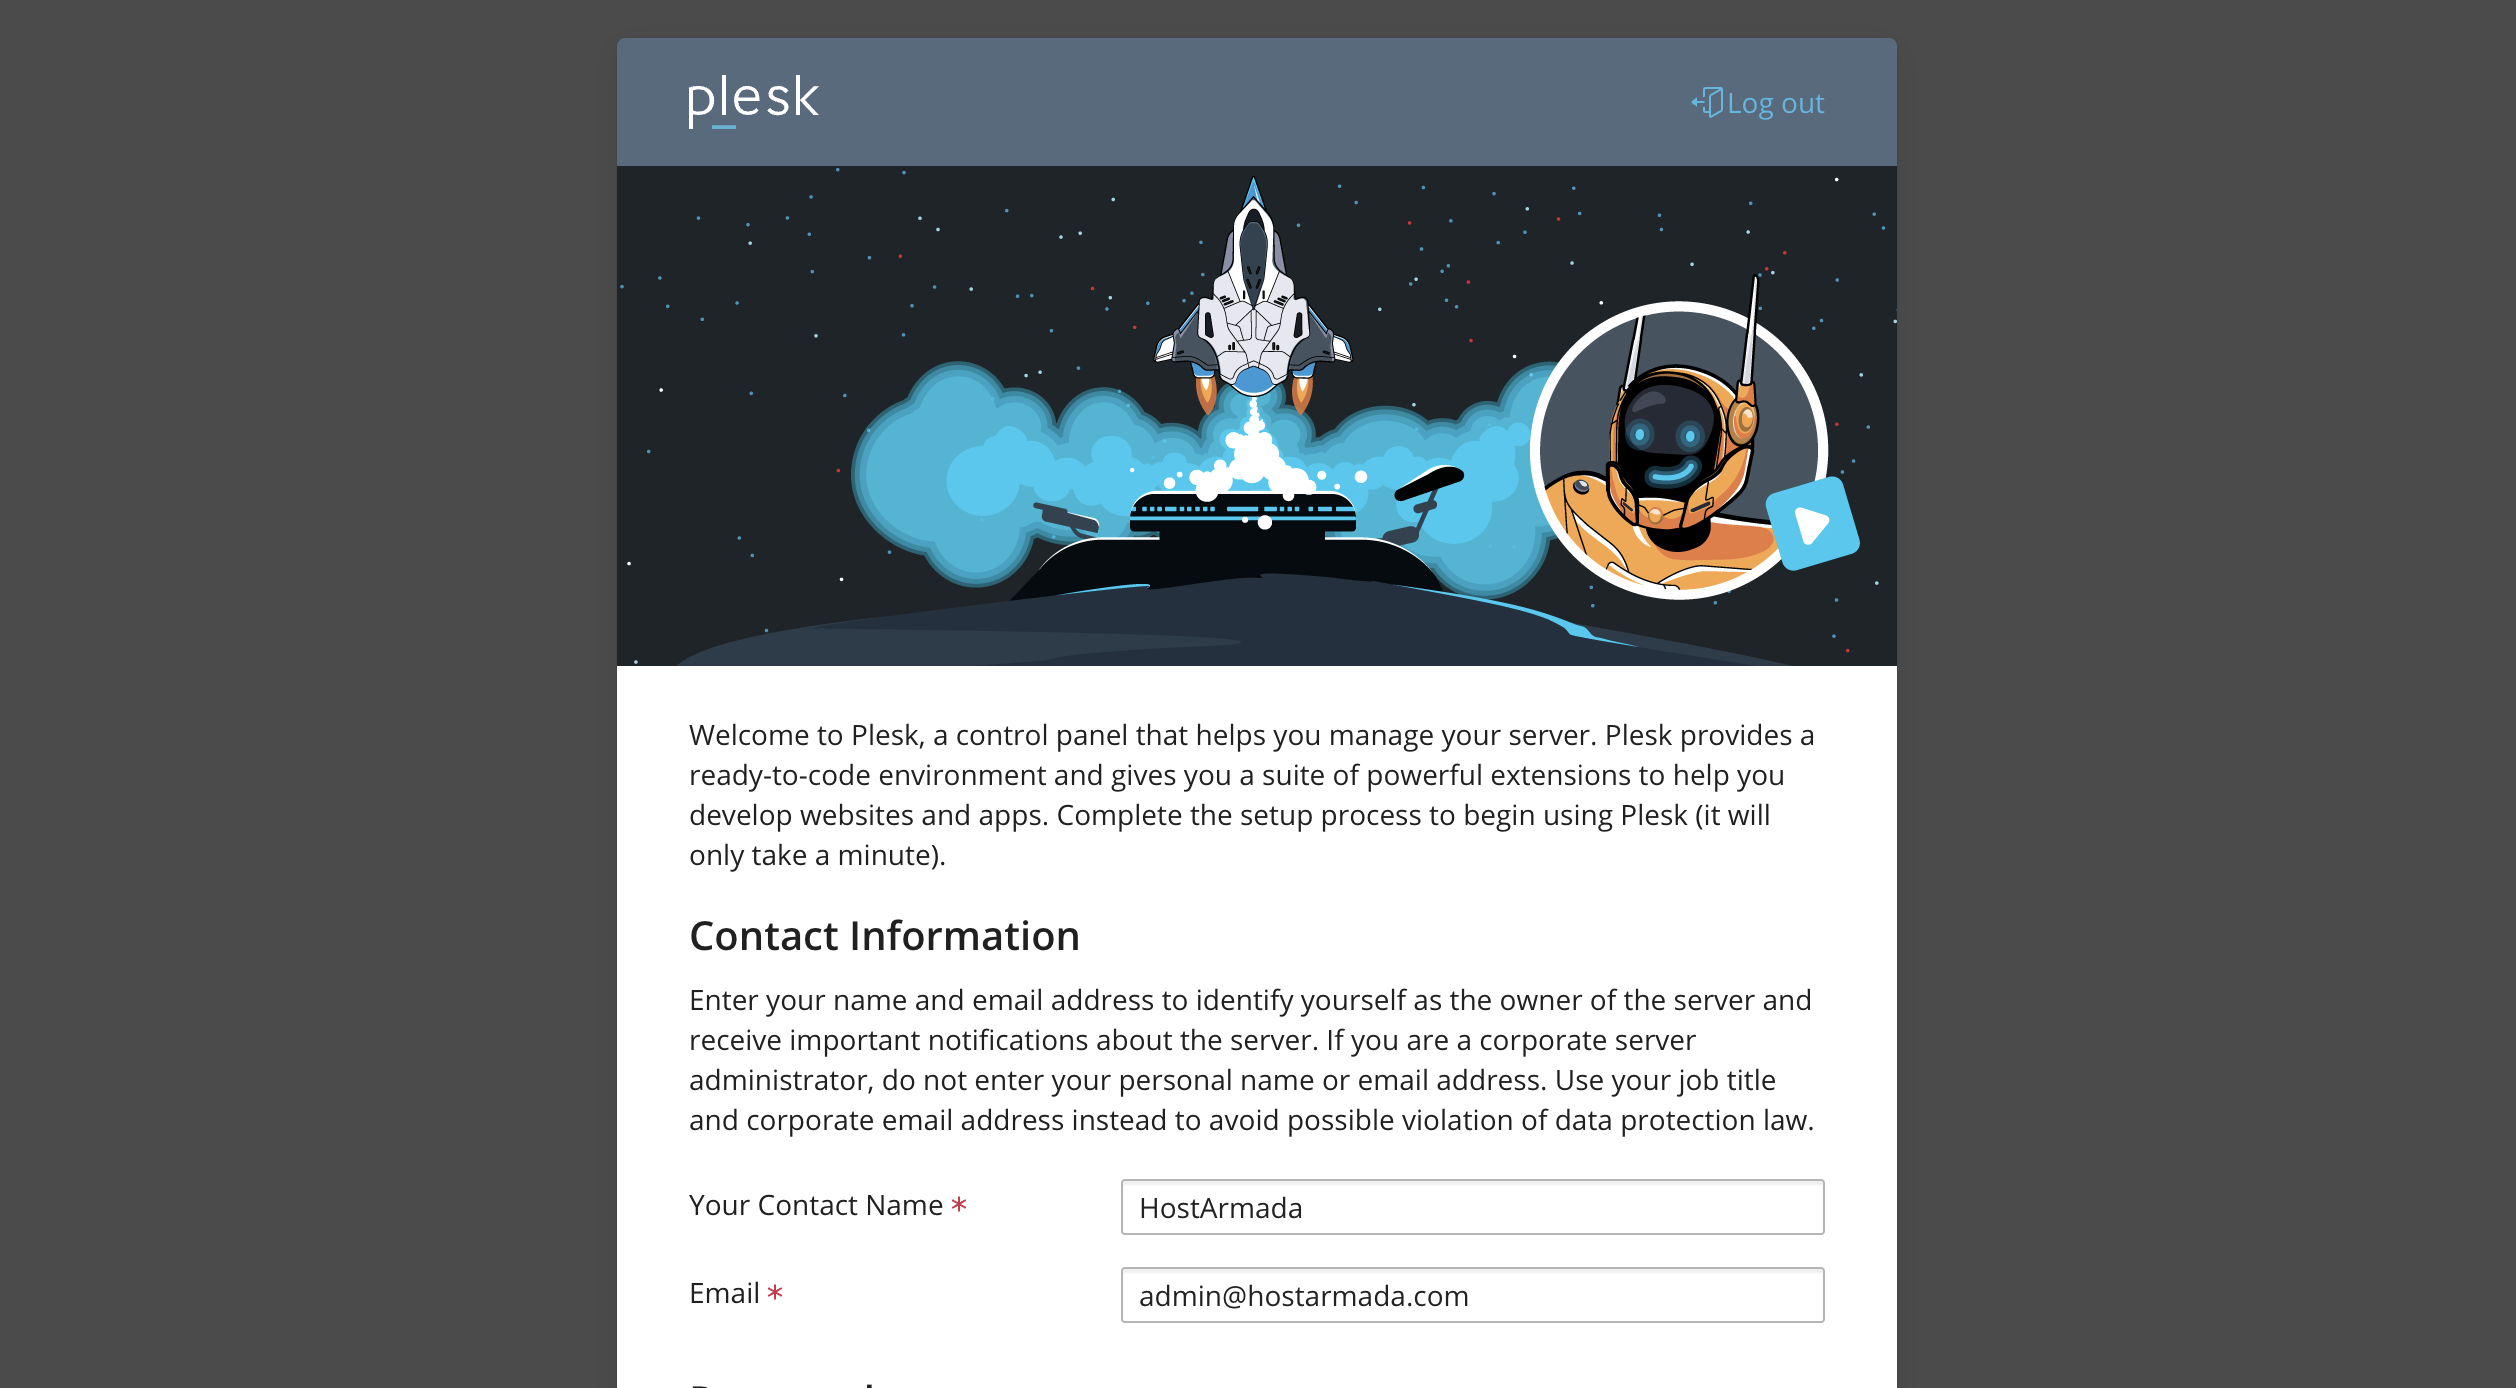
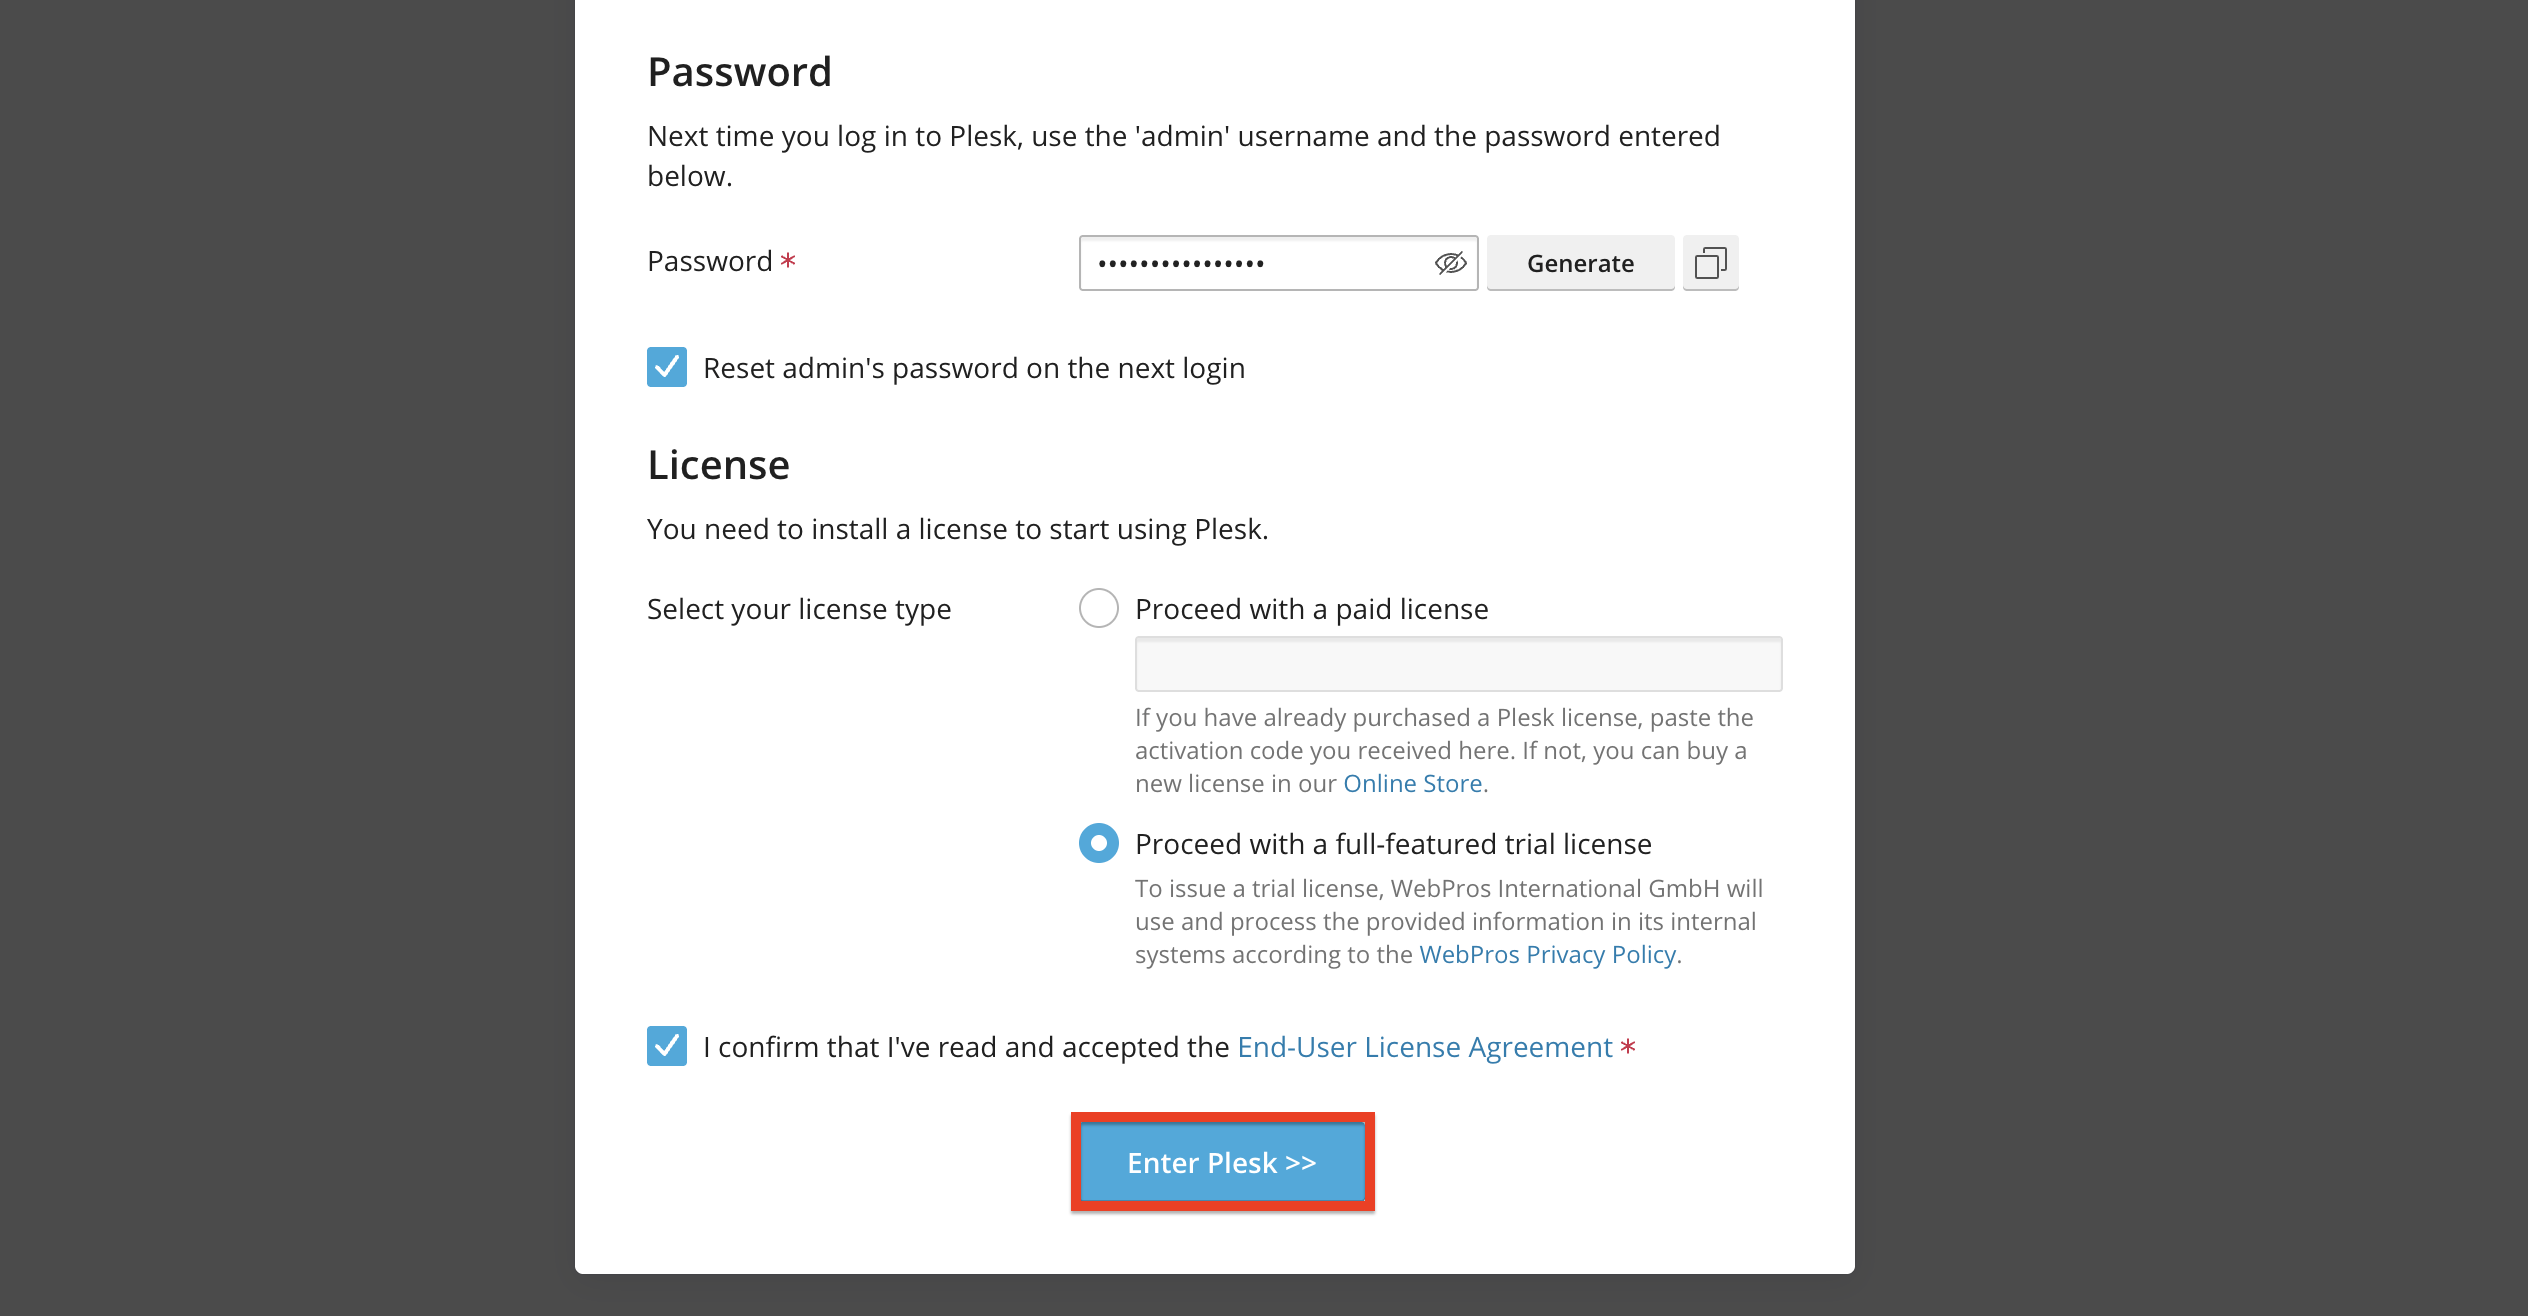
After adding the required information, please press the “Enter Plesk >>” button, located at the bottom of the page.
Performing the action above will trigger a loading screen along with a couple of loading bars in the middle of screen, which will signify the Plesk initial setup time.

Please be patient while this process ends, and afterward, you will be free to start using your newly set up Plesk web hosting account!
There you have it - a quick and easy-to-follow guide on how to get started with Plesk’s initial setup after installation. We hope that they were relatively easy to follow and that you were able to reach the last-mentioned point in the tutorial. From here, we suggest checking out our Pleks Tutorial section, where you can figure out how to use all the features on your Pleks web hosting account with great success!

Nikola is an accomplished tech-savvy extraordinaire with over six years of experience in the web hosting field. He started as a customer care representative and quickly rose the ranks to become a support supervisor and, eventually - the head of the technical department in HostArmada. His deep understanding of the client's needs, combined with his technical knowledge, makes him the perfect man to create the ideal harmony between client satisfaction and professional problem-solving. You will often find him creating helpful tutorials, articles, and blog posts that help existing customers get around.
Learn more about Plesk in the other tutorials that we have:
