Keeping your Plesk installation up to date is essential for maintaining security, stability, and access to the latest features. Plesk regularly releases updates that include bug fixes, performance improvements, security patches, and enhancements to existing tools.
Plesk provides a built-in interface that allows you to easily check for available updates, review update details, and install the latest versions directly from the control panel.
In this tutorial, we will guide you through the process of checking for updates in Plesk.
To start adding domain names to the server’s domain blacklist, ensure you have logged in to your Plesk control panel. To do that, please type in your IP address, hostname, or domain name inside your browser search bar and add “:8443” at the end. It should look something like: https://yourdomain.com:8443. By doing that, you will be prompted by a login form requiring your username and password.

Once logged in, Plesk will automatically display the “Websites & Domains” page, which will be the index page every time. In the middle, you will see a table section containing a list of all your websites.
To check for available updates, please point your attention to the left side menu, where you will see the “Tools & Settings” option. Please click on it.

Once you do the above, you will be redirected to a page with many tools to help you manage your Plesk server. To check for available updates, please click on the “Update” functionality, located under the “Plesk” section.
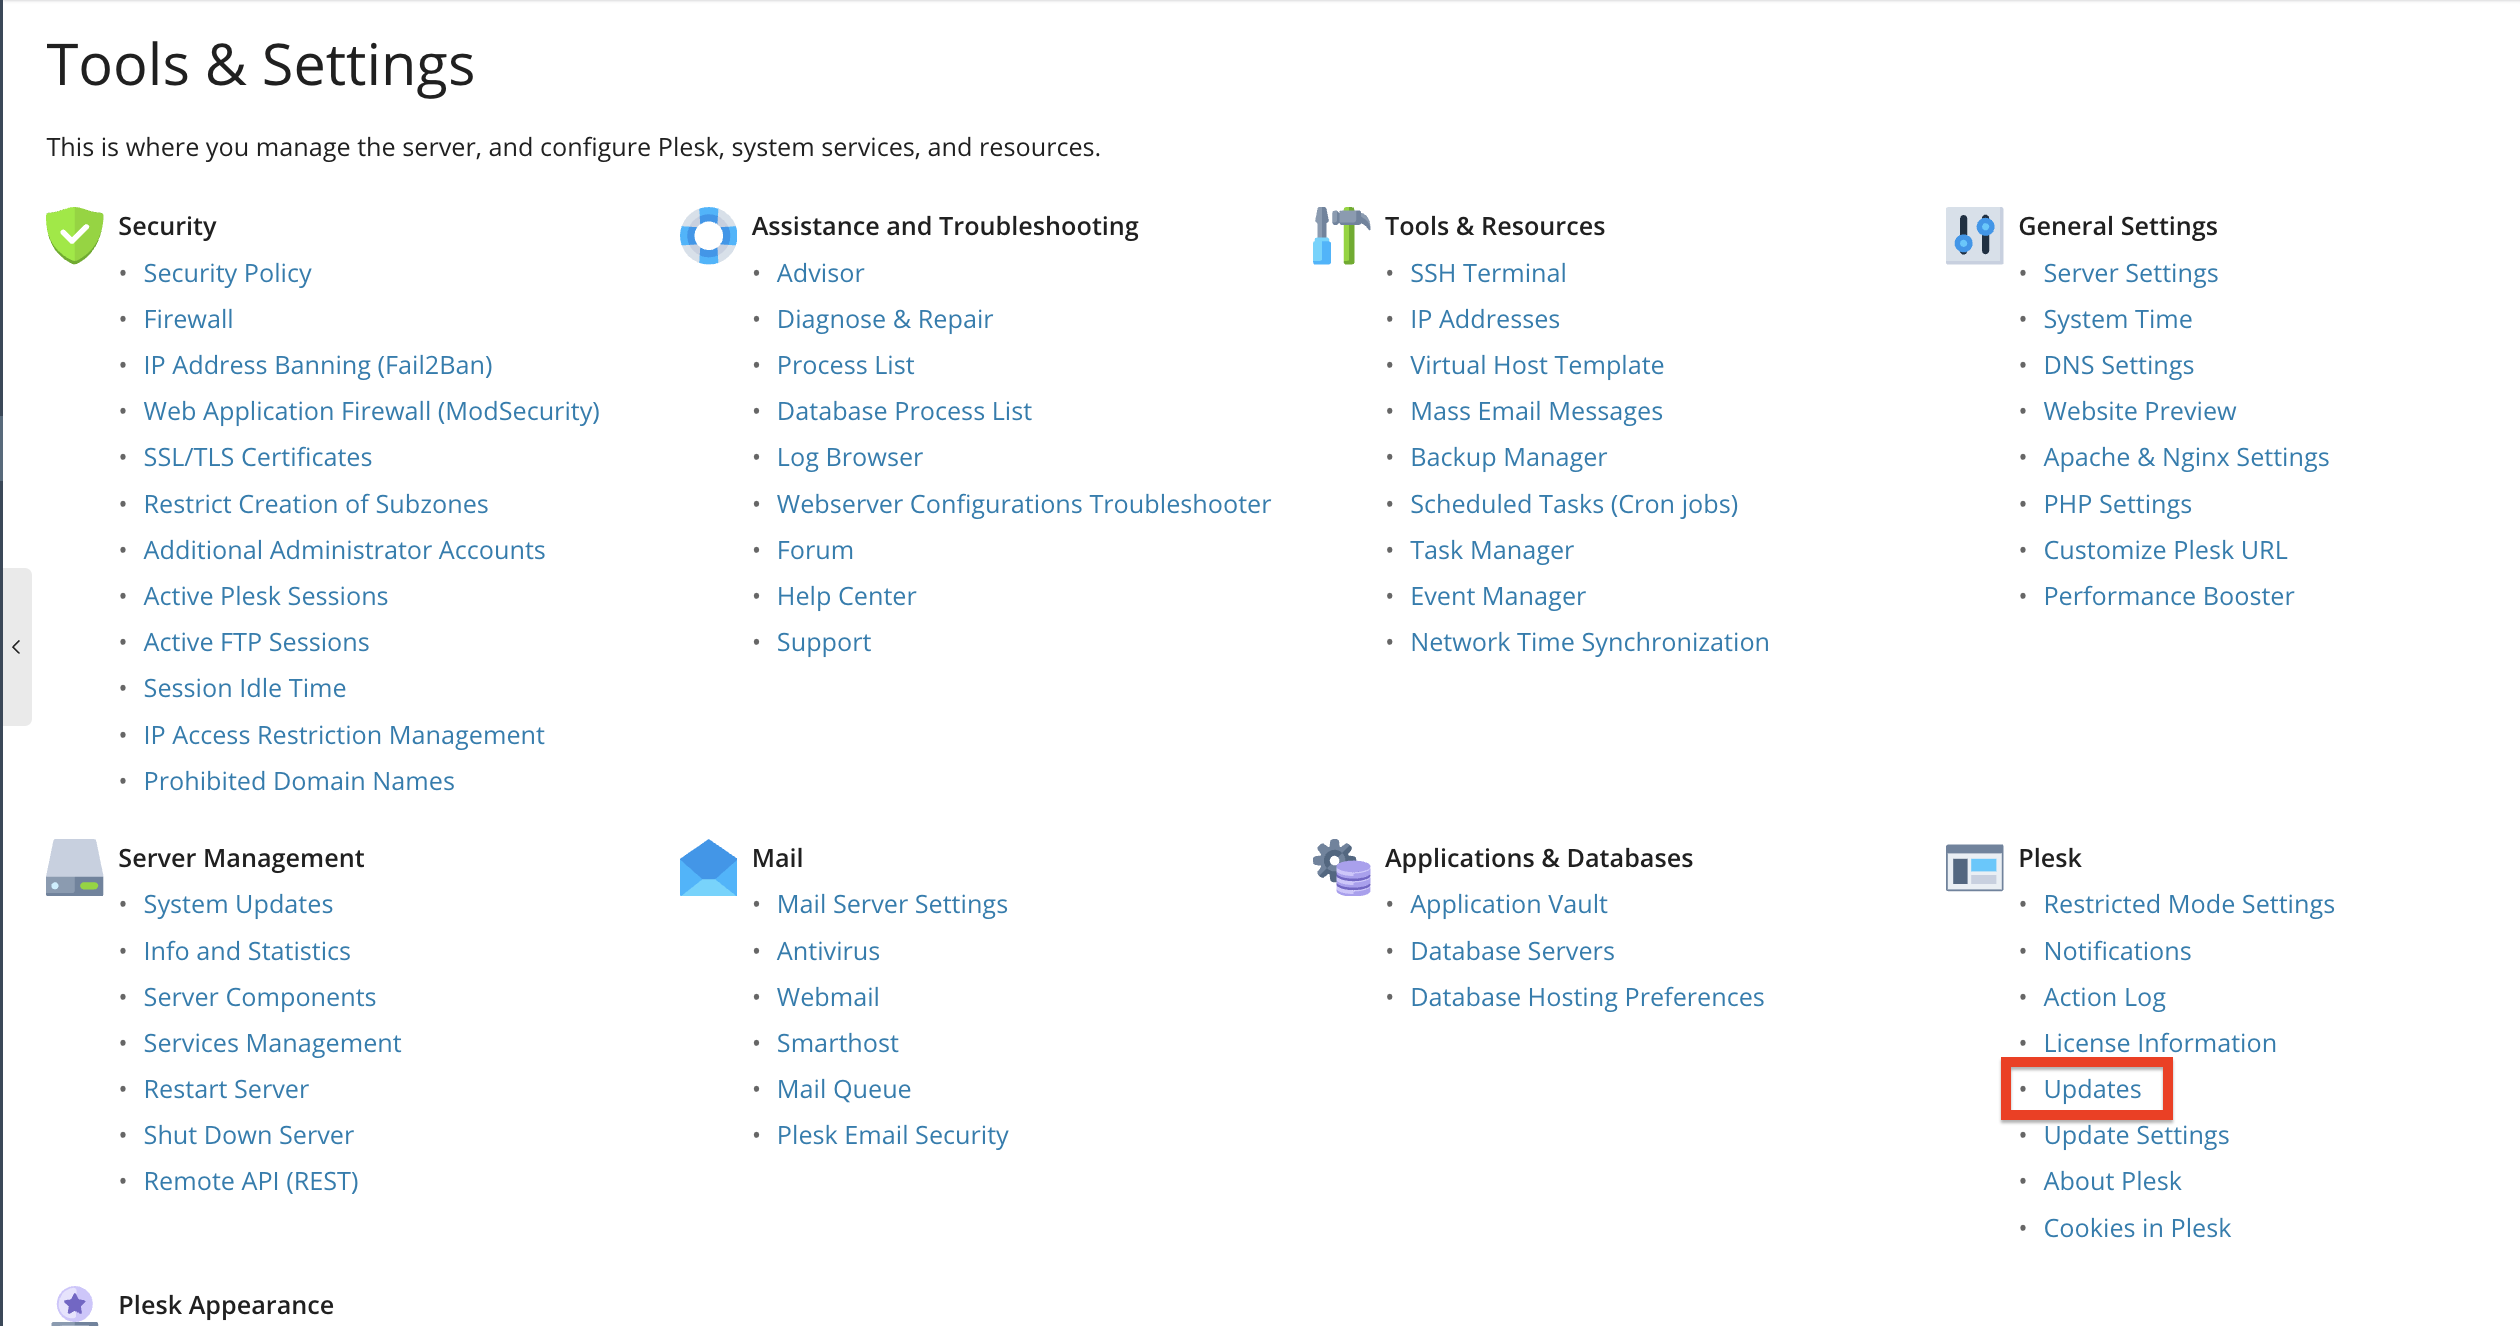
Under the Plesk or Server Management section, click Updates and Upgrades.
This opens the Plesk Installer interface, where updates are checked and installed.
Once inside the “Updates” functionality, you will notice a couple of things. At the top, you will see the label “Install & Update Plesk”.

Underneath, you will see the three available functionalities that you can use:
At the bottom, you will see a short summary of your installed products/components, and usually, you will see there if a new Plesk version is available.

Plesk also indicates whether an update is recommended, optional, or critical. To learn more about a specific update, please click the “Details” link for the Pelsk version pending an update.

Performing this will redirect you to the Plesk official release notes, which is the best source of information when it comes to updates. There, you can expect the following:
This helps you understand the impact of each update before installing it. We highly recommend reviewing the release notes thoroughly before proceeding with the updates.
When you review the release notes and you are happy with the changes, you can proceed with the update process itself.
As mentioned above, please select the “Install or Update Product” functionality, which will take you to the installation wizard.

Please select the Plesk version you want to install using the checkbox and then click the “Continue” button below.
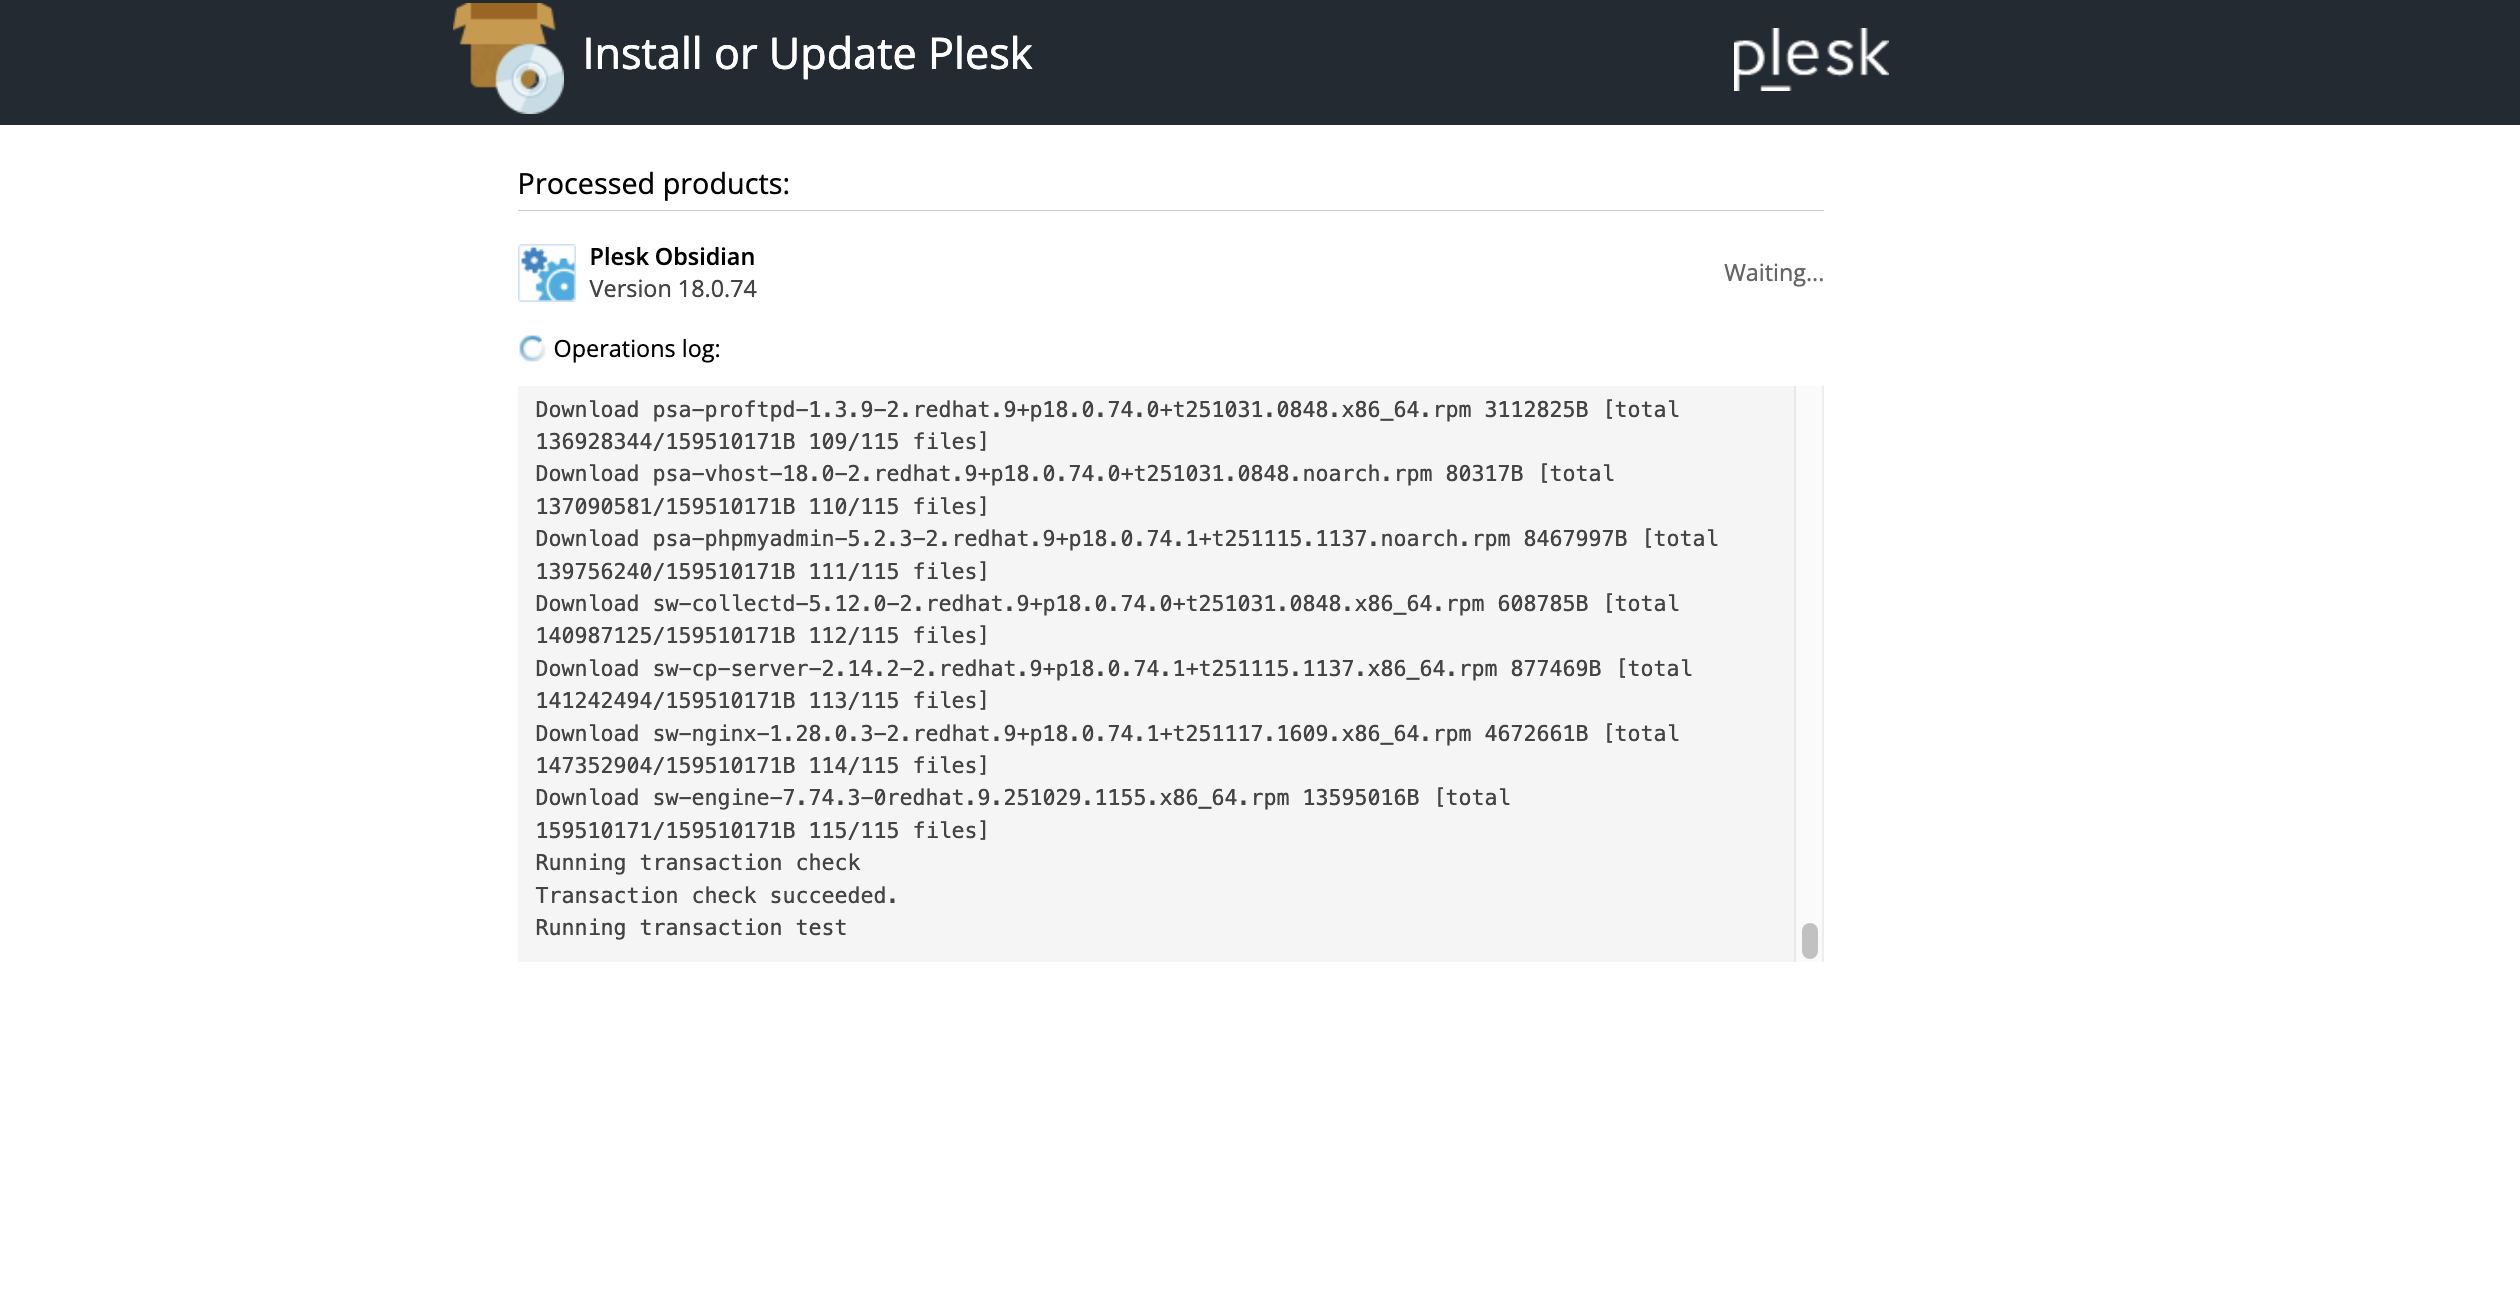
Performing this will trigger a loading screen that first downloads the update and then installs it. Please be patient during this process.
Once finished, Plesk will notify you via a successful message at the bottom of the operations log. To close the page and go back to the “Updates” page, please click the blue “Ok” button at the bottom.

Important: During the update process, some services may briefly restart, and the Plesk interface may become temporarily unavailable.
The process for updating extensions and additional Plesk components is similar. The only difference is that their installation wizard is accessed via the “Update Components” functionality we mentioned earlier in this tutorial.
To ensure your server is secure, reliable, and up to date, we recommend enabling automatic updates. To do that, from the “Tools & Settings” page, please open the “System Updates” functionality underneath the “Server Management” section.

After being redirected to the “System Updates” page, please click on the “Settings” tab, located on the right side of the “All Packages” tab.

On the “Settings” tab, you will see a few other settings, in addition to enabling the automatic updates. Let’s go over all of them.
Automatic updates help prevent vulnerabilities and ensure your server remains stable and up to date. Enabling and receiving notifications also ensures you are informed when this process completes, so you can check whether everything went as expected.

To save the settings on this page, please either click on the “Ok” button to save them and get redirected to the “Tools & Settings” page, or click the “Apply” button to save your changes and remain on the page.
Checking for Plesk updates is simple and highly recommended to keep your server secure, stable, and optimized. With Plesk’s built-in update manager, you can quickly review available updates and install them directly from the control panel.
We hope this tutorial was helpful, and we kindly encourage you to check for updates regularly or enable automatic updates for easier maintenance.

Nikola is an accomplished tech-savvy extraordinaire with over six years of experience in the web hosting field. He started as a customer care representative and quickly rose the ranks to become a support supervisor and, eventually - the head of the technical department in HostArmada. His deep understanding of the client's needs, combined with his technical knowledge, makes him the perfect man to create the ideal harmony between client satisfaction and professional problem-solving. You will often find him creating helpful tutorials, articles, and blog posts that help existing customers get around.
Learn more about Plesk in the other tutorials that we have:
