PHP is one of the most widely used scripting languages for web development, powering platforms such as WordPress, Joomla, Drupal, Laravel, and many others. Managing PHP settings in Plesk allows you to control important aspects of how your website runs, including:
Plesk offers an intuitive interface that allows you to adjust PHP settings per domain or globally (depending on your configuration), giving you full control over your website’s behavior and compatibility.
In this tutorial, we will guide you through the process of managing PHP settings in Plesk.
First and foremost, please ensure you are logged in to your Plesk control panel. To do that, please enter your IP address, hostname, or domain name inside your web browser’s search bar and add “:8443” at the end. It should look something like: “https://yourdomain.com:8443”. By doing so, you will be prompted by a login form that requests your username and password.

After logging in with your username and password, Plesk will automatically display the “Websites & Domains” page, which will serve as the index page from where you can manage everything related to your websites and domains on Plesk.
To manage PHP settings for a specific website, please expand the domain tools by pressing the down-pointing arrow located at the far left side corresponding to the domain name you want to modify.

Performing this action will expand a wide variety of tools. Under the “Dev Tools” you will see the “PHP” option.
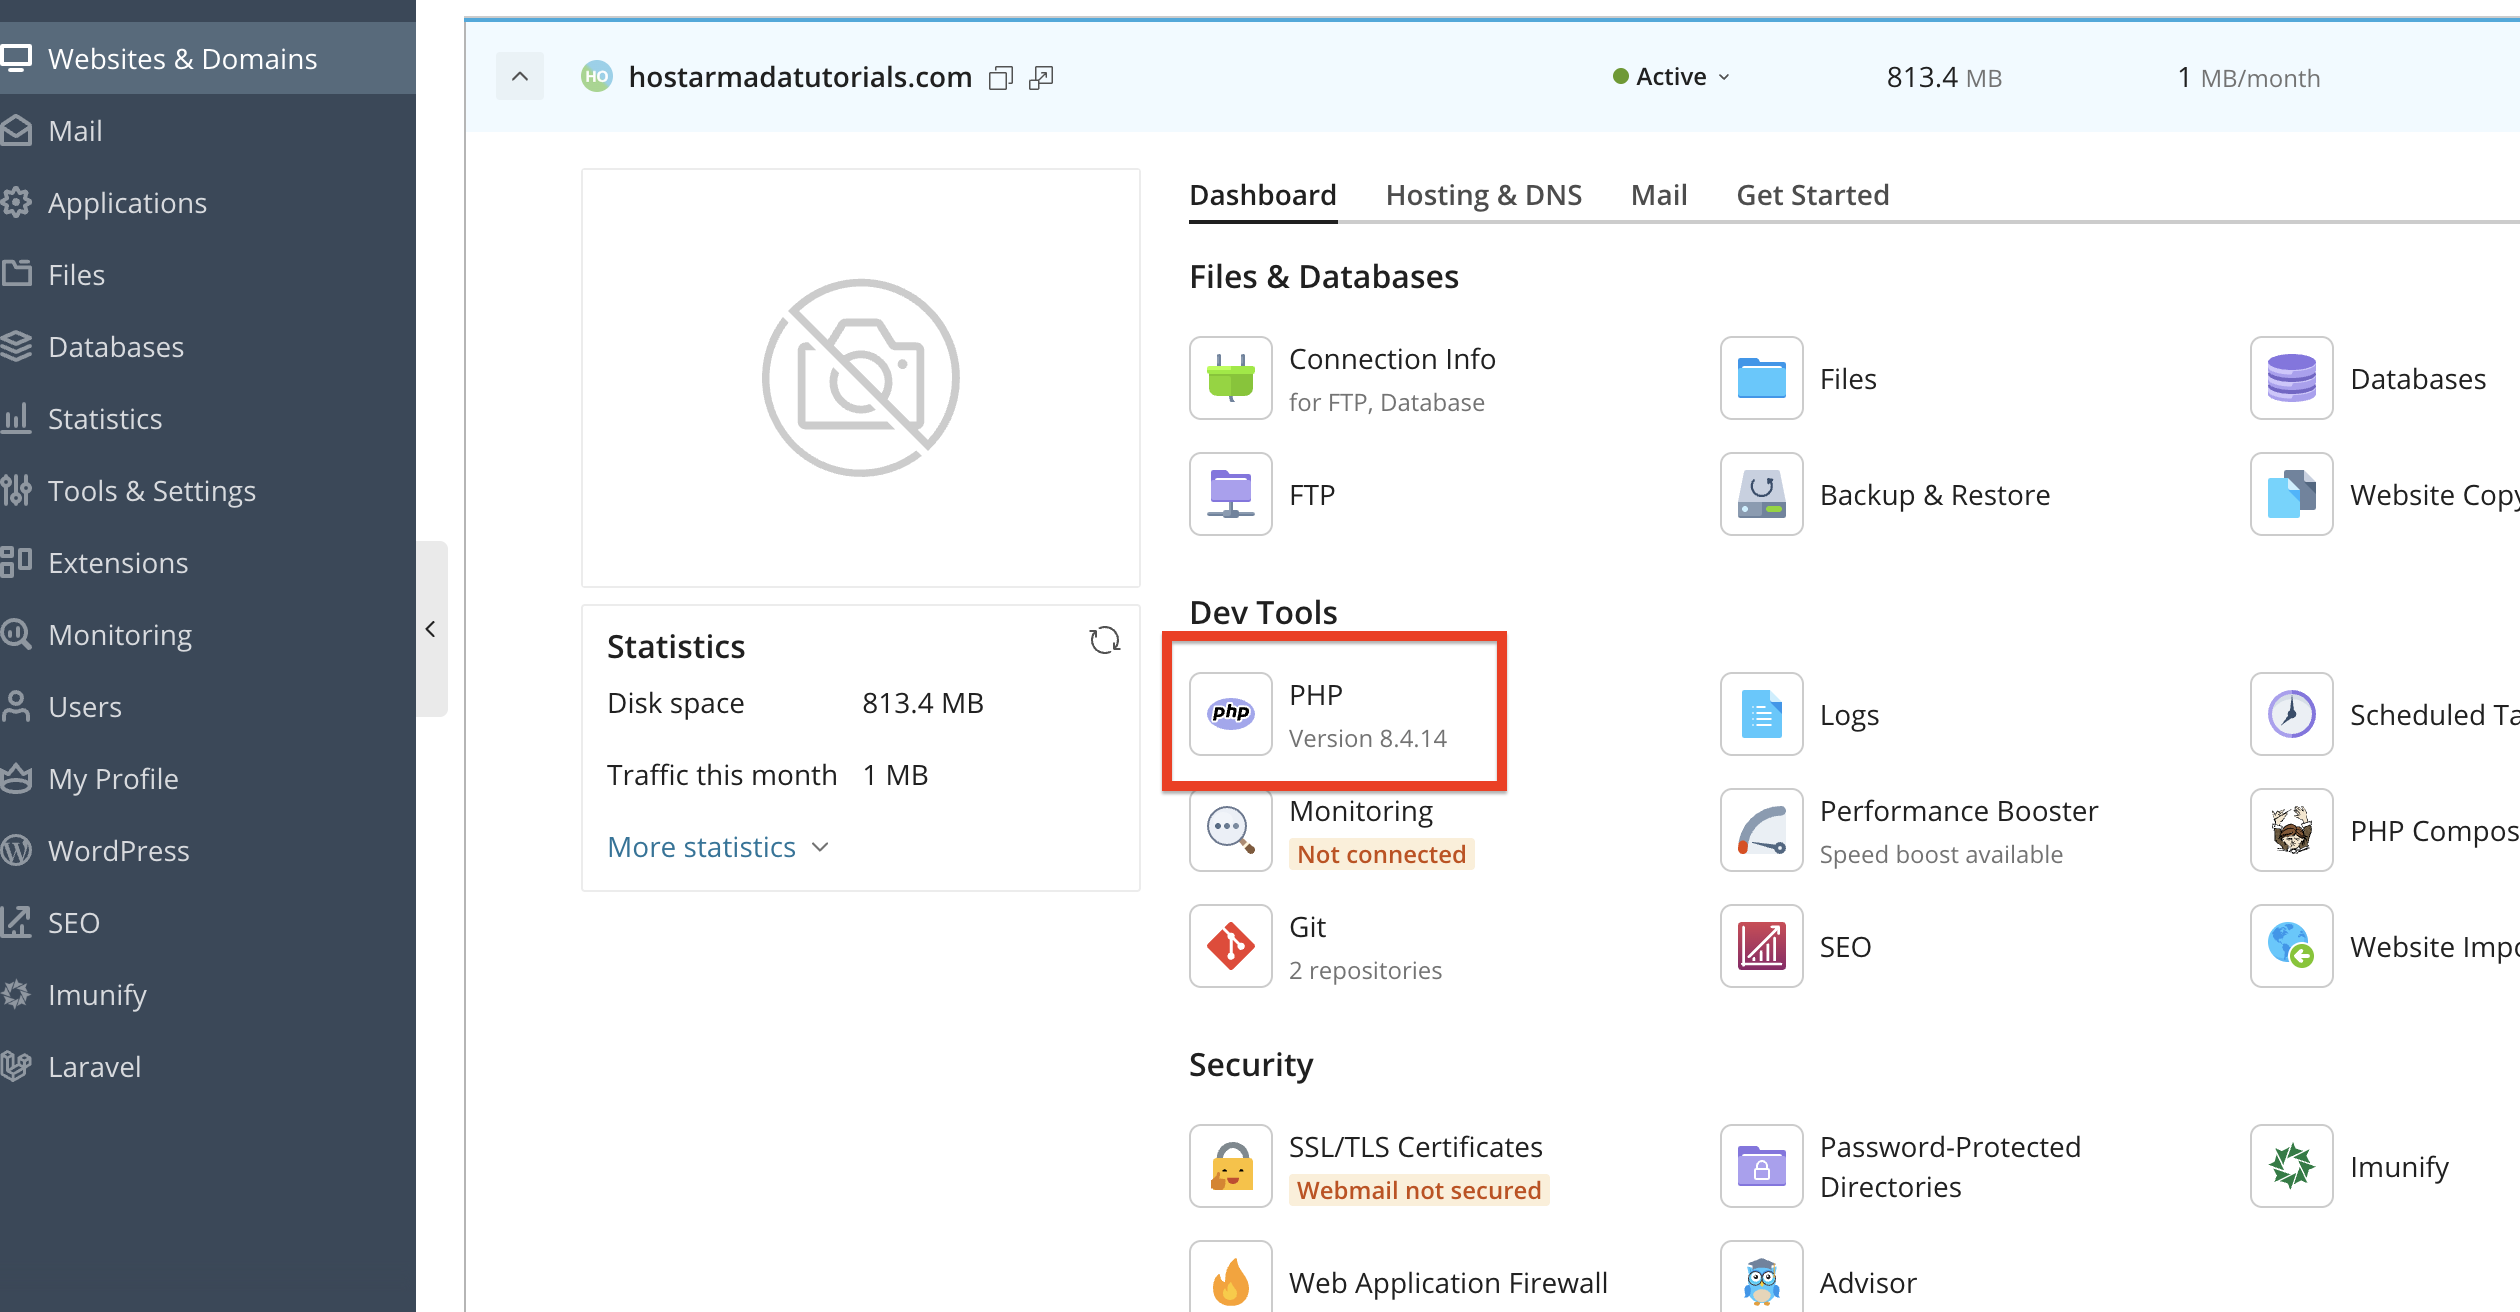
Please click on it to open all PHP-related configuration options for that domain.
Upon clicking on the “PHP” option underneath the “Dev Tools”, you will be redirected to a page where you can begin managing your PHP-related configurations.
Plesk usually supports multiple PHP versions to accommodate the needs of any type of app or any developer. To select the desired version, look for the PHP support or PHP version dropdown menu and choose the version required by your website (e.g., PHP 8.2, 8.1, 7.4).
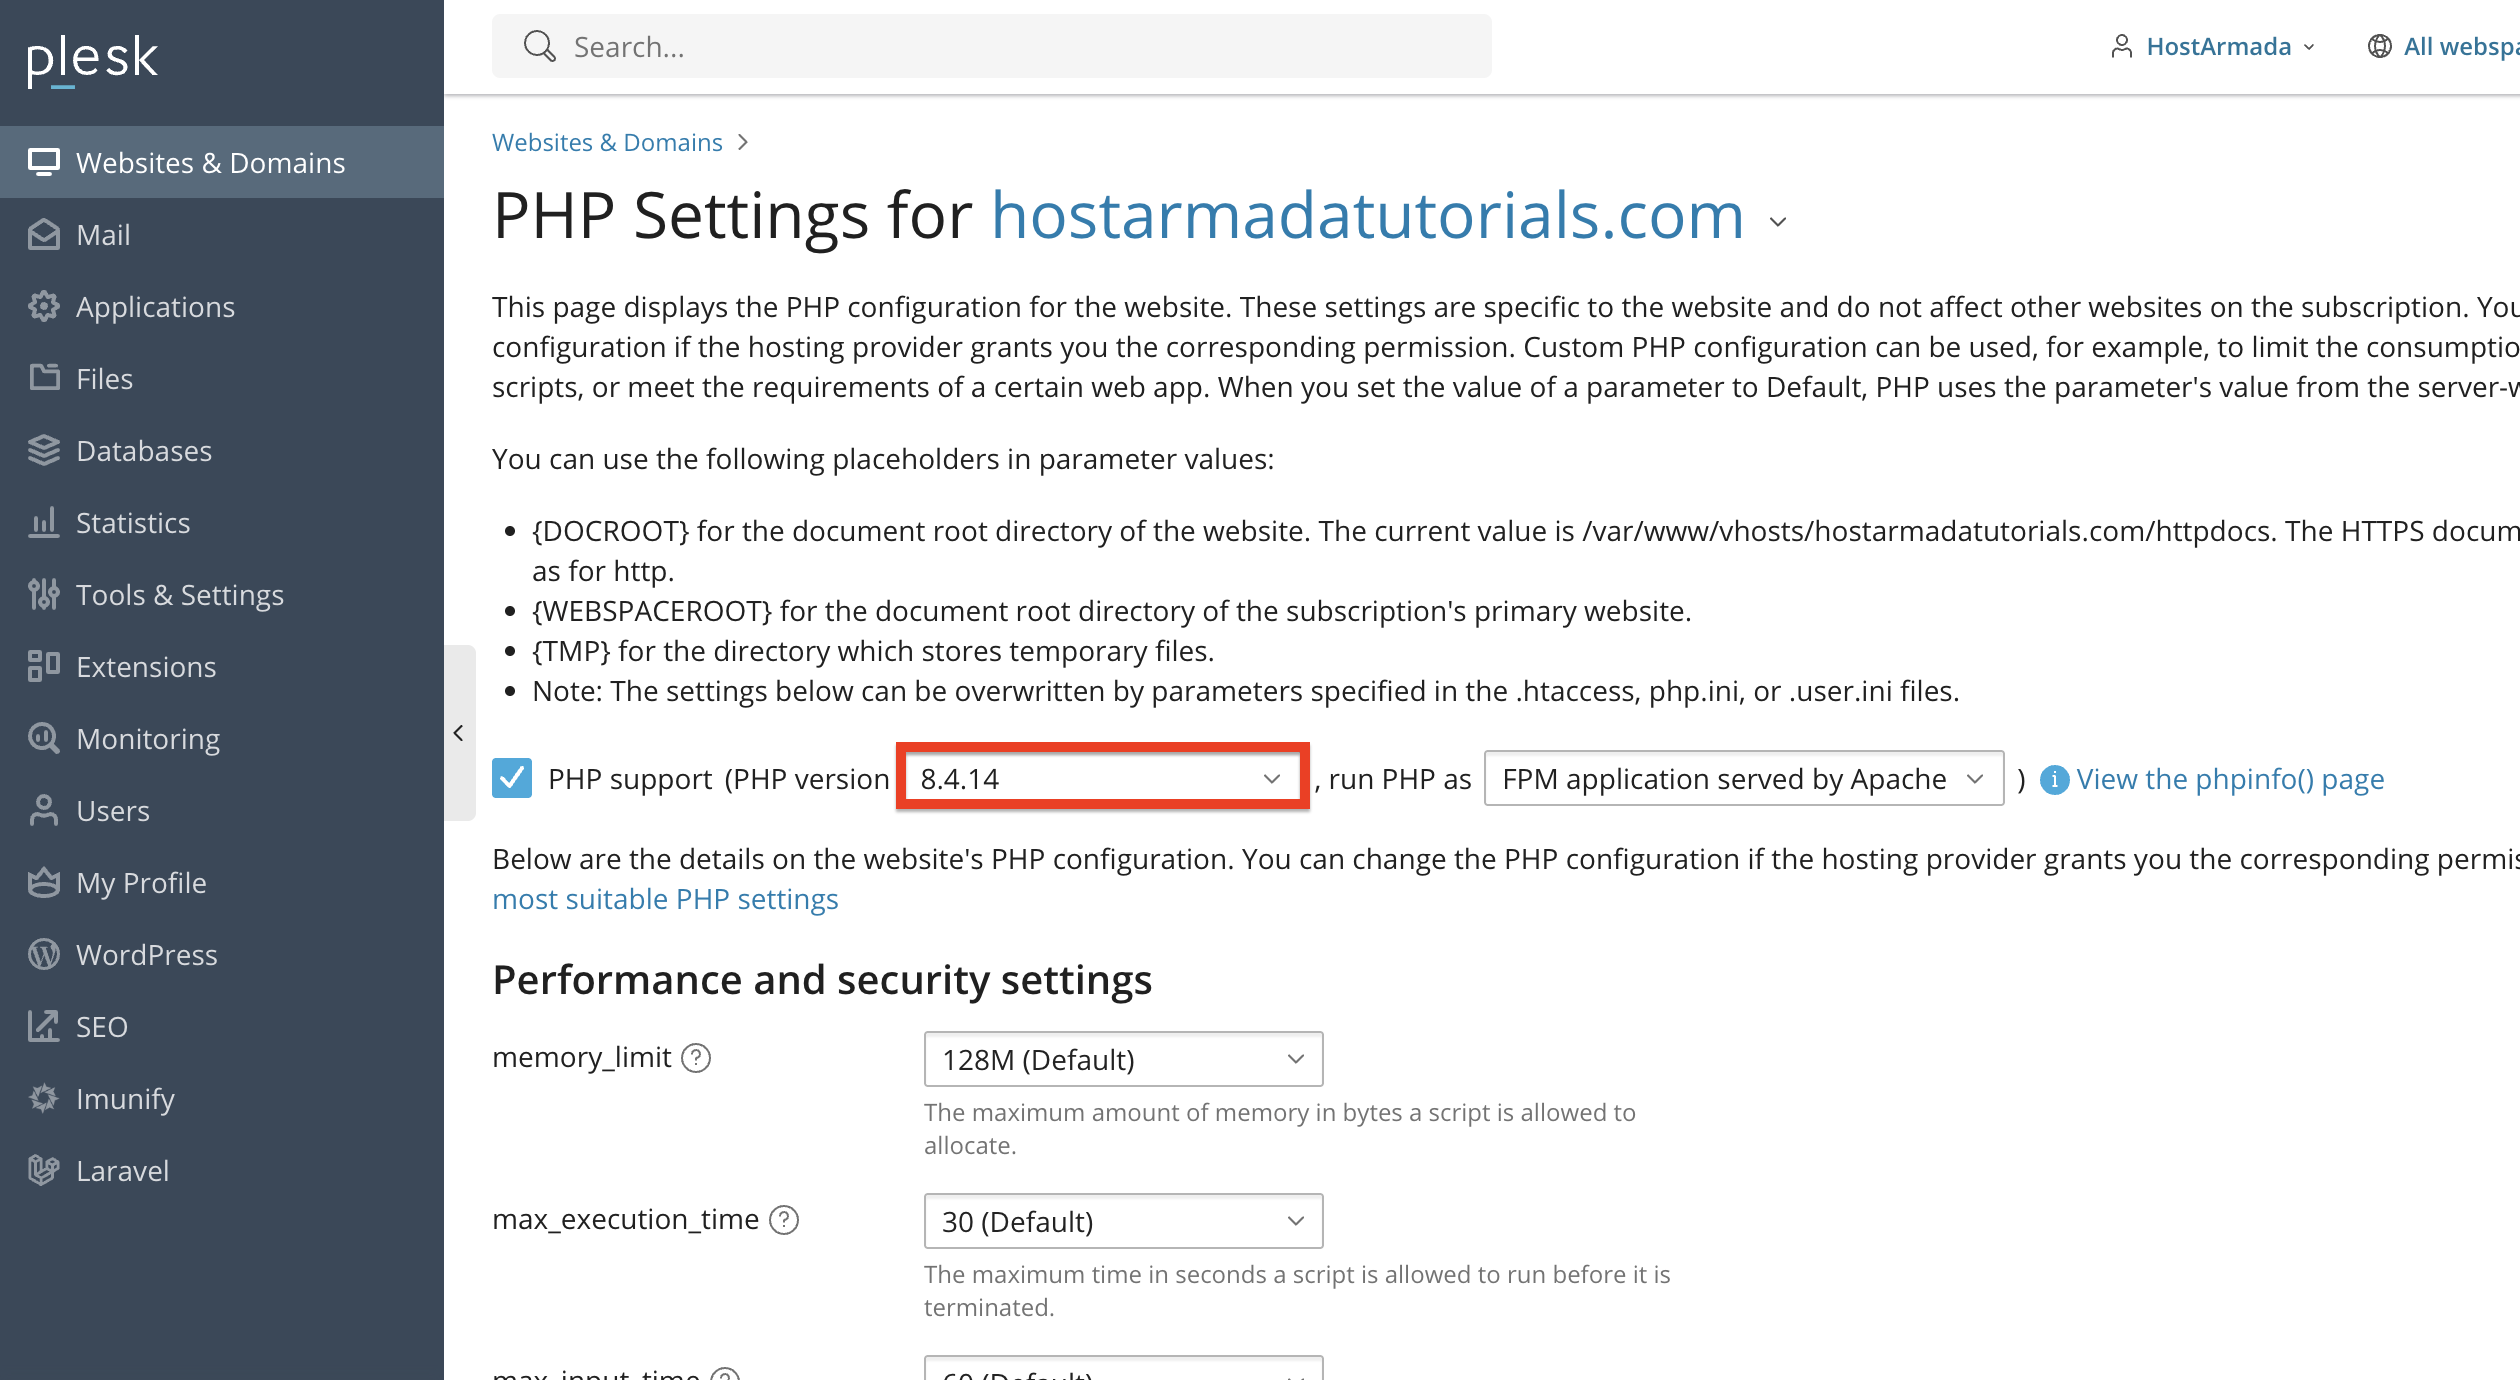
To save the changes, please click the “OK” or “Apply” buttons, located at the bottom of the page.
Recommendation: Always use the latest stable version supported by your application for better security and performance.
In Pleks, you can choose different types of PHP handlers that each provide benefits and downsides for your PHP performance.
To change the handler, use the “run PHP as” drop-down menu and select the handler you want to use.
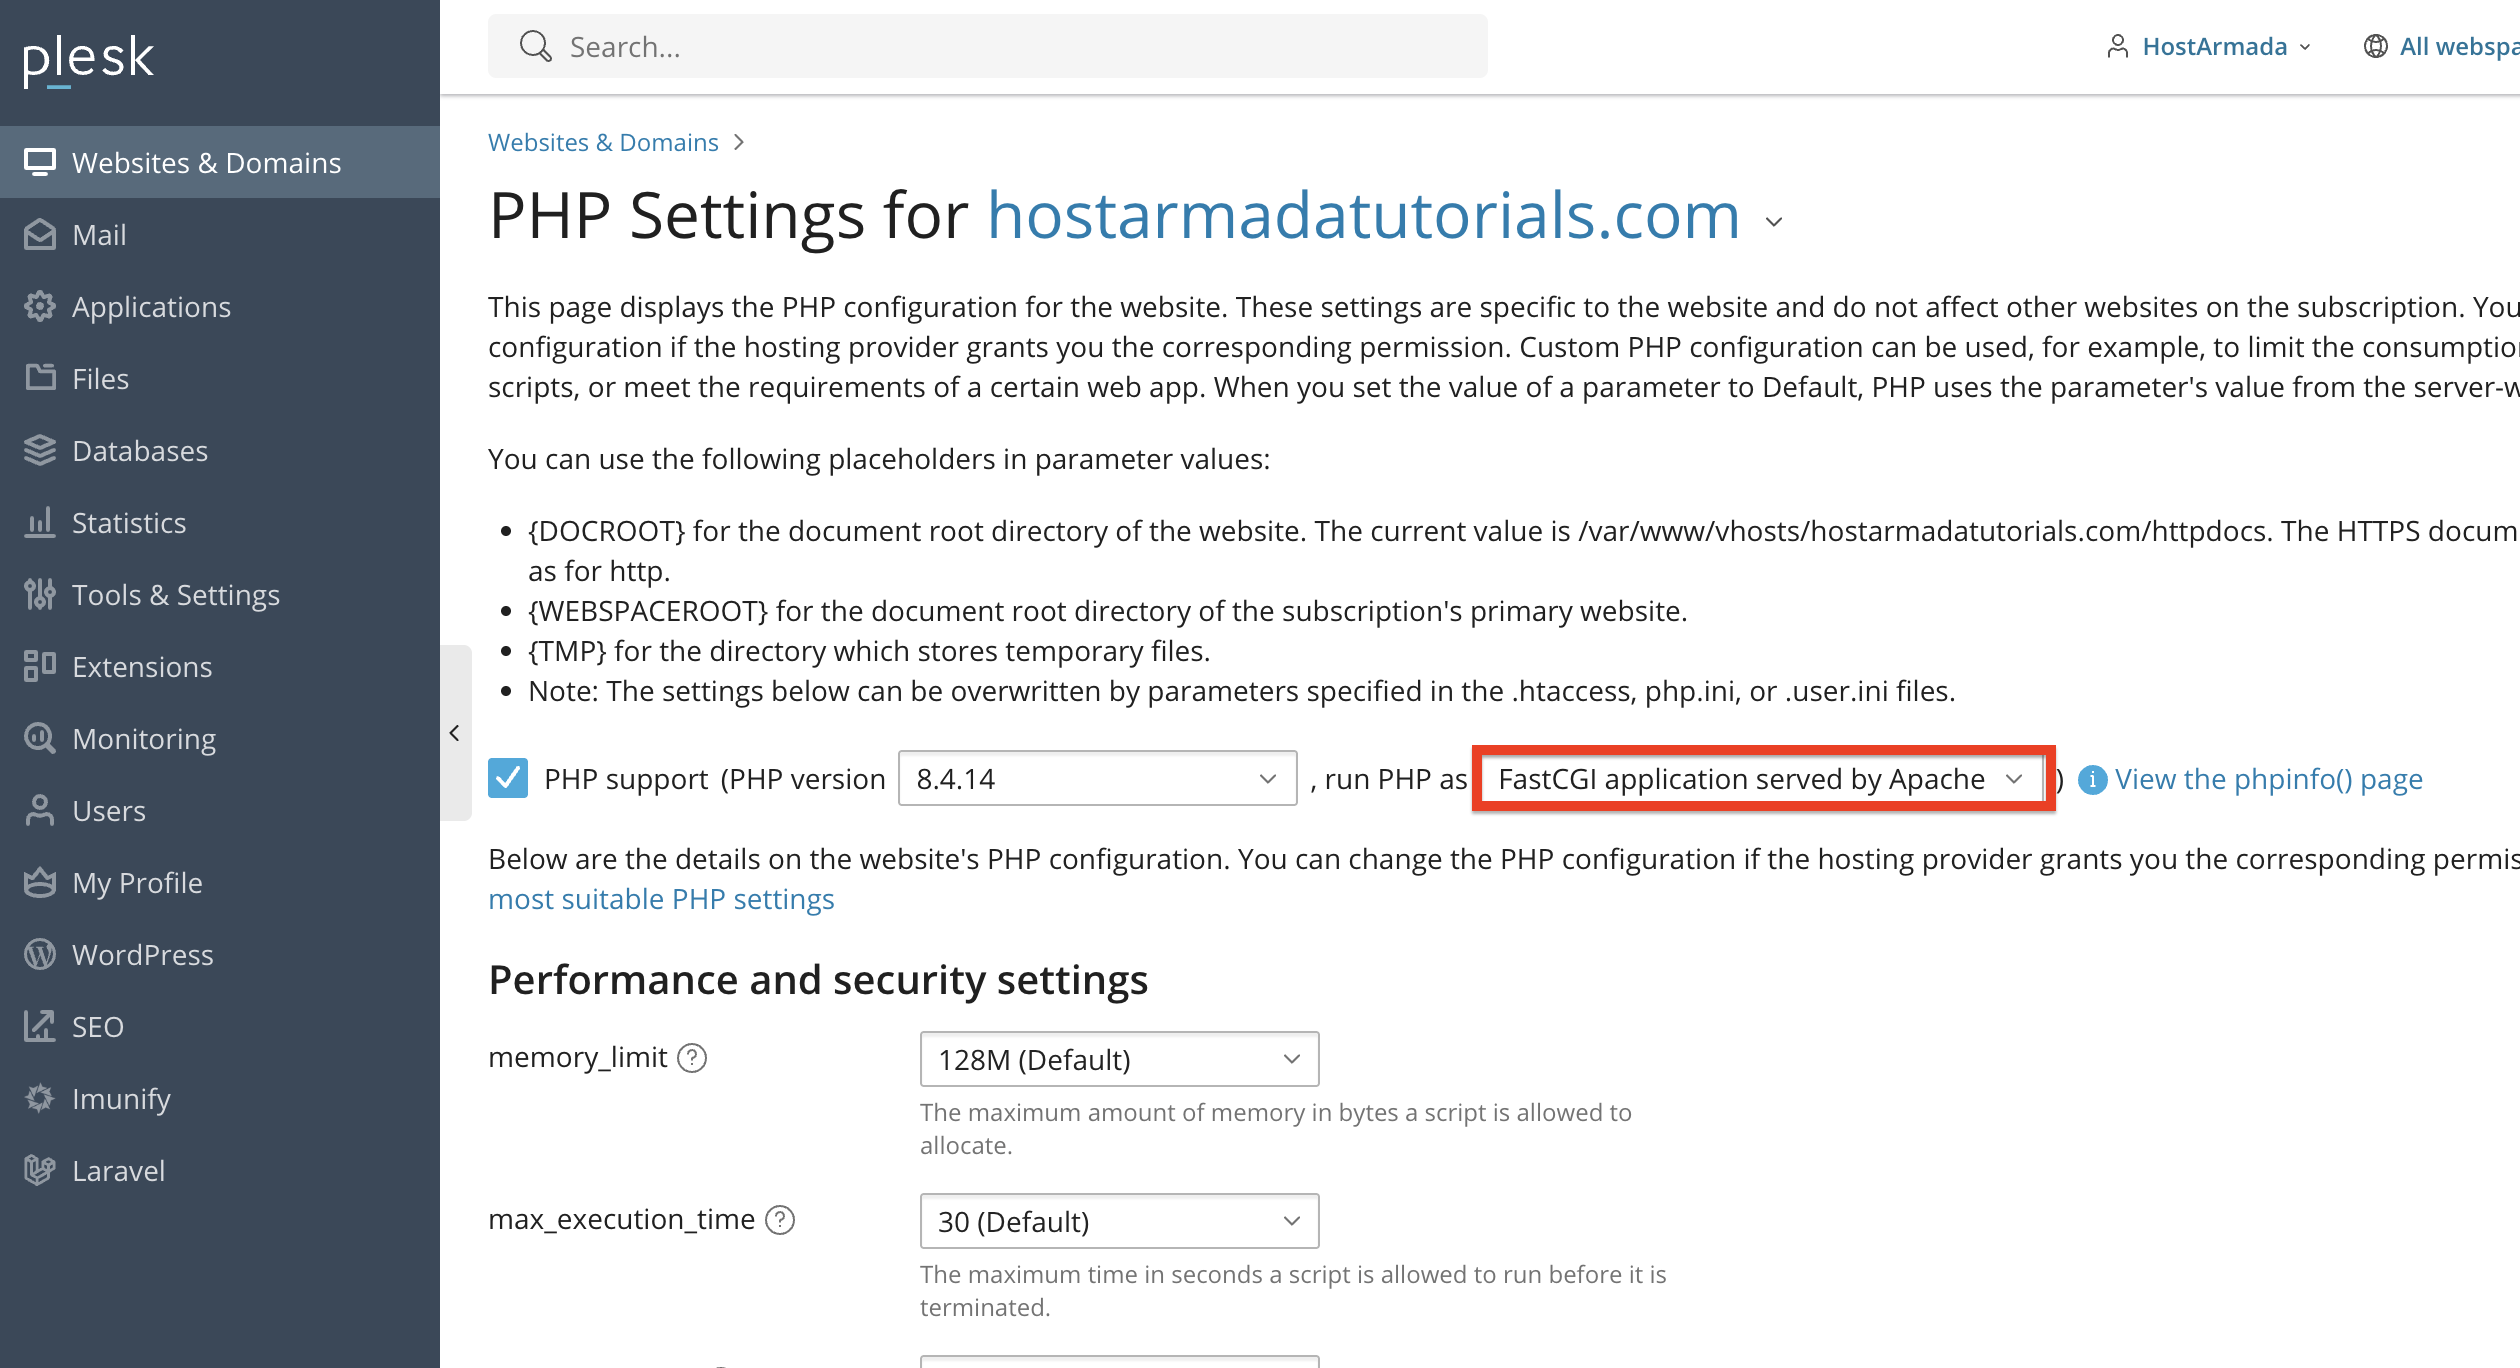
Different handlers can affect performance and compatibility, depending on your hosting environment.
In addition to the PHP version and the PHP handlers, Plesk also allows you to configure vital PHP settings, such as:
You can modify the above on the same page, the PHP version and PHP handlers, by scrolling a bit down the page under the “Performance and security settings” category.

To change any setting, please locate its corresponding text field and enter the new value you would like it to hold.
If you need more advanced settings, Plesk allows you to add custom php.ini rules. To do so, please scroll to the “Additional directives” content box near the bottom of the page and type in the custom directive you want to add via the PHP.INI file. For example:

These directives override default server settings for your specific domain. Finally, to save these settings, please press either the “Apply” button at the bottom of the page to apply them and reload the page itself so you can double-check the values again, or please click on the “OK” button, which will save the setting and redirect you back to the “Tools & Settings” page
Depending on your Plesk access, you may be able to enable or disable extensions such as:
In order to do that, please navigate to the “Tools & Settings” page.

After doing the above, please locate the “PHP Settings” option under the “General Settings” category.

Performing the action above will take you to a page where you will see all the installed PHP versions on your Plesk server. To install extensions for the version you want, please click on it.

Doing the above will redirect you to the extensions page, where you can use sliders to enable/disable the ones you need.
Make sure only necessary extensions are enabled to keep PHP lightweight and secure.
As you can see, Plesk makes it very easy to manage PHP settings for each domain or globally across your server. Whether you need to change your PHP version, adjust performance limits, enable extensions, or configure custom directives, the PHP Settings tool provides everything you need in a clean and intuitive interface.
We hope this tutorial was helpful, and we kindly encourage you to review your PHP settings whenever you install new applications, change hosting requirements, or troubleshoot performance issues.

Nikola is an accomplished tech-savvy extraordinaire with over six years of experience in the web hosting field. He started as a customer care representative and quickly rose the ranks to become a support supervisor and, eventually - the head of the technical department in HostArmada. His deep understanding of the client's needs, combined with his technical knowledge, makes him the perfect man to create the ideal harmony between client satisfaction and professional problem-solving. You will often find him creating helpful tutorials, articles, and blog posts that help existing customers get around.
Learn more about Plesk in the other tutorials that we have:
