
Upgrading and downgrading cPanel accounts is an every-day task when working with WHM. Whether you are limiting the resources of a user or providing them additional resources due to high necessity - it is always useful to have this feature at your disposal. In the following lines of this tutorial, we will review the “Upgrade/Downgrade an Account” feature of the WHM control panel.
As with all other WHM control panel features you need to first log into the WHM service for your VPS or Dedicated Server. If you are not sure how to do that, please check our How to Access WHM tutorial. After you have logged in, please use the search field on the left side of the page and type “Upgrade/Downgrade an Account”.
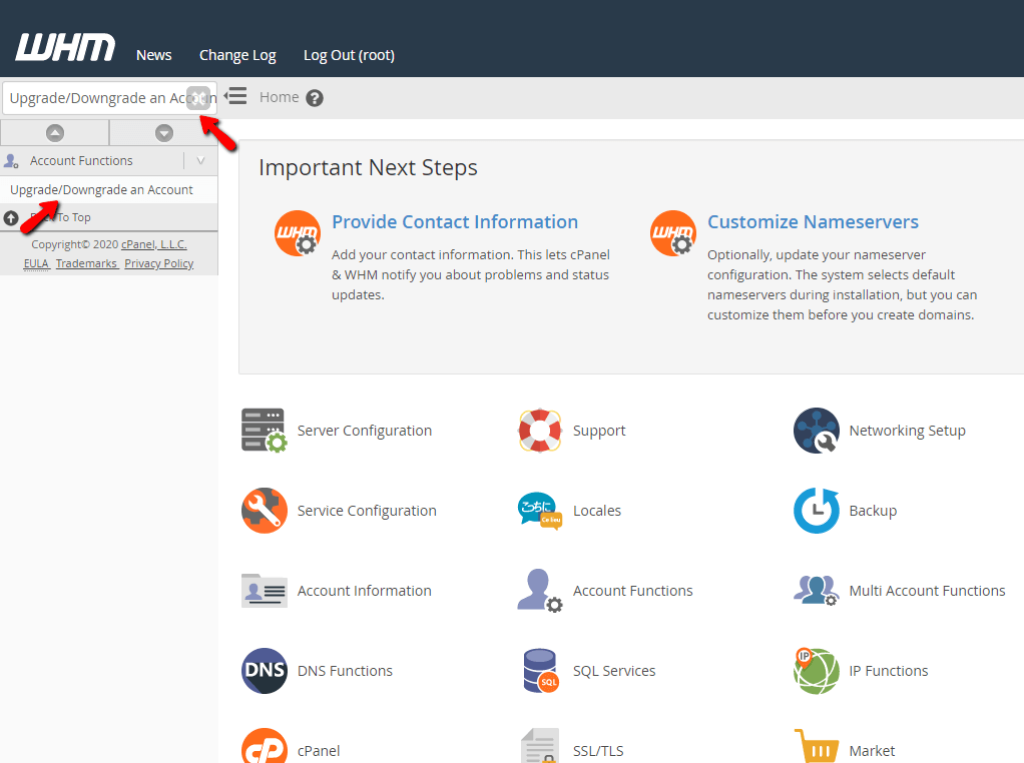
When the single result presents itself below the search bar, click on the “Upgrade/Downgrade an Account” link in order to be redirected to the desired page.

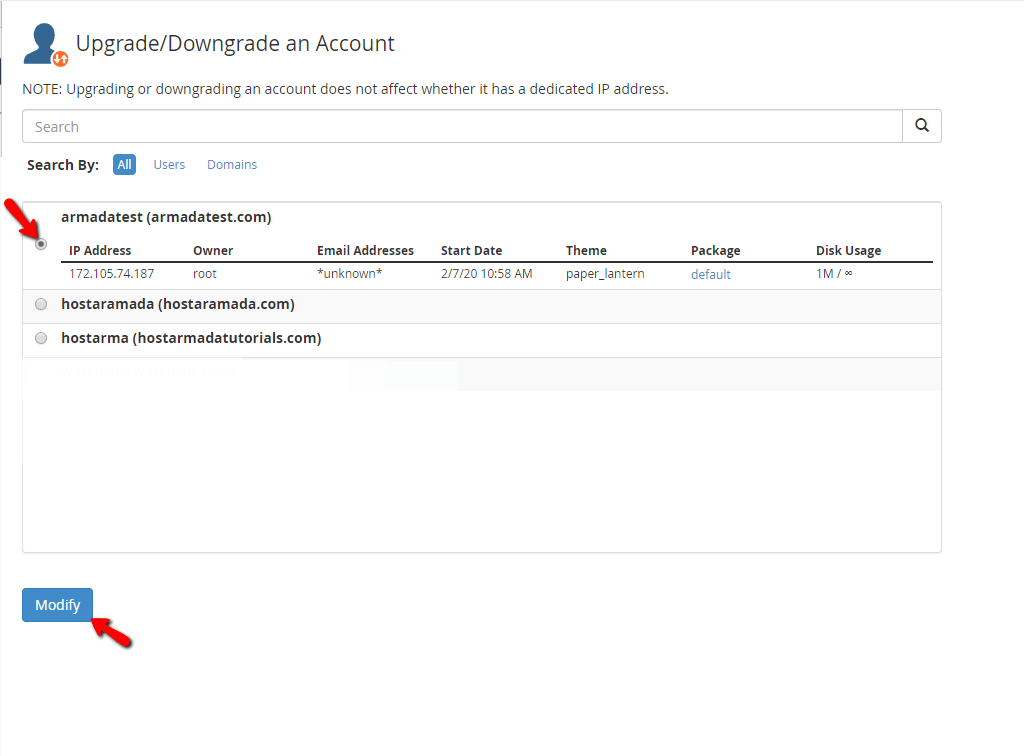
On the “Upgrade/Downgrade an Account” page, you will see a search field with the ability to filter everything based on either “Users”, “Domains” or both. Additionally, there will be another section containing rows representing all the cPanel accounts on your server. For each of the accounts, you will be presented with the username of the account as well as the primary domain for the same. In order to select an account, please click on the radio button located right before the username of the account. This will select the account and the “Modify” button on the bottom will be become active.
When you click on it, you will be redirected to the modification page. When you are there, you will see a couple of options. The first one is a section where the account’s “Current Package” is displayed. Right below there will be a list of all the “Available Packages” on the server.
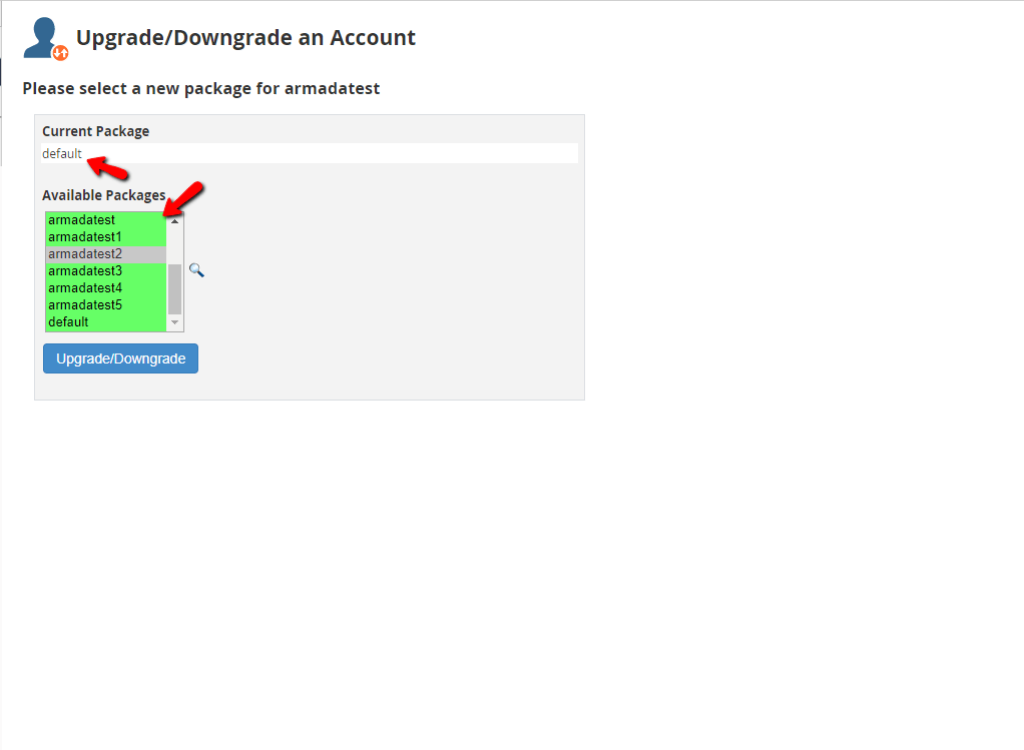
When you select the desired package out of the “Available Packages” list and you want to apply it for the cPanel account, please click the “Upgrade/Downgrade” button which is located right below the package list.
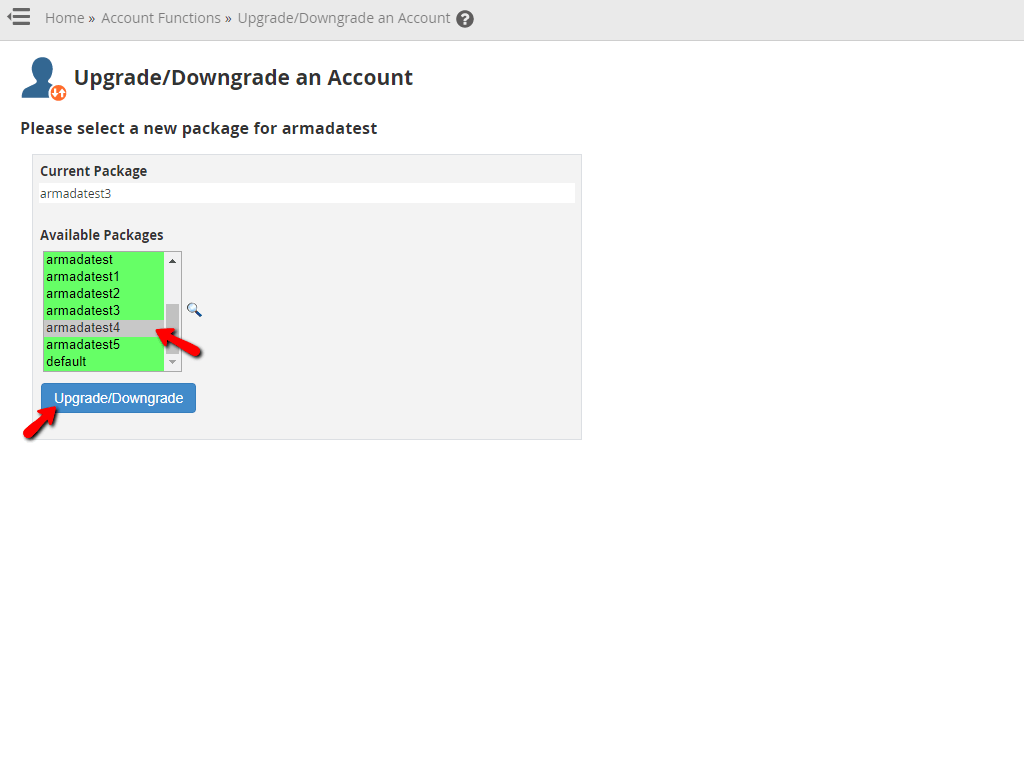
Upon doing so the package will be changed immediately and you will be redirected to a page with a changelog that explains all of the changes that were performed by the tool. We will highlight the alterations that occurred when we pressed the “Upgrade/Downgrade” button in the screenshot to follow so you can get the idea.

This sums up the process of upgrading or downgrading your cPanel account in the WHM control panel. Hopefully, this tutorial gave you the necessary knowledge to use the “Upgrade/Downgrade an Account” feature and manage your accounts correctly. If you have any further questions or are unable to handle the procedure on your end, feel free to contact our Technical Support Crew using our ticking system from your Client Area.

Sebahat is a young and bright woman who has become an invaluable part of our team. She started as a Customer Care Representative, mastering that role and, along the way, growing into a tech-savvy individual who is well acquainted with every support layer of the company. Driven by her aim to improve our customers’ experience constantly, she is committed to enhancing the extraordinary support we deliver.
Learn more about WHM in the other tutorials that we have:
