
Naturally, when people want to become a part of your social networking platform, they will need to register and create their profiles. To make things as easy as possible for you, the thoughtful people who developed Una included the "Create a Profile" form by default. Nevertheless, with the convenience of built-in form, we are sure you would want to customize it and configure it in accordance with your individual project needs. Therefore, we are going to give you a hand by guiding you step-by-step through this process.
First, please log in to your Una Studio and access the "Forms" App.

Within the "Forms" builder, please switch to the "Fields" tab. Under it, select the "Persons" module and the "Add Person" option from the corresponding dropdown menus at the top of the page.
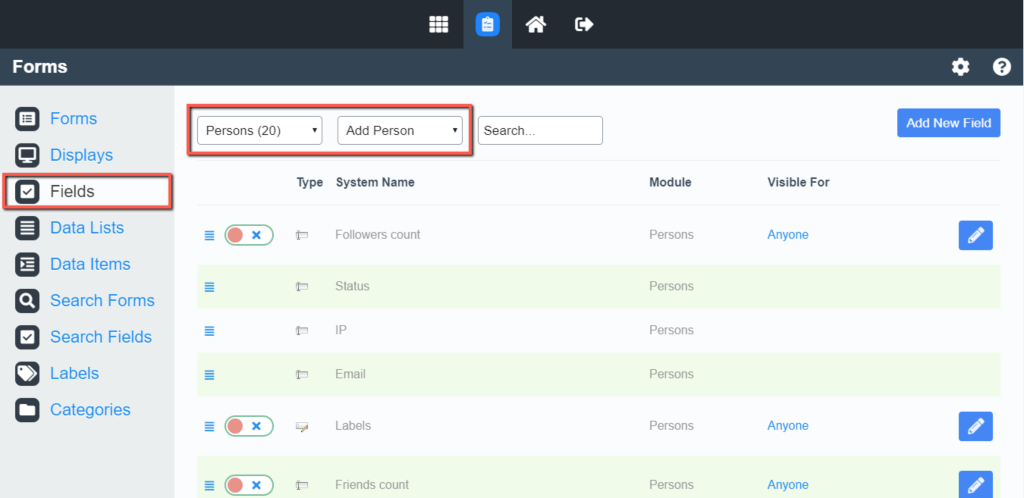
Once this is done, the available fields are listed, regardless of whether they are currently enabled or not.
As you can see, most of the general fields, such as profile picture, name, gender, etc., are pre-configured by default. Of course, you are able to manage them based on your preferences.
As usual, the toggle switch in front of each field indicates whether it is currently enabled (tick) or disabled (x sign).
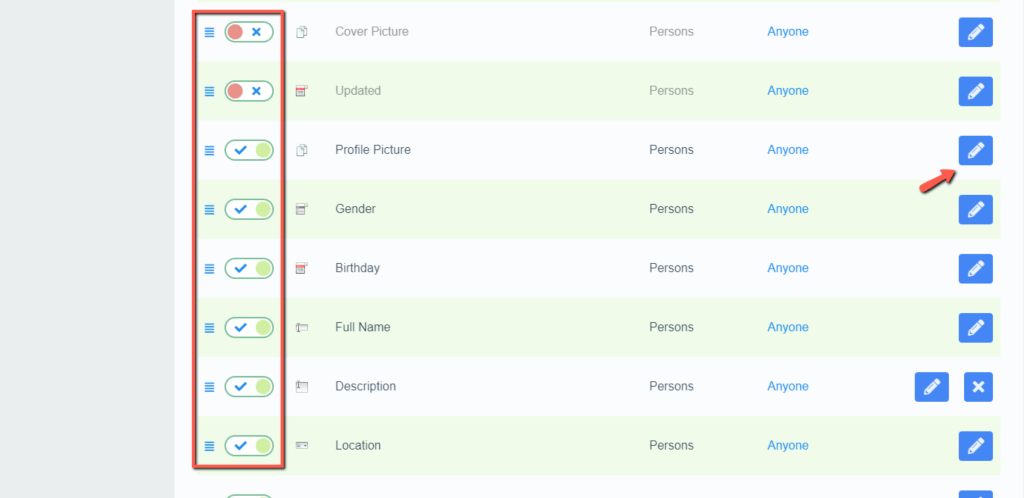
The order in which they appear in your backend determines their consequence in the registration form, excluding the disabled fields. As you are probably already familiar, you can organize the fields by dragging them to the desired position.
To further edit a field, you have to hit the corresponding pencil icon button.
Upon doing that, you are presented with a pop-up window where you can modify the field. You can change the type, edit the system name (backend) and the title (frontend) of the field, and you can include a description intended for your users. The "Mandatory" toggle switch is pretty self-explanatory. It determines whether users are going to be able to skip this field, or they are going to be required to perform the necessary action to complete their registration. These are the general settings included in all fields. Note that the rest of them may vary depending on the type of the field.
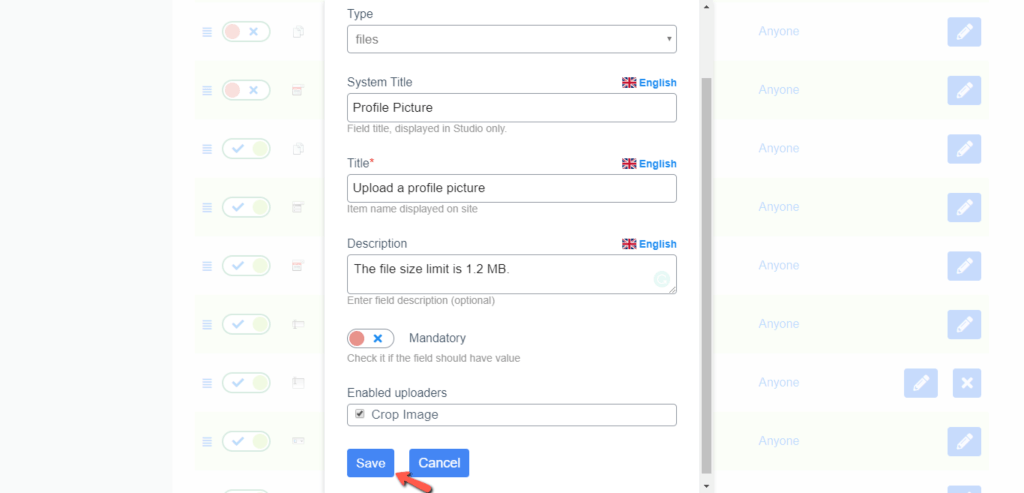
When you perform the desired changes, please do not forget to click on the "Save" button to apply them.
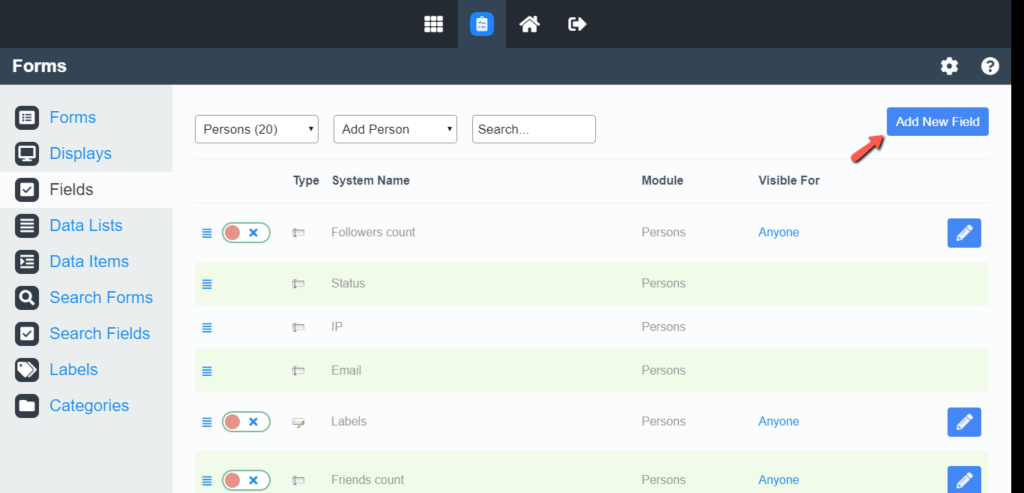
Besides the default fields, you are also able to add extra fields to your profile creation form. To do so, please click on the "Add New Field" button at the top right corner of the page.
First, you have to select the field type from the new pop-up window. Even though most of the general things you would want on your registration form are pre-configured, you might find yourself in a position where you need to create your custom parameters. The good thing is that Una provides complete freedom in this aspect.
In our example, we are creating an "Age Verification" radio button option. Therefore, we had to create an additional data list to be bound to it. Again, based on the field type the actions you need to take to fulfill your goal may differ.

Afterward, you are presented with a pop-up window similar to the one we reviewed previously. Under it, you have to configure the field properties. What you see on your end may vary depending on the field type you have chosen, but in general, most of the characteristics are the same.

Please set the registration field elements as required and click on the "Add" button.

With this done, you have managed to configure an additional field in your "Create a Profile" form.
Congratulations! You have just gained more control over the information or actions required from your customers when they are registering on your fabulous Social networking website. Now you can easily regulate what data will be the base data held for each of your users. We hope this information was useful to you and will come in handy in the future management of your project.

Sebahat is a young and bright woman who has become an invaluable part of our team. She started as a Customer Care Representative, mastering that role and, along the way, growing into a tech-savvy individual who is well acquainted with every support layer of the company. Driven by her aim to improve our customers’ experience constantly, she is committed to enhancing the extraordinary support we deliver.
Learn more about Una in the other tutorials that we have:
