
In this tutorial, we will review the process of configuring the “Text Filters” in Joomla. They allow you to gain more control over the HTML code submitted on your website. You can refer to the Text Fileting settings as a way of enhancing website security and protect it from common attacks. You are allowed to configure the Text Filters exactly per your requirements in order to fit the specific needs of your website.
To begin with, please log in to your Joomla Admin Dashboard and navigate through the top menu bar to System > Global Configuration.

Once you access the “Global Configuration” page, please switch to the “Text Filters” tab.
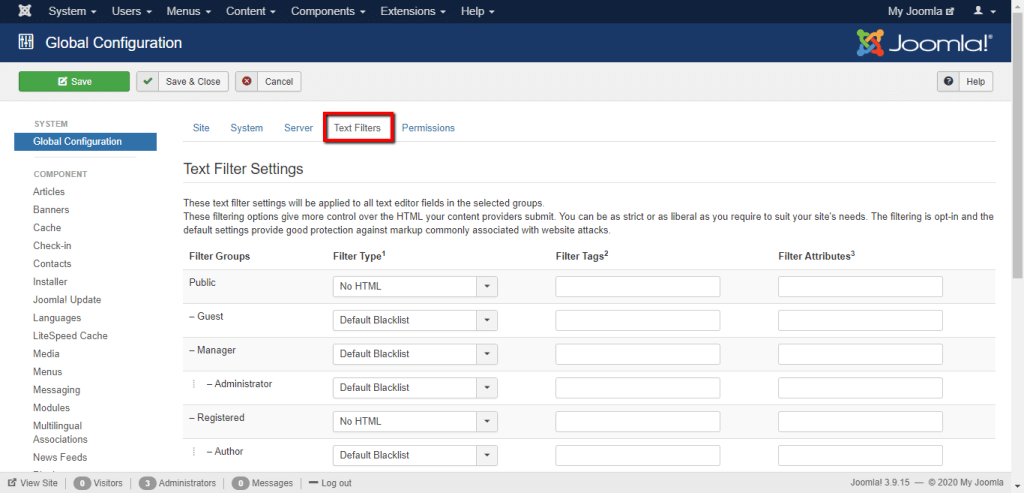
Under the “Text Filters” tab you will see a list of your user groups and you will be able to select the individual filter type, filter tags, and filter attributes for each group.
As you will notice, all groups are already pre-configured by Joomla. However, in some cases that might not be suitable for your needs and cause some dysfunctionalities while customizing your website content. For example, if you are editing an article or Custom HTML module and some restricted tags or attributes are included they might be stripped out.
For each user group, you will be able able to select one of the following “Filter Type” options:
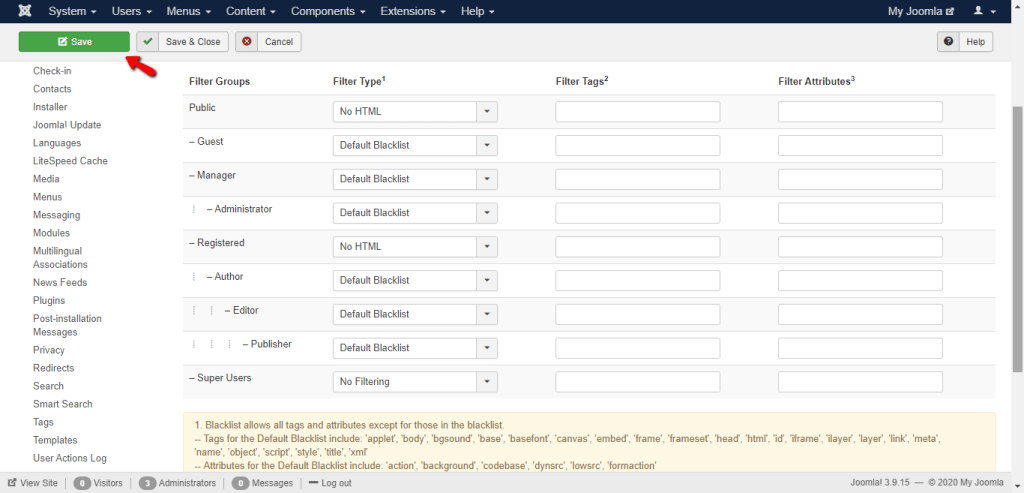
You might want to consider setting up the “No Filtering” option for the “Administrator” user in addition to the “Super User”.
When you apply the desired changes, please do not forget to click on the “Save” button to record them.
If you are using the TinyMCE editor and your code is still being stripped out. You will need to review the “Prohibited Elements” field and remove the elements you would like to exclude. You can do that by navigating through the top menu bar to Extensions > Plugins. From the list of plugins click on “Editor - TinyMCE”, perform the required changes, and click on “Save”.
Well done! You have learned how to configure the Filtering Settings to meet your specific needs. We hope you have found the information in this tutorial useful. In case you have any further questions, please do not hesitate to address them to our Support Team.

Sebahat is a young and bright woman who has become an invaluable part of our team. She started as a Customer Care Representative, mastering that role and, along the way, growing into a tech-savvy individual who is well acquainted with every support layer of the company. Driven by her aim to improve our customers’ experience constantly, she is committed to enhancing the extraordinary support we deliver.
Learn more about Joomla in the other tutorials that we have:
