
The LSCache Joomla plugin is a swift, low budget, and intuitive plugin designed for Joomla 3.x+ operating on a server utilizing the LiteSpeed webserver technology. The speed benefits our clients receive from using the plugin are quite formidable, and the management behind it is rather minimal. The ease of access, combined with the performance gain makes it a desirable choice for Joomla optimization. In this tutorial, we will go over the installation and activation process of the plugin.
First, you need to log into your Joomla administrative area. To do so, please visit “joomlasite.com/administrator” and replace “joomlasite.com” with your actual domain name.

Within the login page, please enter your Username and Password in the respective fields and press the “Log in” button.
Now that you have logged into your admin area, it’s time to install the plugin! First, please click this link and download the archive locally on your PC or device. Next, make sure you disable any other page caching plugins, as having two with similar functionalities will not mix well with your website. Typically, you will be able to see these plugins under the “System” drop-down on the menu located on the top side of your website.

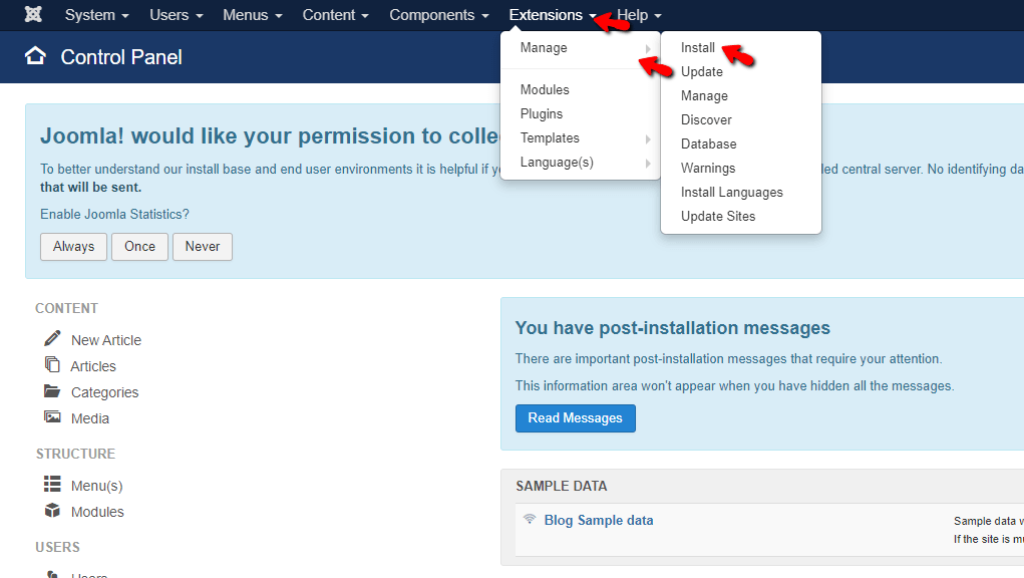
Finally, expand the “Extension” drop-down from the menu on the top of your Joomla admin dashboard, hover over the “Manage” option and then select “Install”.
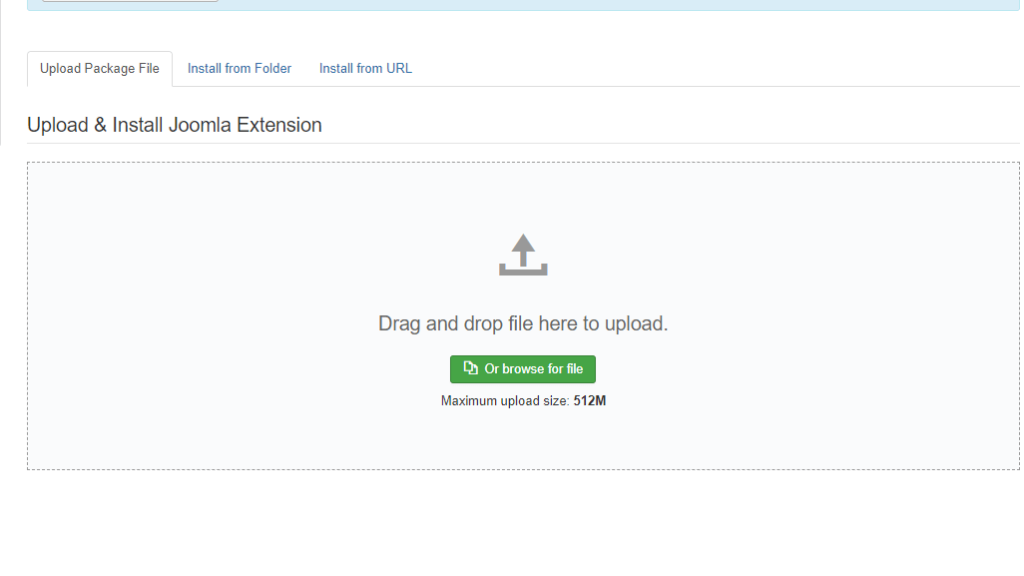
Selecting the “Install” option will redirect you to the plugin installation page. In the middle, you will see the “Drag and drop file here to upload” label and underneath, the “Or browse for file” button.
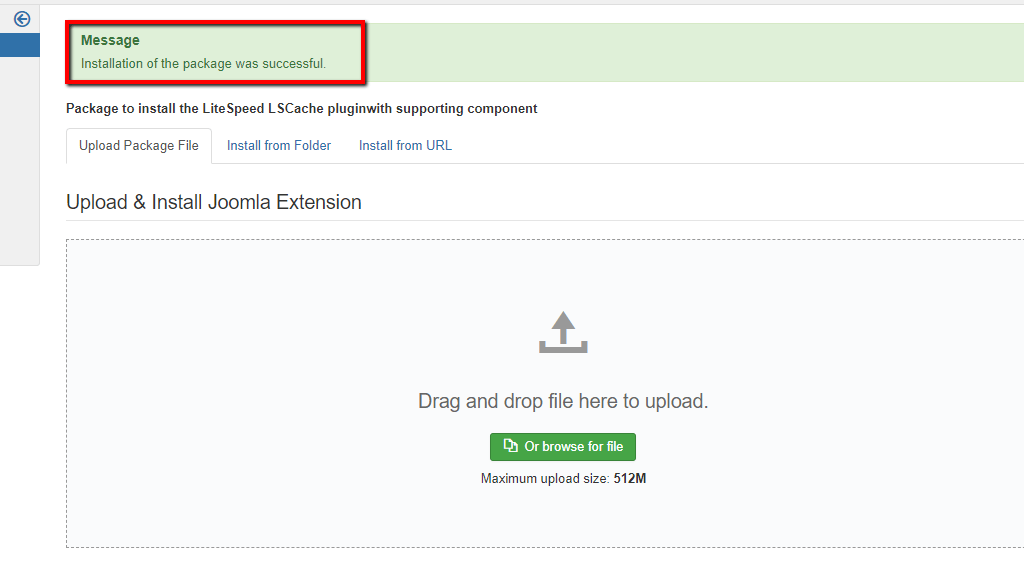
Select your preferred way of uploading the plugin. After doing so, a brief loading screen will be invoked, and eventually, you will see the “Installation of the package was successful” message.
The last thing you need to do is to make sure that the plugin is installed and working. Please navigate through the menu bar on the top and click on the “Extensions” drop-down and then select the “Plugins” option. Doing so will redirect you to a page populated with all your plugins. Please use the search field on the top left corner and type in “LiteSpeed Cache”, then hit the “ENTER” button on your keyboard to filter out your result.

In most cases, the status of the plugin will be “Enabled”. This can be confirmed by the green tickmark underneath the “Status” column. If there is an “X” sign instead, this means that the plugin is inactive, and you simply need to click on it to activate it.

If your website has a separate mobile view, you need to add the following snippet of code:
<IfModule LiteSpeed>

## Uncomment the following directives if you has a separate mobile view

RewriteEngine On

RewriteCond %{HTTP_USER_AGENT} Mobile|Android|Silk/|Kindle|BlackBerry|Opera\ Mini|Opera\ Mobi [NC]

RewriteRule .* - [E=Cache-Control:vary=ismobile]

RewriteCond %{REQUEST_URI} enquiry [NC]

RewriteRule .* - [E=Cache-Control:no-cache]

</IfModule>
inside your .htaccess file as well.
There you have it! The required steps to install the Joomla LiteSpeed Cache plugin with ease! If you do not feel confident enough to do this yourself, please feel free to contact our Technical Support team over the ticketing system in your Client Area. They will be more than happy to help you out! If you liked this tutorial, be sure to check our configuration settings tutorial for this plugin, where you will learn about all its settings and how you could use them to your advantage!

Sebahat is a young and bright woman who has become an invaluable part of our team. She started as a Customer Care Representative, mastering that role and, along the way, growing into a tech-savvy individual who is well acquainted with every support layer of the company. Driven by her aim to improve our customers’ experience constantly, she is committed to enhancing the extraordinary support we deliver.
Learn more about Joomla in the other tutorials that we have: