
Categories are used to logically arrange your posts based on similar features or characteristics. Organizing your content accurately positively impacts your users' experience as they will be able to easily navigate through your website and find exactly what they are looking for.
In WordPress, you have full flexibility in working with categories. You can assign several posts to one category and display them exactly as wish in your theme, menus, and widgets.
In this tutorial, we will step-by-step walk you through the process of creating categories and subcategories and show you how to arrange your content in a tidy and neat way.
Before we move forward, we would like to mention one important detail. It seems like Categories and Tags are often confused. Therefore, before you begin developing your website, it is necessary to know the difference.
There are two general methods for creating Categories and Subcategories in WordPress - from the Categories section and while you are creating new posts.
Considering the fact that when you create categories while adding new posts, you are not allowed to alter the category settings, it is essential first to be familiar with the general category idea. Therefore, in order to become well accustomed to the whole category concept and learn how to properly configure your categories, we will stick to the first method.
To begin, please log into your WordPress Admin Dashboard by accessing your domain followed by "/wp-admin", i.e., "yourdomain.com/wp-admin", where "yourdomain.com" stands for your own domain name.
Once logged, please navigate through the left-hand side menu bar to Posts > Categories.
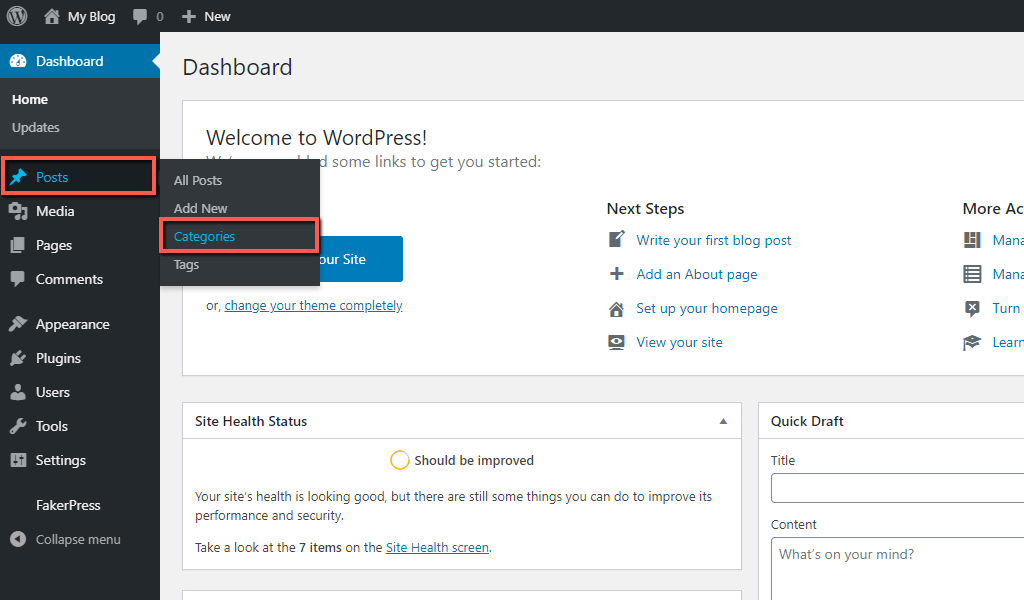
Upon doing that, you will be redirected to the "Categories" section. On the left side, you will find the category creation form. The table on the right side lists all categories currently available on your website. At his point, you will probably see only the "Uncategorized" category.
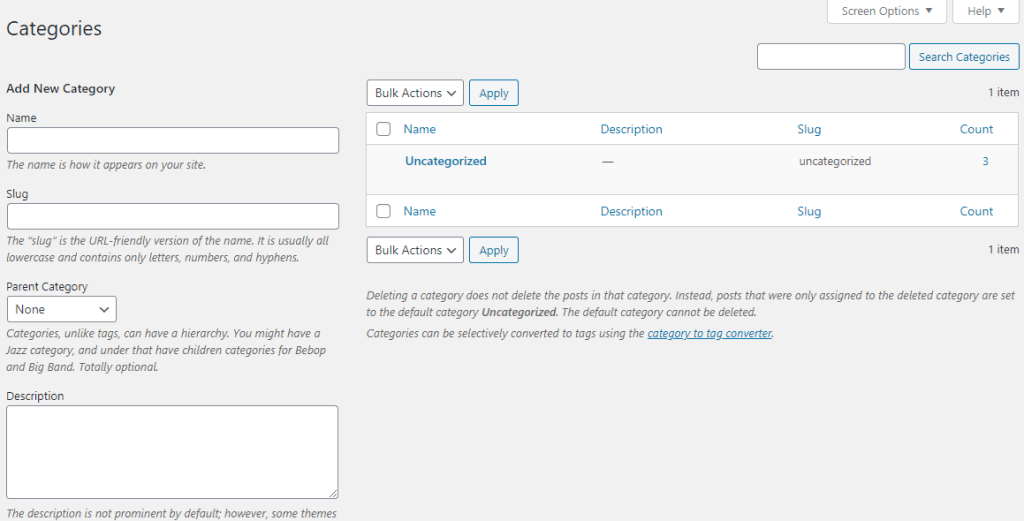
The "Uncategorized" category is created by WordPress. This is a default category, which is required and cannot be deleted. You will be able to rename it or set up another default category, but there should always be one category serving as a such. All posts you are adding that are not assigned to a specific category will be automatically assigned to the default category.
To better explain the hierarchical order of categories, we will give you a simple example and will stick to it while showing you how to create your categories and subcategories. Let's assume you are running a Health and Fitness oriented blog. It will be natural to have a "Workouts" category. Under it, you may nest "Full Body Workouts", "Upper Body Workouts", "Abs Workouts", etc. "Workouts" will be the parent category, while the rest of them will be the child categories (subcategories).
To create a new category, you will have to specify the details required in the “Add New Category” form.

When you enter all required details, please click on the "Add New Category" button to finalize its creation. With this done, your new category is added and ready to be assigned to your posts. Detailed instructions on this matter, you can find in our guide on How to create new Blog Posts in WordPress.
The process of creating subcategories is pretty much the same, with one significant difference.
You will again need to specify the "Name", "Slug", and "Description" in the same manner as explained earlier. However, this time from the "Parent Category" dropdown, you will have to select the actual parent category under which this subcategory should be nested. In our case, this would be the "Workouts" category we have just created.

When ready, click on the "Add New Category" to create your subcategory.
Now that both categories are created, you can see them listed in the table on the right side of the page. All the essential category details are shown in the corresponding rows - name, description, slug, and count, which indicates how many posts are currently assigned to this category.
As you can see, there is a hyphen (-) in front of the subcategory. It indicated it is nested one level below the parent category.

If, for example, there is another category nested under the subcategory (in our case "Full Body Workouts"), it will be two levels below, i.e., it will be indicated with two hyphens (--). This is done with consideration to efficiently managing the hierarchical order of your categories.
Congratulations! At this point, you have learned how to add your categories. Now you will be able to easily assign your posts to the proper category and effectively organize your website content. We hope this information was useful to you and you will take great advantage of your new handy skills.

Sebahat is a young and bright woman who has become an invaluable part of our team. She started as a Customer Care Representative, mastering that role and, along the way, growing into a tech-savvy individual who is well acquainted with every support layer of the company. Driven by her aim to improve our customers’ experience constantly, she is committed to enhancing the extraordinary support we deliver.
Learn more about Wordpress in the other tutorials that we have: