
WordPress Widgets are one of those fantastic components that make website development look like a child's play. They are mostly used for implementing different functionalities such as Calendars, Posts Archives, Menus, Contact forms, to name a few.
In the WordPress Administrative Dashboard, they are represented as movable blocks that you can place in different widget-ready areas, such as Headers, Footers, Sidebars, or even directly in the created Posts or Pages.
Typically, WordPress comes with a set of default Widgets. However, many additionally installed plugins or themes come with extra sets of widgets you can configure for your website. This system is one of the most proficient in terms of managing different functionalities and, most importantly, their position on the overall page structure.
In this tutorial, we will be focused on editing and removing existing Widgets from your web pages, rather than adding them. This is a topic, which is reviewed in detail in our What is a WordPress Widget and how to add a new Widget guide. Therefore, if you have missed it, we would like to encourage you to take a moment and check it out.
First off, we will need you to log into your WordPress Admin Dashboard. You can do that by accessing your domain followed by "/wp-admin", i.e., "yourdomain.com/wp-admin", where "yourdomain.com" stands for your actual domain name.
Once logged, please navigate through the left-hand side menu bar to Appearance > Widgets.

Upon doing that, you will be redirected to the "Widgets" management section, where you will be able to remove and reorganize your widgets.
At this point, we expect you to be well familiar with the structure of the "Widgets" page. Briefly explained, the left section contains all widgets currently available within your WordPress installation, whereas the right one presents the widget-ready areas supported by your theme, and all widgets currently added to each of them.

If you need further clarification, please refer to the tutorial mentioned in the Introduction section of this guide where you will find a comprehensive overview of the "Widgets" page.
We do believe that from time to time, you would want to reorganize the widgets added to your website pages or adjust their settings.
As we previously mentioned, each widget is presented as a movable block that you can drag-and-drop in the desired widget-ready area. You can rearrange the widgets and control their position within the scope of the corresponding widget area again by dragging and dropping them.
Each widget-area panel includes an arrow icon next to its title, which indicates whether the list of widgets is expanded or collapsed. To list all widgets currently added to this particular area, you need to ensure the arrow points upwards.
Once you find the widget you wish to modify, you simply need to click on it to list all its settings.

As you can see from the screenshot example above, depending on the widget, the settings you will be provided with differ. The title is a standard element for every widget, and it represents it on the website frontend.
Once you perform the desired changes, make sure to click on the "Save" button to apply them.
When you are ready, we will recommend you to go ahead and test if the widgets appear as expected on your website frontend.
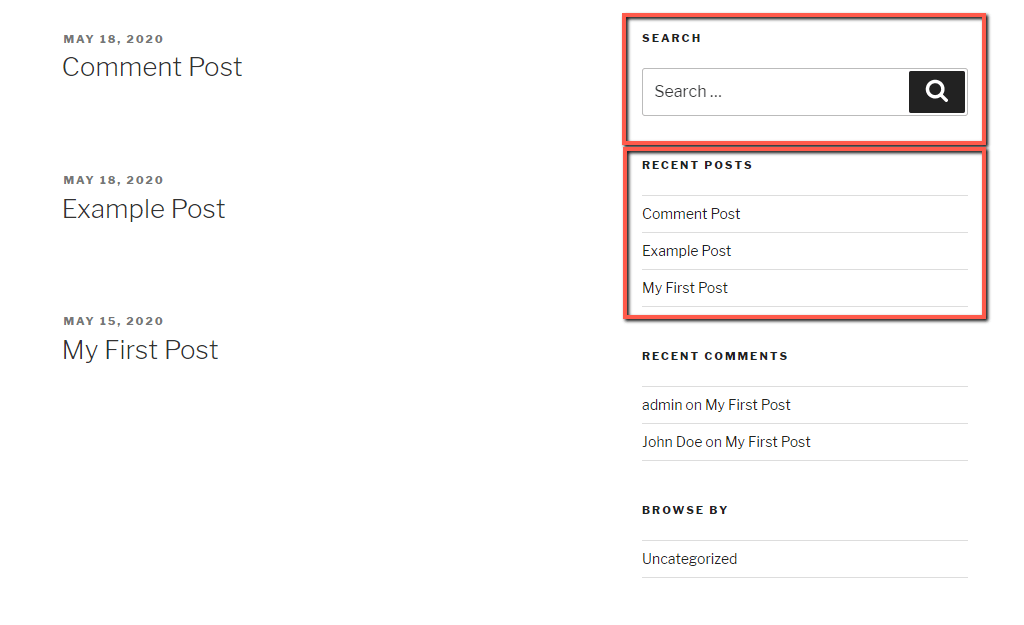
Here is the result of our Sidebar widgets configuration on the frontend. In case you are not pleased with your arrangement, you have to go back and adjust the widgets in the same manner.
Considering the fact websites are dynamic, and the trends are constantly changing, you might come to a point when you want to remove altogether given widgets from your webpages.
Generally, there are two ways of excluding widgets from your pages, and they are both as simple as adding them. The primary difference between the methods is that the first one resets all widget customizations made by you upon removing it. In contrast, the second allows you to remove the widget but keep the changes you have applied to it.
In case you want to remove the widget and reset it to the default state, you need to locate the widget in the widget-ready area panel. Afterward, you have to expand it and then to click on the “Delete” link.

With this done, the widget will be removed from the corresponding widget area, and it will be reverted to its initial state. You can add it again anytime in the future and configure it as desired.
Some WordPress widgets are very simple and do not have many settings, while others have various options.
If you want to remove the widget but keep the customizations you have made, you have to stick to this method.
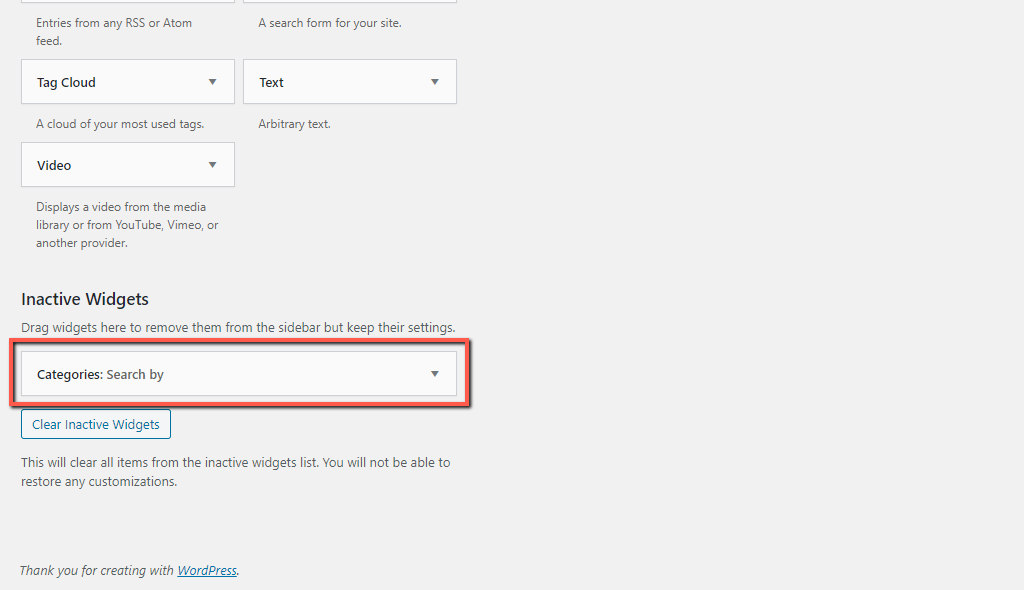
To do so, you have to locate the intended widget within the panel you want to remove it from and drag-and-drop it within the “Inactive Widgets” section located at the bottom left corner of the page. Once you drag the widget to the area mentioned above, a stamped panel will appear indicating the exact spot where you are supposed to drop it.

Once you see the widget listed under the "Inactive Widgets" section, it will mean you have managed to remove it successfully.
Please remember that if you want to use it with its current settings, you have to drag it back from the "Inactive Widgets" section. If you add the widget from the "Available Widgets" section, it will be with its base settings.
This is all there is to know concerning the process of editing and removing widgets from your web pages. Now we expect you to be more confident in your knowledge of managing WordPress widgets. We hope this information was useful to you, and you have managed to follow our instructions with ease.

Sebahat is a young and bright woman who has become an invaluable part of our team. She started as a Customer Care Representative, mastering that role and, along the way, growing into a tech-savvy individual who is well acquainted with every support layer of the company. Driven by her aim to improve our customers’ experience constantly, she is committed to enhancing the extraordinary support we deliver.
Learn more about Wordpress in the other tutorials that we have:
