
Learn Wordpress
The header image of your website is the primary thing your visitors will pay attention to. Therefore, configuring the right image is crucial for the impression you will leave.
WordPress offers thousands of beautiful visual themes and plugins which you can use to do that, but we believe you will rather using your custom image. In this tutorial, we will guide you through the steps you need to take to properly configure a new header image.
For a start, we will need you to log into your WordPress Admin Dashboard. You can do that by accessing your domain followed by "/wp-admin", i.e., "yourdomain.com/wp-admin", where "yourdomain.com" stands for your actual domain name.
Once logged, please navigate through the left-hand side menu bar to Appearance > Header.

This action will redirect you straight to the header customization page within your Theme Customizer.
Within the Header Customization area, you will be able to customize different aspects of the header area of your website. You can do that either by selecting the pencil icon corresponding to each of the elements or through the options on the left menu.
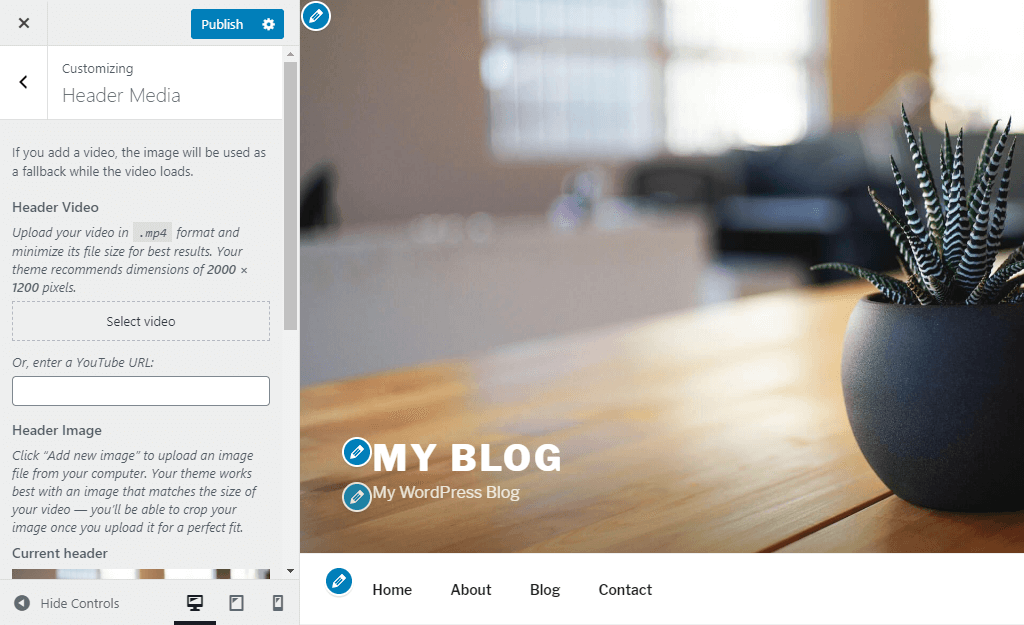
There are several options you can take advantage of when developing the header of your website. We are going to review all of them in order to provide you with comprehensive information.
We are living in an age where media content like videos is constantly being consumed by the average visitor. The majority of people will not actually bother themselves reading long texts when they can just watch something that will give them the same information.
WordPress allows you to replace the header image with a video. Right below the "Customizing Header Media", you should see a "Header video" section. There you are able to upload a video through the "Select video" button. You can also embed a video from YouTube by entering YouTube URL.

Adding video material to the header area of your WordPress website can be a true inspiration for the visitors. It can easily magnify the true slogan of your website and prove that it is worth spending time checking the other pages of your website. The videos are one of the powerful digital weapons you can ever use. They can be used for the promotion of any blog, site, product, service, person, company, or something else on the Internet.
Please, bear in mind that it is recommended to use the format and the pixel dimensions shown above the field for the URL. While videos have their advantages, you should pay close attention to the size of the video file as configuring a large video may significantly impact the loading speed of your website and slow it down.
If you would like to stick to a header image, you will find the related settings beneath the "Header Image" section in the left-hand menu.
The first two options you will see are:
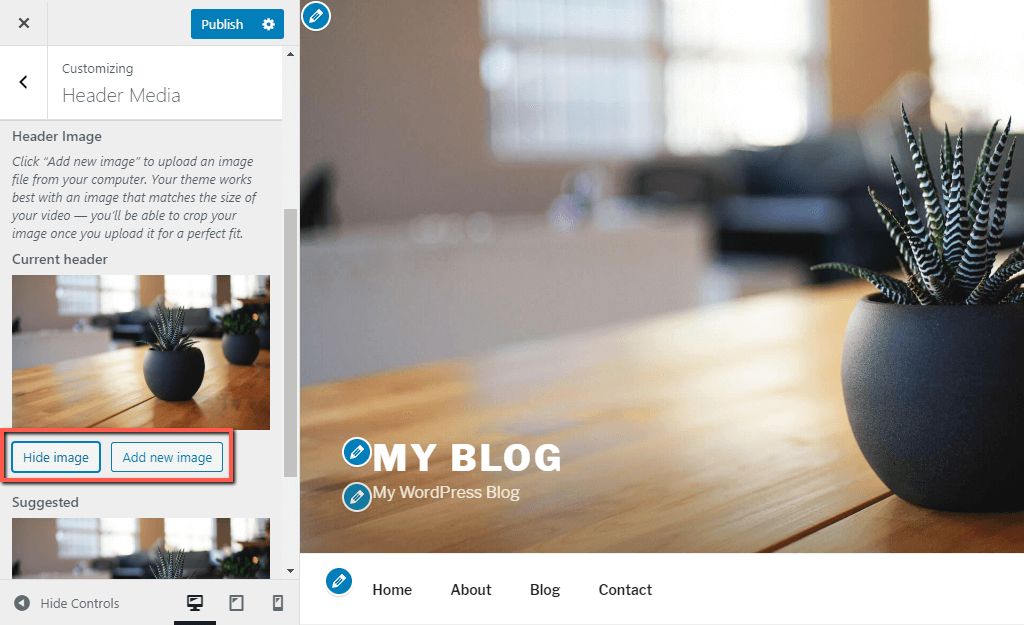
Upon clicking on the "Add New Image" button, a new dialog will appear where you can click on the "Select Files" button to choose the desired files from your local computer or directly drag and drop them into the empty area.

In case you want to choose the image from the available media file in your WordPress instance, please switch to the "Media Library" tab. By doing that, you will be allowed to select any image uploaded to your WordPress gallery.

After the image is selected, please click on the "Select and Crop" button at the bottom of the window.
Please, bear in mind, the default visual theme works best with an image that has the following image dimensions: 2000 by 1200 pixels. Therefore, it is advised to stick to the recommended dimensions.
You can use your favorite graphical software or any available online tool to format your images. You may find the following two tools useful for the purpose:
If required, you may crop the image. Depending on the case, please click either on the "Crop Image" or "Skip Cropping" button.

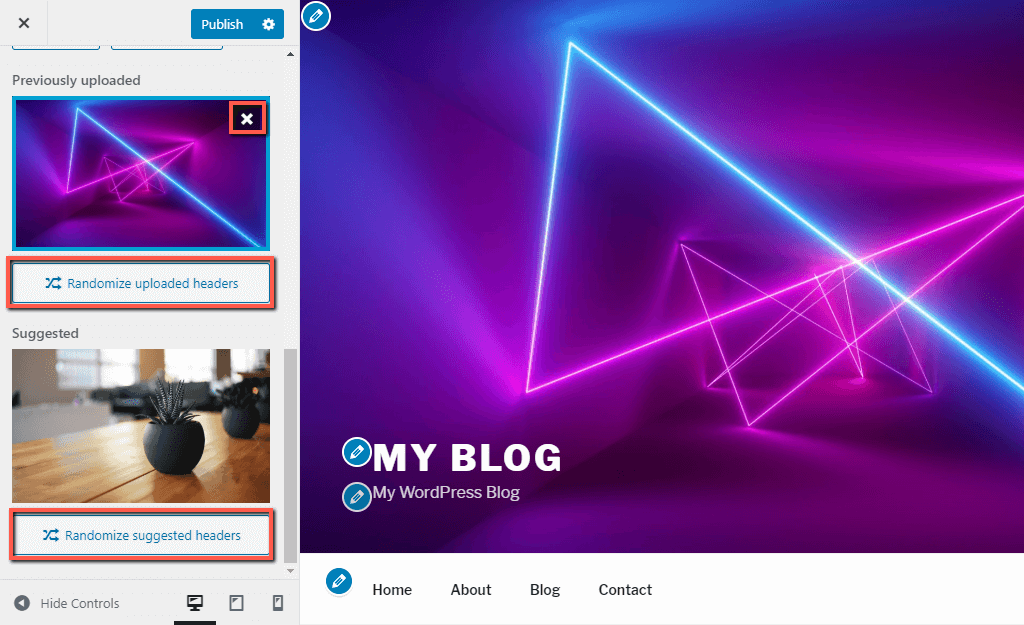
Once this is done, WordPress will instantly apply the new image in the header. You will also find it under the "Previously Uploaded" list along with the rest of the header images.
When you hover over a particular image, you will see an "X" symbol in the top right corner. If this image is no longer wanted as a header image, you may click on it to remove it.
In case you decide to add multiple header images, WordPress allows you to rotate them automatically. You can achieve that by simply clicking on the "Randomize uploaded headers" or "Randomize suggested headers" based on which images exactly you would like to be rotated.
At the bottom right corner of the left menu, you will find three icons representing different devices. They are intended to review the appearance of your web page on the corresponding device. We would recommend you always take advantage of them when performing visual changes on your website.
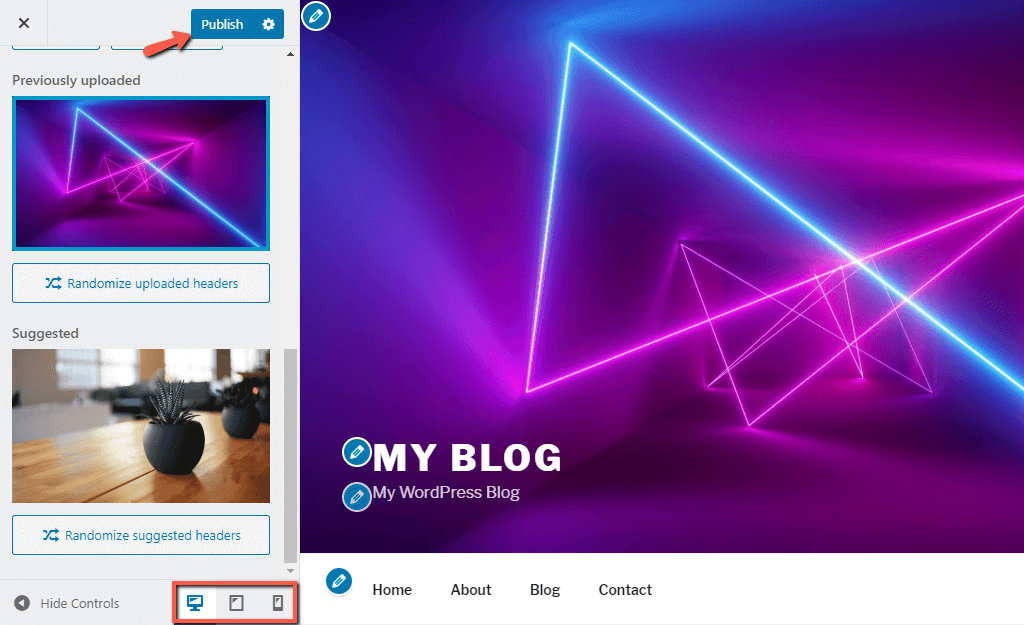
Once you apply all the desired changes, please do not forget to click on the "Publish" button at the very top of the left-hand menu, to successfully apply them.
Congratulations! You just learned how to edit the header of your WordPress based. We sincerely hope you will now manage to leave a long-lasting impression on your visitors.

Sebahat is a young and bright woman who has become an invaluable part of our team. She started as a Customer Care Representative, mastering that role and, along the way, growing into a tech-savvy individual who is well acquainted with every support layer of the company. Driven by her aim to improve our customers’ experience constantly, she is committed to enhancing the extraordinary support we deliver.
Learn more about Wordpress in the other tutorials that we have: