
Product Options are used for specifying additional information and creating different variations of a particular product. In this tutorial, we will step-by-step guide you on how to set up and configure your custom product options in OpenCart 3. Once configured and assigned to a specific product they will be displayed on the product page under the Available Options” section allowing your customers to select the desired version of the product.
As usual, the first step we will need you to take is to log in to your OpenCart Admin Dashboard. Once you are in, please navigate through the left menu bar to Catalog > Options.

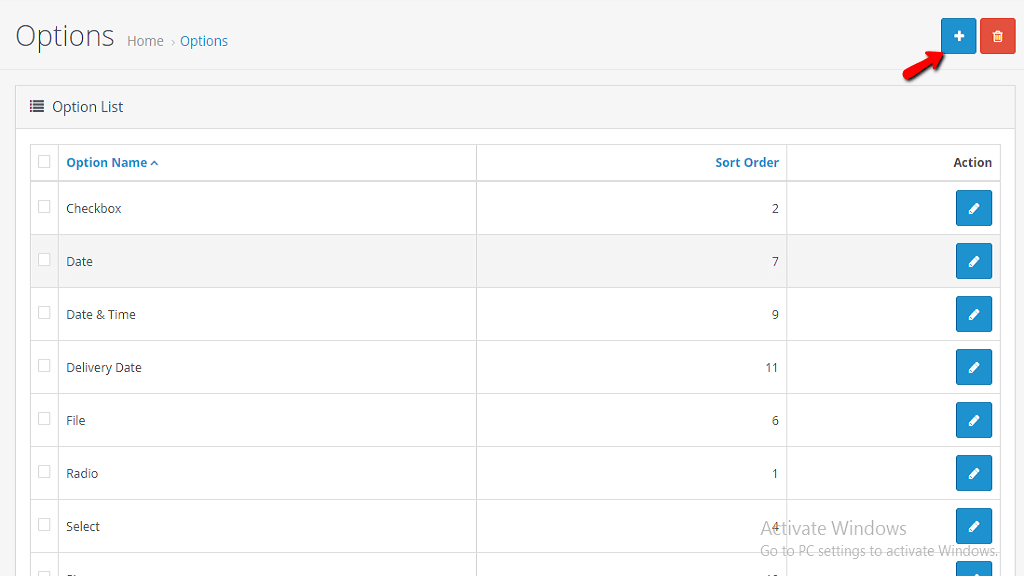
On the “Options” page, you will see listed all the default option types you can choose among. You will be able to edit and configure them depending on your store needs, as well as add your custom option types.
In order to create a new option, please click on the blue “Add New” button located at the upper-right corner of the page.
Once this is done, you will be presented with the “Add Option” screen where you will need to configure the option specifications. For the purpose of this tutorial, we will be creating a “Color” option and we will assign a couple of variations our customers will be able to choose from.
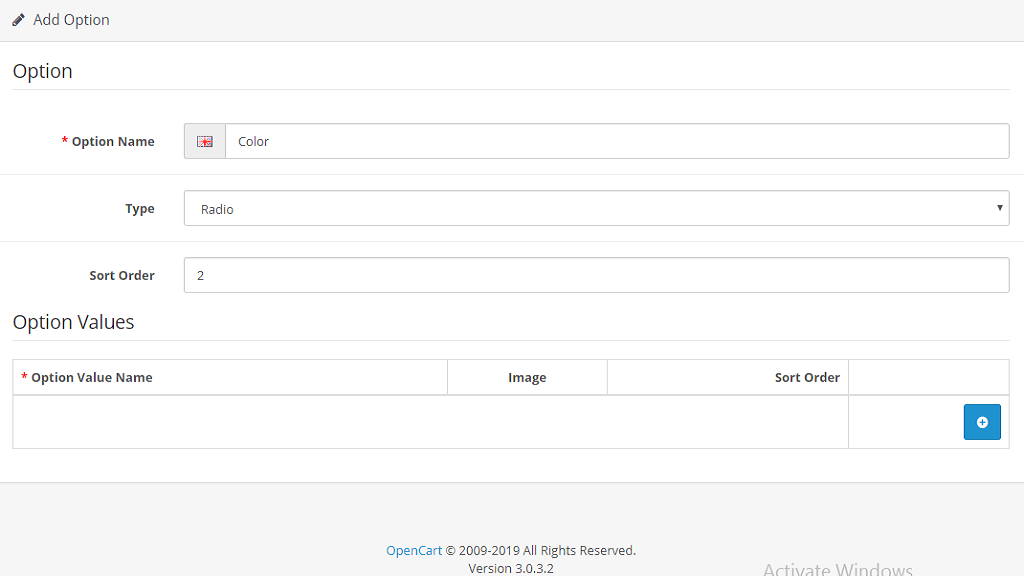
First thing first, under the “Option Name” you will need to determine the actual title of the option as it will be displayed on the storefront. Then, from the “Type” dropdown menu you will have to select the option type. OpenCart comes with default option types among which you can select, such as checkboxes, radio buttons, dropdowns, etc. Afterward, you will need to enter the “Sort Order” value which will determine the position of the option compared to the rest of the options displayed on the product page. Note that as low the value entered is, higher this option will be displayed.
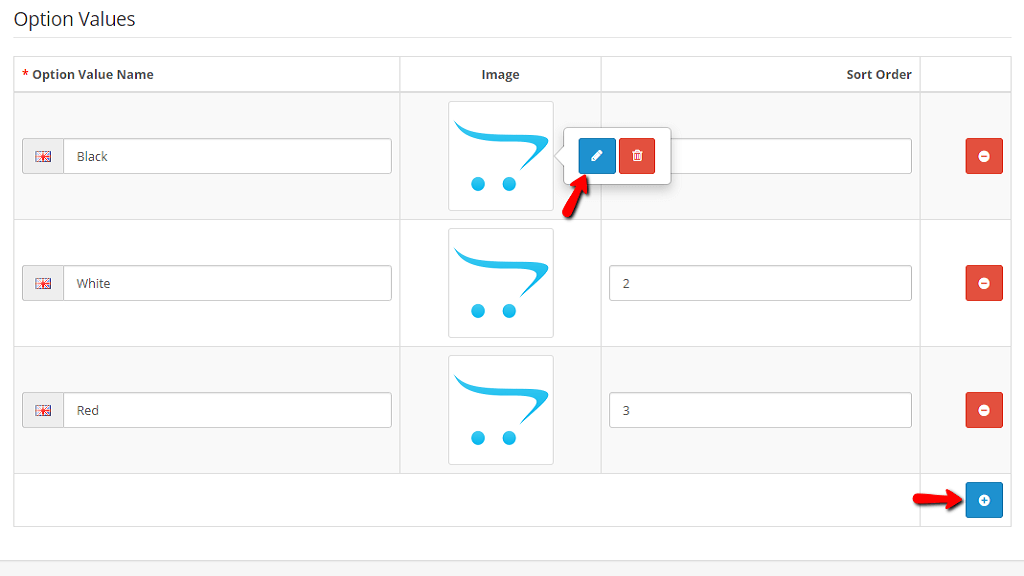
When this is done, you will need to enter the required option values. You will be able to add as many values as needed by clicking on the blue “Add Option Value” button. Then you will be presented with a new line where you will need to specify the name of the option value and the sort order. Similarly to the value itself, here the “Sort Order” determines the position of the option value compared to the rest of the values. Last but not least, you will be able to configure an individual image for each value option by clicking on the default OpenCart logo and hitting on the blue “Edit” button. As we are configuring a color option, this could be really useful as we will be able to demonstrate the visual look of the item in different colors.
Whenever you are ready, please do not forget to click on the “Save” button located at the top right corner in order to successfully create your new option.

Well done! Now your new option is successfully created and you will be able to assign it to your products while creating or editing them. Even though creating Product Option is quite simple they offer great flexibility in managing your product portfolio. We hope you have found the information provided in this tutorial useful and our instructions easy to follow. In case you have any additional questions you are always welcome to contact our Support Team.

Sebahat is a young and bright woman who has become an invaluable part of our team. She started as a Customer Care Representative, mastering that role and, along the way, growing into a tech-savvy individual who is well acquainted with every support layer of the company. Driven by her aim to improve our customers’ experience constantly, she is committed to enhancing the extraordinary support we deliver.
Learn more about Opencart 3 in the other tutorials that we have:
