
The “Recurring Profiles” module in OpenCart allows you to configure subscription payments and automatically charge your customers on an initially defined recurring basis. The time frame is customizable, therefore you will be able to configure the recurring period depending on your requirements. The great advantage of the “Recurring Profiles” functionality is that it provides store owners with the possibility of selling subscription products, offer installments or memberships and gaining more control over payments. In this tutorial, we will step-by-step guide you on how to set up the Recurring Profiles and we will clarify all the details concerning the process.
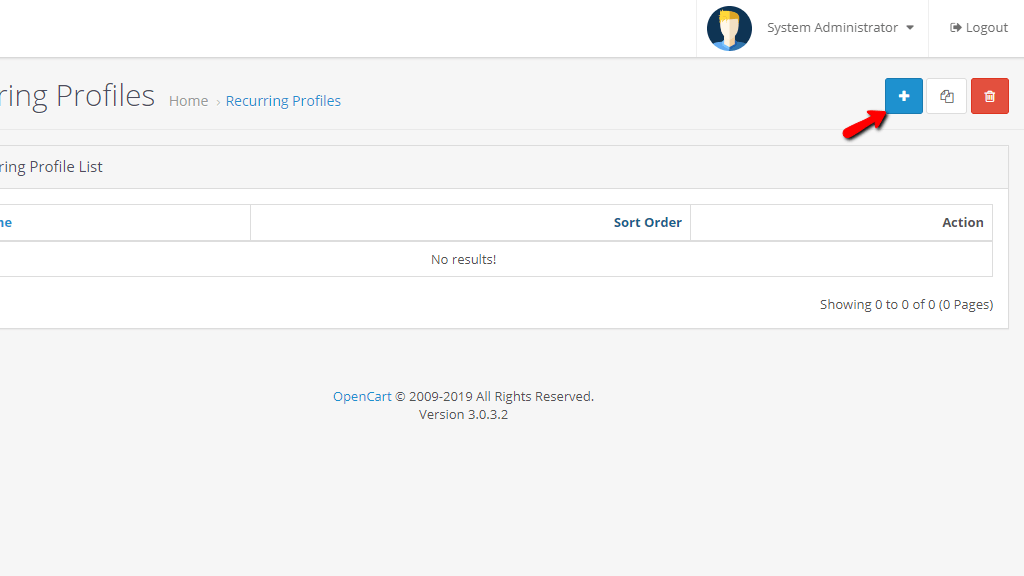
The very first step we will need you to take is to log in to your OpenCart Admin Dashboard and navigate through the left menu bar to Catalog > Recurring Profiles.

This is the page where you will be creating your custom recurring profiles and manage them in the future.
In order to create a new recurring profile, please click on the blue “Add New” button located at the upper-right corner of the page.
Once you do that, you will be presented with the “Add Recurring Profile” page where you will need to specify the required details.
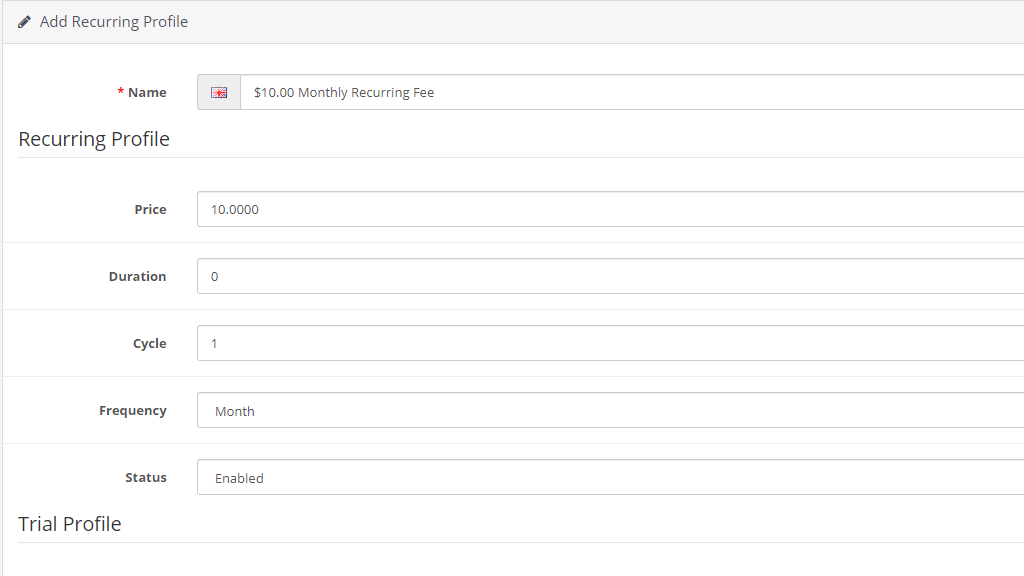
First thing first, you will need to define the title of the Recurring and Trial Profiles in the “Name” field. Note that this name will represent the recurring option and it will be displayed to your customers on the product page under the “Payment Profile” section, therefore please make sure to choose a clear and easily understandable one in order to avoid any possible confusion.
Under the “Recurring Profile” section, please specify the following details:
Once you are ready, please scroll down to the “Trial Profile” section which is intended for products and services for which you would like to offer a trial (free or paid) for a certain period. An important thing to note is that the recurring profile will be activated automatically after the trial period is over.
As you will notice the fields under this section are the same as the under the previous one, therefore you should configure them in the same manner.
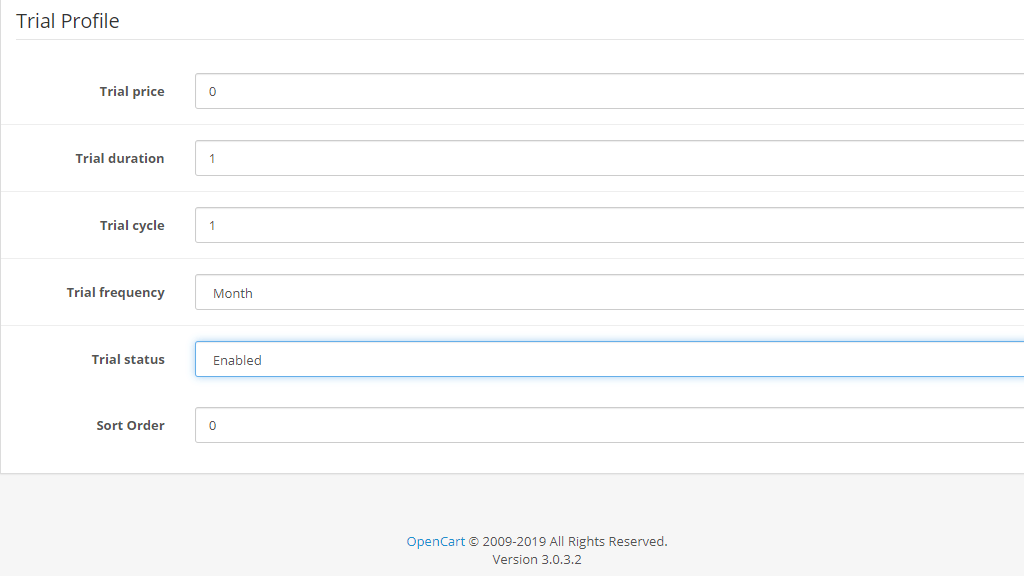
In our example, we have set the “Trial price” to “0” which means we will be offering a free trial. The “Trial duration” and “Trial Cycle” are set to “1” and the “Trial frequency” is set to “month” which means we will offer the trial for one month in total. Then the “Trial Status” is set to “Enabled” to activate it. If you do not want to offer a trial, simply keep the status set to “Disabled”.
Once you confirm everything is configured as you desire, please click on the blue “Save” button at the top of the page and your new profile will be created.

You will be able to create as many Recurring Profiles as you need and assign them to the desired product(s) while you are creating or editing them.
Well done! Now you have learned how to configure subscriptions on your Online Store and you have gained more control over the payment processed on it. We hope you have found this tutorial useful and our instructions easy to follow. In case you require any further assistance, please do not hesitate to contact our Support Team.

Sebahat is a young and bright woman who has become an invaluable part of our team. She started as a Customer Care Representative, mastering that role and, along the way, growing into a tech-savvy individual who is well acquainted with every support layer of the company. Driven by her aim to improve our customers’ experience constantly, she is committed to enhancing the extraordinary support we deliver.
Learn more about Opencart 3 in the other tutorials that we have:
