
One of the most basic computer operations ever is to manage the files stored on a typical computer device. Every Operating System offers different tools to achieve basic operations on its file system and the most common approaches of managing files are either via the command line of the OS or via some sort of graphic interface. cPanel is no different than a standard OS in terms of providing a convenient way of organizing the files of the user’s Web Hosting Account. In the following lines of this tutorial, we will review in detail what the cPanel File Manager feature is and how to use it in order to better organize the files of your Web Hosting Account.
In order to use any of the cPanel features, you will first have to log in to the cPanel service. For that purpose, we have created another tutorial on the matter - "How to access cPanel", so please check it out in case you are feeling lost.
Once logged into the cPanel service, you will see several sections with different icons. We will explain all those in the next tutorials of our cPanel Tutorial Series, however for achieving the goal of this tutorial, you will have to click on the “File Manager” feature:

When clicked the feature will redirect you to a brand new page where further file management actions can be taken.
To better understand how the “File Manager” feature works, first, you have to be aware of all the functionalities it offers.
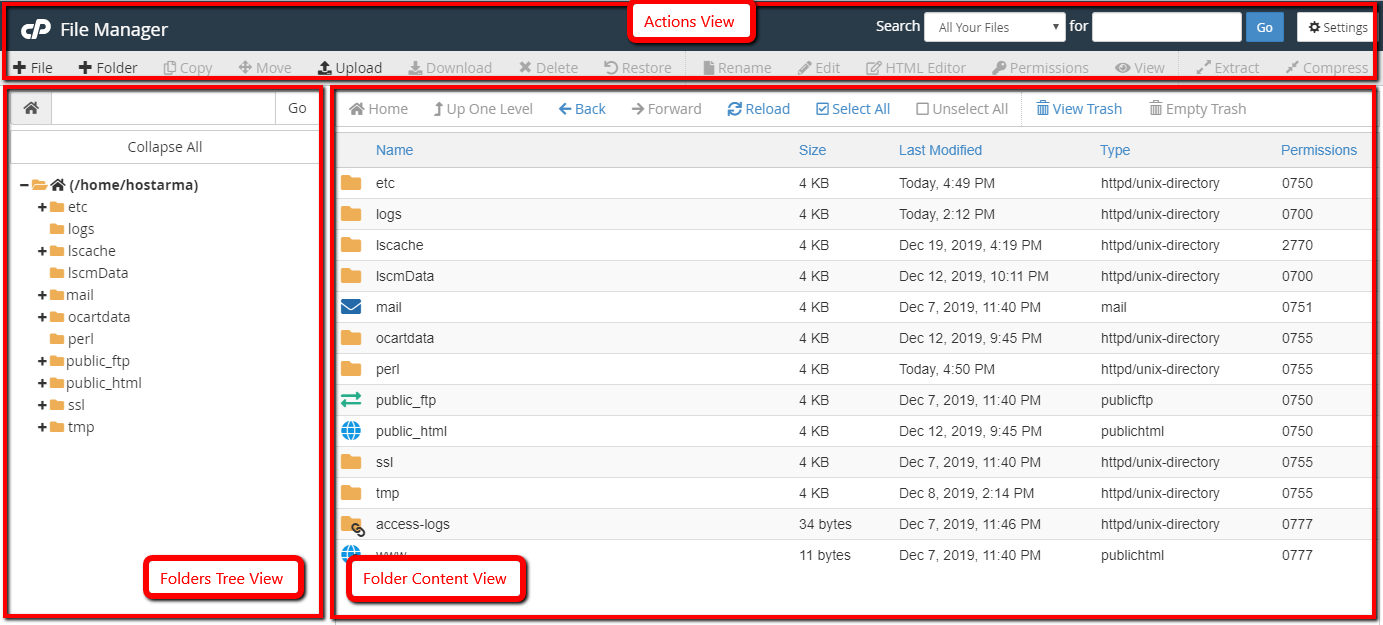
When you access the “File Manager” feature you will be presented with a page which can be logically separated on 3 sections:
By understanding the interface of the “File Manager” feature you will better navigate and take full advantage of the functionalities this feature have to offer!
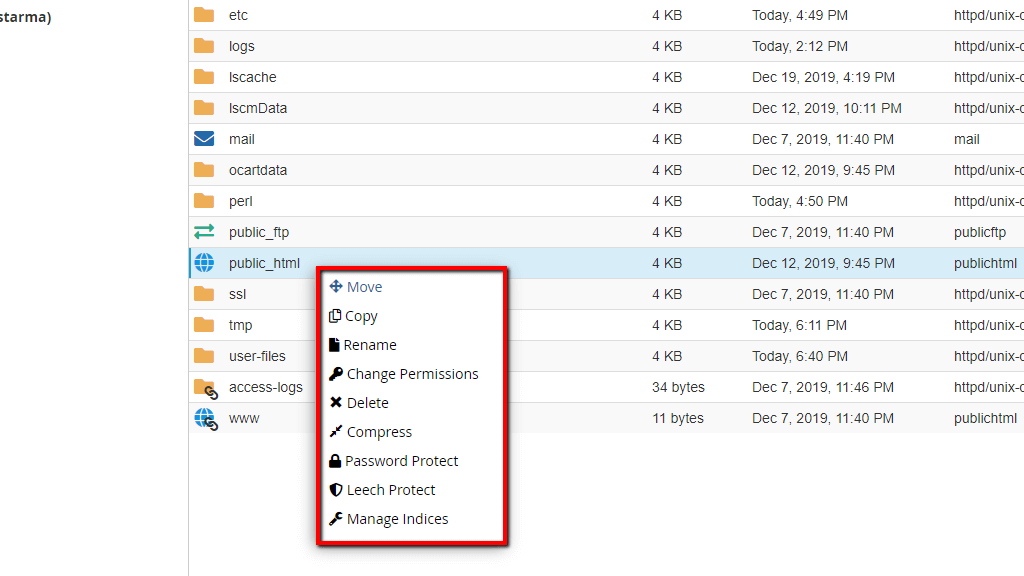
Now that you know how the “File Manager” feature looks, let’s check out each of the functionalities it has to offer. Please note that all features that we are going to describe are available both as separate buttons in the Actions View section as well as a drop-down menu for each selected file.
Therefore it is up to you to choose which method will be more convenient for you.
To be able to create a new File or Folder, first, you will need to ensure that you are located in the correct folder. A typical file structure for every Web Hosting account consists of:
Now that you are well aware of what folders you can find in your Web Hosting Account, lets create a new Folder called “user-files” in the root of your account. To do that, please click on the “New Folder” button located in the “Actions View” section.
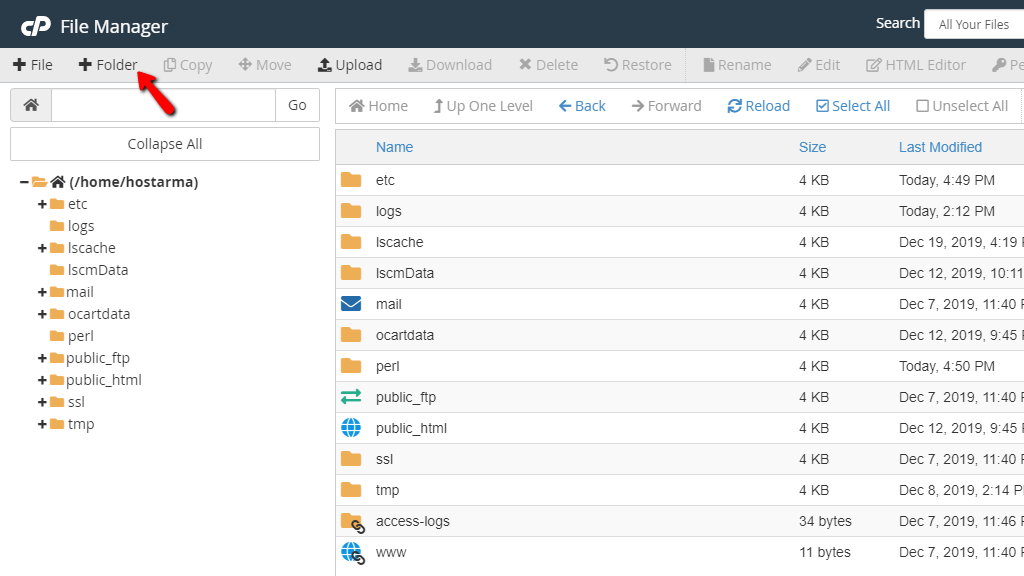
Clicking on the button will bring up a new configuration window called “New Folder”, where you will need to input the actual name of the folder you would like to create. Additional configuration is available here - the location of the new folder. Please note that this feature requires that you enter the relative path to the folder if you would like to have the same created in another location, different than the one you are currently located (displayed in the Folder Content View section).

Finally, please click on the “Create New Folder” button in order for the folder to be created.
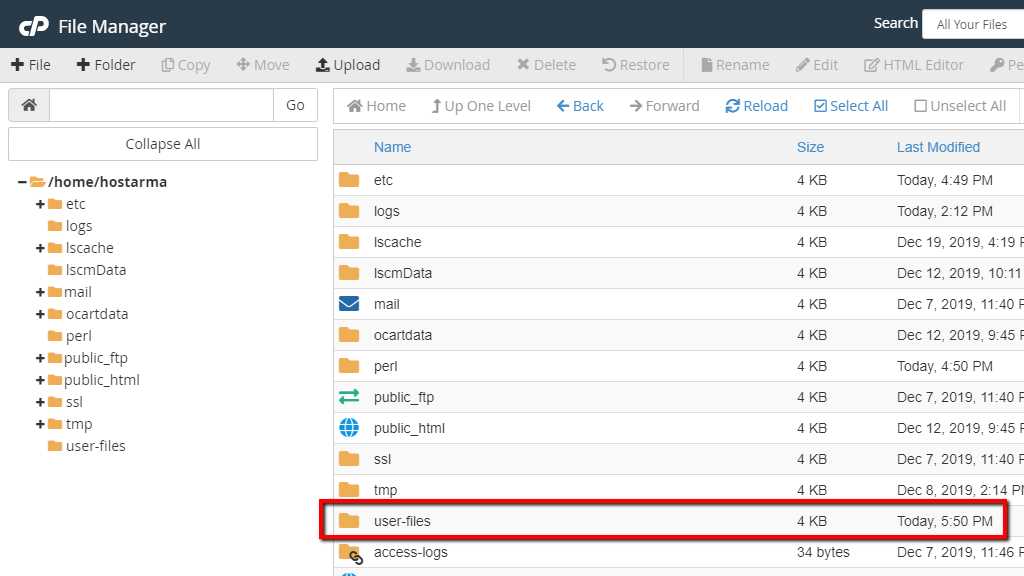
The folder will be then displayed in the Folder Content View section.
Now, let’s create a new file in the newly created folder. To do that, please access the folder by double-clicking on the same within the Folder Content View section. This will show you the content of the folder which in our case is empty.

Please note also, that cPanel will highlight the name of the folder in the Folders Tree View section so you can be well aware in which folder you are currently located.
To create a new file, please click on the “New File” button from the Actions View section.

Again, you will be presented with a new window that will require you to enter the name of the newly created file and of course if you need to configure its relative to the home folder for your account path. You will probably notice that the second field for the relative path to the file is already filled with the name of the folder you are currently located at. So, if the file should be created in the current folder then leave it as it is or if you would like to create it in some other folder, then please specify the relative to your home folder path in that field.
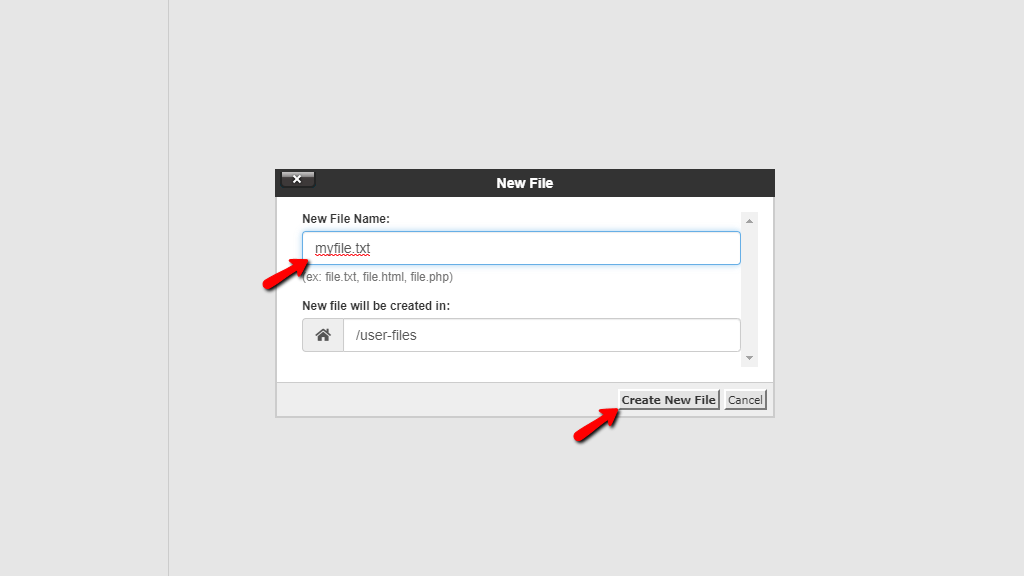
Clicking on the “Create New File” button will create the file you have specified.

Please note that in our example we have also specified a file extension (.txt), however, this is not required since the UNIX like operating system will consider this file as plain-text content type.
One of probably the best functionalities the “File Manager” feature offers is the option to Upload or Download files. Let’s see how that can be achieved.
To upload a new file you will have to make sure that the folder in which your file should be uploaded is selected and visualized in the Folder Content View section. For the purpose of this tutorial, we will remain in the newly created “user-files” folder.
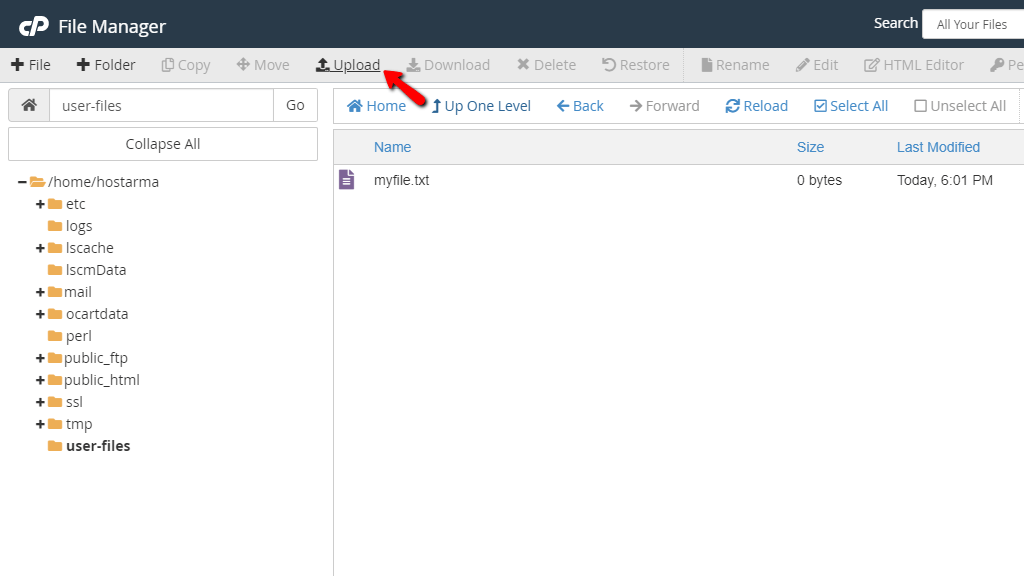
By clicking on the “Upload” button you will be redirected to a new page where you will be able to select or drag/drop the file from your local computer.
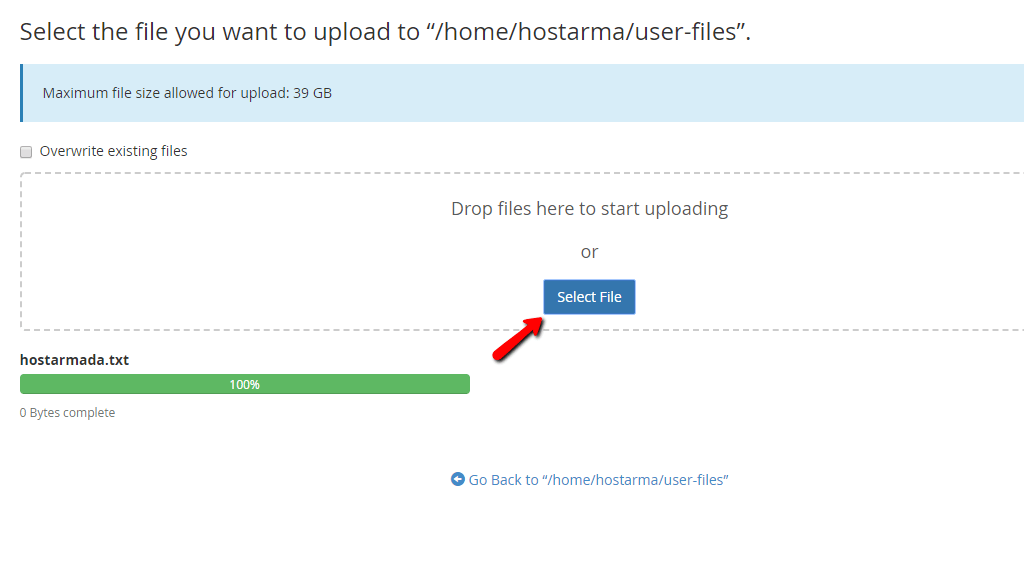
Once the file is selected it will automatically upload and for tracking the upload progress you will be provided with a progress bar right below the uploading interface.
Please note, that you can actually select multiple files when uploading and for each one of these an upload progress bar will be displayed.
Finally, if you click on the “Go Back to ....” link right below the files list, you will be returned to the folder where the files should have been uploaded and of course, you should see the file already in that folder.
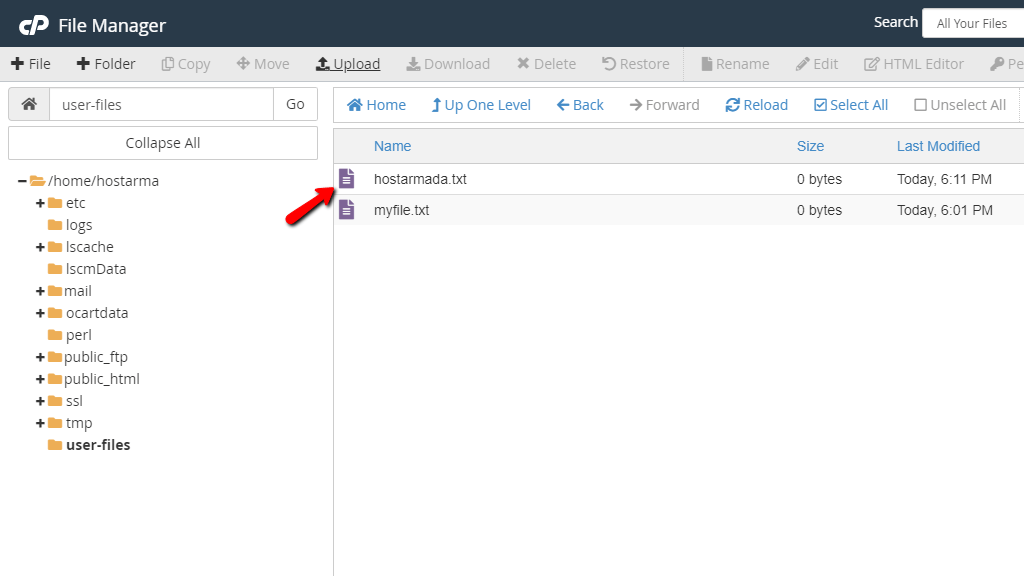
Respectively, in case you have uploaded multiple files, then all of those should be displayed as well.
Downloading a file is even simpler! The only two actions you will need to perform is to select the file from the Folder Content View section and then use the “Download” button from the Actions View section.

The file will then be downloaded in the “downloads” or any other folder that you have configured for web downloads in your Web Broser’s configuration.
To delete a file or a folder you will once again have to select the file/folder and simply use the “Delete” button located at the Actions View section.

A new window will be displayed requiring your confirmation on how the file should be deleted. The provided options are if the file should be moved to the “trash” folder of your web hosting account or if the same should be permanently deleted.
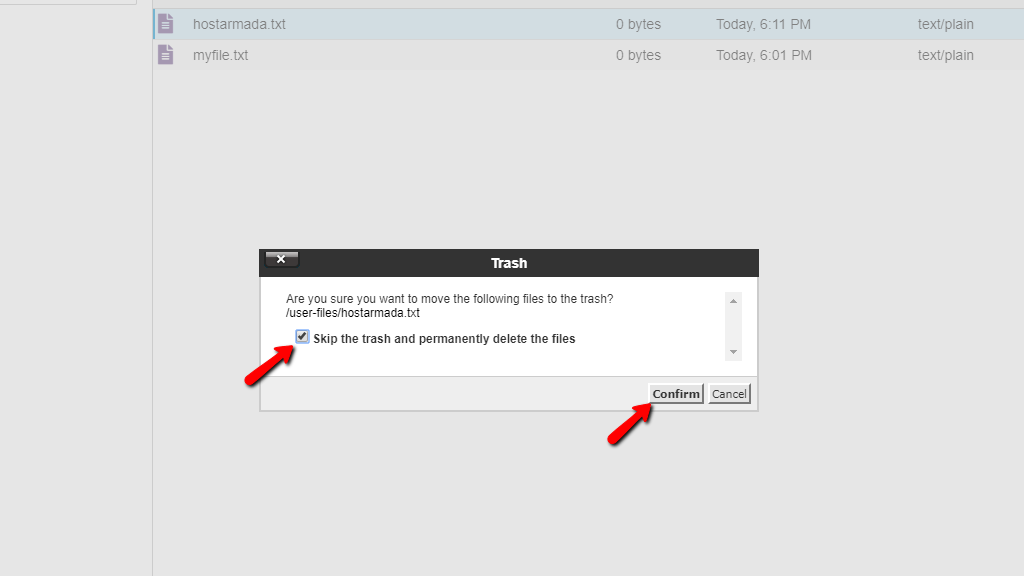
We strongly suggest that instead putting the file in the trash folder you should instead download the same and then delete it permanently in order to avoid any data-loss.
To rename a file or a folder you will have to once again select it and use the “Rename” button from the Actions View section.

You will be prompted with a new window in which you should fill the new name of the file you would like to rename.
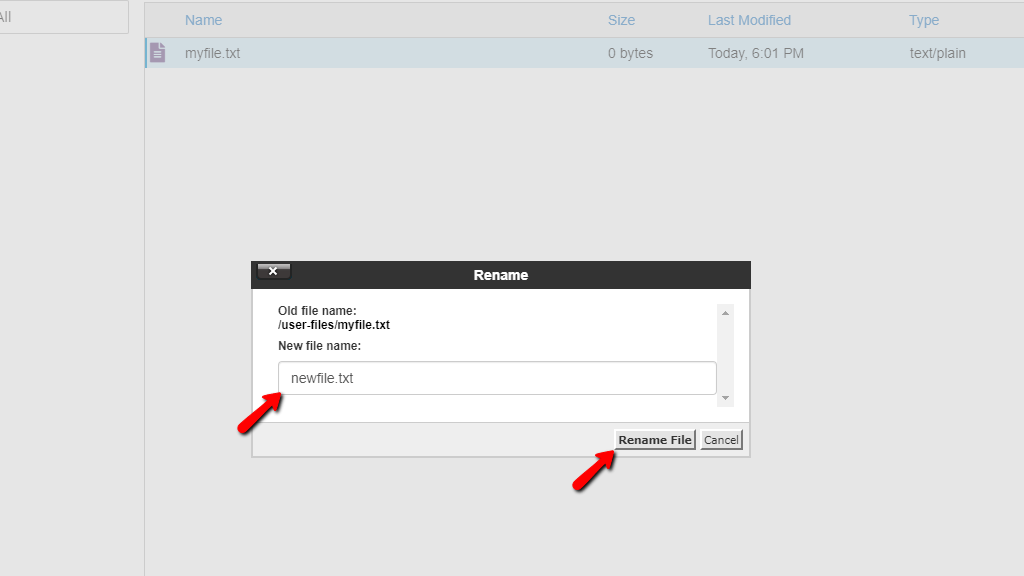
When you are ready, please click on the “Rename File” button so the file can be then renamed successfully.
Editing a file means changing what is inside the actual file itself (typically text). The cPanel File Manager feature provides a convenient text-like editor for all the available files on your cPanel account. To use the Text Editor you will need to select a file and then click on the “Edit” button located in the Actions View section.

This will bring a new window that will require you to select the file encoding.

We strongly suggest selecting the “utf-8” encoding which should be selected by default. Finally please click on the “Edit” button so you can be presented with the file editor feature.

The functionalities of the file editor are pretty much self-explanatory, so we will not cover them in this tutorial.
If the type of file you are editing is HTML, then you can also take advantage of an additional editor specifically optimized for HTML files - the HTML editor. You can locate it once again in the Actions View section right next to the “Edit” button.
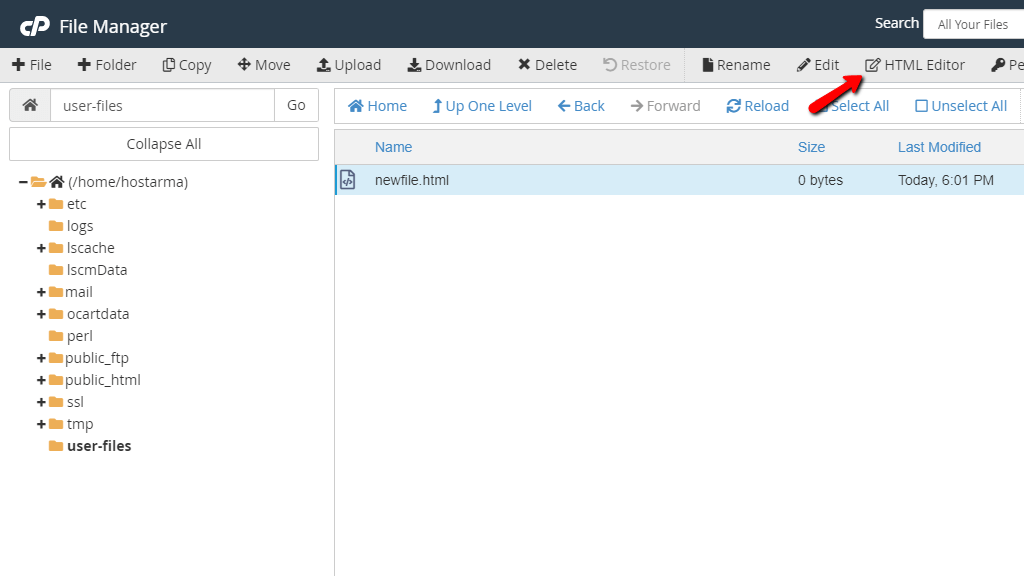
The HTML editor is actually a simple WYSIWYG type of editor that will allow you to manipulate not only the content of the file but its source code as well.
In every UNIX based Operating System, all files and folders are secured thanks to a set of security permissions. To set those, typically, a user should do that via the command line. However, thanks to the cPanel File Manager feature the permissions of a file/folder can be set using an easy-to-use permissions manager.
To view the current or set new File Permissions, please select the file/folder you would like to edit and then click on the “Permissions” button located in the Actions View section.

This will bring up the Permissions window in which you can fully manage the permissions and configure those based on your personal needs. Please keep in mind that the default permissions for files are 644 and for folders are 750.

Clicking on the “Change Permissions” button will set the new permissions for the selected file/folder.
Along with all file operations, the users are provided with the option to Compress or Extract archives. Let’s begin by creating an archive.
The File Manager feature allows you to create archives consisting of files or folders. Let’s create an archive of the previously created “user-files” folder. Since the folder is located in the home directory of the web hosting account we will select it from the Folders Tree View section.

Then we will need to locate the file or folder which we would like to archive from the Folder Content View section. When located, the folder has to be selected and then the “Compress” button should be pressed.

This will bring a new window, where you will need to configure the archive type and of course the location where the archive should be exported. We recommend that the archives should be created in the GZipped Tar type since this offers the best compression ratio. As for the location of the archive, it will be filled by default as the folder you are currently into. If you would like to have the archive created in a different folder, please specify the relative path to the folder in the corresponding field.

By clicking on the “Compress File(s)” button the archiving process will begin and once ready you will be presented with a “Compression Results” window, where all compressed files will be listed.
Extracting an archive is even simpler. To extract an archive, please select the archive and click on the “Extract” button located in the Actions View section.

The extracting will continue, with a new window asking for the location where the files should be extracted. If that location is the current folder you are in, please leave it as it is and click on the “Extract Files” button.
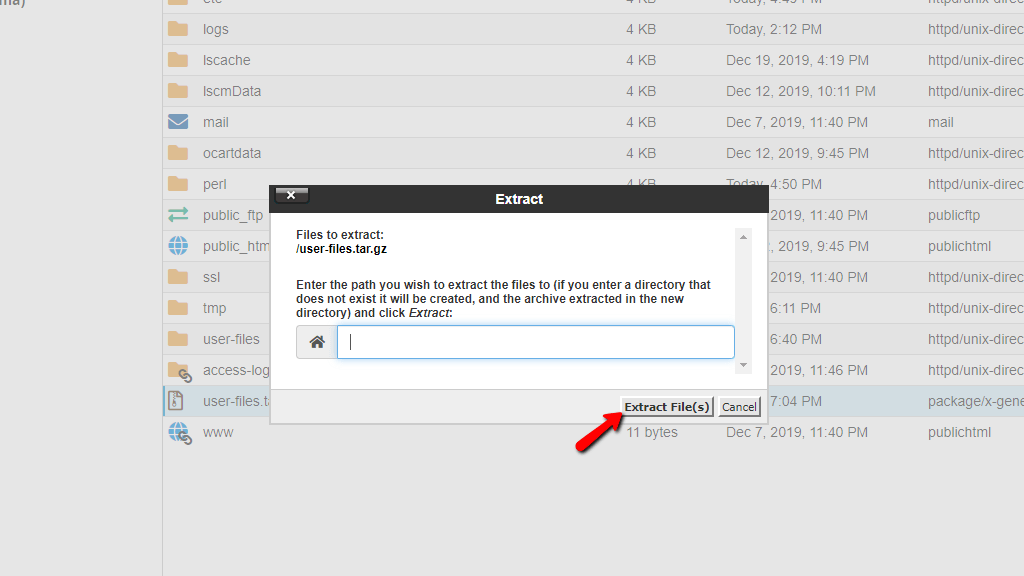
Once completed, the extraction process will display an “Extraction Results” window showing the extracted files. Please bear in mind that if you are extracting files or folders with names the same as those already existing on your Web Hosting Account, those already existing will be overwritten.
Managing the files and folders of your Web Hosting Account will always be the strong foundation, every Web Hosting Account owner has to understand and perform without any hassle. In case there is a functionality that you do not understand or you do not feel comfortable using please get in touch with our Technical Support Team and ask them anything you need to in order to achieve your File Management related goal.

Nikola is an accomplished tech-savvy extraordinaire with over six years of experience in the web hosting field. He started as a customer care representative and quickly rose the ranks to become a support supervisor and, eventually - the head of the technical department in HostArmada. His deep understanding of the client's needs, combined with his technical knowledge, makes him the perfect man to create the ideal harmony between client satisfaction and professional problem-solving. You will often find him creating helpful tutorials, articles, and blog posts that help existing customers get around.
Learn more about cPanel in the other tutorials that we have:
