
FileZilla is an open-source FTP client that allows you to connect to your web hosting account and remotely transfer, edit, and manage your web files. Because web hosting control panels usually have limitations (file size limit, folder uploads, etc.), it is always handy to work over FTP. In this tutorial, we will review the entire process of configuring the FileZilla client step-by-step. Even if you are new to FileZilla, you will be able to follow our guidance easily.
The first thing you =need to do is download and install the FileZilla client on your local computer. If you have not done that yet, please go ahead and download it from FileZilla's official website that you can directly access from here. There are two options to download: "FileZilla Client" and "FileZilla Server" - please make sure to choose the client option.
Afterward, you will need to gather the FTP details required to connect to your hosting account:
If you are a HostArmada client, you will find the required details in the welcome email containing all the necessary information about your hosting account with us. You can review the email directly from your Client Area by clicking on the email icon located at the top menu bar. If you have any difficulties finding the details, please make sure to submit a ticket request to our team, and they will gladly provide you with them.
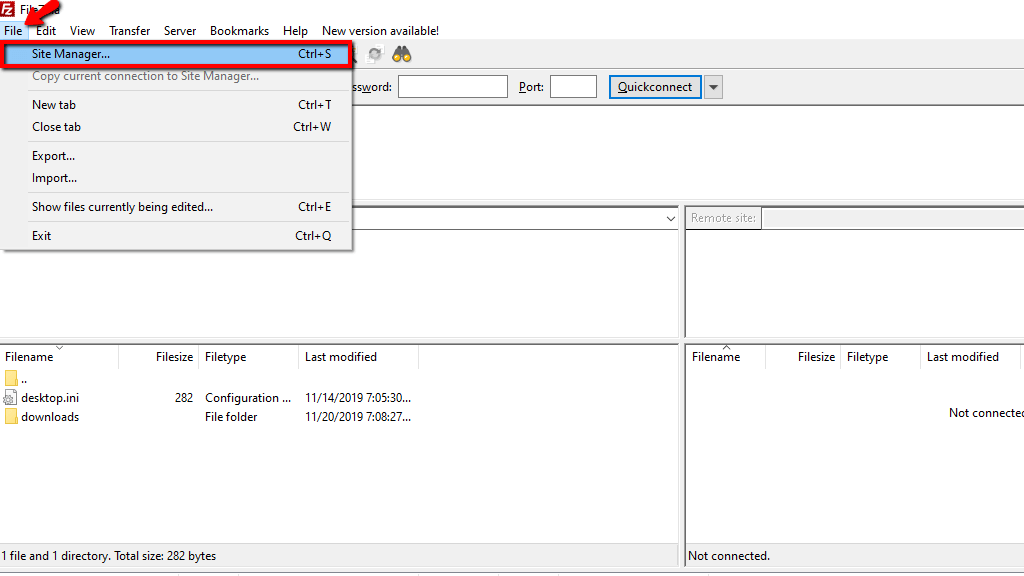
Now that you have the FileZilla Client successfully installed, please open it and click on the "File" button located at the top left corner, then select "Site Manager" from the list of options.
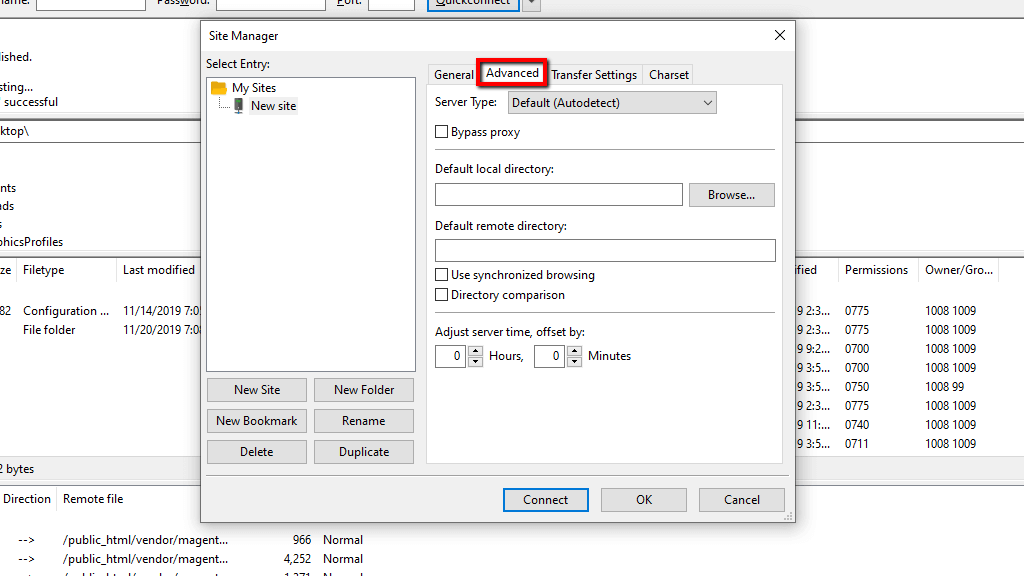
Afterward, the "Site Manager" window will show up - you will need to click on the "New Site" button. The "New Folder" button located right next to it will allow you to create separate folders and group your websites within them if needed.

Now you need to enter the required connection details under the "General" tab.

Please, specify the following:
Under the "Advanced" tab, you will be able to predefine the server type and specify the default local and remote directory paths if needed.
From the "Transfer Settings" tab, you can determine which "Transfer Mode" FileZilla will use. Please make sure to select the "Passive" mode option. It will make sure any firewall rules on the server won't block your FTP connection.

From the last "Charset" tab, you will be able to select a specific charset encoding standard if needed.

Once you are ready, please click on the "Connect" button to initiate the connection.
Please note that depending on the "Encryption" method you have selected, you might be prompt with a pop-up certificate inspection window requiring your confirmation. If this is the case, please make sure to click on the "OK" button to process further.
That is it! You have managed to establish a successful FTP connection to your web hosting account. Now your details are saved in FileZilla. By clicking on the arrow button, FileZilla will list all your websites, and you can connect with just one click anytime in the future.

If you need to disconnect from the server, please make sure to click on the "x" icon pointed at the screenshot example above.
Pretty simple - right? We hope you have managed to establish a successful connection by following our instructions. If you received any error messages during the process, please contact our Support Team for further investigation and resolution.

Nikola is an accomplished tech-savvy extraordinaire with over six years of experience in the web hosting field. He started as a customer care representative and quickly rose the ranks to become a support supervisor and, eventually - the head of the technical department in HostArmada. His deep understanding of the client's needs, combined with his technical knowledge, makes him the perfect man to create the ideal harmony between client satisfaction and professional problem-solving. You will often find him creating helpful tutorials, articles, and blog posts that help existing customers get around.
Learn more about FTP Service in the other tutorials that we have: