
Learn FTP Service
In this tutorial, we will guide you on how to upload local files to your web hosting account and how to download web files to your computer using the WinSCP client. Transferring files via WinSCP is as simple as dragging and dropping them to the desired location, therefore we believe you will manage to do it by following these simple steps.
Before we begin, we would like to mention that you are expected to have the WinSCP client already installed on your local computer and connected to your web hosting account.
If you have not done this yet, please take a moment to review our guide based on How to configure WinSCP FTP Client.
As soon as you initiate a successful connection, you will be presented with two columns listing your files. The left column will display the local files on your computer, while the right one will show the web files located in your hosting account.

At this point, you are ready to move forward to uploading and downloading files.
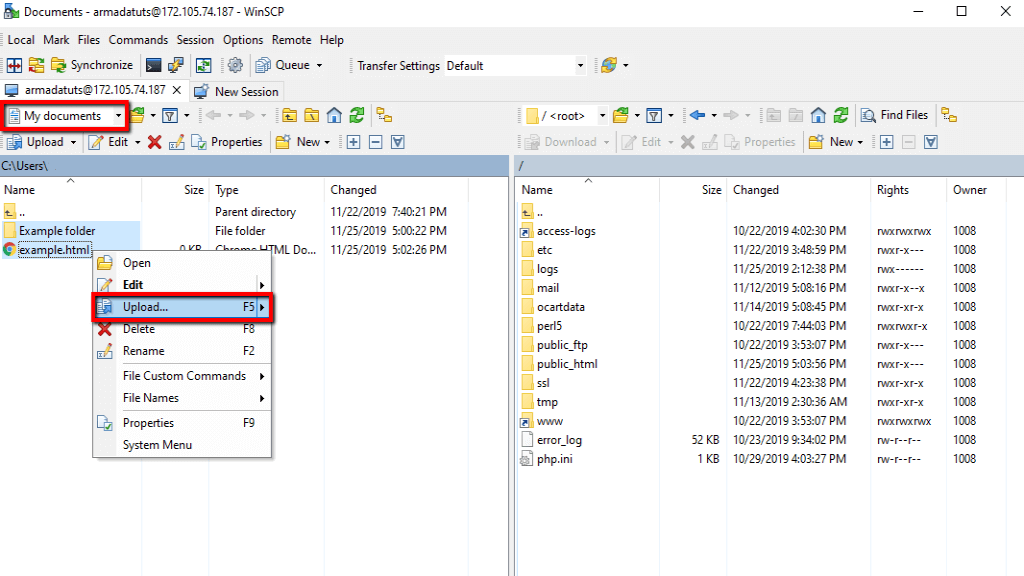
In order to upload file(s) or folder(s) from your local computer to your web hosting account, you will first need to locate them by clicking on the “My document” dropdown menu and select the folder where they are stored.
Once you locate the desired file(s)/folder(s) you can upload them by simply dragging and dropping them into the remote directory or by right-clicking on them and selecting the “Upload” option. Note that you are able to select multiple files/folders by pressing the “ctrl” (PC) / “command” (Mac) key on your keyboard and clicking on them.
After that, a pop-up window will be displayed and you will need to confirm the remote directory where the files need to be transferred. Once this is done, please click on “OK” to initiate the upload process.

Please note that the transfer process duration will vary depending on the size of the files, therefore in some cases, it may take a long time to be completed.
When it is done, a pop-up notification will be displayed informing you that upload was successful.
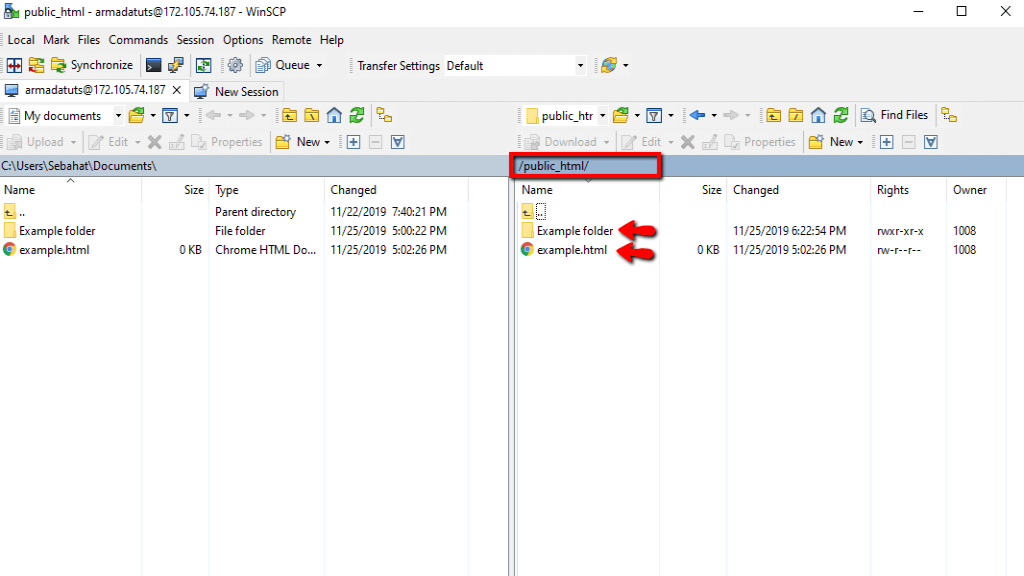
If everything was properly done, you will see the file(s) you have selected displayed under the remote directory.
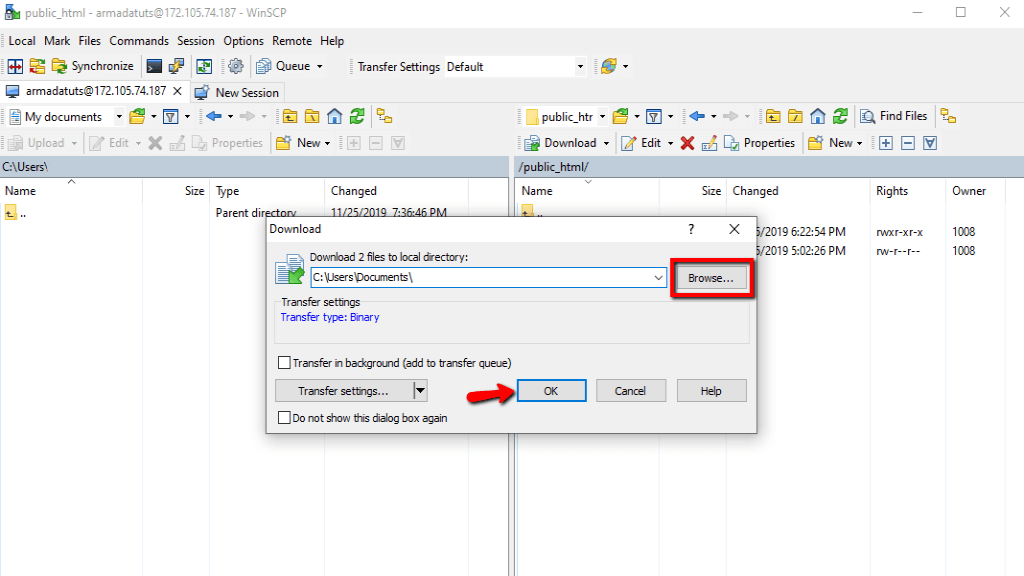
The process of downloading file(s) or folder(s) from your web hosting account to your local computer is pretty much the same as uploading them. However, this time you will need to select the desired files/folder from the right column. Once you locate the files in question, please right-click on them and select the “Download” option. Similarly to the previous example, you can select multiple file(s)/folder(s) by pressing the “ctrl” (PC) / “command” (Mac) key on your keyboard and clicking on them.

Afterward, you will be presented with a pop-up window and you will need to select the destination where the files are supposed to be downloaded. Once selected, please hit the “OK” button.
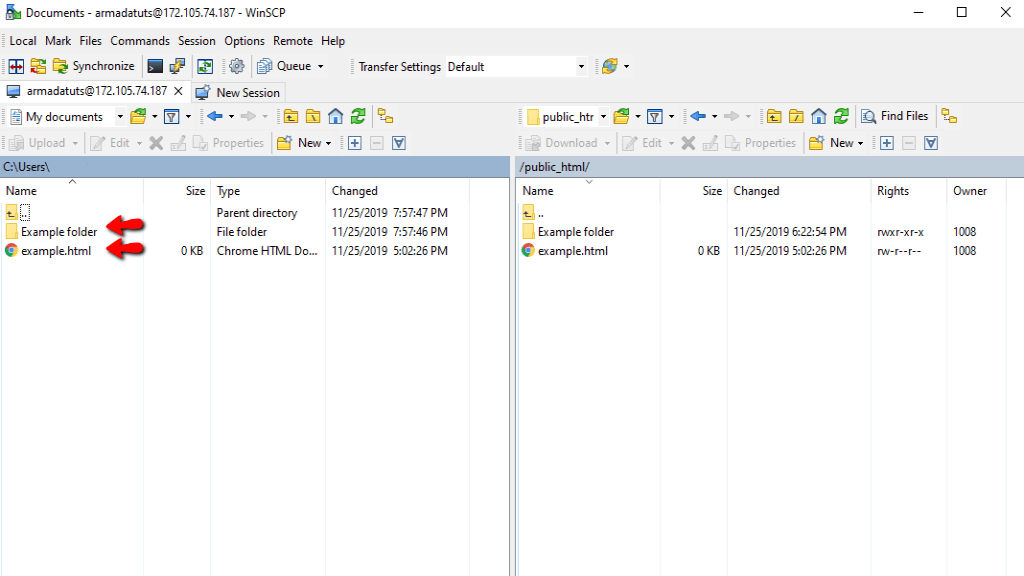
Please, allow some time for the process to be completed and once it is done you will see the files listed under the desired local directory.
In case you do not need those files any longer, please right-click on them and select the “Delete” option.
Congratulations! At this point, you already know how to transfer files from your local computer to your web hosting account and vice versa. We hope you have found the information in this tutorial useful and our guidance easy to follow. In case you have experienced any difficulties, please do not hesitate to contact our Support Team for further assistance.

Sebahat is a young and bright woman who has become an invaluable part of our team. She started as a Customer Care Representative, mastering that role and, along the way, growing into a tech-savvy individual who is well acquainted with every support layer of the company. Driven by her aim to improve our customers’ experience constantly, she is committed to enhancing the extraordinary support we deliver.
Learn more about FTP Service in the other tutorials that we have: