
A reseller can be described as a person who can create and sell cPanel accounts to other people. With our VPS or Dedicated Server plans, you will have enough resources in order to distribute those between the cPanel accounts and potentially start a reseller business of your own. This raises the need for control and WHM will help you achieve it by placing various limits for your resellers that will be based on the type of plan they have purchased from you or the number of resources they are spending each month. Lastly, WHM is so flexible, it also gives the option to each reseller to have his own pair of nameservers as this provides a more professional look when someone attempts to trace their domains. In this guide, we will be going through the options which you have in terms of reseller access on the server. There is quite a lot to go over so, let’s get right into it!
As with all other WHM control panel features you need to log into the WHM service for your VPS or Dedicated Server. If you are not sure how to do that, please check our How to Access WHM tutorial. After you have logged in, please use the search field on the left side of the page and type “Edit Reseller Nameservers and Privileges”.

The control panel will show a single result. Click on it in order to view the “Edit Reseller Nameservers and Privileges” interface. When you are on the correct page, you will see a search bar right on the top along with a way to filter the results based on the user, domains, or both. Right below the search, you will see a section containing a list with all of the Reseller accounts hosted on your server, each following the pattern username(domain.com). On the left side of the username, there will be a radio button that is used to select the desired account.

When the account you want to edit has been selected, please press the “Submit” button located at the bottom of the page to proceed further.

You will be redirected to the main page that lets you select the privileges of your Reseller users. If only one reseller exists, the interface automatically selects that reseller and takes you to the page, without displaying the search options mentioned in the previous paragraphs.
At the top of the page, WHM will present you with information about the reseller user you are editing. From there the whole page will be separated into different sections containing the actual reseller privileges you will need to configure. Let's Review those.
Right below the reseller's username, there will be another section that will let you modify the “Account Creation Limits”. There are 3 options that you can activate by clicking on the checkboxes.
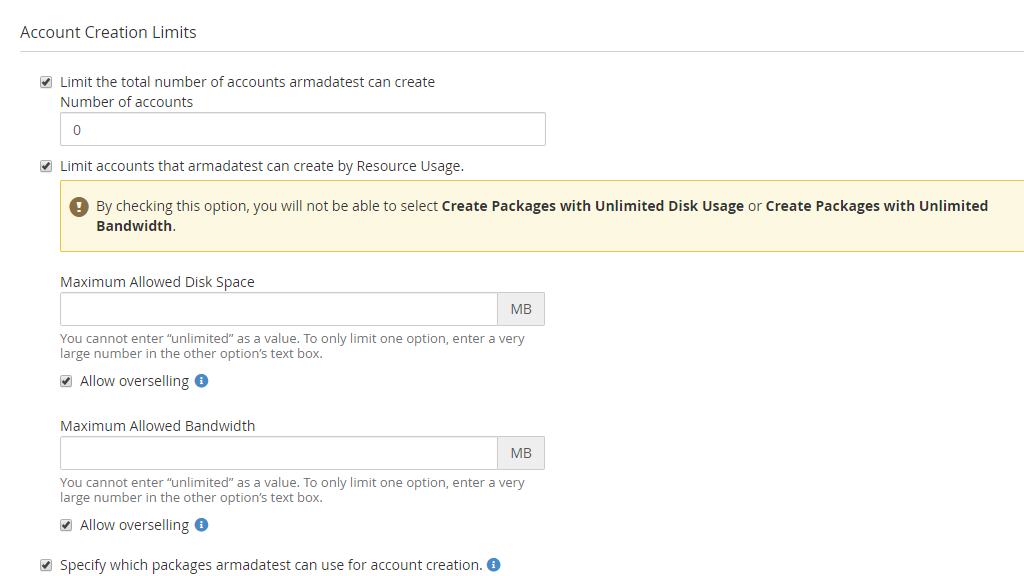
Please bear in mind that in the screenshot above we have checked the options just to show how they look like. Please select these options only if you need to configure them.
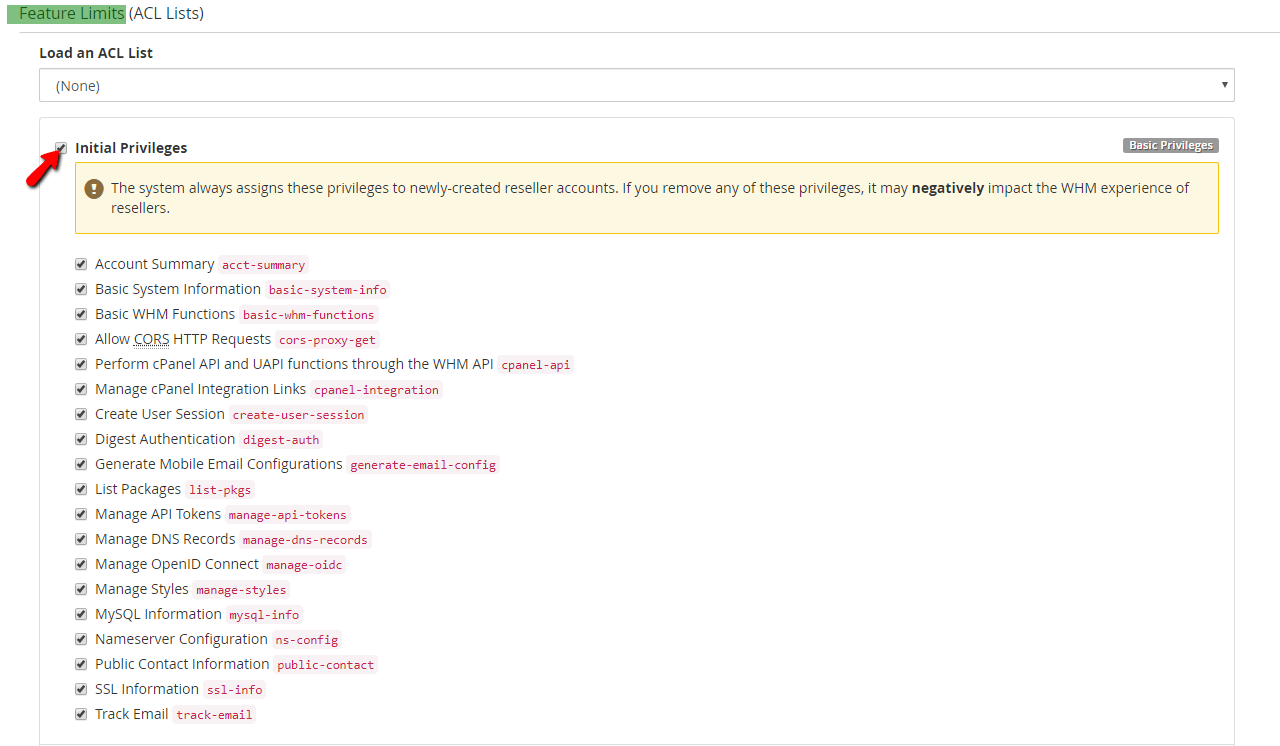
The second section contains the “Feature Limits” list. This is a rather long list of features that your reseller users will be able to use. Please note that these features are WHM features or in other words here you are configuring the set of WHM features your reseller users will have access to.
By default, the “Initial Privileges” will be ticked, as these are the most basic restrictions a reseller can have, and disabling these restrictions will negatively impact the experience of your reseller users.
When scrolling down, you will be able to configure the “Standart Privileges”, “Package Privileges”, “Additional Software”, “Global Privileges”, “Super Privileges” and “Root Access”. The ones you should be most careful with are the “Super Privileges” and “Root Access” as these will give your resellers the ability to bypass most of the restrictions you have placed upon them.
When you have ticked all the features you want the reseller to have, you will be able to create an “ACL list” which you can use for other resellers as well. An “ACL list” is an Access Control Lists of all the predefined by you features to which the resellers of your server will have access. To do that select the radio button on the left of the “Save selections as a new ACL list” label, and write down its name.
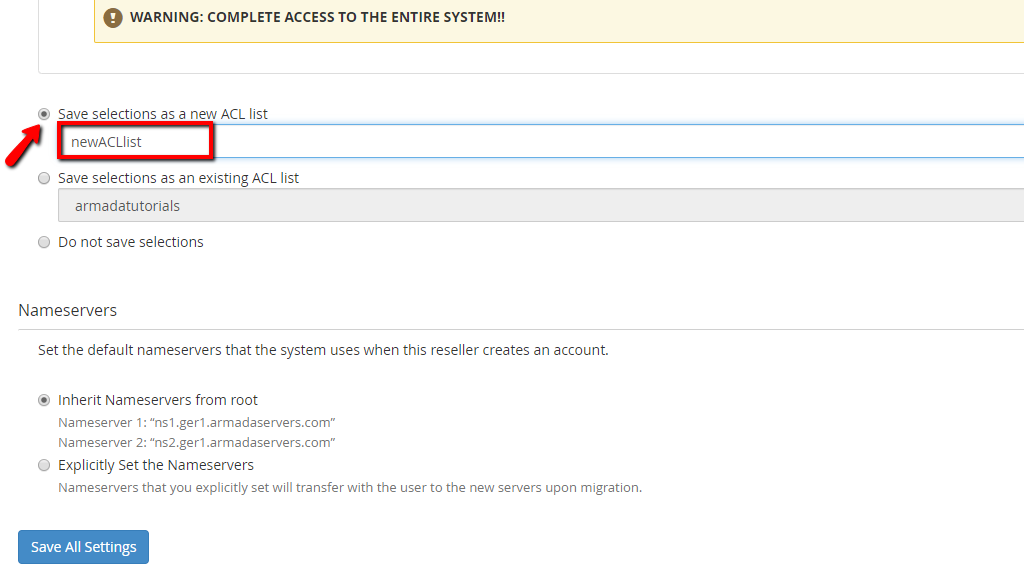
Once the settings are saved using the "Save All Settings" button the ACL list can be used by loading the list from a drop-down menu at the beginning of the “Feature Limits” section for any other reseller account.

With this, the "Feature Limits (ACL Lists)" section is completed. Please do not forget to save the options using the "Save All Settings" button located at the bottom of the page.
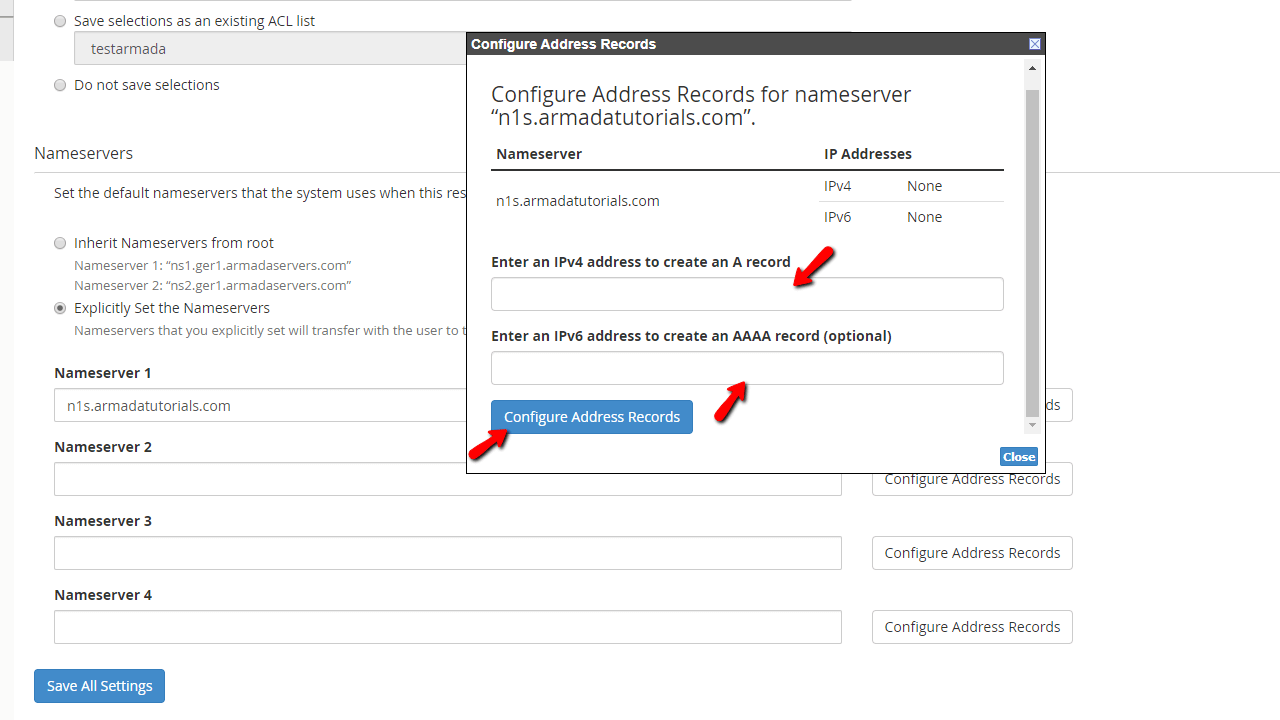
The last section with configuration options available on the page is regarding the nameservers of the accounts created by this particular reseller. You can have it inherit the ones from root, or you can set custom nameservers that will be applied when an account is added by the reseller. The default value is the “Inherit Nameservers from root”. If you do not want this option, select the “Explicitly Set the Nameservers” radio button and input these in the fields under “Nameserver X”.

Do not forget to click the “Configure Address Record” for the nameservers you have added, as this could lead to resolution errors when a domain is pointed to them. When “Configure Address Records” pops up, you will see a small screen showing the options to set either an A record(IPv4) or an AAAA record(IPv6). When you set the IP, please click on the blue “Configure Address Records” button to finalize the process.
A changelog screen will appear after that, showing the IP has been set for the chosen nameserver.

Finally, when all of the settings have been configured, please click on the “Save all Settings” button located at the bottom of the page. This will then redirect you to the last screen, which will inform you about the success of the performed modification or about any errors that the process has faced.
There you go! It’s quite a lot of information but we believe we were able to review the majority of the available settings this tool has to offer. If you are facing any difficulties using it, feel free to contact our Technical Support Team via the ticketing system in our Client Area.

Sebahat is a young and bright woman who has become an invaluable part of our team. She started as a Customer Care Representative, mastering that role and, along the way, growing into a tech-savvy individual who is well acquainted with every support layer of the company. Driven by her aim to improve our customers’ experience constantly, she is committed to enhancing the extraordinary support we deliver.
Learn more about WHM in the other tutorials that we have: