
Learn WHM
Sometimes, it is necessary to control the amount of access a given user has. The “Host Access Control” feature in the WHM control panel allows you to add specific rules that either provide access to an IP address or deny access completely. In this tutorial, we are going to go through all the services you can control using the “Host Access Control” feature and how exactly you are able to do so. Let’s begin!
In order to gain access to this feature, you will need to first log into the WHM control panel. If you are not sure how to do that, please check our How to access the WHM service tutorial.
After you log in, you will see the default page which lists all of the different categories of features/functionalities WHM has to offer. It may look overwhelming at first, however, do not panic, as we got you covered with everything WHM-related.
You will notice a search bar on the left side, where you need to type “Host Access Control” in order to filter everything out and find the functionality you need.

When you click on the link right below the search bar called “Host Access Control” you will be sent to the page where you can start the process.
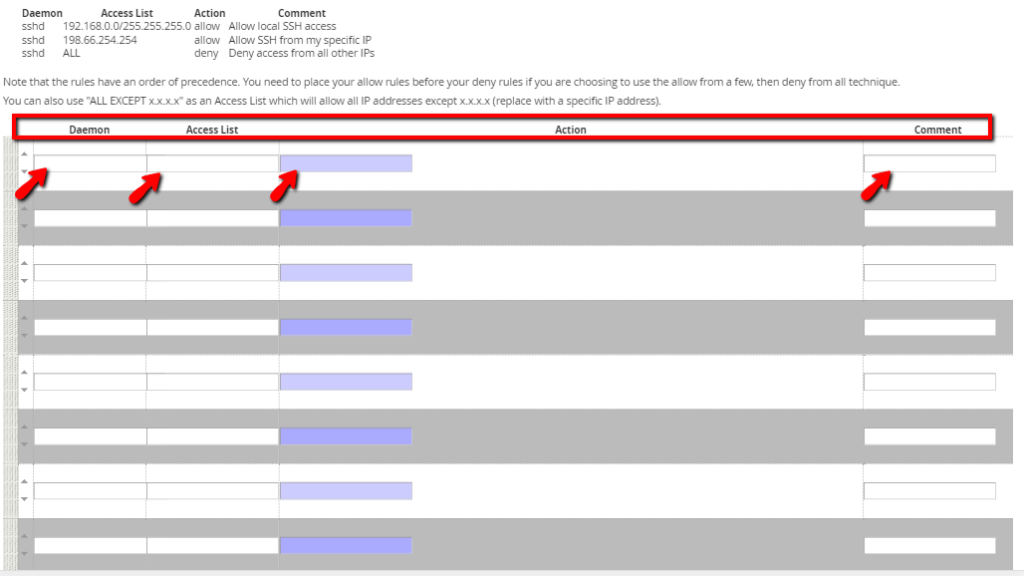
When you are redirected to the “Host Access Control” page you will see a brief description of the feature on the top. Underneath this description, you will see examples of how you can deny or allow an IP address or an entire IP range.
Here are all of the services that the “Host Access Control” feature allows you to manage access to.
Now that you know which services you can control, let’s explore the way you can actually do it.
Please point your attention to the table section which is located on the lower side of the page. It has 4 columns, which we will explain below.
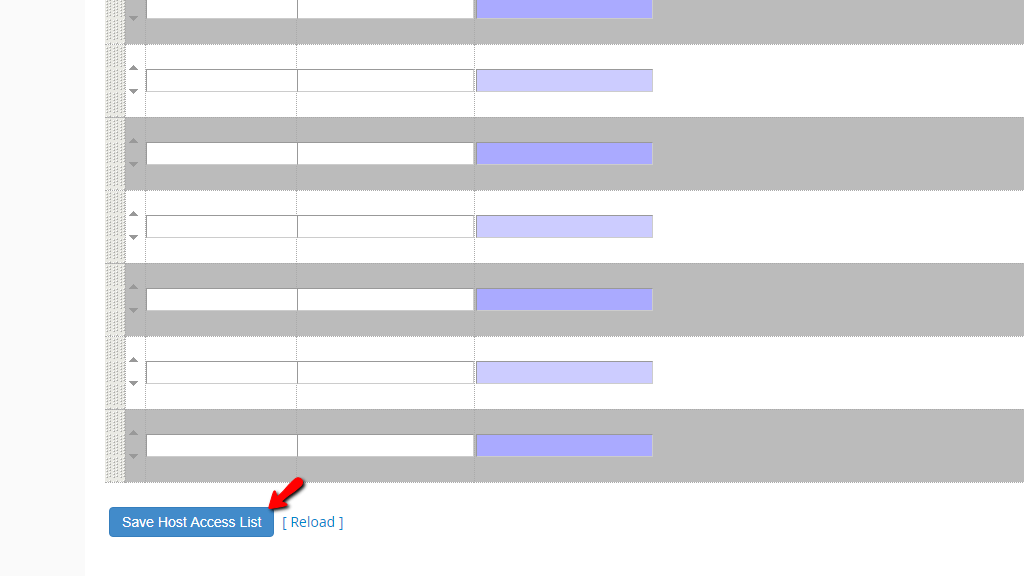
When you are done allowing or denying the desired IP addresses, please press the “Save Host Access List” button, located on the bottom of the screen.
A really important thing you need to be aware of is that the rules have an order of precedence. You HAVE to place all of the ALLOW rules prior to adding the DENY ones if you wish to allow access to certain IP addresses and deny access to all other IP addresses. For example, if you wish to allow the IP addresses 123.123.123.123 and 234.234.234.234 to access the sshd service and deny the rest, make sure to first add the allowed IP address rules and afterward the restricted (denied) IP addresses rule. Please find the screenshot example below for a better understanding.
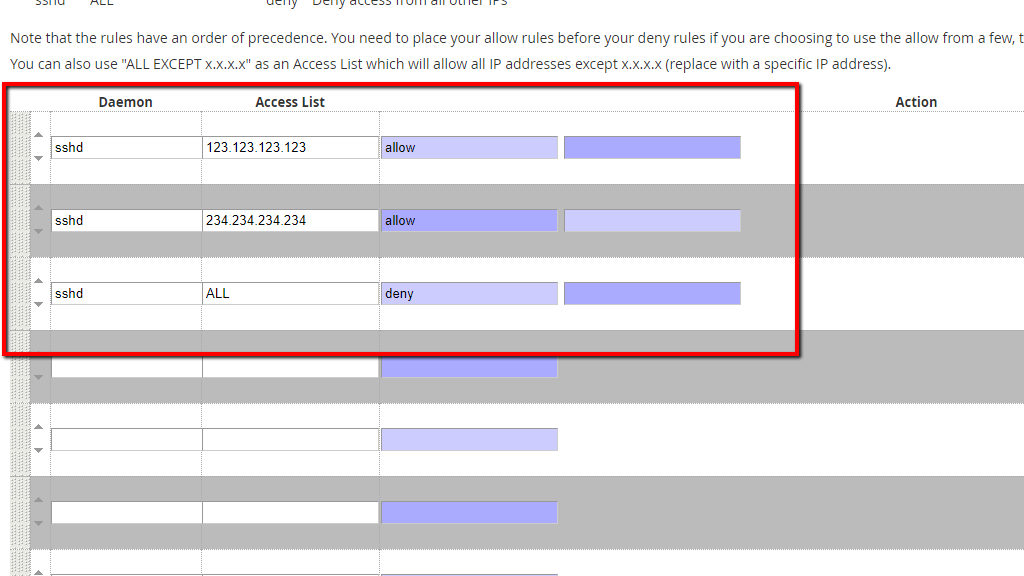
As you can see, the allow rules are located on the top and the deny one is the last one in the table, meaning that from here on out - the IP addresses 123.123.123.123 and 234.234.234.234 will be able to freely access the sshd service, while the rest of the IP address will not be able to do so.
This sums up all of the information for the “Host Access Control” feature in the WHM control panel. We hope that the provided information was helpful and you have now learned how to allow or deny access to IP addresses for certain services on your server. If you are having issues setting certain allow or deny rules properly, please do not hesitate to contact our Technical Team over the ticketing system in your Client Area.

Sebahat is a young and bright woman who has become an invaluable part of our team. She started as a Customer Care Representative, mastering that role and, along the way, growing into a tech-savvy individual who is well acquainted with every support layer of the company. Driven by her aim to improve our customers’ experience constantly, she is committed to enhancing the extraordinary support we deliver.
Learn more about WHM in the other tutorials that we have: