
Learn Una
You would probably agree that the default look of Una after the initial installation is rather blank. With more content, your site becomes more entertaining and engaging for your visitors. With this in mind, it is never too early to start to customize and enrich the appearance of your website. In this guide, we are going to cover the very first and essential step of this process - creating a new page. This is a relatively simple task, so if you are ready, let's jump right into it!
For a start, please log in to your Una Studio and access the "Pages" App.

The Page Builder is where you can create new pages, customize existing pages, and manage block layouts. As you can see, it consists of several separate tabs. Each tab holds a group of pages relevant to a specific Una module.
To create your very first step, please switch to the "Custom" tab and click on the "Add New Page" button.

Upon doing that, a new window pops up where you have to configure the page elements. The page settings are grouped under separate tabs. To keep it consistent, we are going to review each of them in the same order they appear on your end.
Let's start with the "Options" tab.


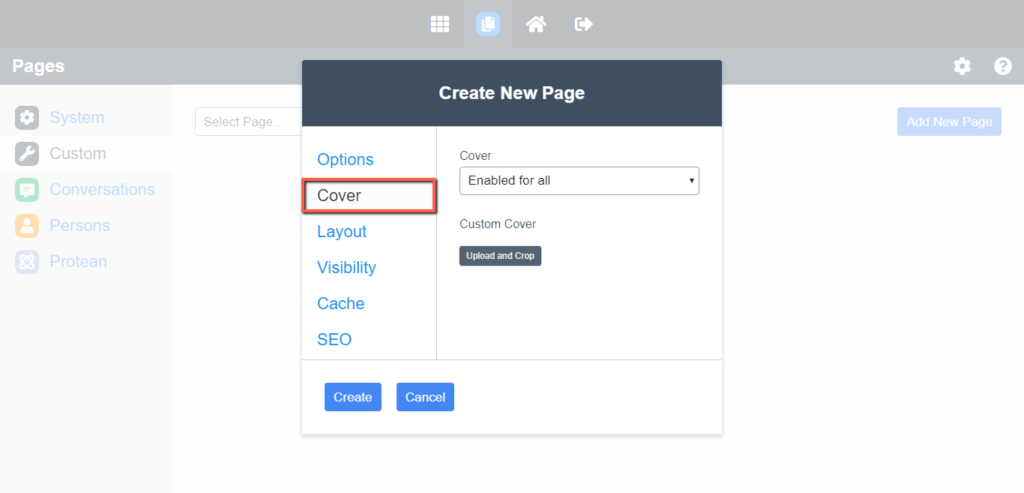
Next is the "Cover" tab. You can upload an image that is going to be used as a cover, displayed at the top of the page. You can also control the availability of it by selecting the applicable user group from the "Cover" dropdown.
From the following "Layout" tab, you can select the default layout of the page. Each option is visually represented so you can get a clear idea.

From the "Visibility" tab, you can restrict the page to a particular visitor group(s). You have two options - "Anyone", which makes the page available to all users, and "Selected levels". The second option requires you to select the visitor groups the page should be available for.

Within the "Cache" tab, you can specify the period (in second) during which the page to be cached in Una.

Under the last "SEO" tab, you can specify the page metadata.

When you are ready, please click on the "Save" button to finalize the creation of the page.
At this point, your page is successfully created, but it is a blank canvas. In Una, content is created using blocks. You can think of a block as a box containing specific website content. There are lots of different block types in Una. We are not going to get into explaining each of them individually since this is not the primary topic of our guide.
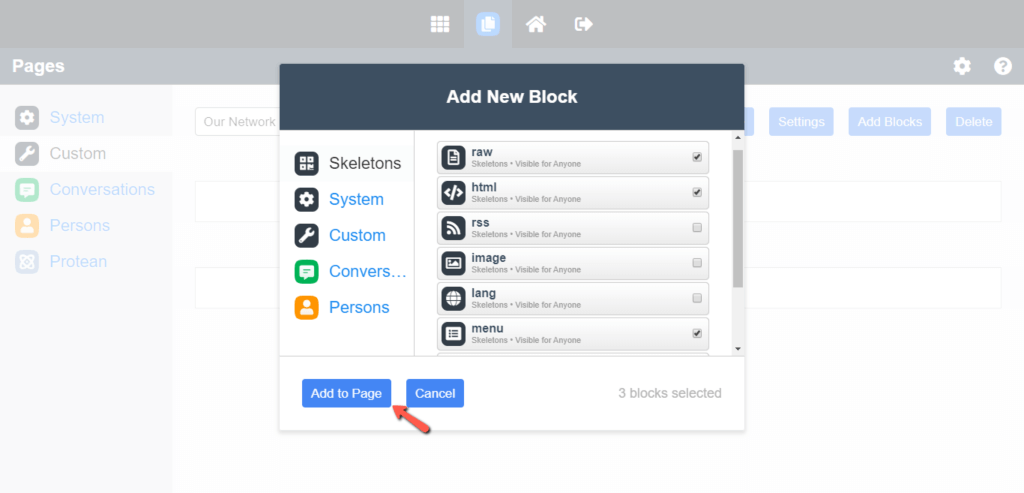
Now, to add actual content to your newly created page, please click on the "Add Blocks" button.

Within the pop-up window, please select the desired blocks by ticking the corresponding checkboxes and click on the "Add to Page" button.
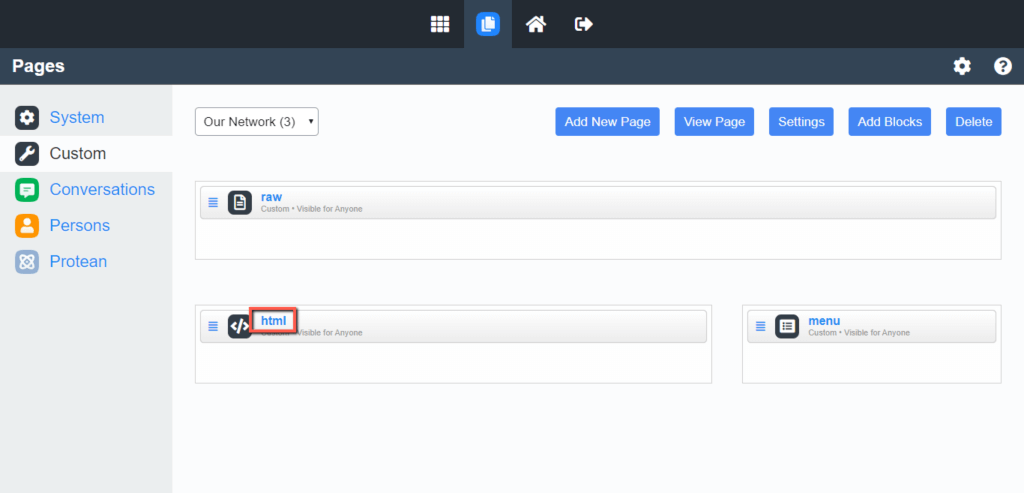
Once this is done, you can see the blocks listed at the top of the page. You can place them into the desired page layout by dragging and dropping them.
To further customize a block, please click on its title.
In the new pop-up window, you have to specify the block details:

Within the "Content" WYSIWYG editor, you have to enter the actual content of the block. You can use the available tools to format the text quickly, include links, images, videos, etc.
The "Simple Upload" and "Multiple Upload" buttons allow you to upload a single file or several files at once.
The "Active" toggle switch controls whether or not the block to be displayed on the website frontend. In case you do not want to publish it right away, you may disable it. The block is going to be available in your Una Studio and ready for publishing.
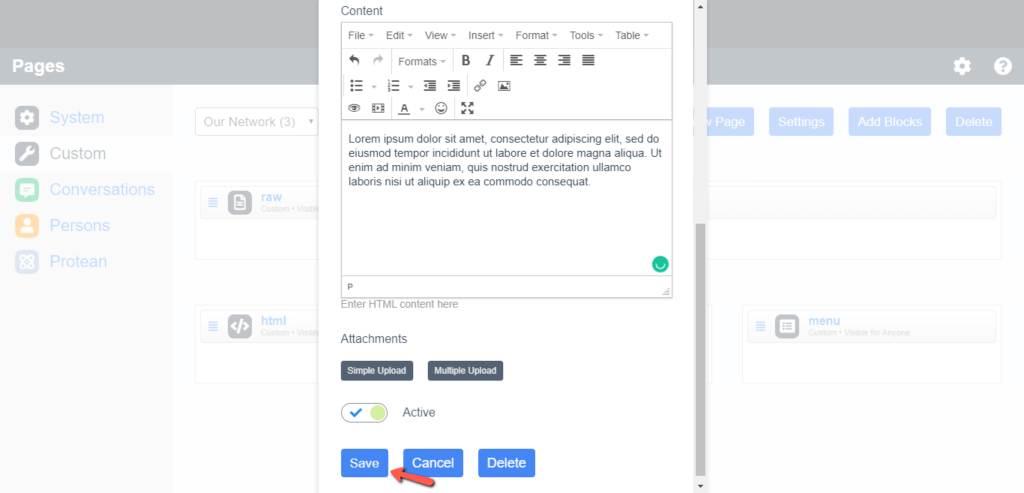
When you are ready, please do not forget to click on the "Save" button.
We would recommend you to edit your pages step-by-step and continuously check the result to ensure everything looks as desired. You can do that by clicking on the "View Page" button.
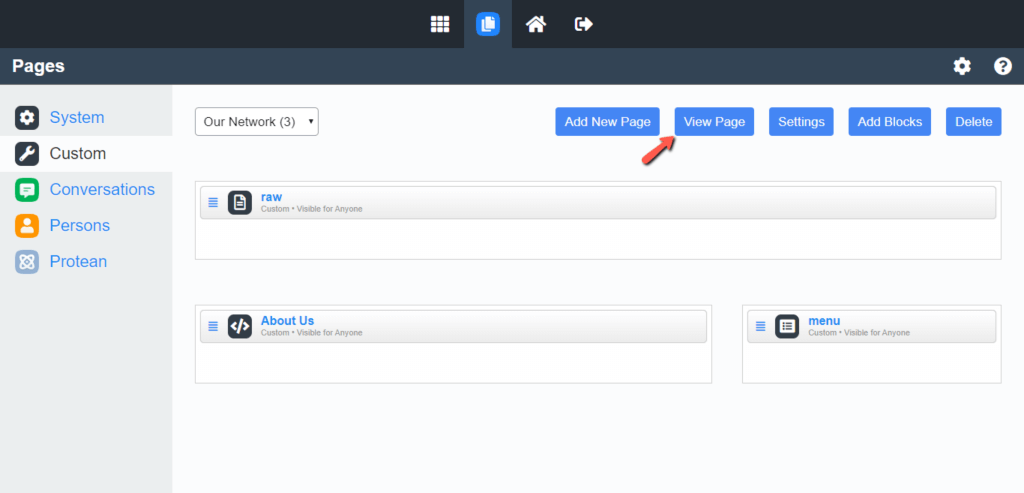
Upon clicking on it, the page is going to open within a new tab. Once you confirm you have got a satisfactory result, you can continue with the rest of the blocks.

As you can see, in Una, the entire process of creating pages is divided into separate steps. This might seem confusing at first, but once you get used to it, you are going to realize how neat and consistent it is. We hope that after our guide, you have a clear idea of how pages are structured, and you are able to create your pages with ease.

Sebahat is a young and bright woman who has become an invaluable part of our team. She started as a Customer Care Representative, mastering that role and, along the way, growing into a tech-savvy individual who is well acquainted with every support layer of the company. Driven by her aim to improve our customers’ experience constantly, she is committed to enhancing the extraordinary support we deliver.
Learn more about Una in the other tutorials that we have: