A cache is a part of the memory block invisible to the user that stores data, which typically originated from a query or script execution. The next time this piece of content is requested, it is loaded much quicker than usual as all the database queries or scripts executions are skipped, and the result is immediately delivered to the user from the mentioned memory block.
As TYPO3 is a CMS, it heavily utilizes numerous caching systems. Their incorporation includes backend and frontend caching engines, which result in significant speed increase when working from your admin dashboard or when browsing your pages.
Knowing how to manage all the caching types will help you troubleshoot issues related to certain aspects of your site’s pages or backend. It will also ensure that all changes you do when working on your website are reflected immediately.
In this article, we will discuss the way you can handle the caching types of your TYPO3 CMS along with your temporary files, which are likely to overgrow the more content you add. Let’s begin!
To open the cache management interface in TYPO3, you need to log into your admin dashboard first. To do that, please add “/typo3” to your domain name - for example, “mycms.com/typo3” where “mycms.com” is your actual domain.
Accessing the mentioned URL will show a login page, where you have to enter your login credentials to access the backend. We also highly recommend checking our TYPO3 Backend Overview tutorial, which will introduce the basics.
Once you have logged inside your dashboard, please point your attention to the left, where you will see the Module Menu.

Right under the “Admin Tools” section, you will see the “Maintenance” option. When you click on it, the page will be refreshed, and you will see a few panels in the middle section allowing you to perform various actions.
Once you are on the “Maintenance” page, please look for the “Flush TYPO3 and PHP Cache” panel. On the bottom left side, you will see the “Flush cache” button.
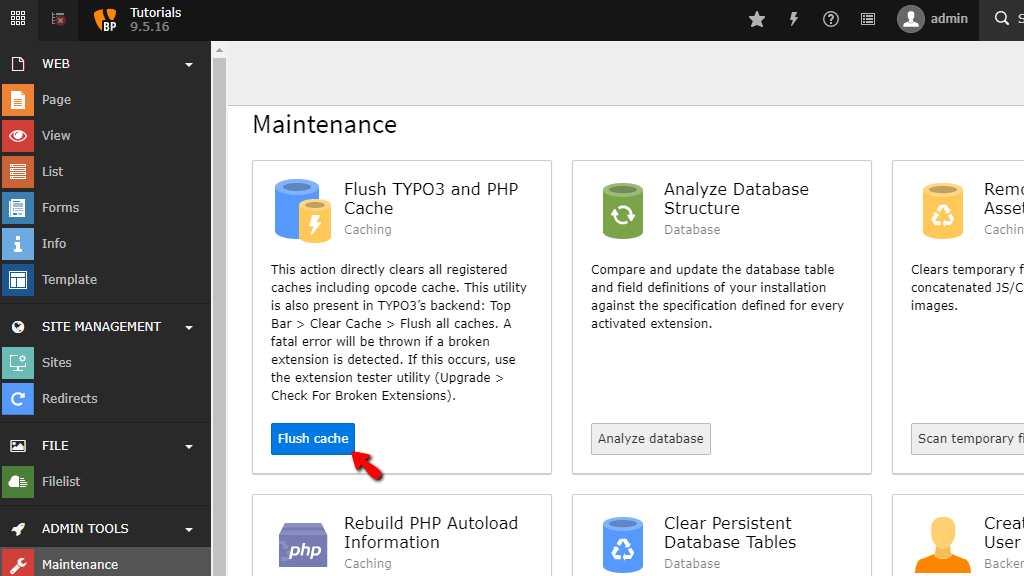
Depending on the size of your cache, this could take some time to finish. Eventually, you will receive a notification at the top right corner, letting you know that the task has been complete.

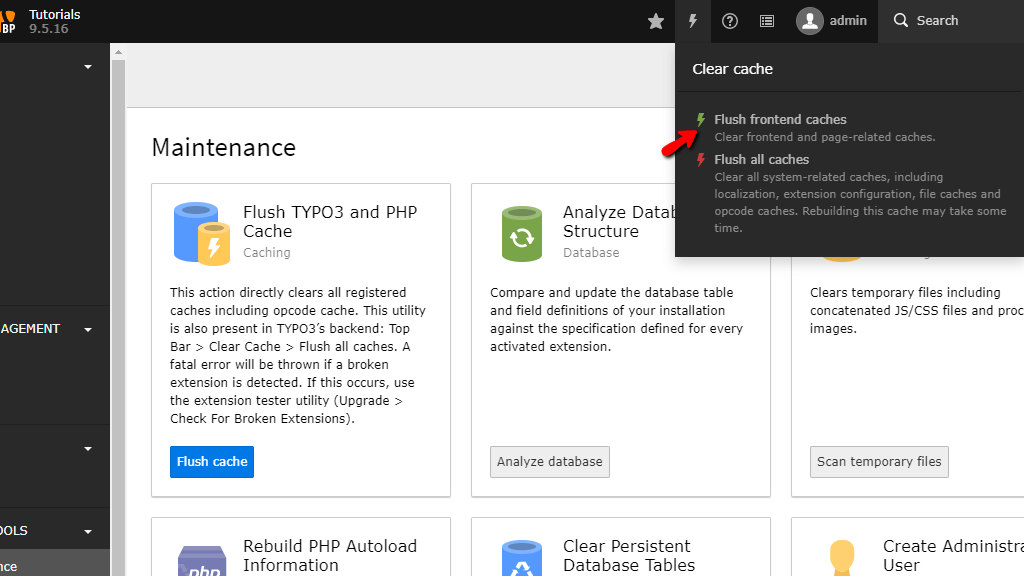
An alternative way of clearing all the cache types of your Typo3 CMS is by clicking the icon on the top right corner, resembling lightning.
![]()
Doing so will expand two options - “Flush frontend caches” and “Flush all caches”.
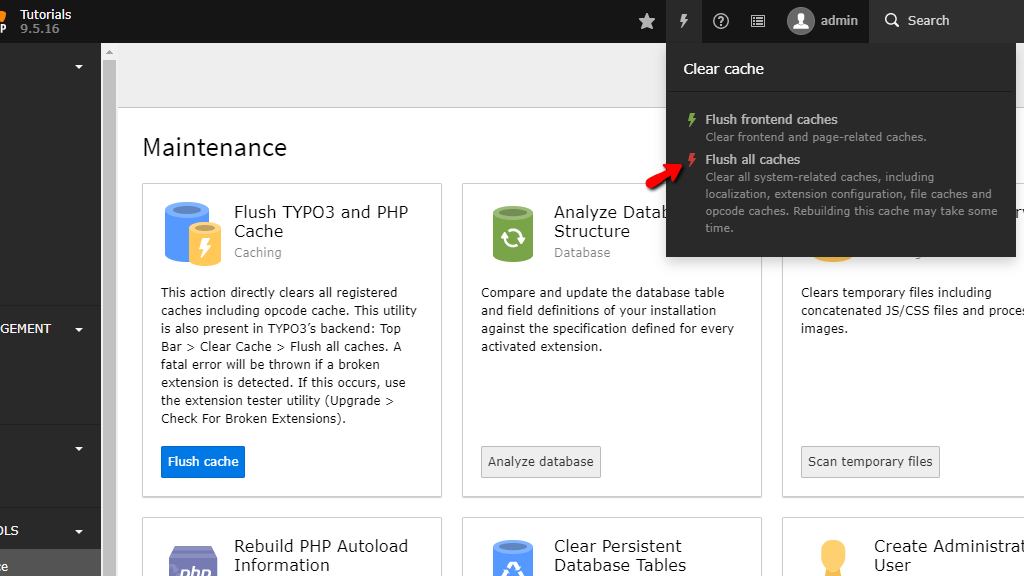
Please select the “Flush all caches” option to perform the same action, which you previously did on the “Maintenance” page. If you want to clear only the frontend cache, please select the “Flush frontend caches” option.
Now that we have gone over how to clear your caches let’s see how to remove the unnecessary temporary files of your CMS.
The panel intended for managing the temporary assets is actually located on the very same “Maintenance” page. Please look for the “Remove Temporary Assets” panel and then click on the “Scan temporary files” button located on the bottom.

Clicking on the “Scan temporary files” button will open a popup window, which displays all the temporary files and their location on the filesystem. Each file type (CSS, JS, cache, HTML) will be represented by a row, which is actually a button, allowing you to delete the specific type when pressed.

If you want to delete a particular file type, please press the button corresponding to it - the file type itself is mentioned within the button. For example, if you look at the above screenshot, you will notice that on the third row, the asset directory is “CSS”, which means that this will delete the temporary CSS files when press.

Removing a specific temporary file asset will result in a notification in the top right corner of the screen, notifying you that the specific asset was successfully cleared.
There you have it! The method of managing all caching types and temporary files in your TYPO3 based website. As you can tell, it was quite an easy task, which when used at the correct times will save you a lot of time and nerves!

Sebahat is a young and bright woman who has become an invaluable part of our team. She started as a Customer Care Representative, mastering that role and, along the way, growing into a tech-savvy individual who is well acquainted with every support layer of the company. Driven by her aim to improve our customers’ experience constantly, she is committed to enhancing the extraordinary support we deliver.
Learn more about TYPO3 in the other tutorials that we have: