Introduction
LiteSpeed Cache for WordPress is a powerful optimization plugin. It is a collection of multiple features built-in one handly tool, which is easily integrable directly into your WordPress Admin Dashboard.
After installing the plugin, it is essentially important to review and configure its settings with attention to achieving the best possible results.
In this tutorial, we will review a wide variety of settings that allow you to do a lot with your page content. Most of the settings we are going to discuss are concentrated on the static content (CSS, JS, and HTML) and certain technologies that aim to optimize the way your pages are served in the visitor’s browser. Minification is the main focus here, and we highly urge you to be careful with this, as it can cause problems with your pages and your website’s layout in general.
Getting Started
To begin, you have to log into your WordPress Admin Dashboard. To do that, please add “/wp-admin” to your domain name - for example, “mywordpress.com/wp-admin” where “mywordpress.com” is your actual domain.
Once you are in, please hover over the “LiteSpeed Cache” option on the module bar on the left. When the submenu is expanded, please click on the “Page Optimization” option.
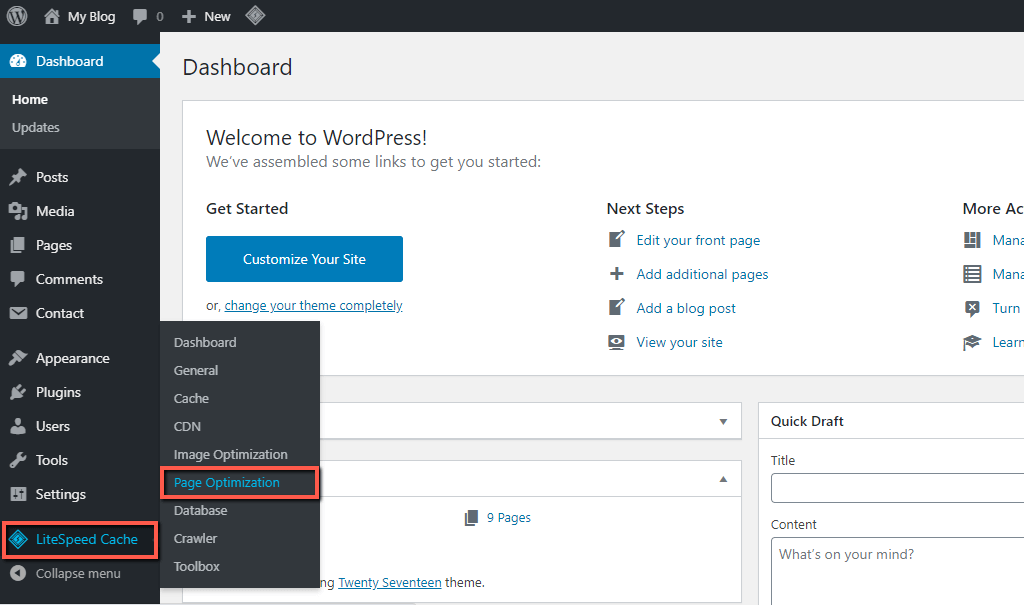
Upon doing that, you will be redirected to the Page Optimization section.
Configuring Page Optimization Settings
If your website is already loading really fast, the benefits you will receive from these settings are really minor (if any at all), so we recommend leaving them at their default values unless you have a lot of experience with them and you fully understand what each setting will bring to your site. If you really insist on having any sort of minification on your website for increased scores in benchmark testing sites, then our advice is to use a CDN service to implement them as the majority of them offer CSS, JS, and HTML minification.
CSS Settings
- CSS Minify - The default option here is “OFF”. As mentioned above, if you want to implement CSS minification, please use a CDN service, such as Cloudflare.
- CSS Combine - The default option here is “OFF”, and this is for a good reason. It will combine all the CSS files into a single file, and it may cause issues with your site. If you want to use this, please test it out carefully afterward.
- CSS HTTP/2 Push - The default option here is “OFF”. It sends the CSS files to the browser before they are requested. It may be beneficial to your site, if you have a lot of CSS files, otherwise, it will most likely not result in any speed increase.
- Load CSS Asynchronously - This setting once again defaults to “OFF”. When a request is made towards your website, the CSS is loaded prior to the content within the HTML body. If this is turned, “ON” both CSS and content will load asynchronously, which will increase the page load speed. However, this may result in the so-called FOUC effect, which will hurt the user’s experience and will most likely irritate you a lot.
- Generate Critical CSS - This setting defaults to “OFF”, and it will only work if the above option is enabled. Our recommendation in regards to this option is to leave it disabled unless you have a huge amount of CSS files, and the majority of them are loaded at the upper half side of your page. Otherwise, the benefits will be none, to begin with, given the fact that browser cache is going to take care of the fast distribution of CSS files to the visitor when your site is accessed.
- Generate Critical CCS In Background - If you decide to go with the above option, then leave this enabled, as it will allow the Critical CCS to be loaded in the background using a cron based queue.
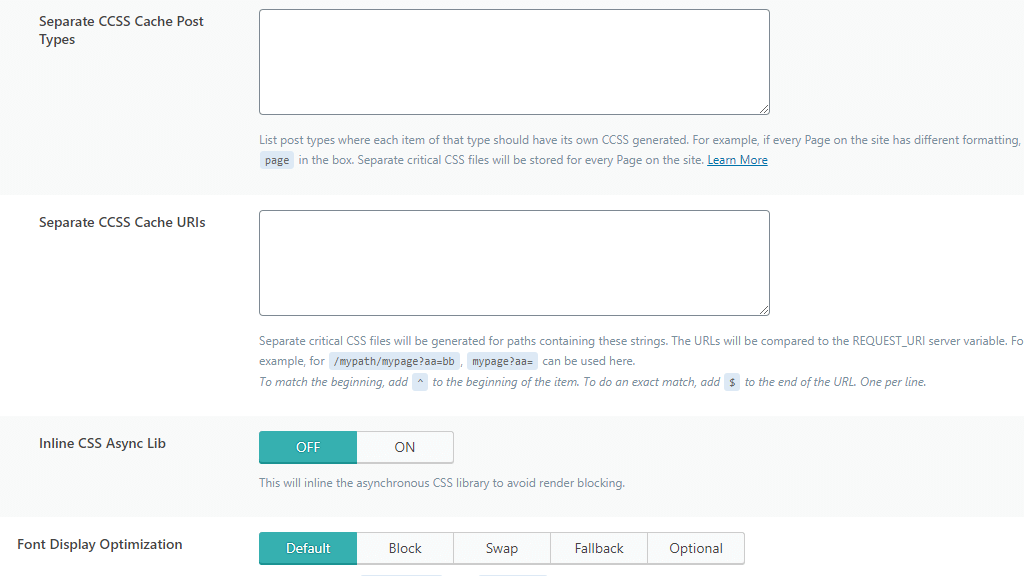
- Separate CCSS Cache Post Types - Each set of critical CSS has a specific post type. The default ones are for posts, pages, categories, tags, or products. You may use this content box to add other custom implemented post types (if such are present) that will take advantage of the CCSS.
- Separate CCSS Cached URIs - This content box is similar to the above, however, this time, you may specify a URI which uses custom CSS, instead of post types.
- Inline CSS Async Lib - The default value here is “OFF”, and it should remain this way if you want to avoid the FOUC issues, mentioned above.
- Front Display Optimization - The default value here is set as “Default”. We recommend sticking with it or using “Block” as online studies shown that these two are less likely to cause the FOUC effect. A really good option here is the “Optional” choice, as it is most flexible in pretty much all situations where the user experience will not be hindered by their internet connection, and the font itself is not critical to the user experience.
JS Settings
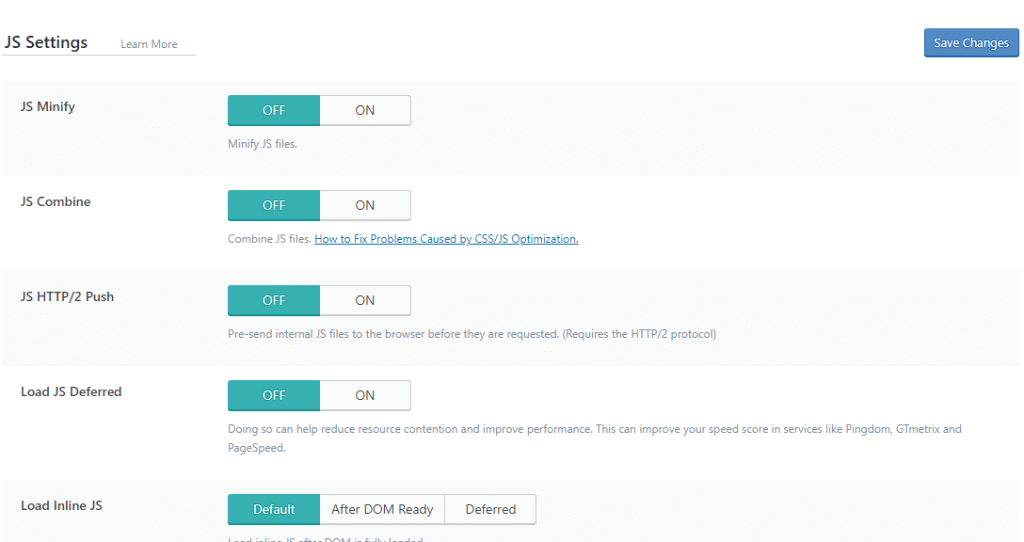
- JS Minify - The default option here is “OFF”. As mentioned above, if you want to implement JS minification, please use a CDN service, such as Cloudflare.
- JS Combine - The default option here is “OFF” and for a good reason. It will combine all the JS files into a single file, and it may cause issues with your site. If you want to use this, please test it out carefully afterward.
- JS HTTP/2 Push - The default option here is “OFF”. It sends the JS files to the browser before they are requested. It may be beneficial to your site, if you have a lot of JS files, otherwise, it will most likely not result in any speed increase.
- Load JS Deferred - Leave this setting with its default “OFF” value. Enabling it may increase scores in sites such as GTMetrix or Pingdom, but then the scripts are loaded after the HTML is finished, and this may hurt the UX(user experience).
- Load Inline JS - We recommend sticking to the default “Default” value here. The other two settings can boost page scores on various benchmark websites. However, they can cause your JS scripts to act out and not function properly.
- Exclude JQuery - This setting defaults to “ON”, which will exclude the JQuery library optimization on your site. We recommend keeping it enabled unless you have tested it carefully.
Optimization Settings
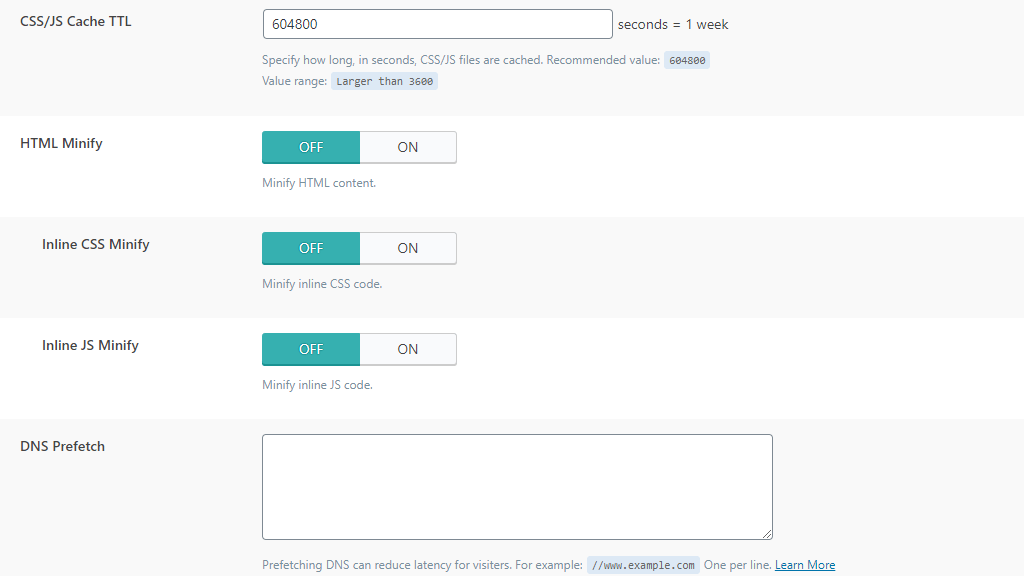
- CSS/JS Cache TTL - We recommend keeping the default setting (604800 seconds). Translated into days - this is 7 days worth of time, which is more than enough if you are making changes to your website. You may increase it if you believe you are done building the site, and you do not see making any changes in the near future.
- HTML Minify - The default option here is “OFF”. As mentioned above, if you want to implement HTML minification, please use a CDN service, such as Cloudflare.
- Inline CSS Minify - Selecting this option will remove all the whitespaces, new characters, and comments from the CSS code on your HTML pages - this could increase your page score. However, the speed benefit will not be noticeable at all, thus we recommend leaving this setting to its default value “OFF”.
- Inline JS Minify -Selecting this option will remove all the whitespaces, new characters, and comments from the JS code on your HTML pages - this could increase your page score. However, the speed benefit will not be noticeable at all, thus we recommend leaving this setting to its default value “OFF”.
- DNS Prefetch - This is an amazing option! The content box presented under this setting will allow you to type in external URLs from which you are loading content on your site. This can significantly improve loading speed, especially for newer visitors. To get a hold of all the external URLs that are loaded on your site, simply open your Chrome and press the “F12” button on your keyboard. This will open a side menu from the right side of the screen. On the top side of this menu, you will see a menu bar. From the tabs presented there, please select the “Sources” tab. Doing so will refresh the menu, and on the left side of it, you will see all the pages from which your website is receiving external content. Now, all you need to do is type them inside the provided content box so the plugin can preload their DNS.
- DNS Prefetch Control - You can enable this option to further amplify the effect of the previous one, however, in our experience, this has not really proven to show any results at all. You can play around with it, but leaving it with its default “OFF” option should be completely fine.
- Remove Comments - Enabling this option will remove any comments within the JS and CSS files when they get minified. The speed benefit you will receive is pretty insignificant. However, if you care about page scores on websites such as GTMetrix, or Pingdom, you can enable it to increase your results.
- Remove Query Strings - Like the previous option, we recommend enabling this only if you care about page score results in benchmark websites. In our opinion, enable it when you believe that you are finished with your website design.
- Load Google Fonts Asynchronously - If you rarely visit any websites from the computer you are building your site from, then you can enable this option. If you are accessing various websites regularly, you should not bother with it, as your browser has surely cached all the needed web fonts from Google anyway.
- Remove Google Fonts - A viable option if you are using locally stored fonts. If that is the case and this is enabled, you may see a drastic difference in the website’s layout.
- Remove WordPress Emoji - Nowadays, all modern, up-to-date browsers support emojis, and this option will not really benefit them since they have this option natively. We recommend keeping it off as it will not really show any speed increase and only people with very old browsers will notice any difference.
Media Settings
- Lazy Load Images - Enables the “Lazy Load” images on your site. This allows the images to load gradually, as you are scrolling down the site. We only recommend enabling this feature if you have a lot of images and big, high-resolution images, as this is the only time where you will actually benefit from Lazy Load. In addition to that, please make sure that the majority of the pages are located above the fold of the website (the upper half of the page) as this may cause images there to load slower and affect the user’s experience when they visit the website.
- Basic Image Placeholder - If Lazy Load is enabled, you can set an image “placeholder” that will be displayed immediately and will slowly disappear while the original image is taking its place. You may use this text field to set a base64 image.
- Responsive Placeholder - If you have Lazy Load enabled, it is a good idea to enable this too. It will obey the dimensions set for the image and will prevent page reshuffling.
- Responsive Placeholder SVG - You can set the image which will be used as your responsive placeholder in this text field.
- Responsive Placeholder Color - Lets you set the color of the image placeholder of your lazy load images. You should set something which is not noisy and does not attract the eyes of visitors. Gray is a great option.
- LQIP Cloud Generator - LQIP or (Low-Quality Image Placeholder) is a feature supported only if you have QUIC.cloud enabled. It will allow you to load a lower quality image of the original lazy-loaded image so that it appears as if it loads faster.
- LQIP Quality - This will let you define the quality of the LQIP image. The range is from 1-20, and the lower you go, the lower the image quality will be. The plugin’s developers recommend that you set it to 4, and we believe that this is the optimal quality as well.
- LQIP Minimum Dimensions - This option will allow you to define the minimum dimensions which the plugin will abide by when requesting images. If the image has dimensions below the set threshold, it will not be generated as a placeholder.
- Generate LQIP In Background - If you are using Lazy-Load and placeholders, you should set this option to “ON”. It is a cron-based operation that will generate each of the placeholders in the background without a visitor having to access the page.
- Lazy Load Iframes - This will enable the Lazy Load technology to iframes and video embeds. A great option if you have such content, and it is located in the upper half of the page.
- Inline Lazy Load Images Library - This is another interesting option. This will inline the Lazy Load JS library inside your HTML code, and you will not need additional requests to pull these libraries on your site. We recommend enabling this if you believe that the code on your website is perfectly done or optimized, otherwise, you may see degraded performance.

Media Exclude Settings
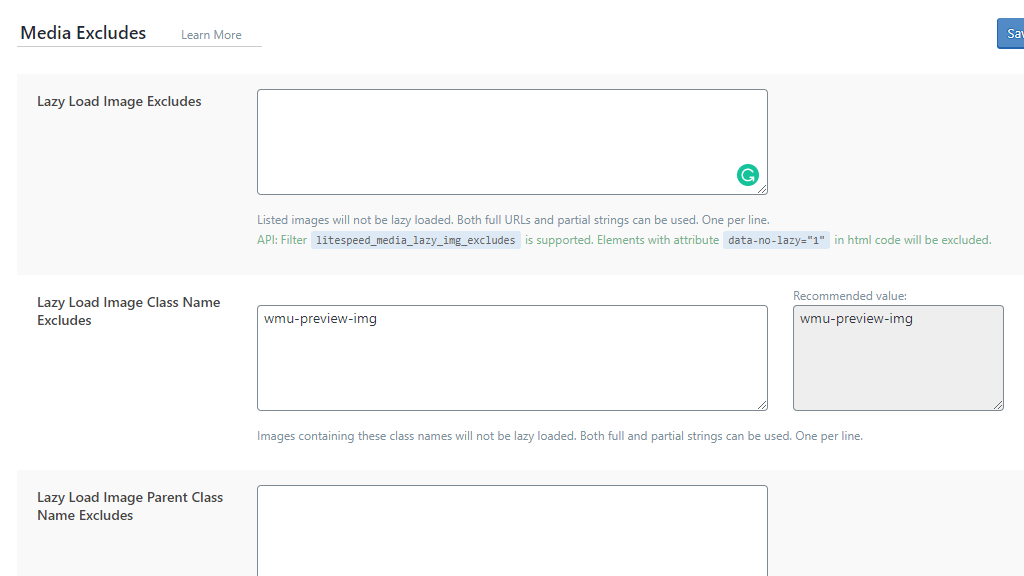
- Lazy Load Image Excludes - You may use this content box to exclude images from Lazy Load. This is a great option for images that are likely to be seen by visitors right away, and you want to avoid the lazy-load effect.
- Lazy Load Image Class Name Excludes - This content box provides a convenient way of excluding images from lazy load based on their CSS class.
- Lazy Load Image Parent Class Name Excludes - This content box provides a smart way of including the images’ parent CSS class that benefits from Lazy Load. Useful for images that do not have a CSS class of their own.
- Lazy Load Iframe Class Name Excludes - Use this content box and define videos that typically take longer to load or are near the upper half of the page to exclude them from the Lazy Load tech.
- Lazy Load Iframe Parent Class Name Excludes - This content box provides a smart way of including the iframe’s parent CSS class that benefits from Lazy Load. Useful for videos that do not have a CSS class of their own.
- Lazy Load URI Excludes - You may use this content box and exclude entire pages from Lazy Load. This may be used for landing pages or pages where you simply want all the images and videos to load immediately.
Discussion Settings
- Gravatar Cache - Enabling this option will start caching the Gravatars locally. Useful when you have a website containing posts with loads of comments.
- Gravatar Cache Cron - Enable this only if the above option is enabled, otherwise leave it as “OFF”.
- Gravatar Cache TTL - The default value here is 1 week (604800 seconds). Unless you notice that a lot of people are changing their Gravatar regularly, leave it with its default setting.

Tuning Settings
- Combined CSS Priority - This option should be left at the default “OFF” position unless you have combined and uncombined CSS. Enabling it will prioritize the combined over the uncombined CSS.
- CSS Excludes - Using this content box, you can list all the CSS files you would like to exclude from being minified or combined.
- Combined JS Priority - This option is the same as the “Combined CSS Priority” option, but this time it involves JavaScript files.
- JS Excludes - Using this content box, you can list all the JS files you would like to exclude from being minified or combined.
- Max Combined File Size - This option allows you to define the max combined file size of your combined files - JS and CSS. The lower the number, the higher the file count, which will reduce your overall page score in sites such as GTMetrix, or Pingdom. To get the best results from this setting, we recommend playing around with it - try it out with a higher setting and then with a lower setting and see what is best for your site.
- Critical CSS Rules - This will only benefit you if you have the “Load CSS asynchronously” option enabled. To separate additional CCS files that you want to be loaded on the upper side of the page plain CSS the same way, they appear in your styles. The plugin will then append them to the newly generated CSS.
- JS Deferred Excludes - This is useful when the “Load JS Deferred” option is switched to “ON”. Please write down URIs or partial strings that you wish to match.
- URI Excludes - Please use this content box and list any URIs which you want to completely exclude from page optimizations. If you happen to come across pages on your website that appear broken after the optimization features, it might be a good idea to list them here. This is a much better alternative than completely disabling optimization options for the entire website.
- Role Excludes - You may exclude the optimization options for a specific user role by putting a tick corresponding to the respective role on your WordPress website. The only time where you may find yourself using this is when you would like to troubleshoot issues that involve a certain role.

Finally, when you have done implementing all the desired changes and excludes, please hit the “Save Changes” button that is located either on the top right corner of the screen or on the bottom of the screen.
There you have it! All the settings and their optimal values based on our opinion and experience in the Page Optimization tab of the LiteSpeed Cache plugin. You need to be really careful with them as there is a risk of breaking your website’s layout if you enable something you are unsure of!

