
Learn Email
 Last
Updated: 10/04/2020
Last
Updated: 10/04/2020
 ( 7 minutes reading )
macOS is one of the most used operating systems in the world. Its simplicity and ease of use make it the choice of everyday users, programmers, content creators, and even musicians. The Operating System offers many applications that users can install easily through the integrated App Store. One of the most-used macOS applications is the natively supported Apple Mail app. To use it, you must have an active email account, which you need to create first and set up correctly. In the next lines of this tutorial, we will show you how easy it is to do that. For the tutorial's purpose, we will use an email account created in the cPanel service and the macOS El Capitan operating system.
Open the Mail app. If you haven't added any other email accounts to Apple Mail or are opening the app for the first time, it will prompt you to add a new email account. It will also show a list of all supported email services. From the list, please choose the last option: "Other Mail Account...".

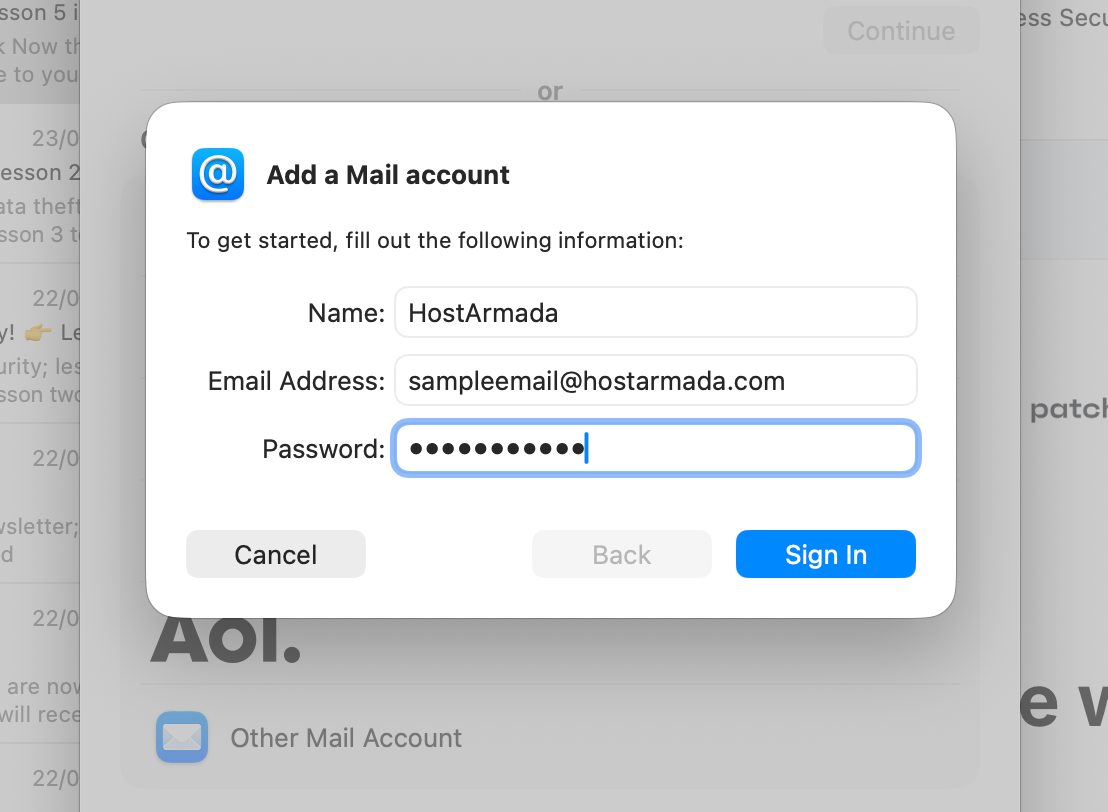
You will see the following fields that you will have to fill out:
Once you complete these details, click on the Sign In button.
Next, the Mac application will prompt a new configuration screen where you will need to perform a more detailed configuration. To fill in the required fields, you'll need the details of the email account you created in cPanel.
You can find these by checking the welcome email you should have received right after signing up for a service with us. In that email, look for the last section called Email Settings, where you can find the IMAP/POP3 Host Address information.
Please bear in mind that if you want to use the mail subdomain (mail.domain.com), where domain.com" is your actual domain name, as your mail service's Hostname, you need to point it appropriately to our nameservers. You will find the name server information in the Welcome Email mentioned above. If you are not sure that you have done it correctly, please contact our support team for assistance.
The fields you need to configure on this page are as follows:
Once you are ready, click the Sign In button again.

Please note that if you use the web hosting server hostname, Apple Mail may show an error saying it cannot send your email password securely to the server. This error is common and happens because the Mac Mail app doesn't match the server's SSL certificate hostname with the domain name used in the Apple Mail setup process. You should ignore it and click Continue to proceed further with the configuration process.
Next, the email app will ask what type of apps you want to use with this email. By default, Apple Mail will choose one of two options: Mail or Notes. Click the Done button to continue.
This will finalize the process, and the application will add the email account to your Mac. Apple Mail will display all your existing emails in the Inbox folder, and you should be able to see and read them immediately.

Emman is a Content Manager at HostArmada where she helps make complex topics accessible for readers around the world. With 5+ years of experience in crafting SEO content, she’s passionate about making tech topics easy to understand. In her free time, Emman enjoys traveling and watching Formula 1/E races.
Learn more about Email in the other tutorials that we have:
