
Learn Una
The email service maintenance in Una is a crucial part of the configuration of your Social Networking platform as the deliverability of email messages to your users depends on it. Una sends various email notifications, and the outbound delivery solely relies on your email configuration.
Similarly to most applications, by default, Una is configured to utilize the PHP mail function to send outgoing emails. That is not always the right method because often (especially on shared servers), the Outbound Mail IP address of the server gets blacklisted. Consequently, this leads to any outgoing emails being rejected. This is one of the main reasons to consider sending your emails over the SMTP protocol.
Configuring Una to send emails using SMTP is a relatively simple task, which can be completed within a few steps.
In Una, the SMTP functionality is empowered by the SMTP Mailer module. This module is not available by default in a fresh Una installation. Fortunately, the process of installing additional modules is extremely simple and straightforward. You can find step-by-step instructions in our guide on How to install Apps in Una Social Network.
As soon as the module is installed, you can see it listed on the Home Page of your Una Studio. Naturally, the first step is to access it.

SMTP Mailer does not only enabled the possibility of configuring your SMTP details, but it also allows you to test the email functionality.
Before we step into the SMTP configuration of your Una network, there is certain information you have to gather. You need the following details:
You can obtain the details mentioned above from your email service provider. In case you are a HostArmada customer, you are able to find the required details in the welcome email containing all the essential information of your hosting account with us. You can review the email directly from your Client Area by clicking on the email icon located at the top menu bar. In case you have any difficulties finding the details, please make sure to submit a ticket request to our Support team, and they will gladly provide you with them.
We expect you to be ready with everything pointed out in the previous section. If that is true, you should now be located under the first "Settings" tab in SMTP Mailer. The following settings require your attention:


When ready, please make sure to click on the "Save" button to record your SMTP connection details and configuration preferences.
With this done, you have finalized the SMTP configuration of your Una website.
It is vital to ensure the seamless functionality of your email configuration. Either way, you are going to end up with a bunch of emails failing to be delivered, and nobody wants that.
To revision your email functionality, please switch to the second "Test" tab in the SMTP Mailer module.
When there, just fill in the required details:
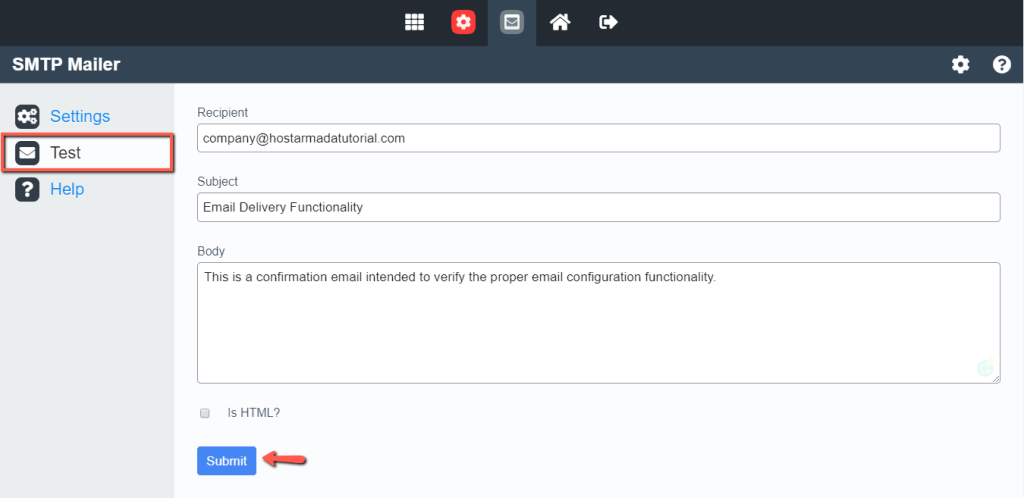
When ready, please hit the "Submit" button to initiate the test. You are going to receive a message indicating whether the test was successful or it had failed.
Well done! You have just configured your Una Social Network to send outbound emails over SMTP. We hope you have found this tutorial helpful and easy to follow. In case you require any further assistance, please do not hesitate to contact our Technical Support Department by submitting a ticket request from your HostArmada Client Area.

Sebahat is a young and bright woman who has become an invaluable part of our team. She started as a Customer Care Representative, mastering that role and, along the way, growing into a tech-savvy individual who is well acquainted with every support layer of the company. Driven by her aim to improve our customers’ experience constantly, she is committed to enhancing the extraordinary support we deliver.
Learn more about Una in the other tutorials that we have: