
Google reCaptcha is designed to identify humans from bots and, consequently, to prevent spam, phishing, and hacker attacks on your website. What is great about Una is that it comes pre-packed with Google reCaptcha, and you only need to provide your reCaptcha keys to activate it.
In this tutorial, we are going to step-by-step guide you on how to obtain the required keys and configure them in your Una Studio.
The required API keys need to be obtained from your Google reCAPTCHA account. In case you do not have an existing account, please go ahead a create a new one by going to google.com/recaptcha/.
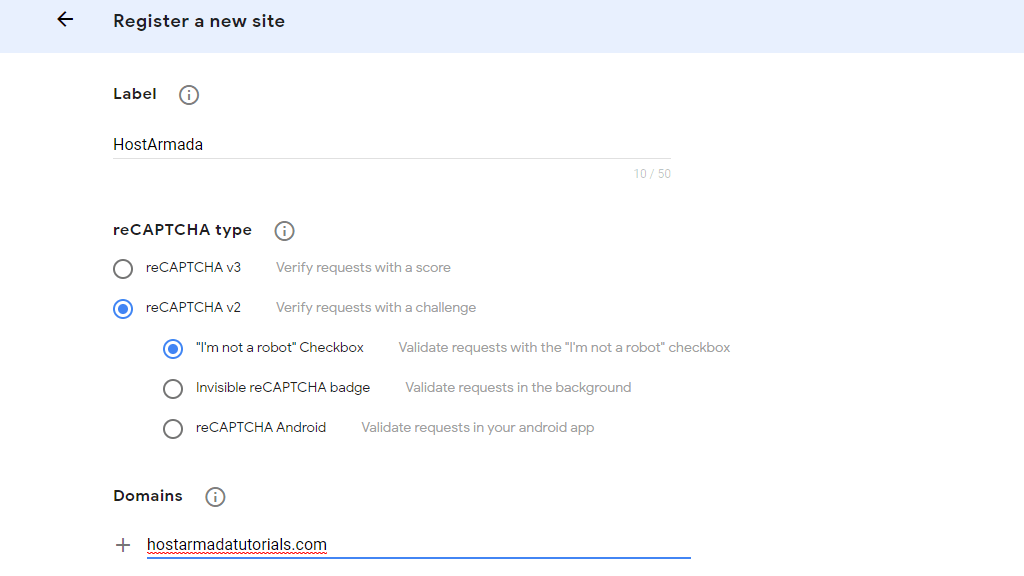
Once your account is successfully created, you have to register your new site.
Under the "Label" field, please enter a title to help you quickly recognize this site in future.
From the options below, please select your desired reCaptcha verification type. If you are uncertain, what is the exact difference between these types, please take a moment to review Google's official documentation.
You also need to enter the domain name of your Una website into the empty field available under "Domains".
Make sure to tick the "Accept the reCAPTCHA Terms of Services" checkbox below and then click on the "SUBMIT" button.
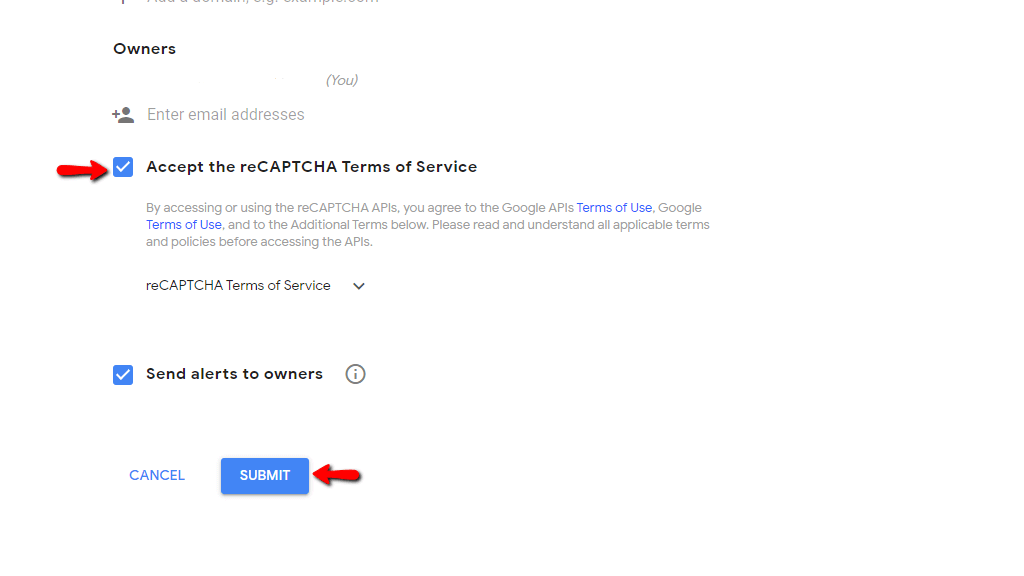
Afterward, you are provided with the required "Site Key" and "Secret Key". Please copy the keys or keep the page open as you are going to need them in the next step.

With this done, you are all set here.
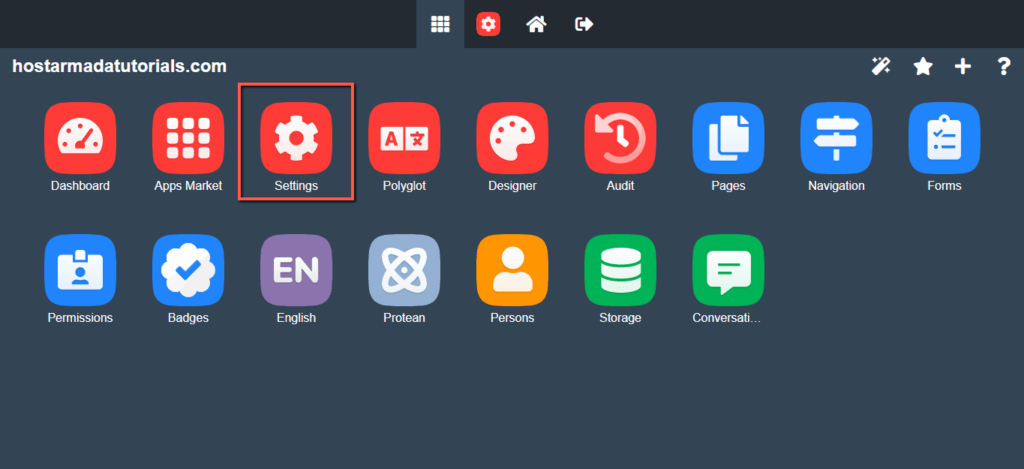
Now, please log in to your Una Studio and click on the "Settings" App on the home page.
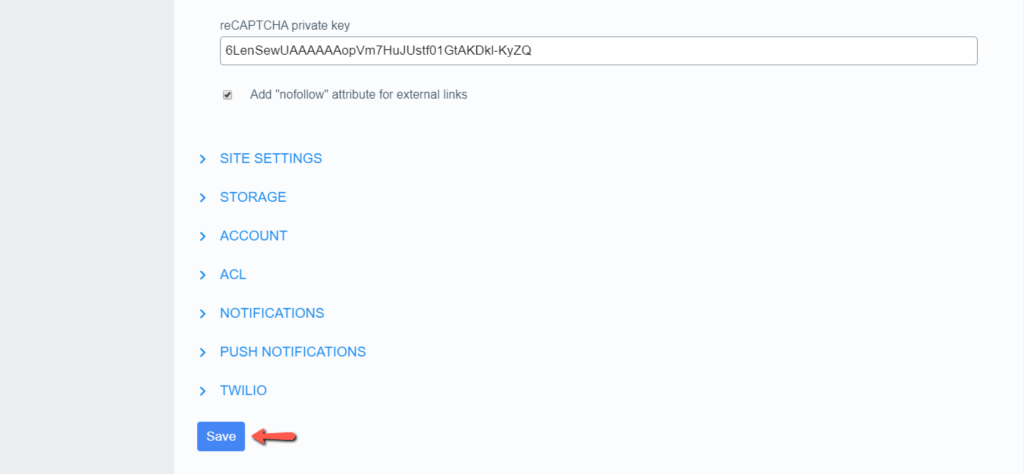
At the "Settings" page, please navigate to System > Security and enter the "reCAPTCHA public key" and "reCAPTCHA private key" into the corresponding fields.

When ready, please scroll down to the very bottom of the page and click on the "Save" button to apply the changes.
That is all! We would like to recommend you to go ahead and test if the reCaptcha form appears on your website. Once you confirm everything works as expected, you are all set.
As you can see, the configuration of Google reCaptcha is quite easy and straightforward. Therefore, we hope you have managed to enable it without much of a hassle. In case you happened to experience any sort of difficulties, do not hesitate to contact our Support Team for further instructions.

Sebahat is a young and bright woman who has become an invaluable part of our team. She started as a Customer Care Representative, mastering that role and, along the way, growing into a tech-savvy individual who is well acquainted with every support layer of the company. Driven by her aim to improve our customers’ experience constantly, she is committed to enhancing the extraordinary support we deliver.
Learn more about Una in the other tutorials that we have:
