
The email service maintained by PrestaShop 1.7 is a crucial part of the interaction between your customers and your Online Store. Prestashop 1.7 sends an email for basically every action the user takes from purchasing products to changing the password for their profile. Furthermore, the email service can be utilized by shop owners for sending newsletters or any custom coupon codes in order to engage with the customers even more.
To send any outbound emails, Prestashop 1.7 is configured by default to utilize the mail service of the web hosting server directly without authenticating thanks to the PHP mail function, however, that is not always the correct approach considering the fact that nearly always the Outbound Mail IP address of the server gets blacklisted, thus causing any outbound emails to be rejected. The solution to this issue is rather simple and also included in the default set of features PrestaShop 1.7 offers. It is called SMTP and it basically connects your PrestaShop 1.7 Online Store with the Email service offered either by the Web Hosting Provider or by any third party Mail Provider like Google Gmail for example, using settings for SMTP authentication.
In this tutorial, you are going to learn how to set up the SMTP settings for your PrestaShop Online Store and how to integrate the protocol in order for all the emails that are sent from your Store to use it.
The email configuration of your Prestashop Online Store, like every other setting is located in the admin area of Prestashop. So, to access the Email Settings page you will first have to be logged in as an administrative user. Then, from the main left vertical navigation menu, you have to look for the “Advanced Parameters” option. When you find it, please, click on it. А drop-down menu will appear with the following options “Information”, “Performance”, “Administration”, “Email”, “Import” and so on.
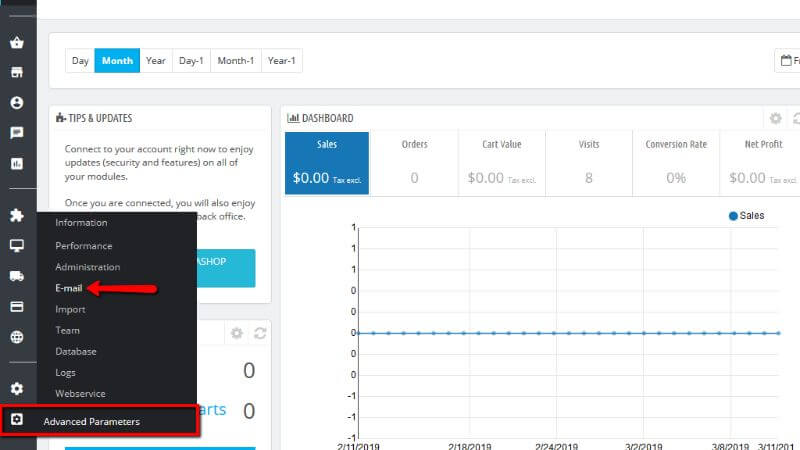
Out of all these options, please, click the “Email” one. This action will redirect you to the “Email” page.
Once redirected to the “Email” page you will be presented with few sections.

In the first section, you will be presented with a list of all the emails that were sent from PrestaShop, containing the following information: “Recipient”, “Template”, “Language”, “Subject”, “Sent”, “Actions” and a button for the settings.

The second section is called “Emails” and it contains options about the settings of the emails. More precisely - how they are going to be sent and the format of the sent emails.

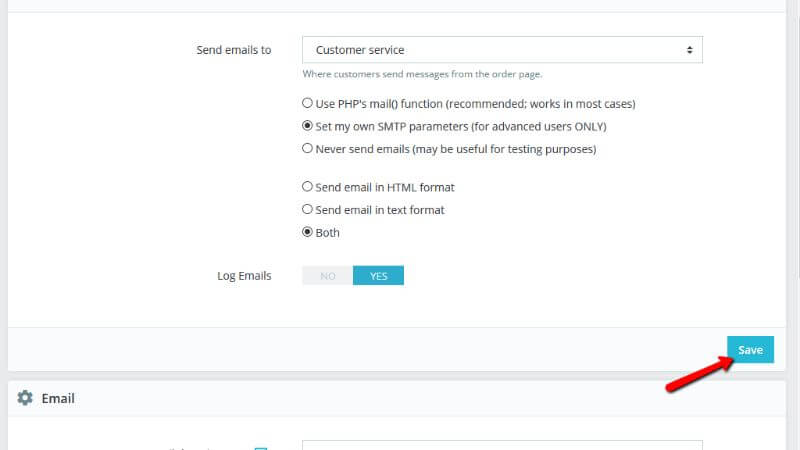
The first option in the “Email” section contains a drop-down menu and is about where the customers will send messages from the order pages. The option is called “Send email to”. At the end of the checkout process, the customer can leave a message to your staff. With that option, you can decide to whom this message will be sent.
For example, if you want the messages from the customers to arrive at the “Customer service” department, then you should mark the customer service option from the drop-down menu. That means that people who are part of the customer service team will be responsible to take care of the email. Otherwise, if you prefer the messages to go to the person responsible for maintaining the website, click the webmaster option.
Next, in that section, you will see a few different options related to the method of how the emails of your Online Store will be sent.
The next part of that section is about in which type of format you want the emails to be sent in: “Send email in HTML format”, “Send email in text format” or do “Both”.

The last option in that section is called “Log emails”.

By default, that option will be marked on “Yes”, but if you do not want to keep the track of the emails sent by your Online Store, please, click the “No” button then. This way you will disable that option.
Once ready with that, please, click the “Save” button at the bottom of the section.
Under the section that appears if the option “Set my own SMTP parameters” is chosen there is one last section. It is called “Test your email configuration”. The purpose of that section is for you to see if the email configuration is working properly by sending a test email to an email address of your choice.

In the next step, you will learn more about the “Email” section and how to actually set up the SMTP settings for your emails.
Now, the option we are looking for out of these three is called:

Now, let’s move to the section that appears and is the important one for setting the SMTP parameters. That section is called “Email” again and it has 6 fields that should be configured.

The information that you have to fill out should be provided to you by:
Please, bear in mind, you have to make sure to enter the information exactly as being provided to you.
Let’s start with the options one by one:
After you are done setting the SMTP configuration, please, click the “Save” button at the bottom of that section.

The last section is called “Test your email configuration”.

The moment you are done configuring your emails, please, enter your own email address in the field called “Send a test email to”. After that click the “Send a test email” button. Now, please, check your inbox of the provided email address to verify that you actually received the test email in the correct format. If you have not entered the correct information when you click the “Send a test email” button, you will receive a label at the bottom of the page saying which are the errors.

Congratulations! Today you learned the benefits of having SMTP settings for outbound emails and how to configure those.

Simeon is an experienced System Administrator with over 10 years of experience in the Web Hosting field. He is recognized unanimously as the man behind every technical innovation or improvement that HostArmada introduces. Adaptable and responsible, he solves every technical issue that we or our clients throw at him. Every so often you will find him publishing technical content on our website.
Learn more about Prestashop 1.7 in the other tutorials that we have:
