
Learn Client Area
 Last
Updated: 01/09/2020
Last
Updated: 01/09/2020
 ( 5 minutes reading )
In this tutorial, we will guide you on how to manage the account details in your HostArmada Client Area (“Client Dashboard”). You will get familiar with the process of editing your Personal Information and creating Contacts/Sub-Accounts. We will show you how to change the password for your HostArmada Client Area as well as how to configure the Security Settings of your account.
When you are logged into your HostArmada Client Area, please click on the arrow icon next to the “Hello, Your Name” message (top right corner) and select Edit Account Details from the list of options.
.png)
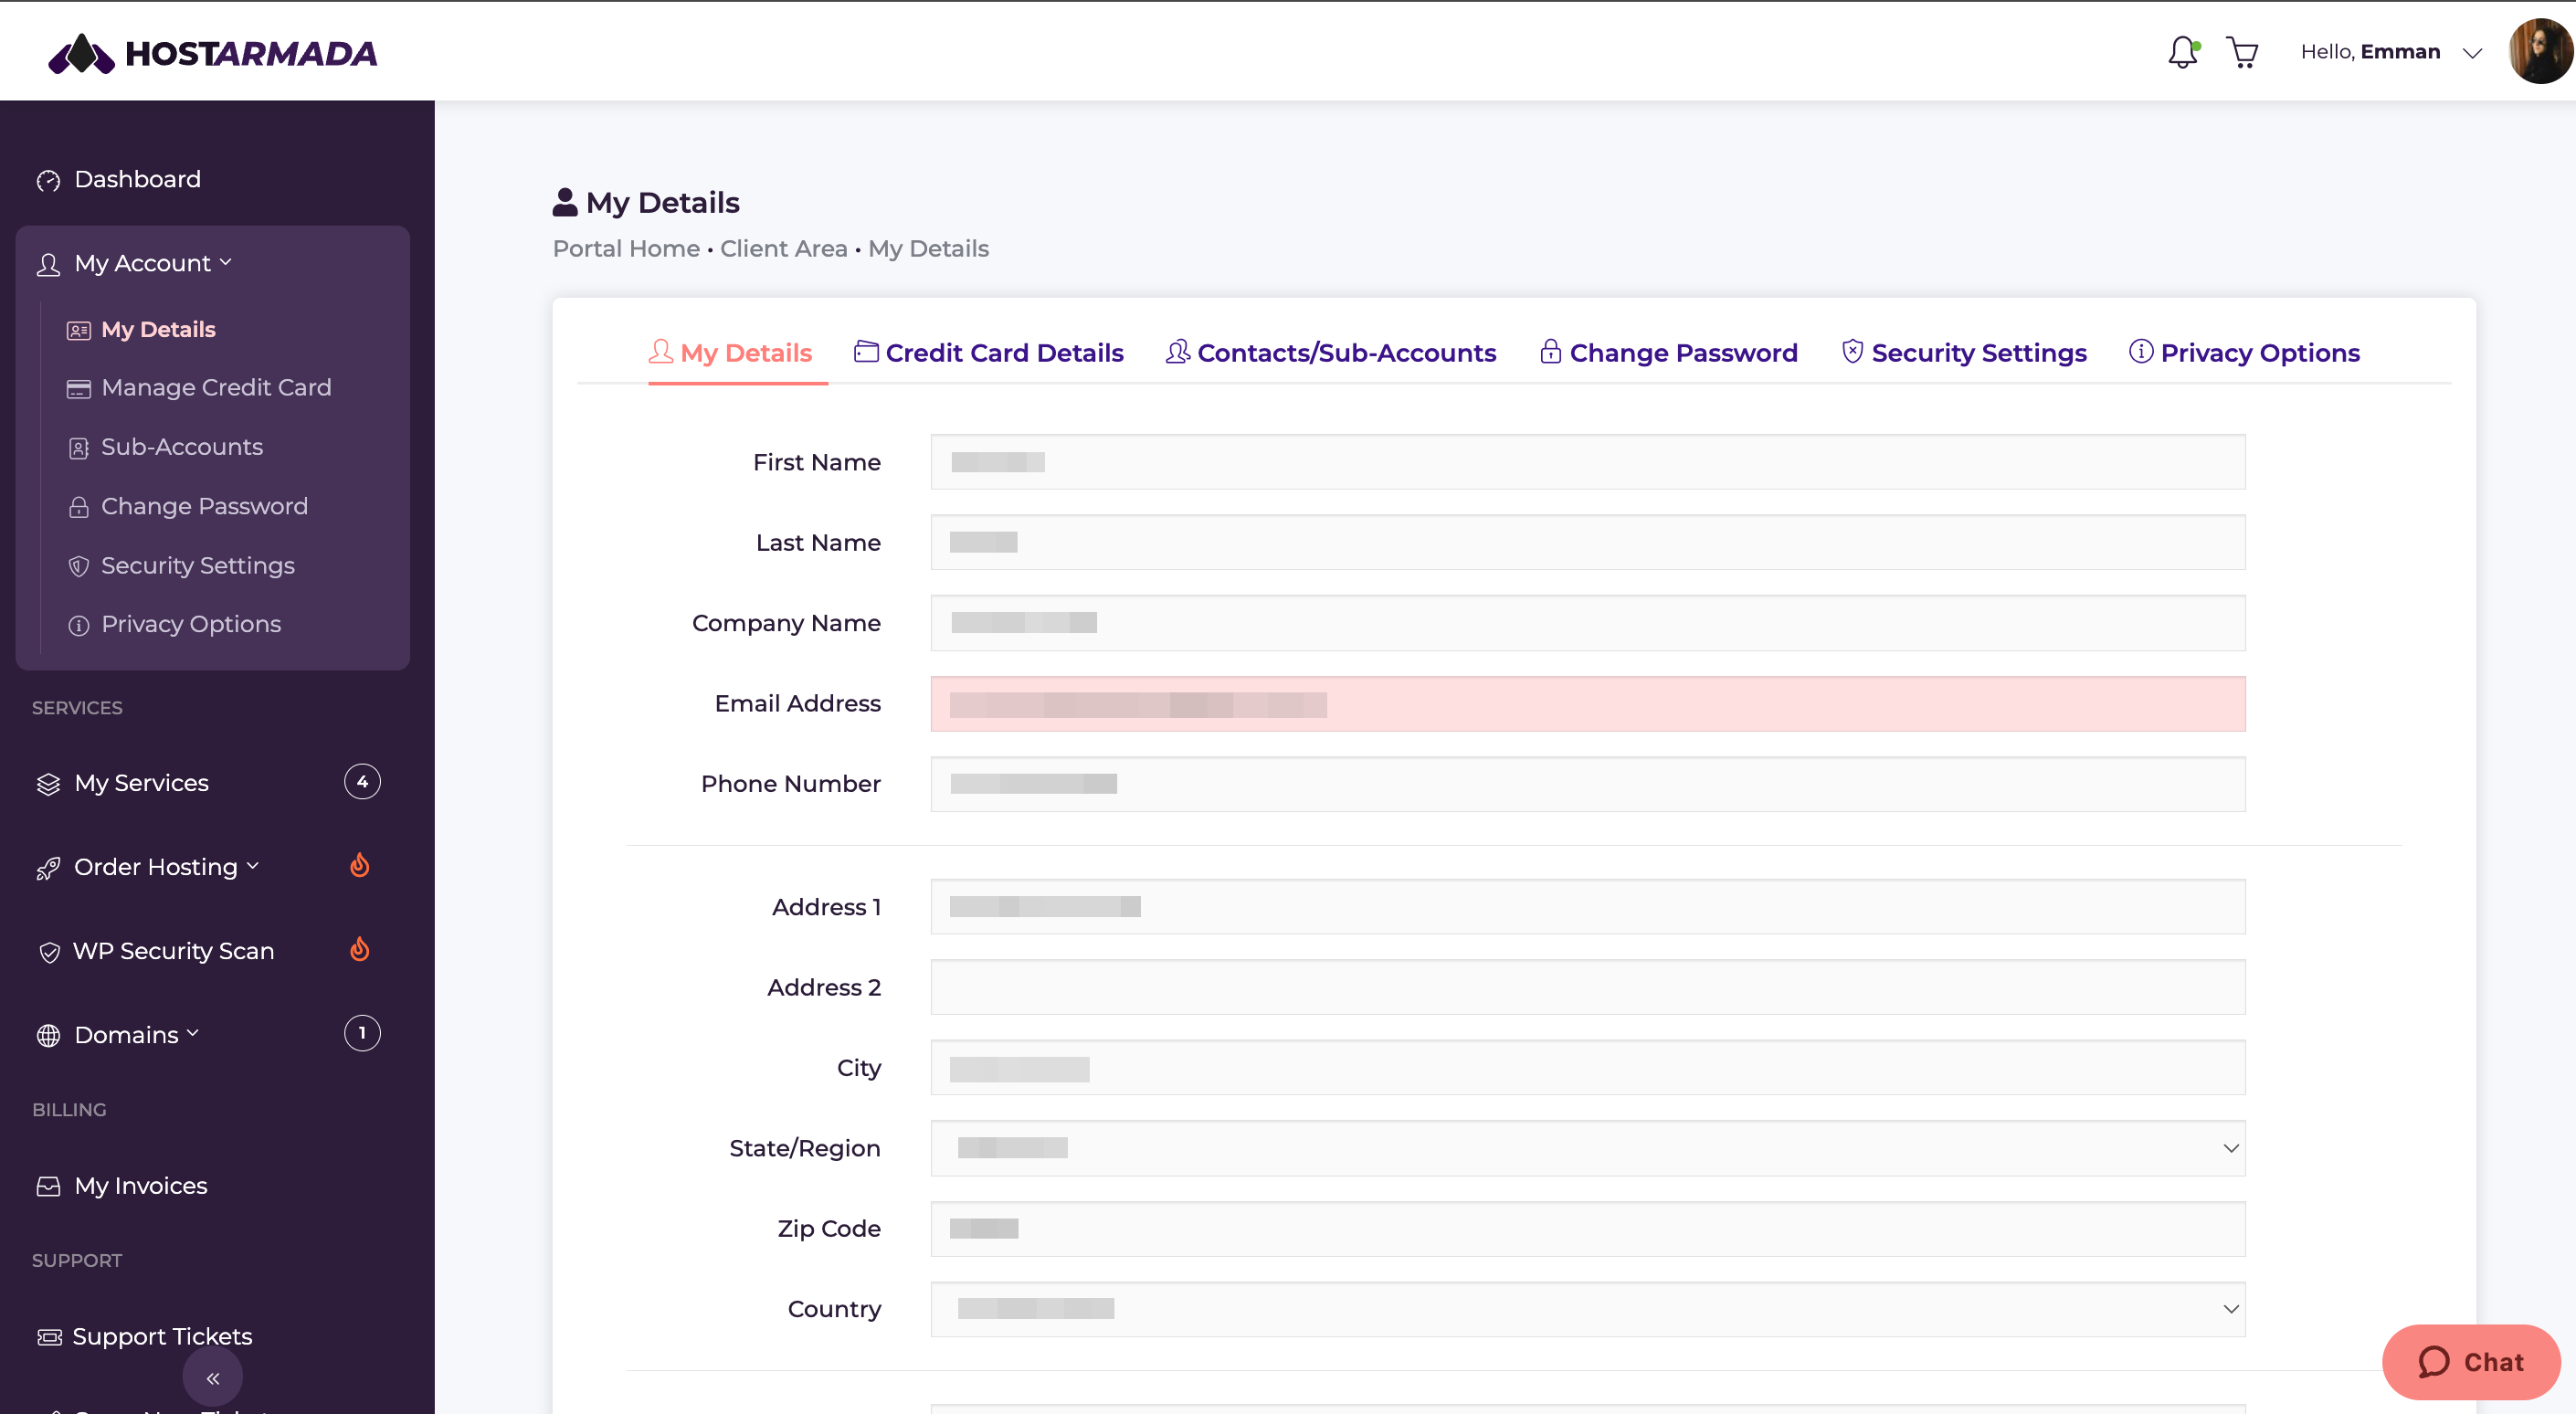
You will be redirected to the account details management page. As you will notice, this page is split into multiple tabs. Let's have a look at what actions you can perform from each tab below.
Under My Details tab, you can edit all your Personal Information, including your names, company name, email address, phone number, and physical address.
Right below your Personal Details, you will be able to configure your Billing preferences.
The Payment Method setting determines the default method that will be used for all future payments. You will need to select one of the following options from the dropdown menu:
Default Billing Contact determines the PayPal or Credit Card holder. Note that the selected Billing Contact will be assigned as a holder to all invoices.
Finally, the Join our mailing list checkbox lets you control whether you desire to receive promotional emails from HostArmada.
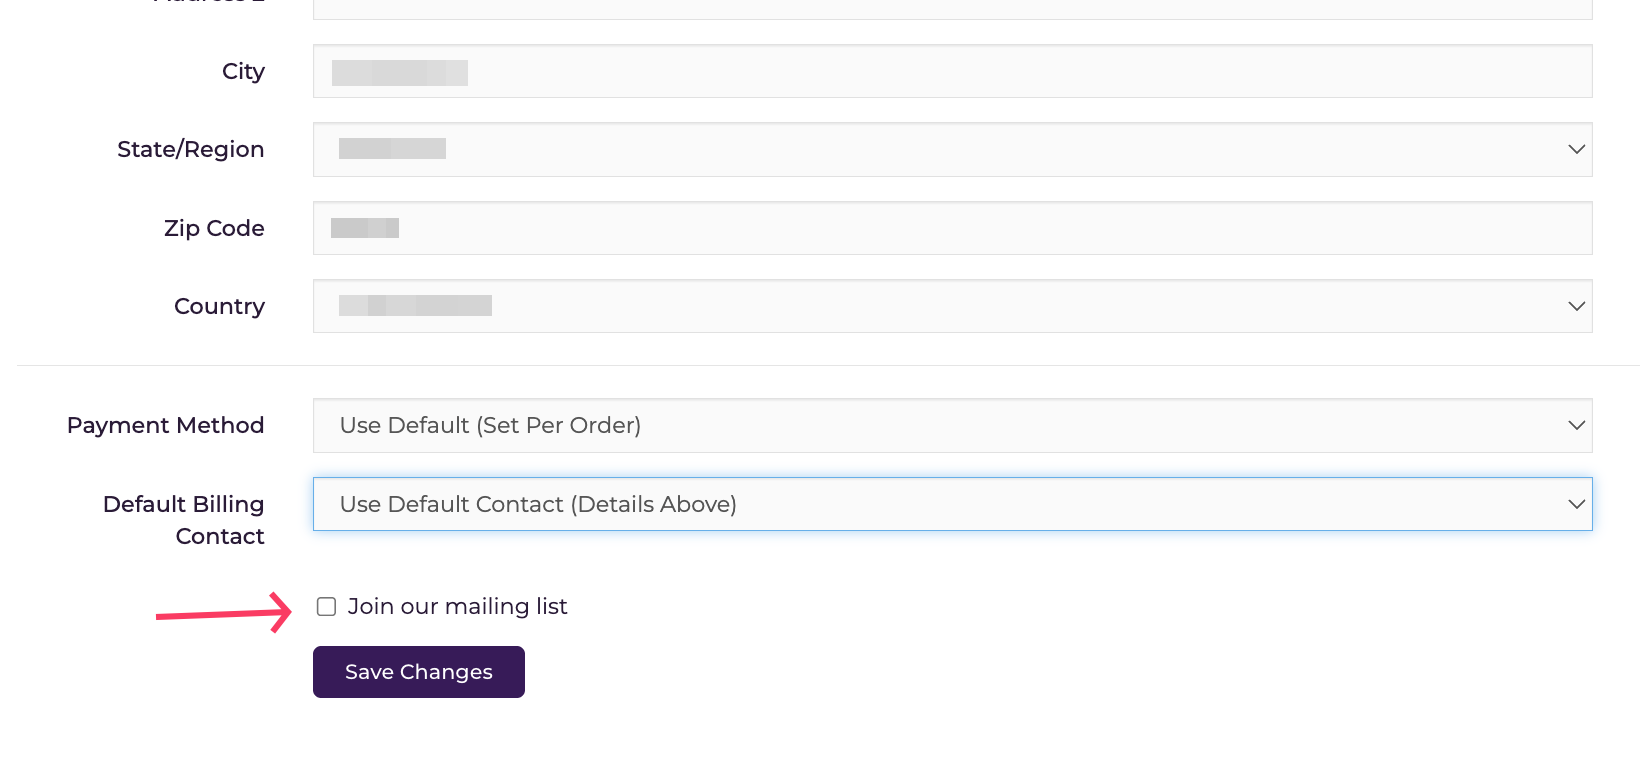
Once you perform the necessary changes, please do not forget to click on the “Save Changes” button in order to successfully record them.
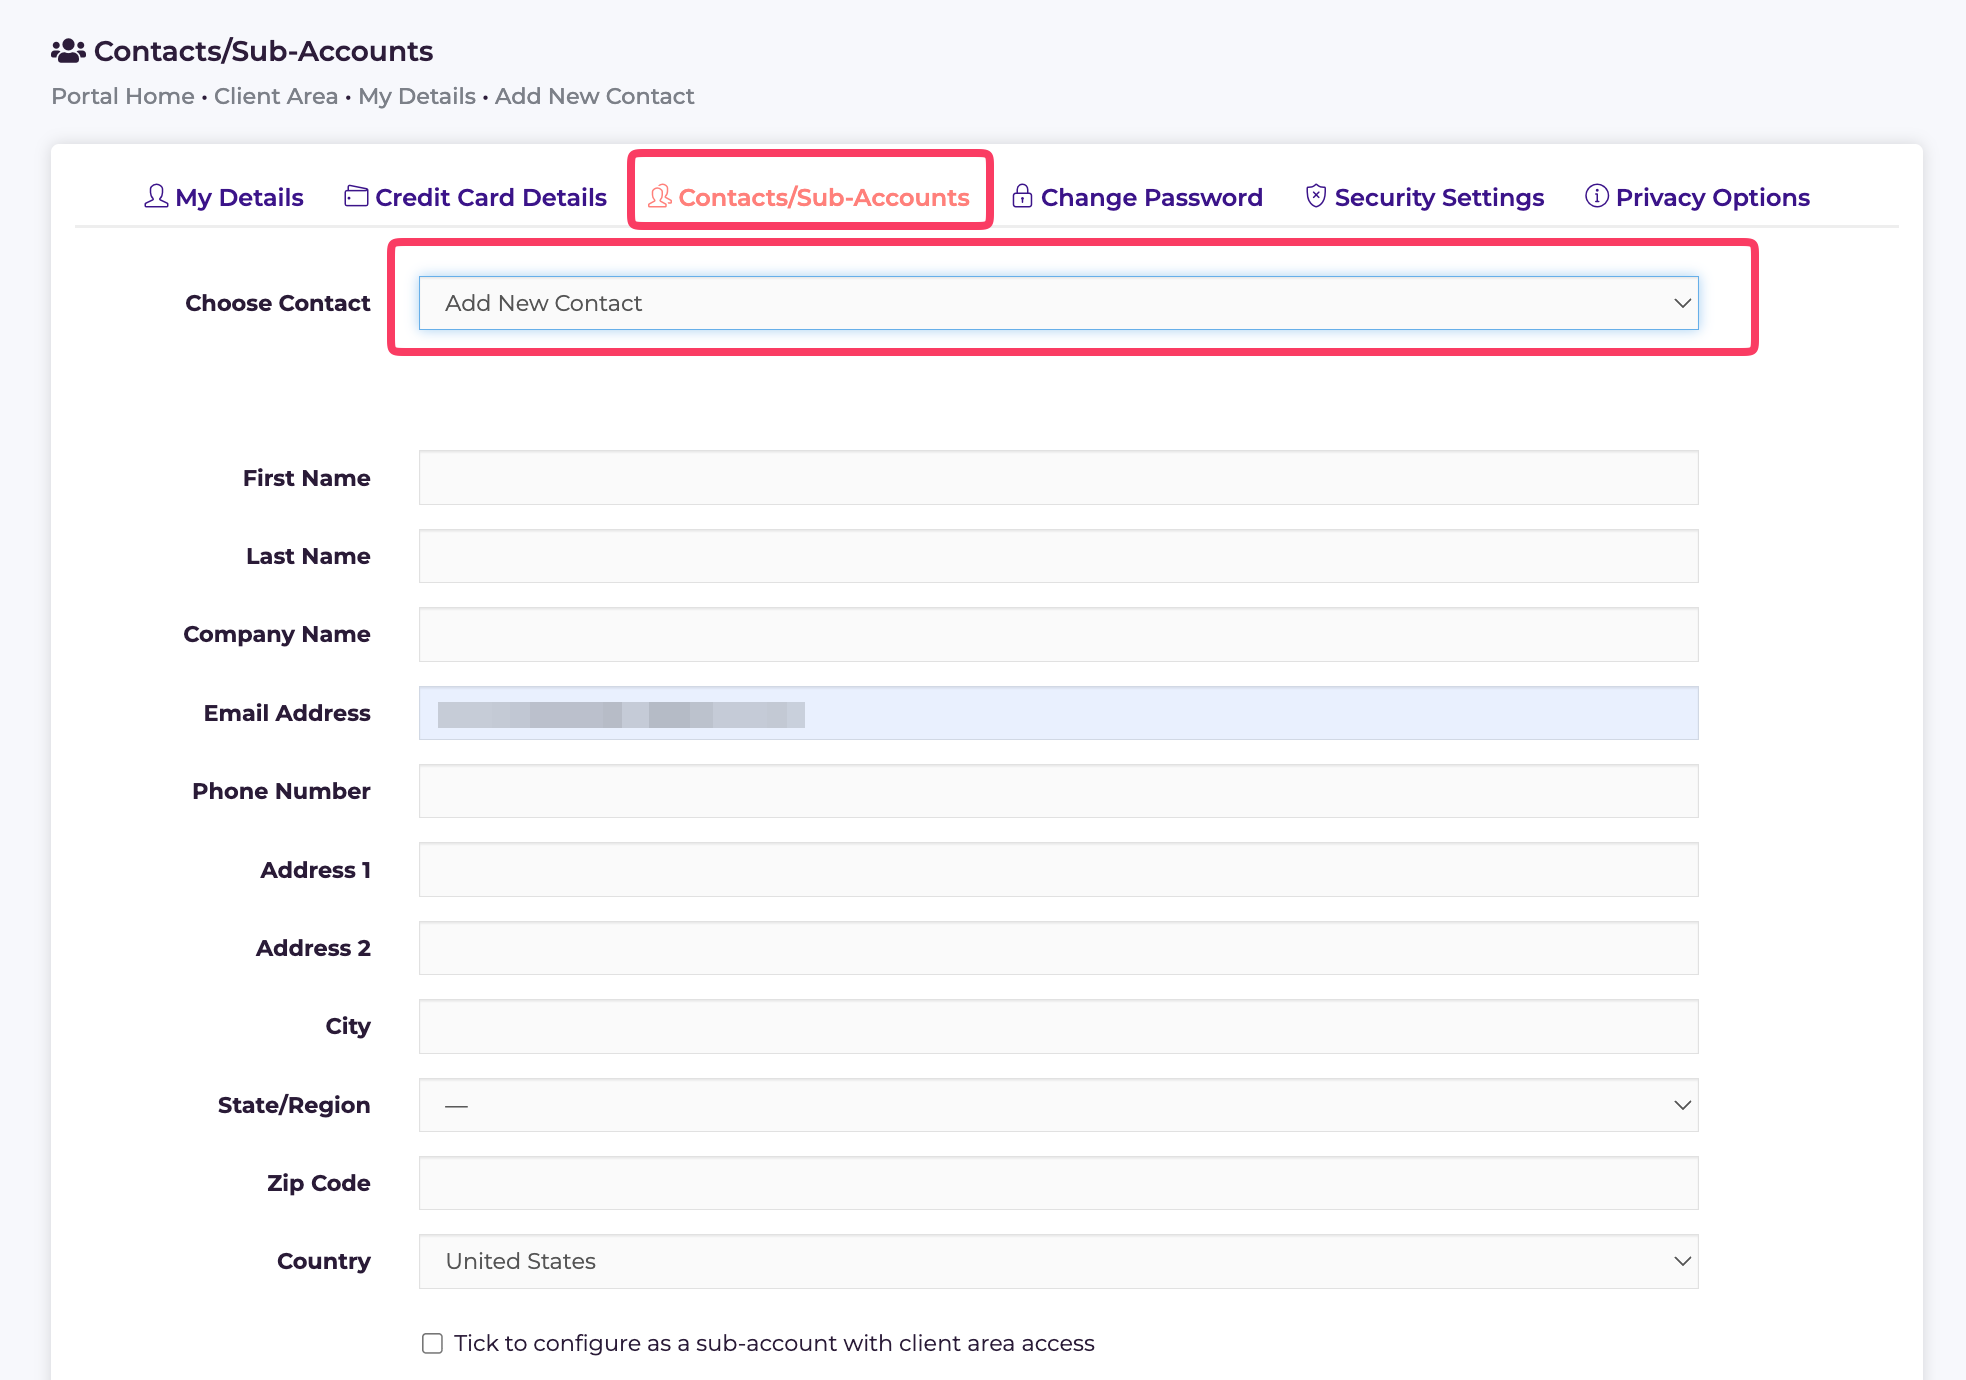
If you need to allow a third person access to your account, you can create a sub-account for them. The sub-accounts are entirely customizable; therefore, you will be able to determine the privileges granted and control the level of access provided.
To create a new sub-account, go to the Contacts/Sub-Accounts tab and select Add New Contact from the Choose Contact dropdown menu.
Once this is done, you will need to specify the Contact details of the new account in the same manner as for your own account.
In case you would like to allow the sub-account with access to the Client Area, please mark the Tick to configure as a sub-account with client area access checkbox. Once this is done, a new Permissions list of options will be presented and you will be able to control the level of access of the sub-account by ticking the corresponding checkboxes. You will also need to specify the sub-account login password.
Also, from the list of options under Email Preferences, you will be able to select what email notifications will be sent to the email address associated with the sub-account, as well as to allow the account owner to submit support tickets if needed.
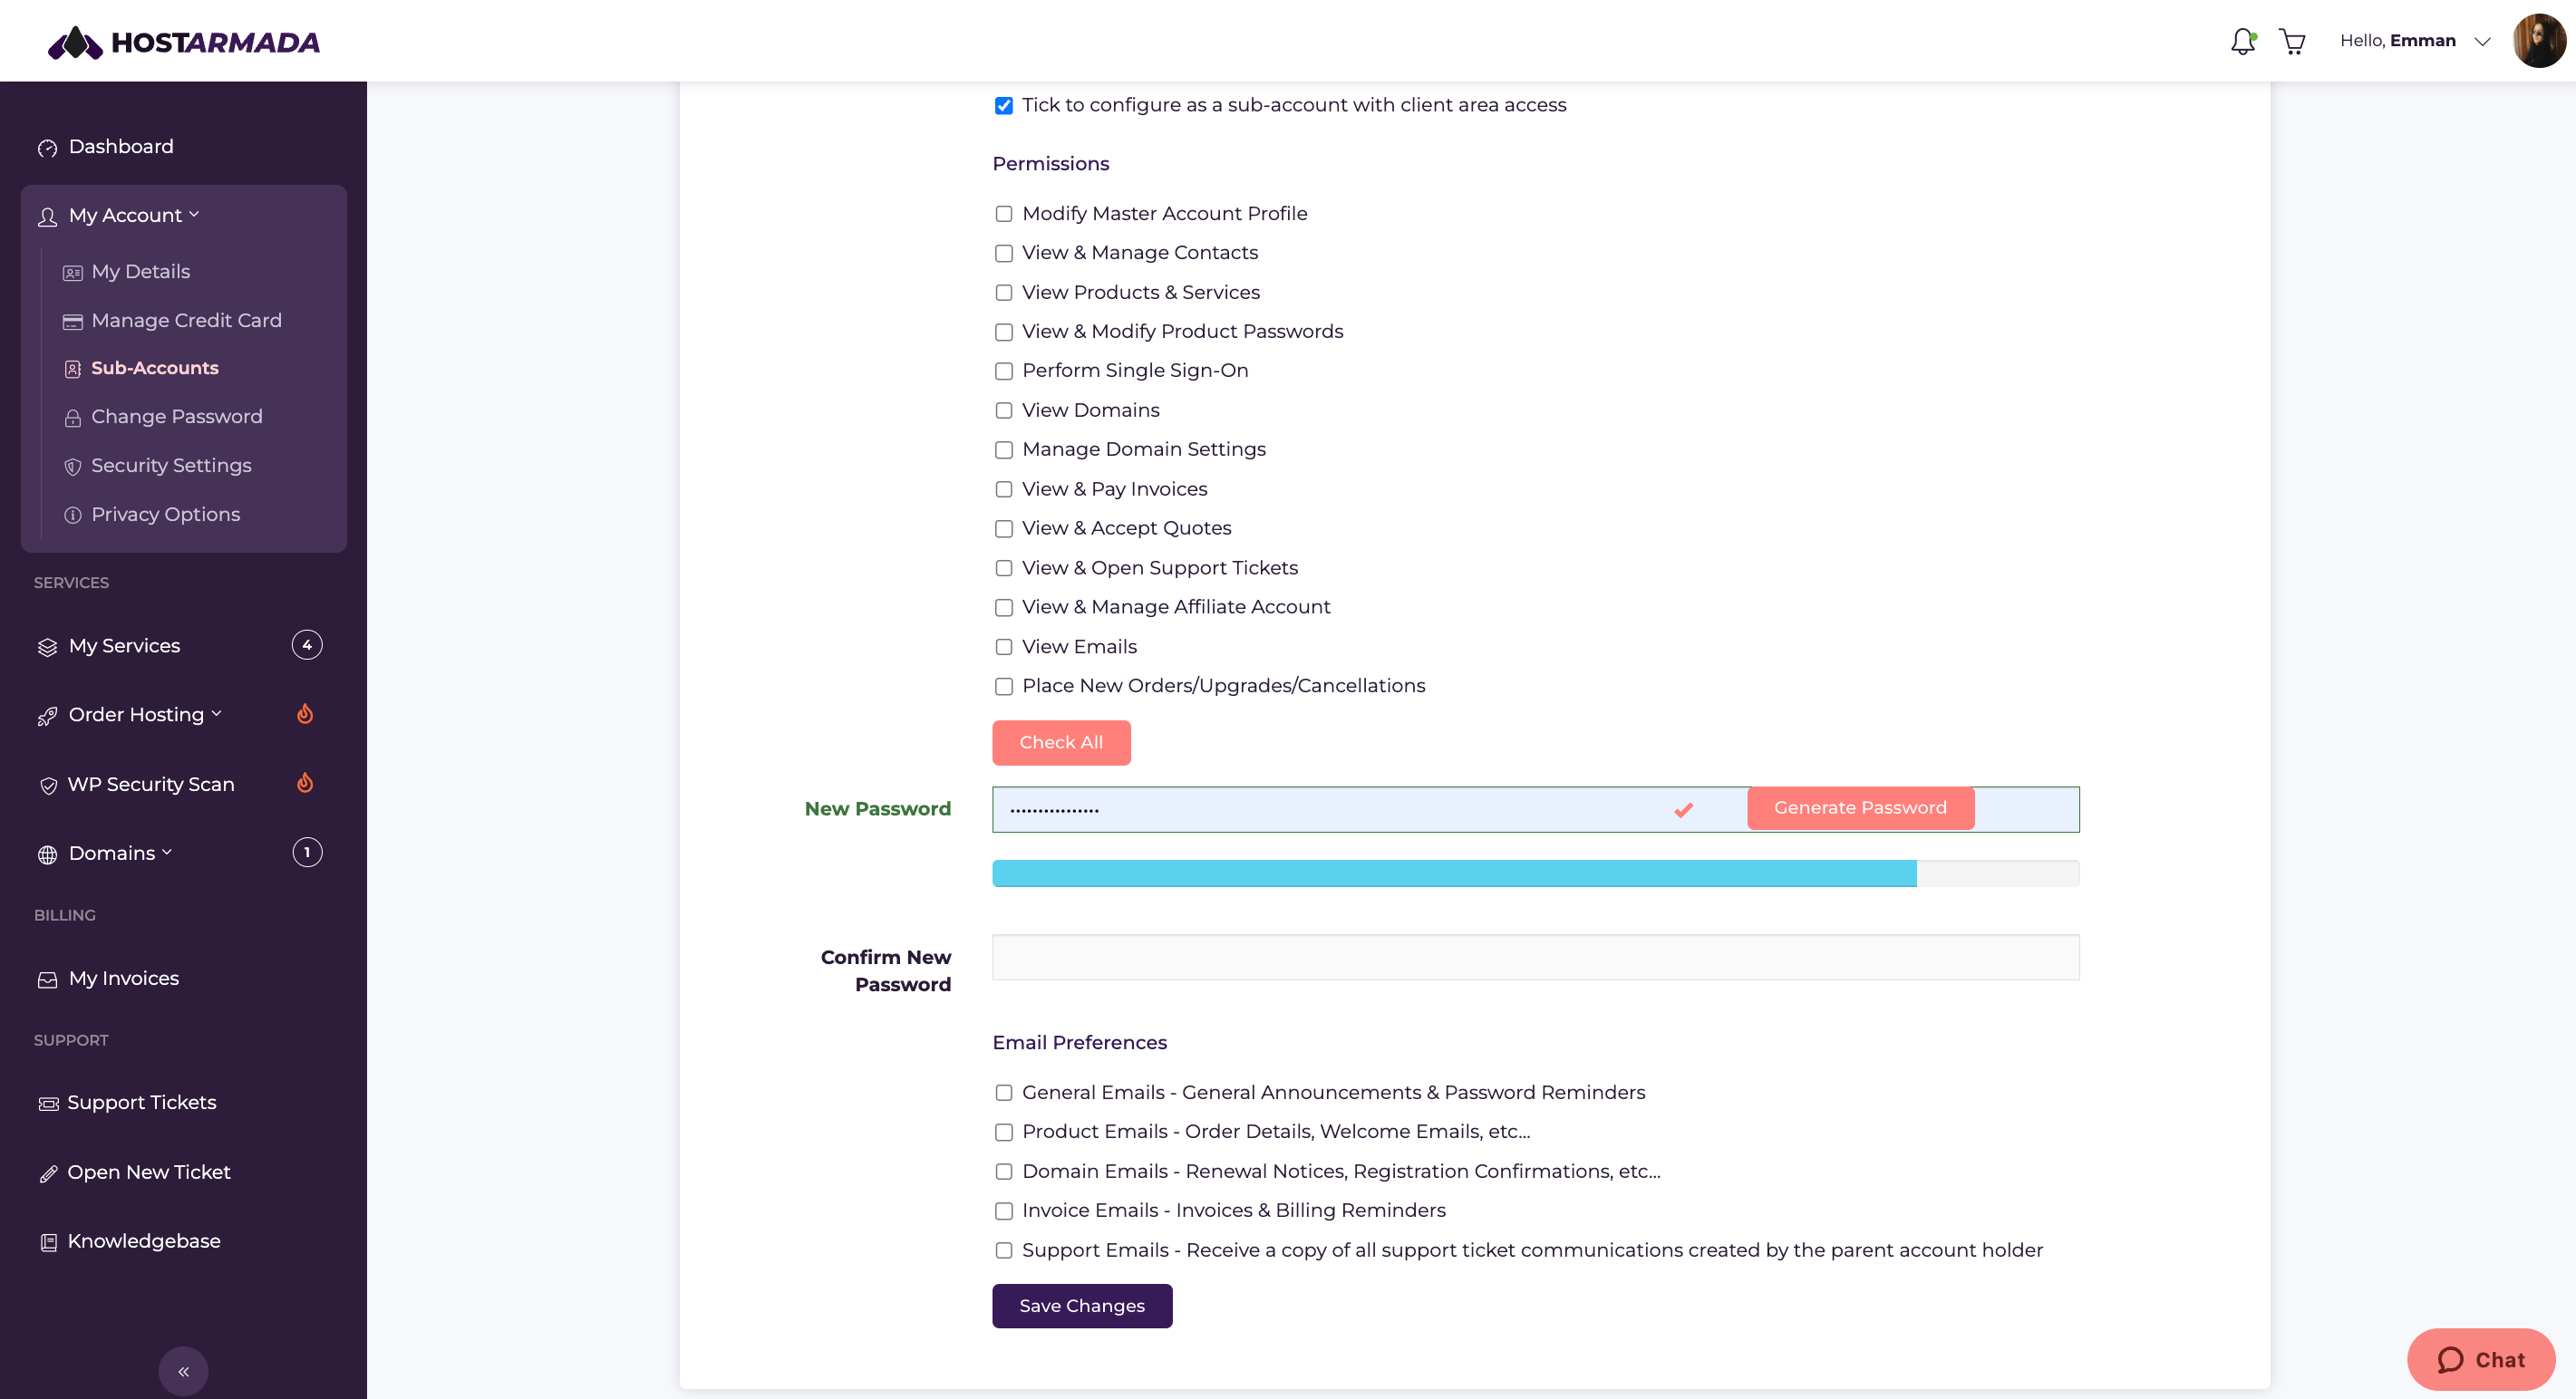
When you are ready, please make sure to click on the Save Changes button in order to finalize the creation of the sub-account.
In case you need to change the password for your HostArmada Client Area, you can do so from the Change Password tab. All you will need to do is enter your current password, then specify the new password and re-type it to confirm it matches. Please make sure to use a strong password, as using a common and easily guessable password can lead to a security vulnerability. You can use the Generate Password option, which will automatically generate a strong password (combining letters, numbers, and symbols) for your account.
.png)
Once you are ready, please click on the Save Changes button and your new password will be successfully configured.
From the Security Settings tab, you can add extra layers of security to your HostArmada Client Area and protect it from unauthorized access. You can configure Two-Factor Authentication (2FA) as well as Single Sign-On functionality.
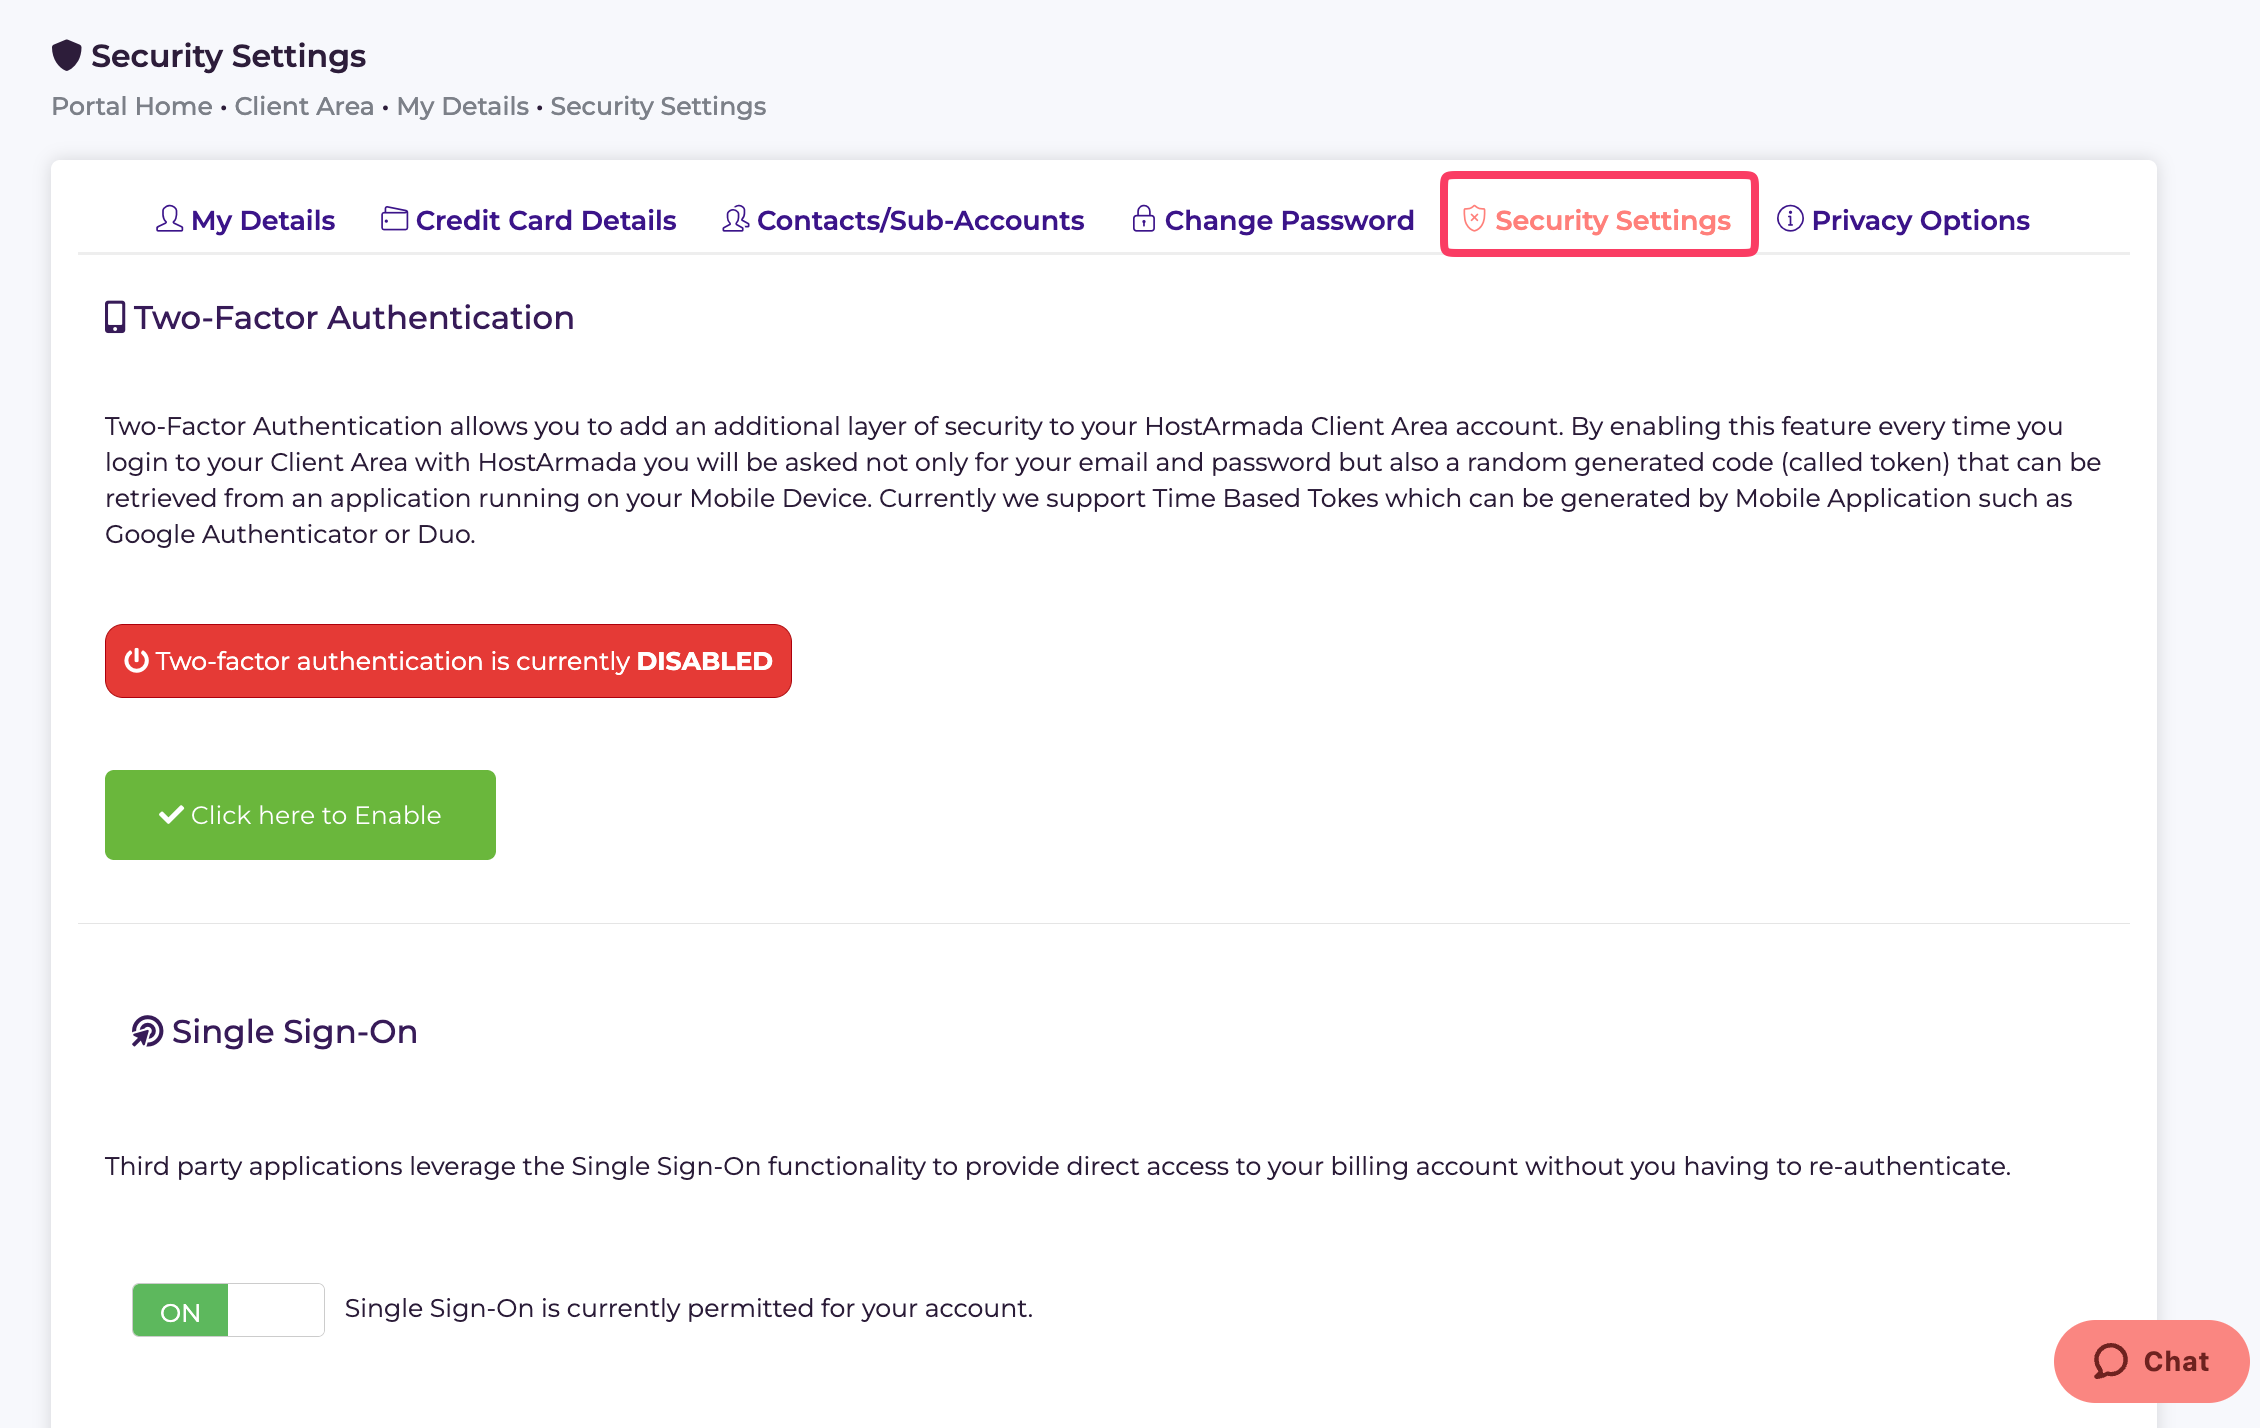
Two-Factor Authentication will defend your HostArmada Client Area and sensitive data from various attacks, such as Brute-force, hackers, keyloggers and other threats.
With 2FA enabled on your account, you will be obligated to provide a passcode that can be obtained from an additional smart device configured for the purpose.
In case you wish to enable it, please follow the steps in our guide based on How to enable Two-Factor Authentication in HostArmada Client Area.
The Single Sign-On functionality allows you to directly sign in to your cPanel account through your HostArmada Client Area without a need for further authentication. Please note that it is enabled by default. In case you would like to manually sign in to the cPanel account, please make sure to disable it by clicking on the green “On” button.
We hope you have found the information in this tutorial useful and our guidance easy to follow. In case you have experienced any sort of difficulties, please make sure to contact our Support Team for assistance.

Emman is a Content Manager at HostArmada where she helps make complex topics accessible for readers around the world. With 5+ years of experience in crafting SEO content, she’s passionate about making tech topics easy to understand. In her free time, Emman enjoys traveling and watching Formula 1/E races.
Learn more about Client Area in the other tutorials that we have:
