
Learn Client Area
 Last
Updated: 01/09/2020
Last
Updated: 01/09/2020
 ( 5 minutes reading )
In this tutorial, we will introduce the Service Management section available under your HostArmada Client Area (“Client Dashboard”). The main purpose behind developing this area is to grant full control and allow easy management of all hosting services you are using with HostArmada. In the following lines, we will explain all the details and guide you on how to efficiently administer your services.
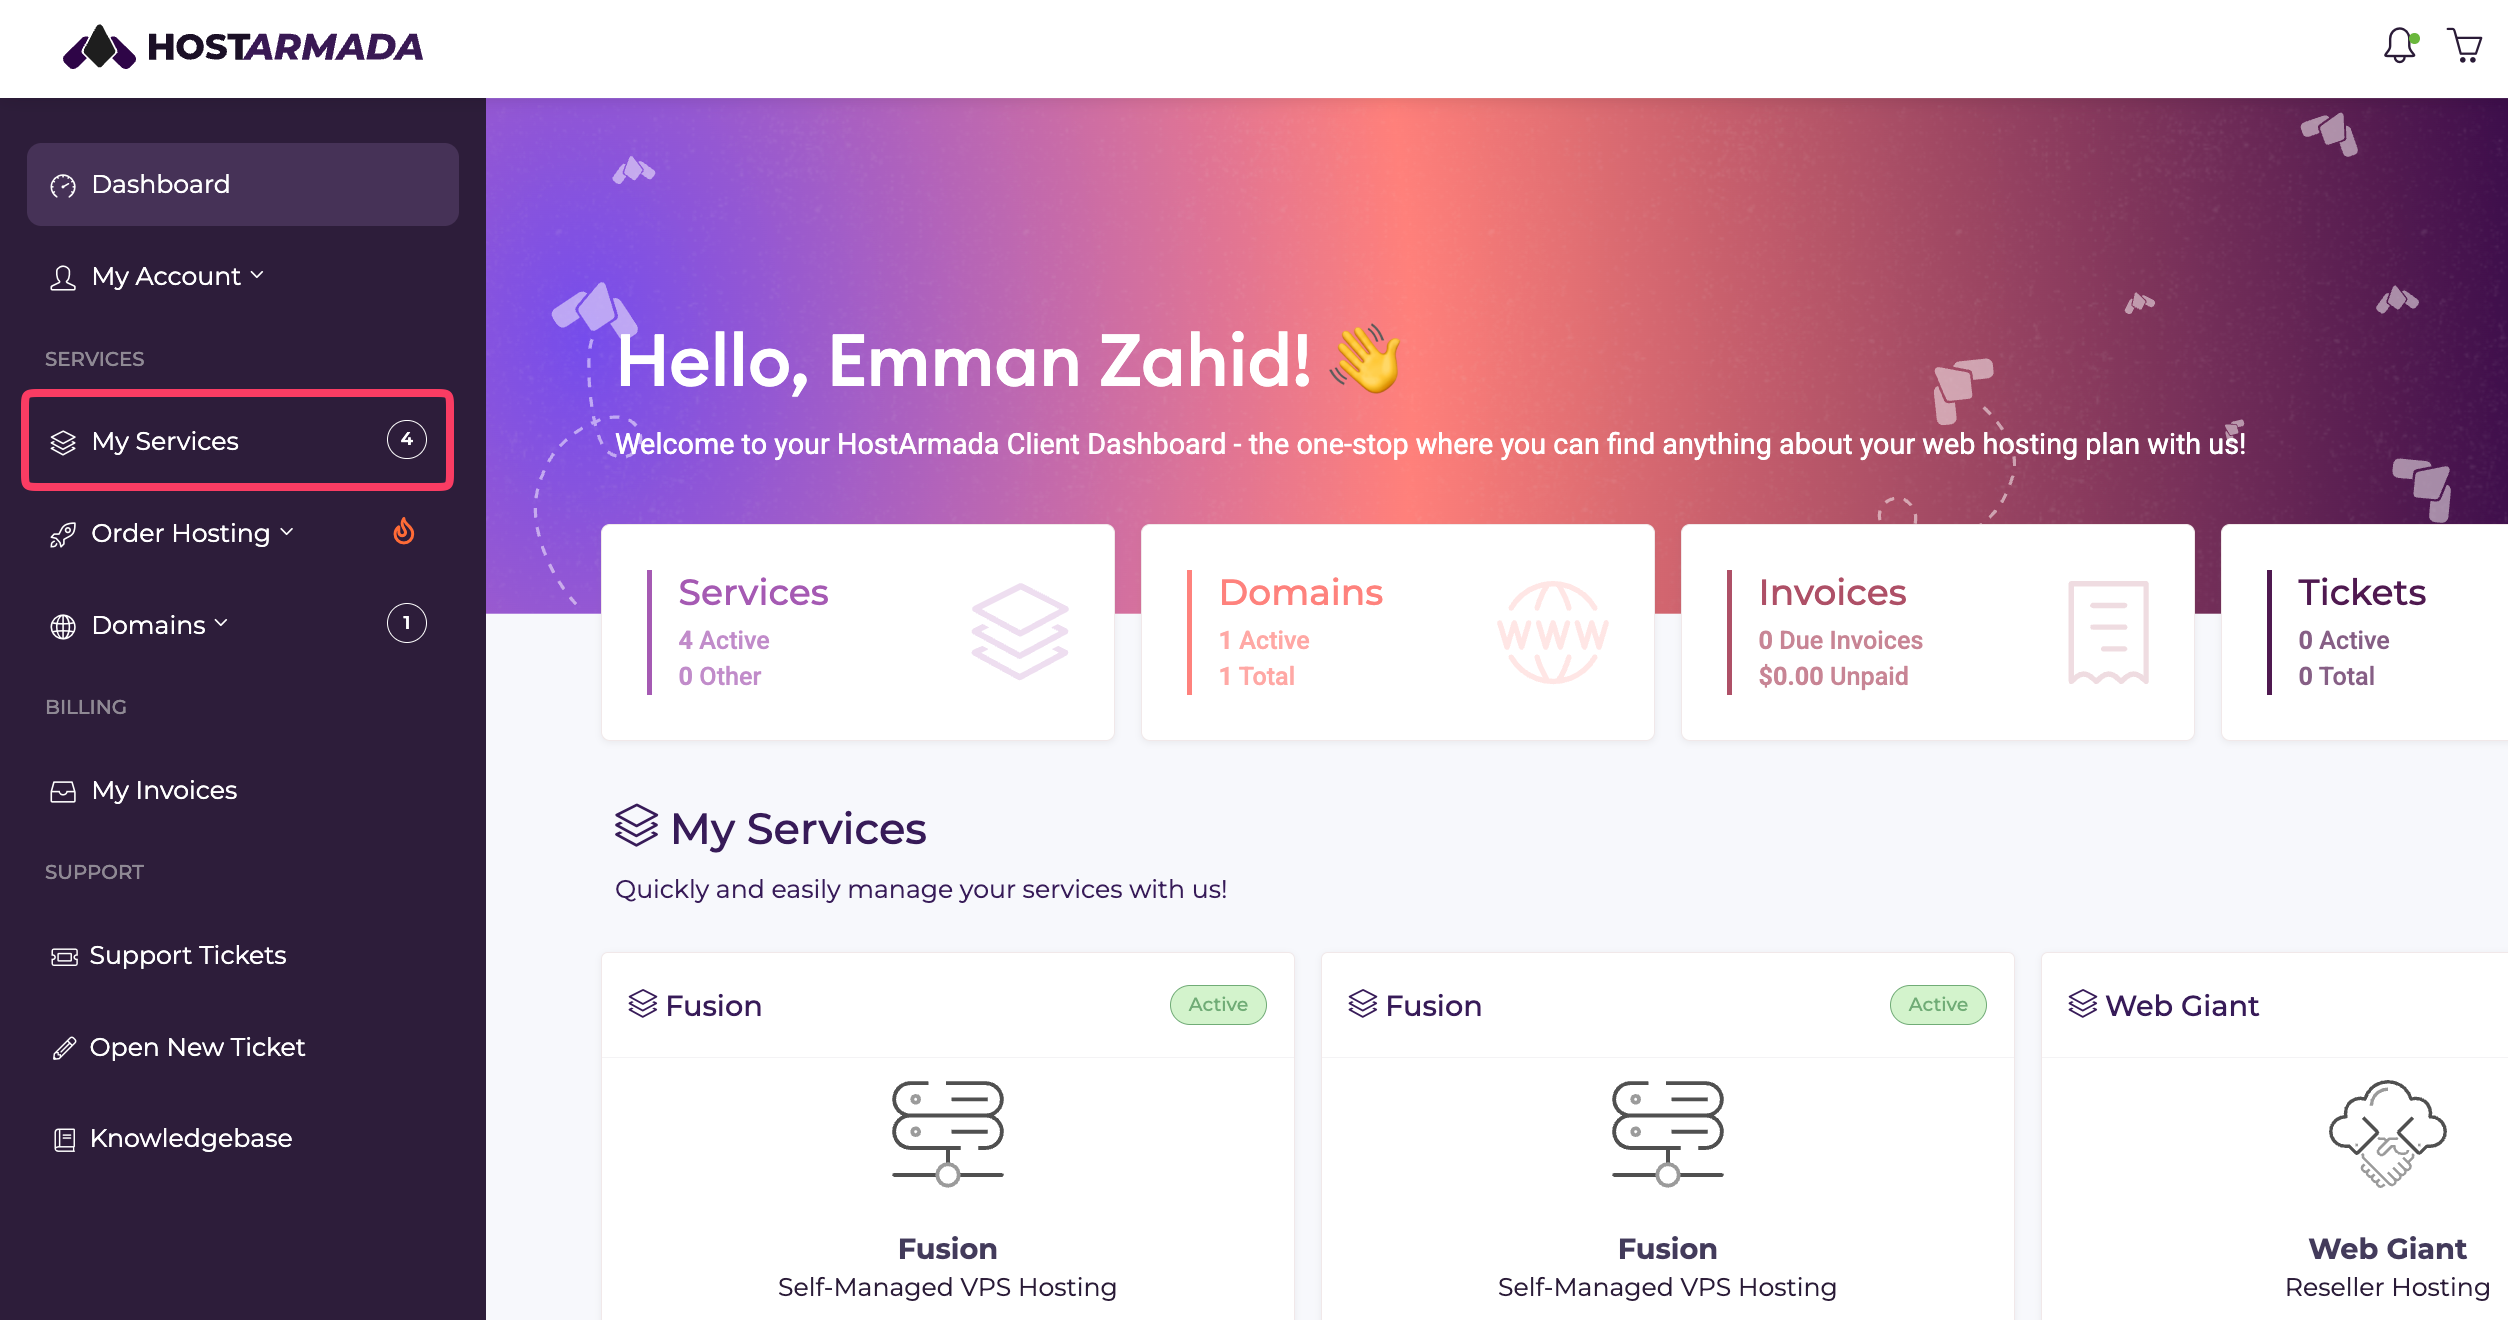
Log in to your HostArmada Client Area. To access the Service Management section, click on My Services located in the left-hand menu bar.
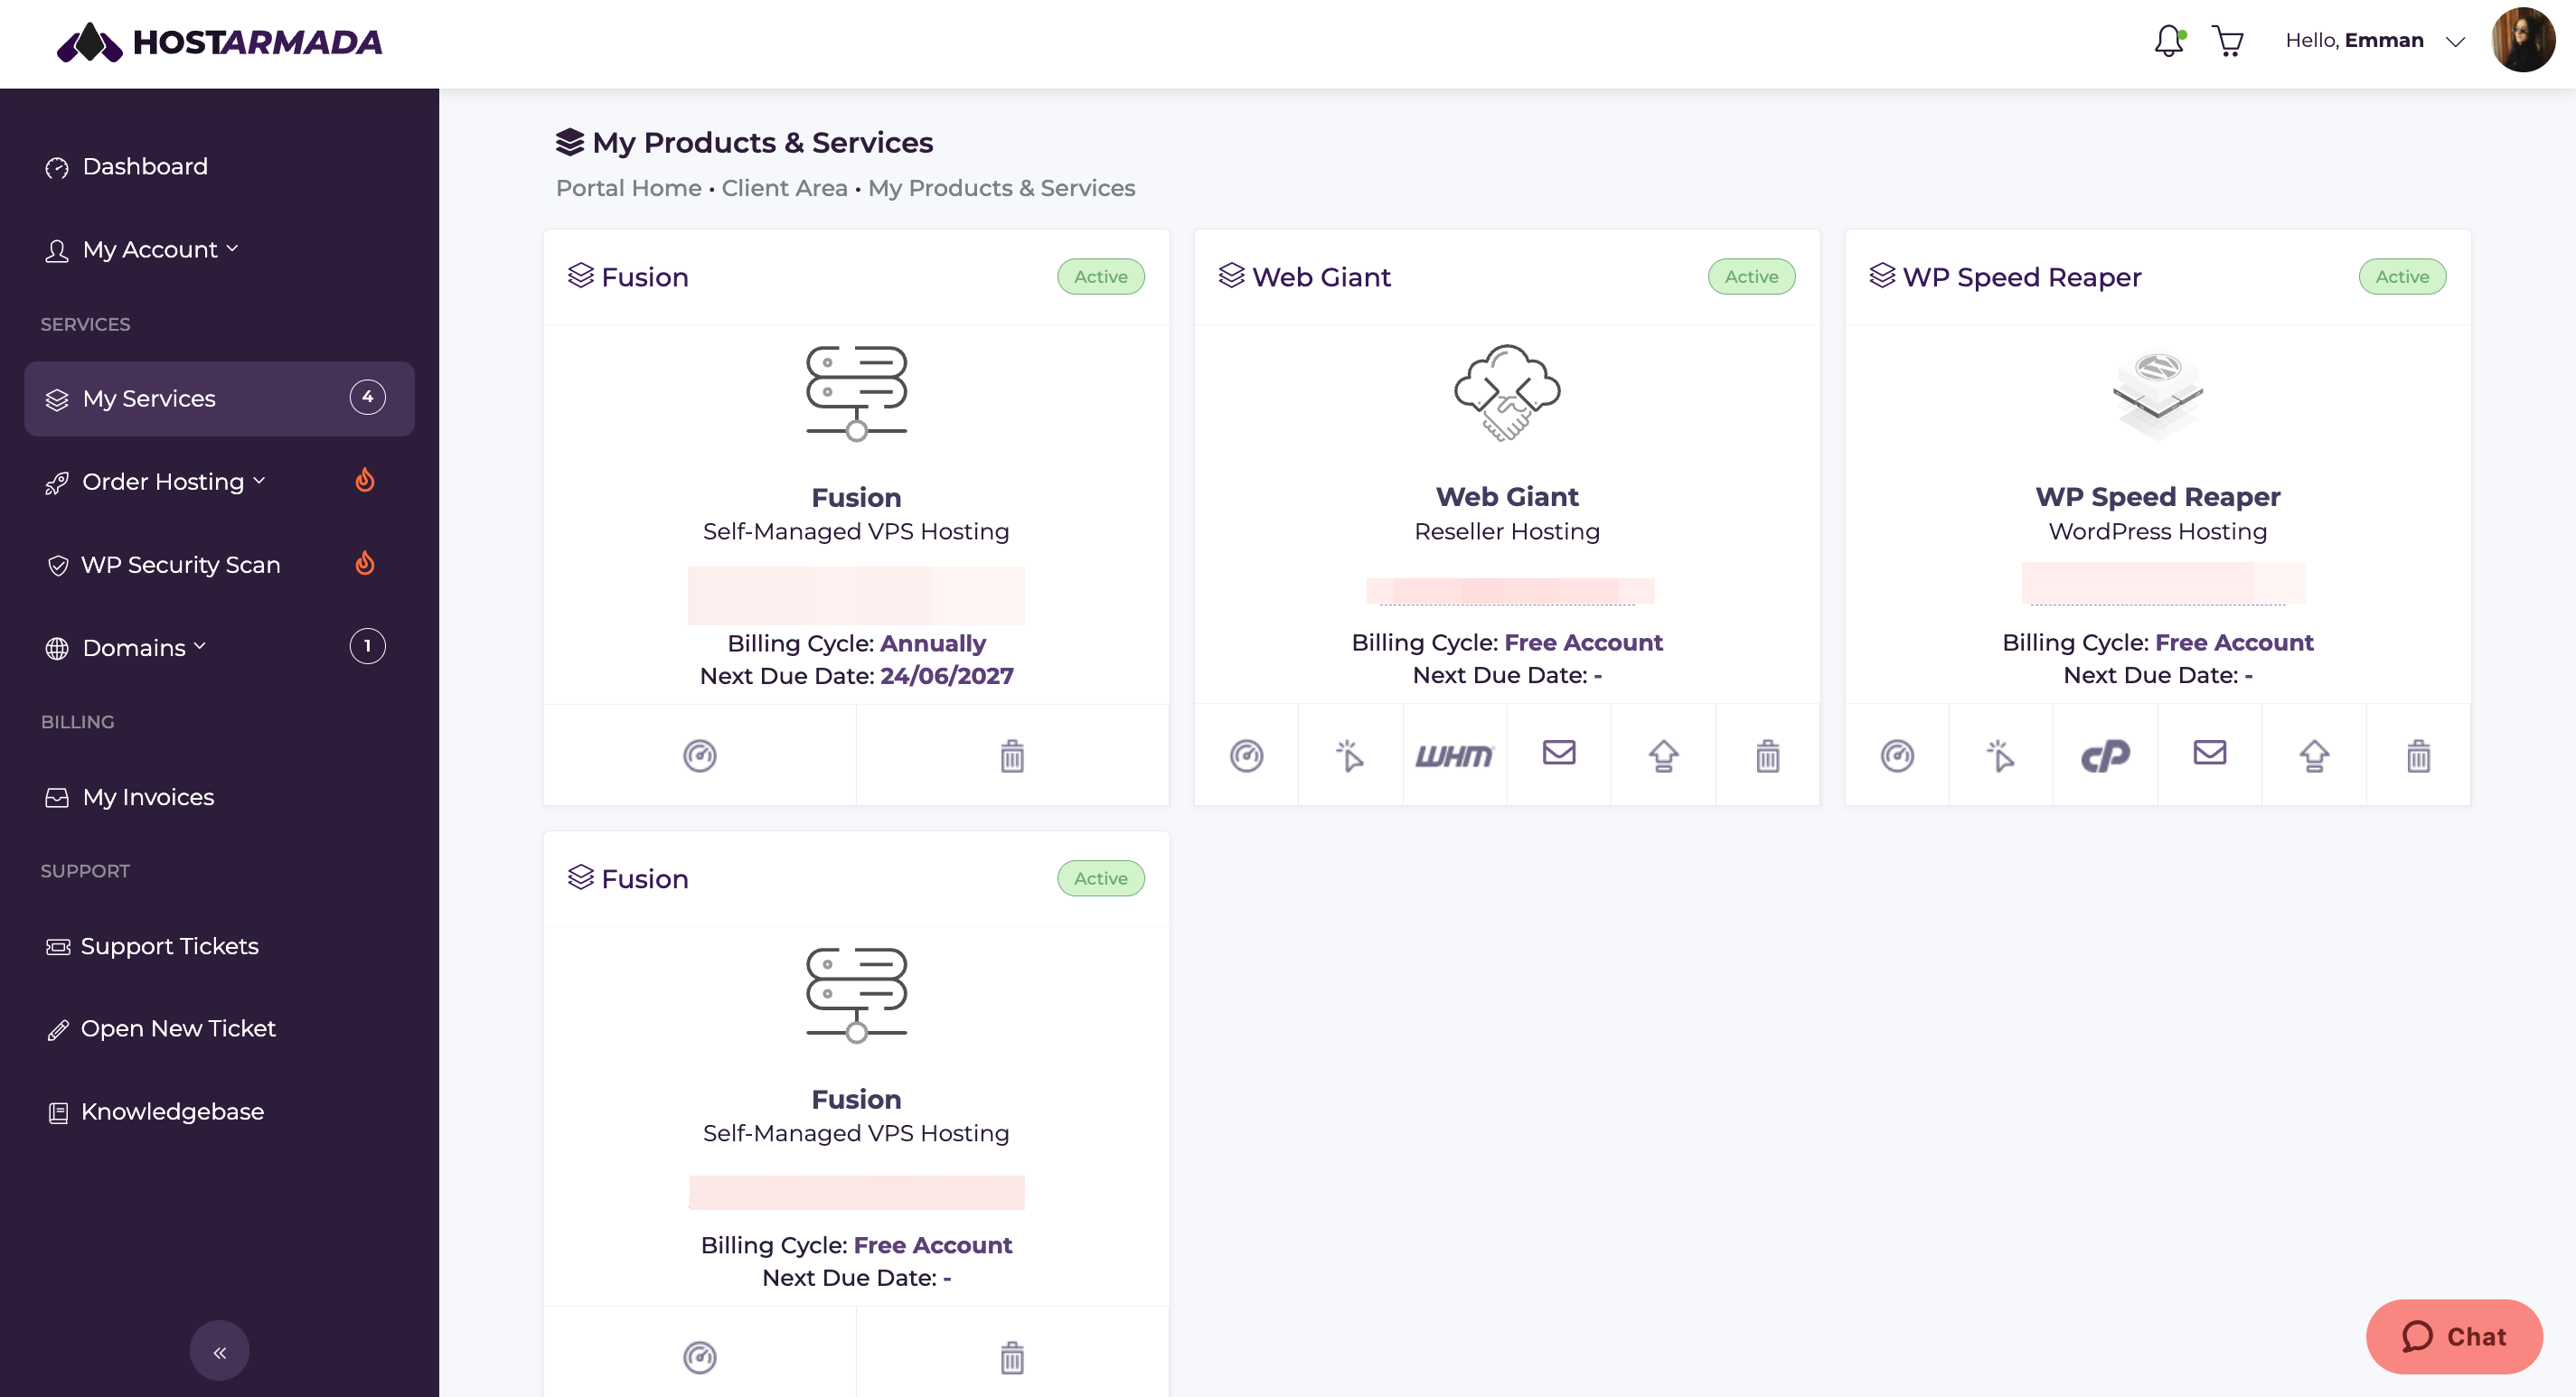
On the new page, you will see a list of all the hosting services you are currently using with us. Each service is presented in an individual panel displaying essential information, such as the product name, the type of product, the primary domain name, the billing cycle, the next due date, as well as the nameservers and the server IP address.
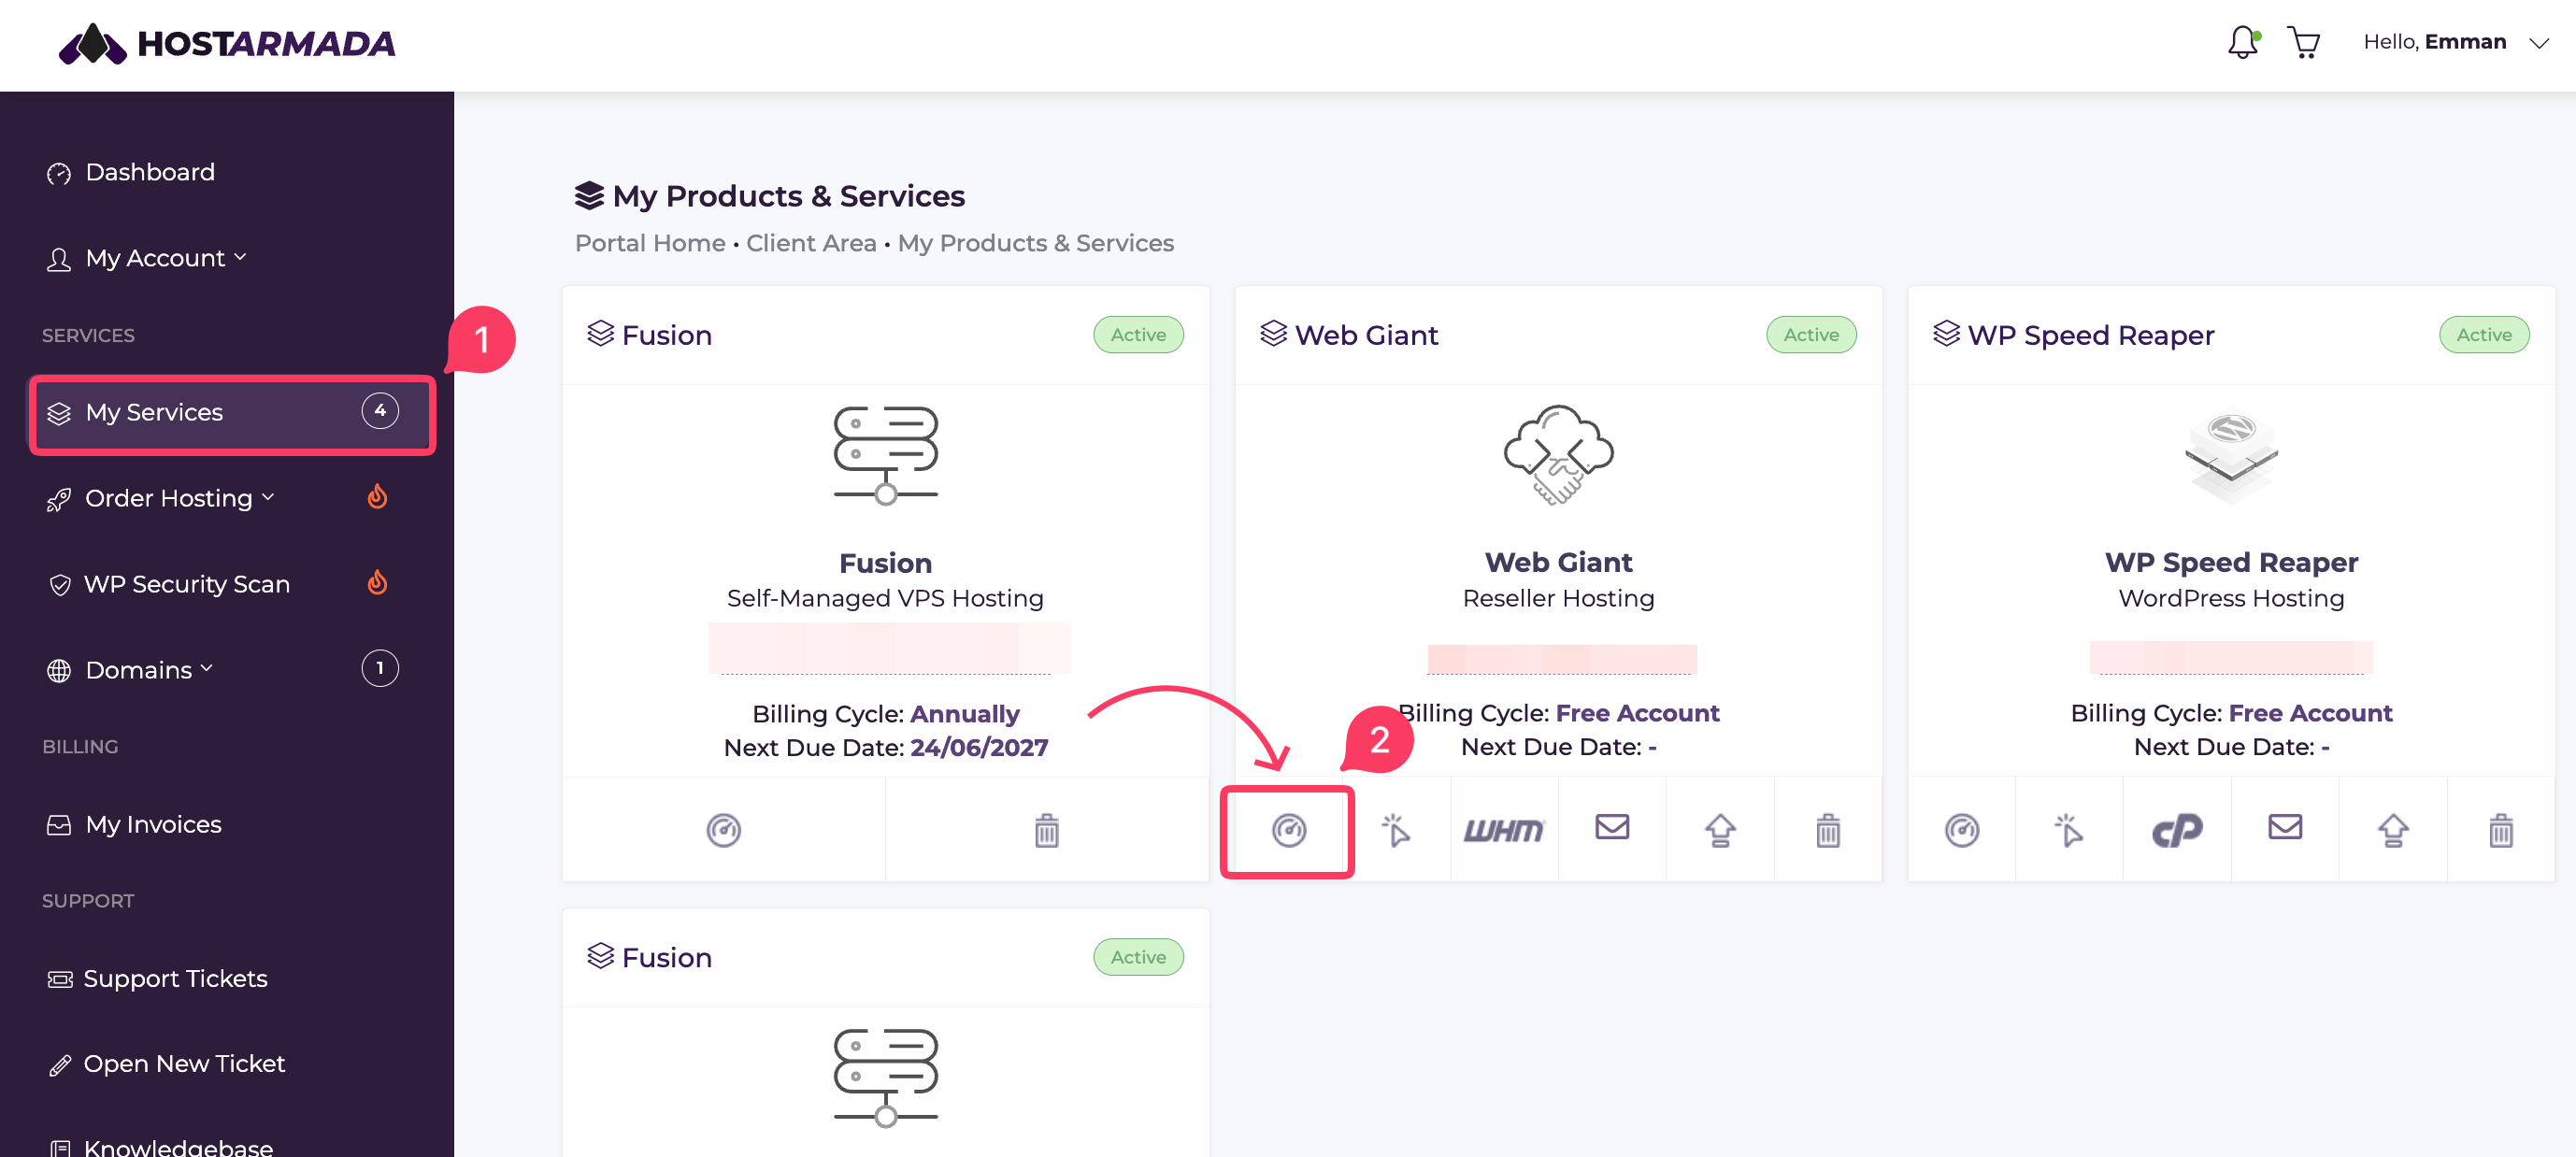
Right below the service information, you will notice a few Quick Access buttons, including:
To access the Product Details page and further manage your hosting service, click the Manage Service icon.
Once you access the Product Details page, you will notice it is split into blocks containing specific details related to the service. Even though they are quite self-explanatory, we will review each of them and interpret the information they hold.
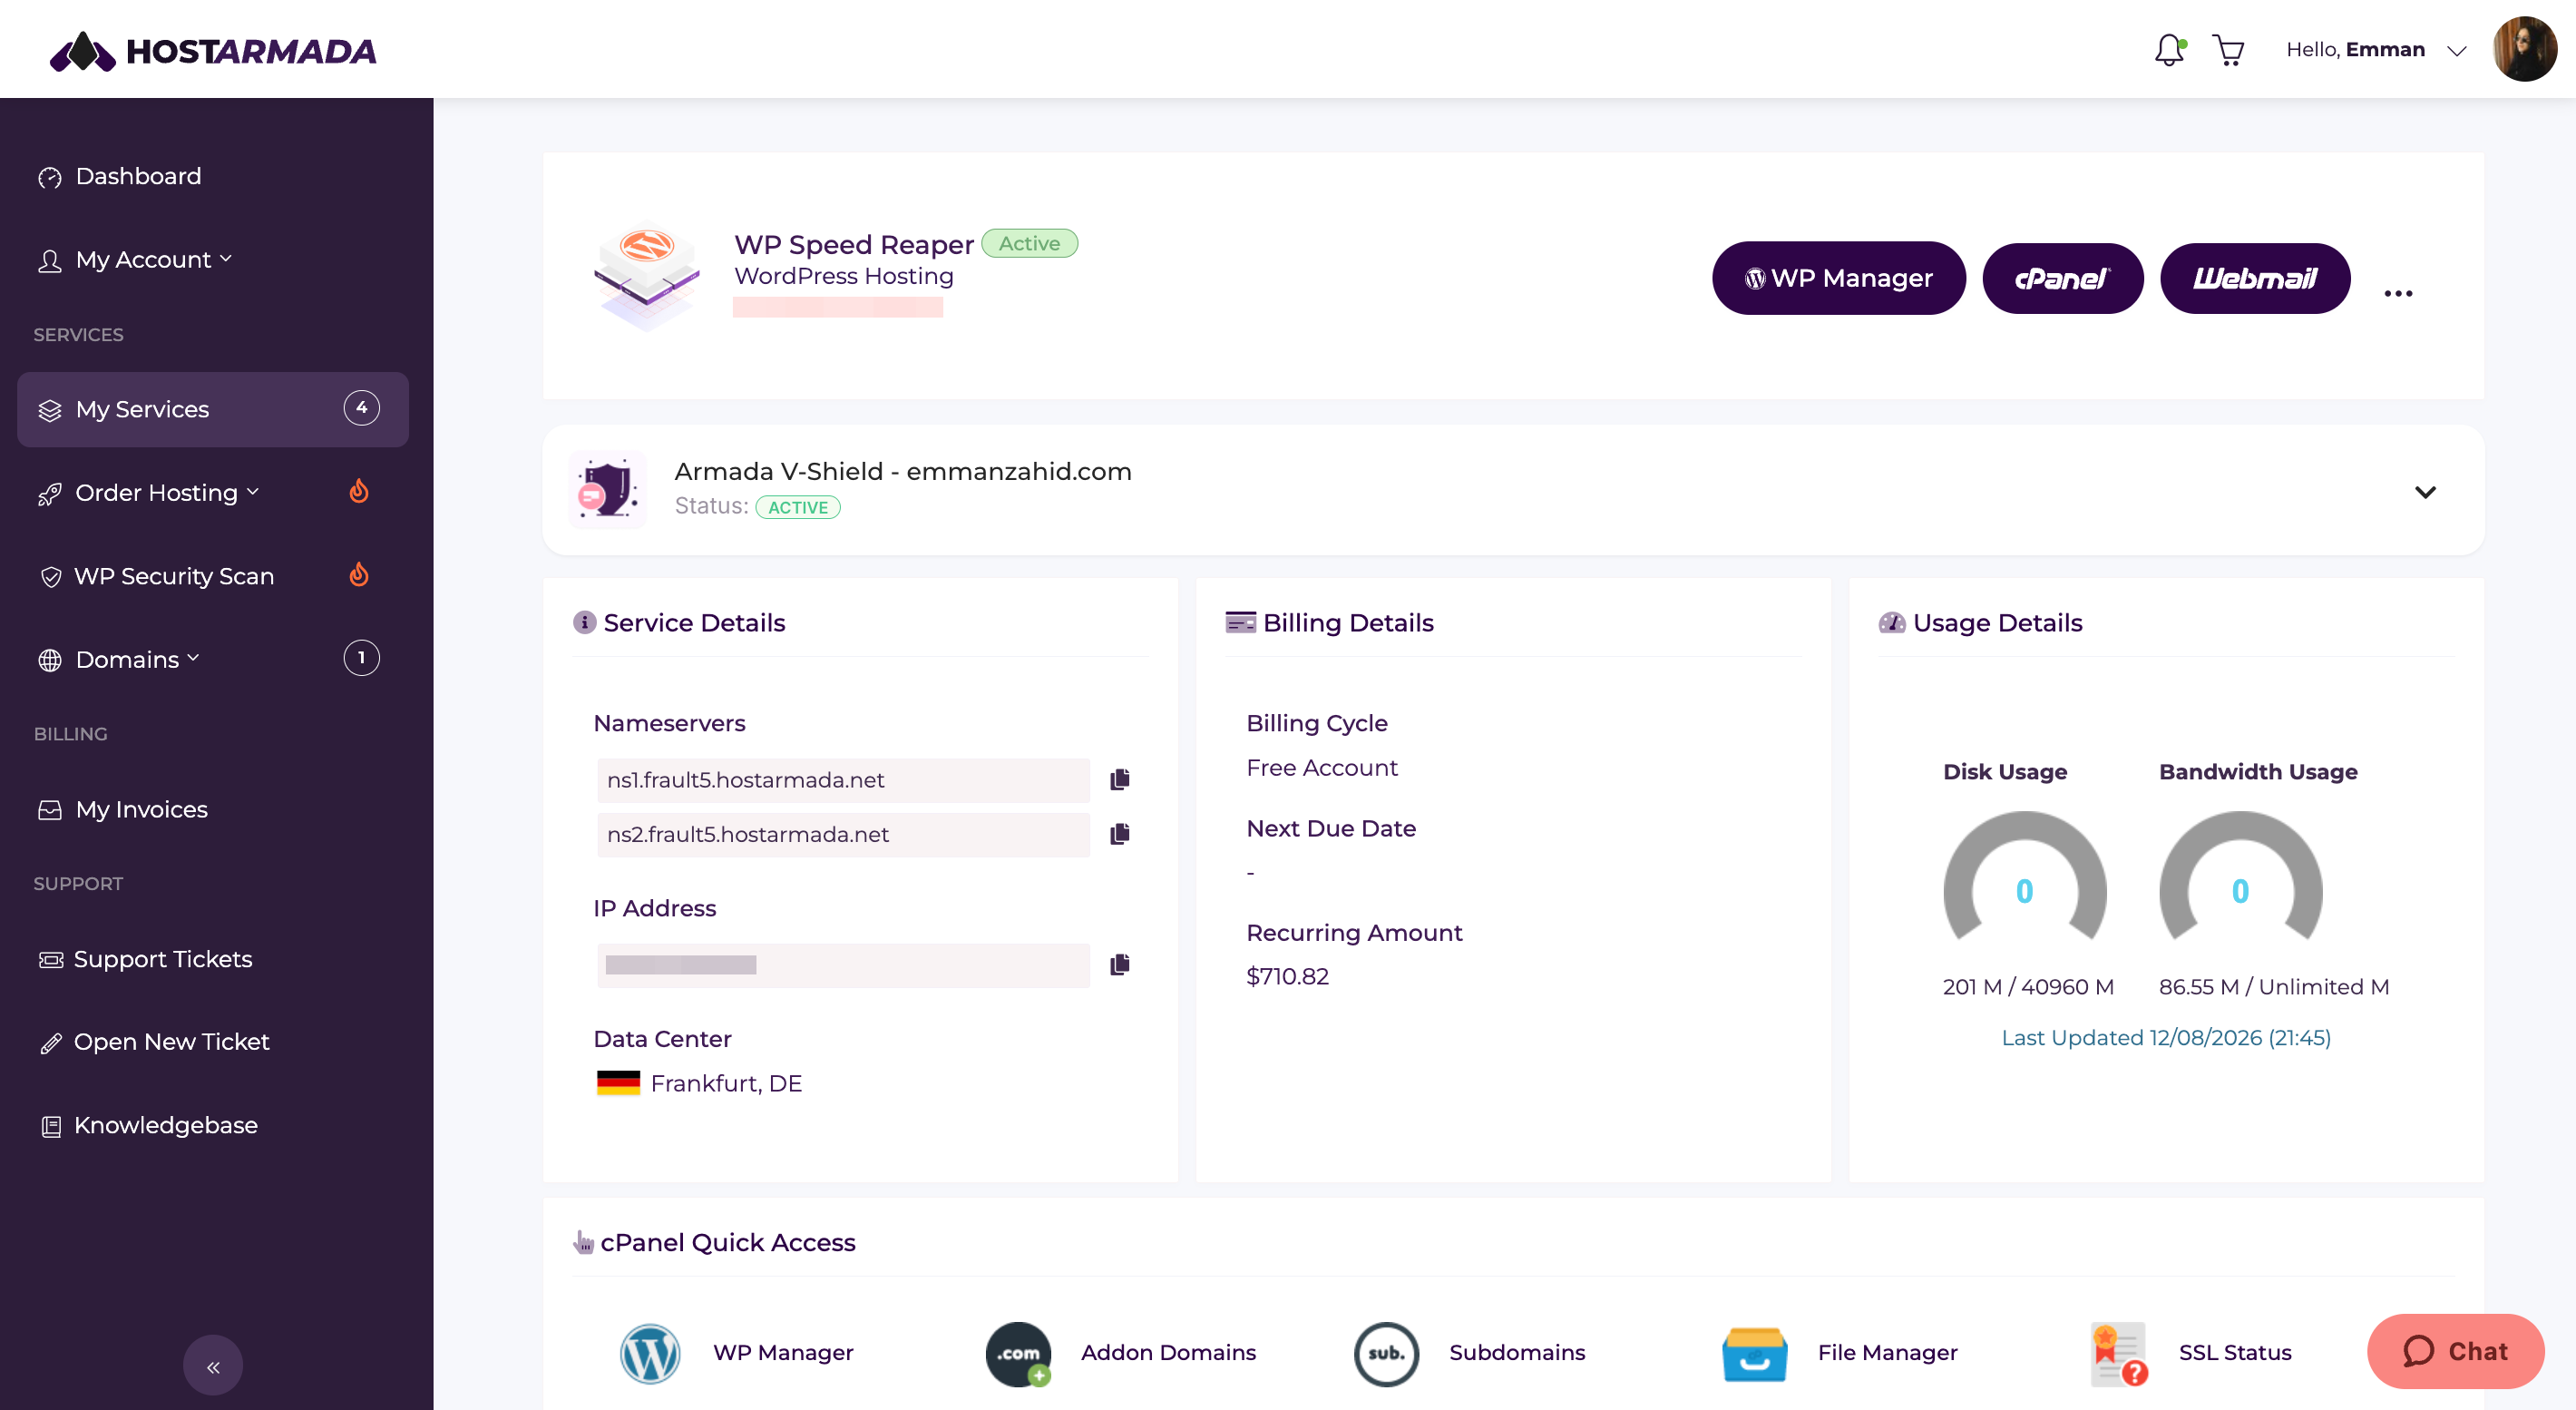
You are already familiar with the information contained in the first block; therefore, we will not bore you by reviewing it again.
The second block (in the first line) contains two sections:
The third “Usage Statistics” block tracks and displays the current disk and bandwidth usage of your hosting account as well as its total capacity. Below you will see the time of the last update of the metrics.
The first block in the second line shows your currently activated additional services as well as the addons available for purchase.
The second block contains Quick Access buttons to a number of useful cPanel tools, including your email accounts, file manager, backups, add-ons and subdomains, databases, etc. They allow you to directly access the corresponding tool without the need to sign in to your cPanel account.
From the last block, you will be able to directly change the password for your cPanel account. Please note that this change will NOT affect the Client Area login credentials in any way; it is intended for your cPanel account only.
We hope that the information provided in this tutorial was useful to you and now you feel comfortable working with the Service Management section of your Client Area. In case you have any additional questions or you need further assistance, please do not hesitate to contact our Support Team.

Emman is a Content Manager at HostArmada where she helps make complex topics accessible for readers around the world. With 5+ years of experience in crafting SEO content, she’s passionate about making tech topics easy to understand. In her free time, Emman enjoys traveling and watching Formula 1/E races.
Learn more about Client Area in the other tutorials that we have:
