
Learn Email
 Last
Updated: 10/03/2020
Last
Updated: 10/03/2020
 ( 6 minutes reading )
Being able to send and receive emails on the move without having access to your laptop or desktop computer can be invaluable, especially if you are expecting an important mail related to your business. This tutorial will acquaint you with a few necessary steps you need to take to set up your email on your iPhone, allowing you to check, send, and receive emails through your phone. Let's get started!
Please note that this tutorial assumes that you created the email account in your cPanel first. If you have not completed that, please go ahead and do it before you continue reading. You can find explicit instructions in our guide based on How to manage Email accounts in cPanel.
You are going to need the following configuration details to set up your email account:
If you are a HostArmada customer and are using our email services, you will find the details mentioned above in the “[HostArmada] New Account Information” email. It contains the essential information of your hosting account with us.
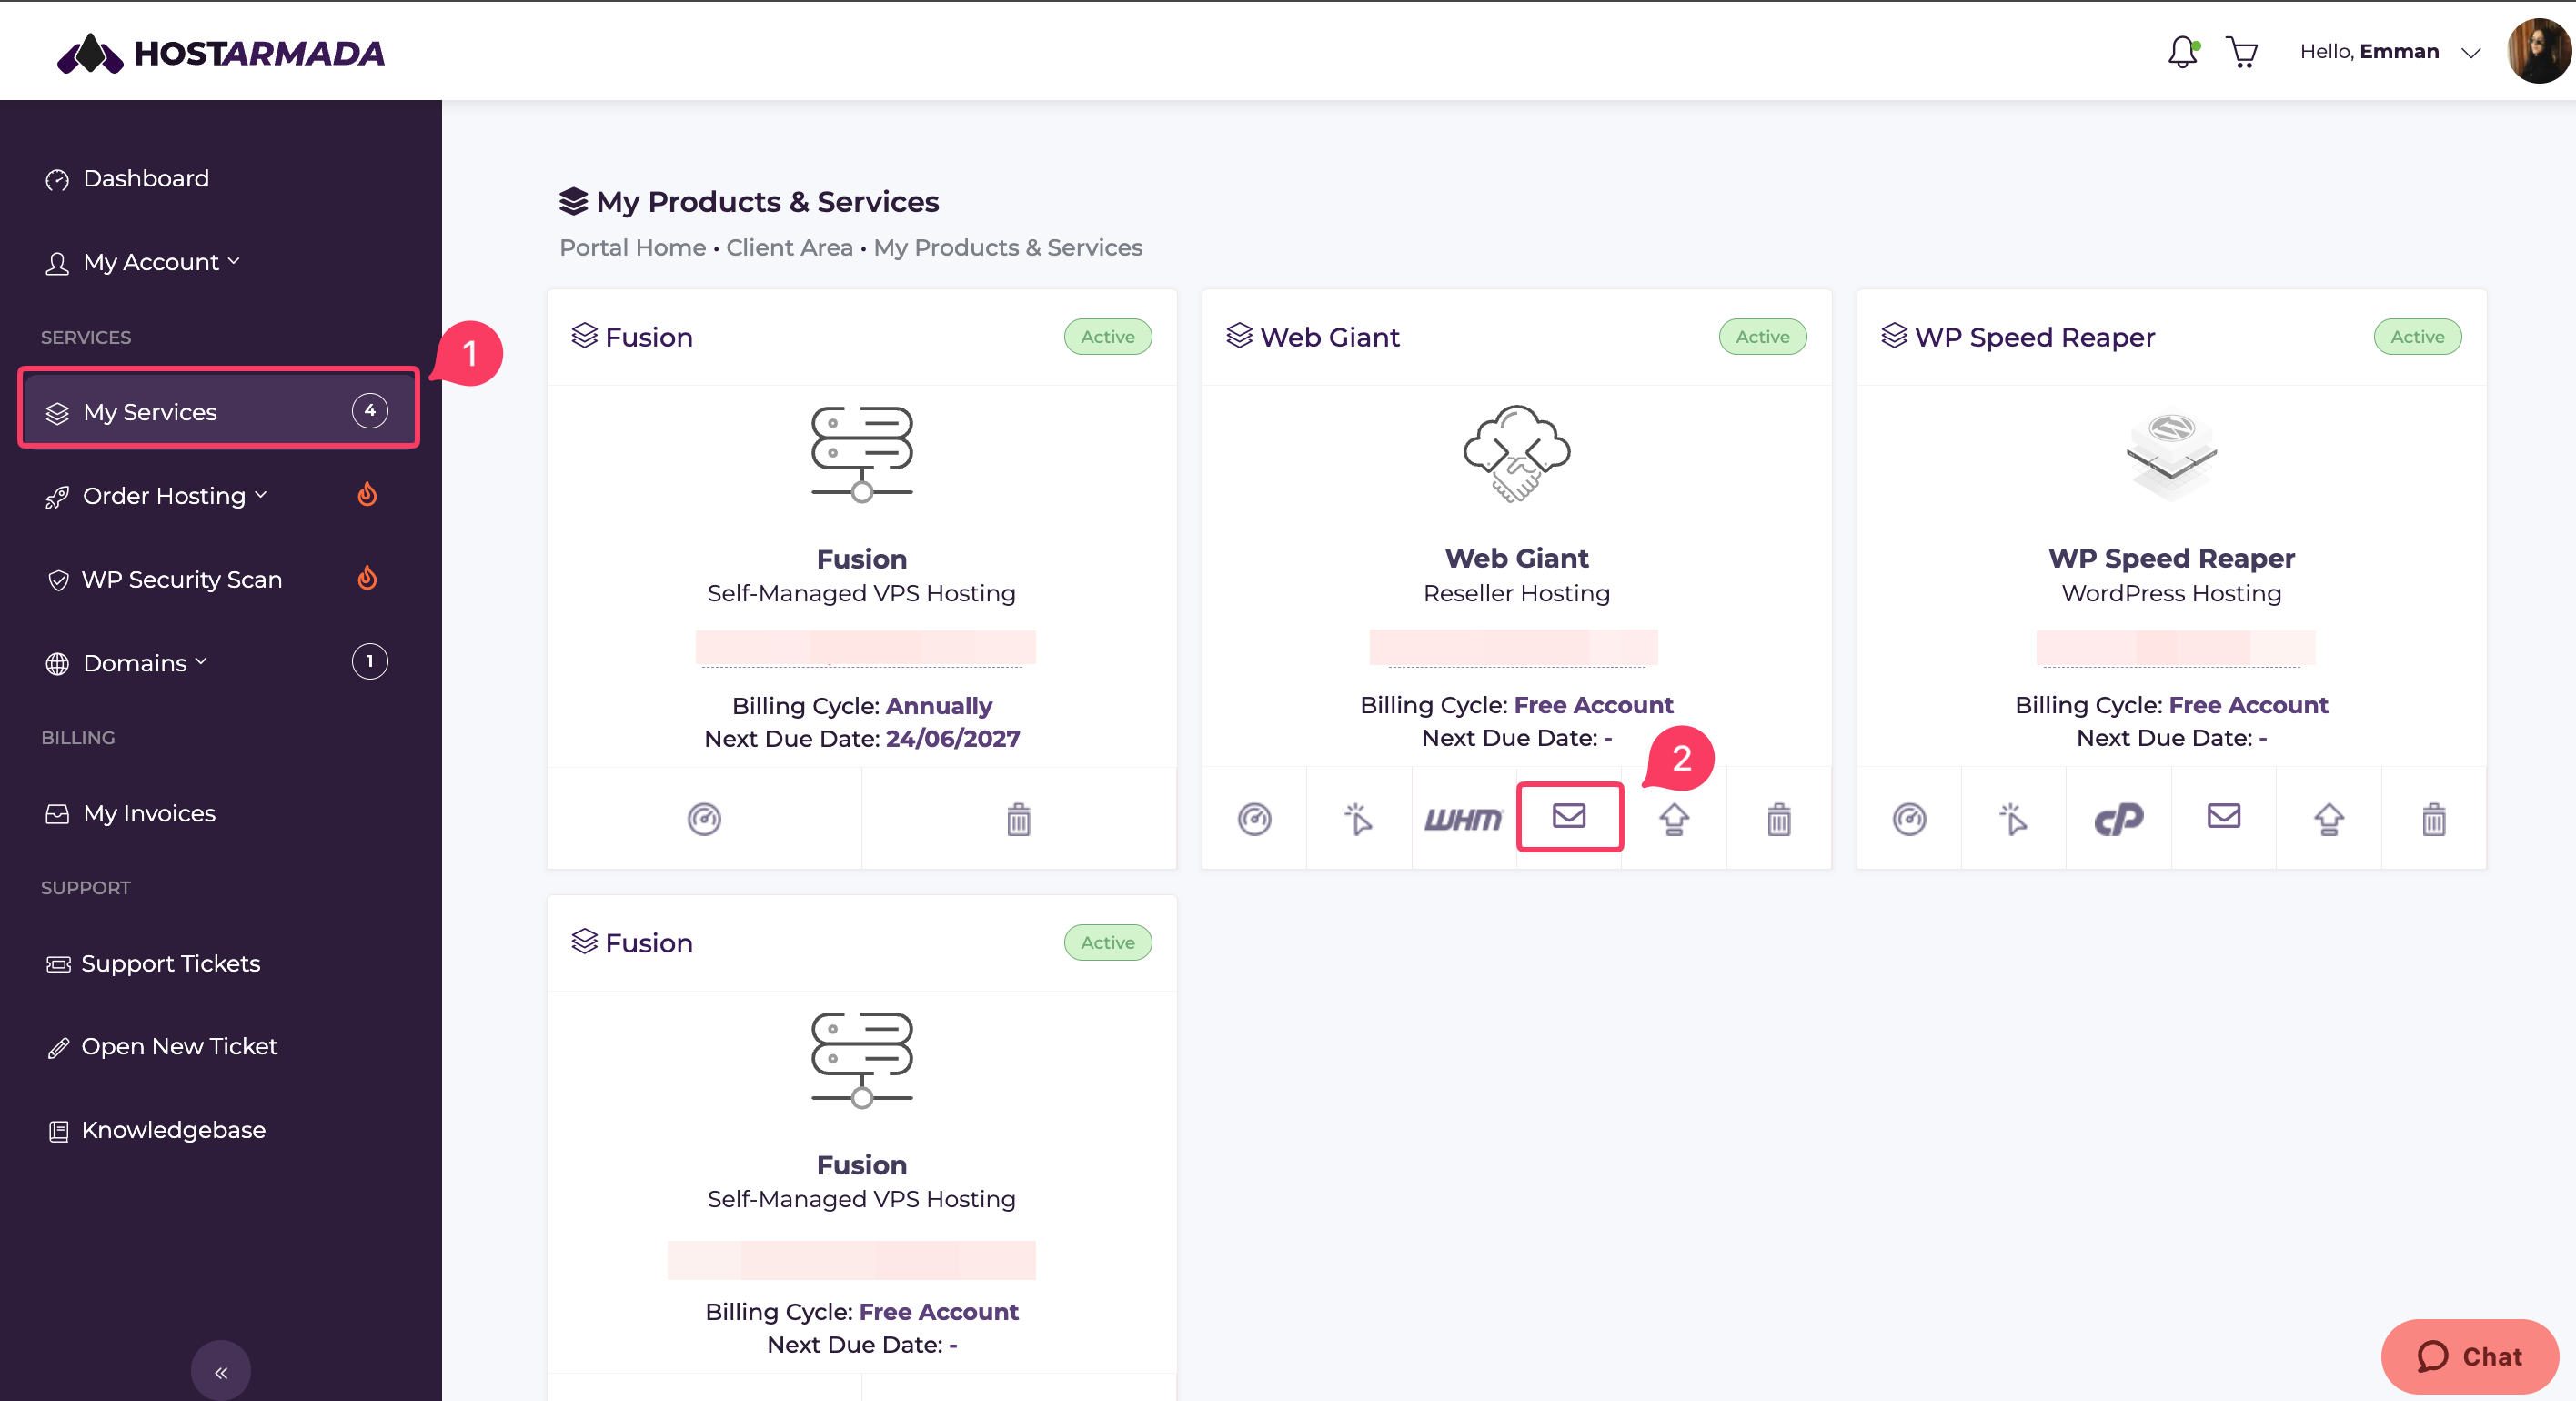
You can also directly review the email from your Client Area. Log in to your Client Area and go to My Services. From your plan, click on the mail icon.
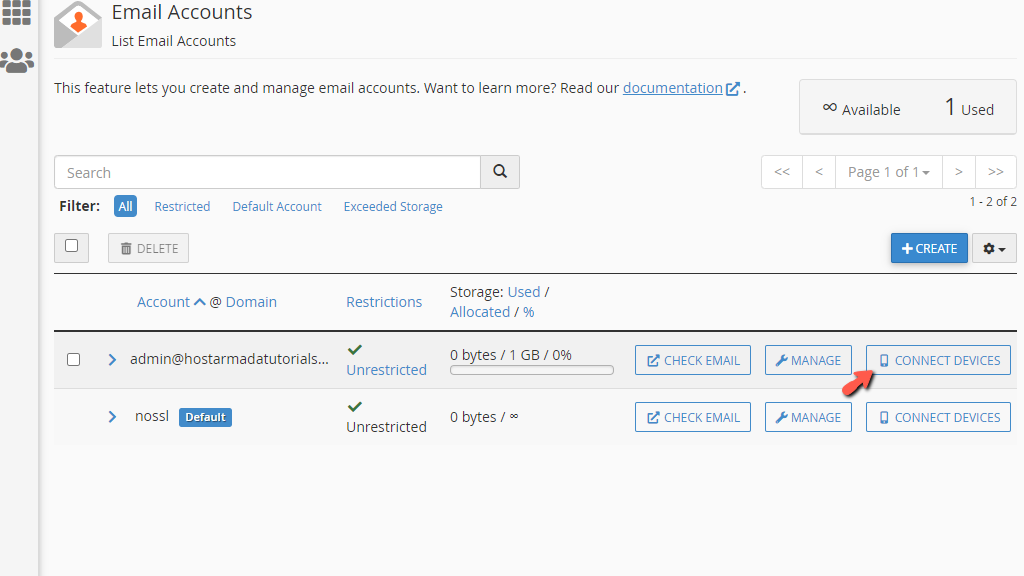
You can also find the configuration details for your email in your cPanel account by navigating to the EMAIL section > Email Accounts > Connect Devices.
In case of difficulties finding the details, please make sure to submit a ticket request to our Support Team. They are going to be happy to provide these to you.
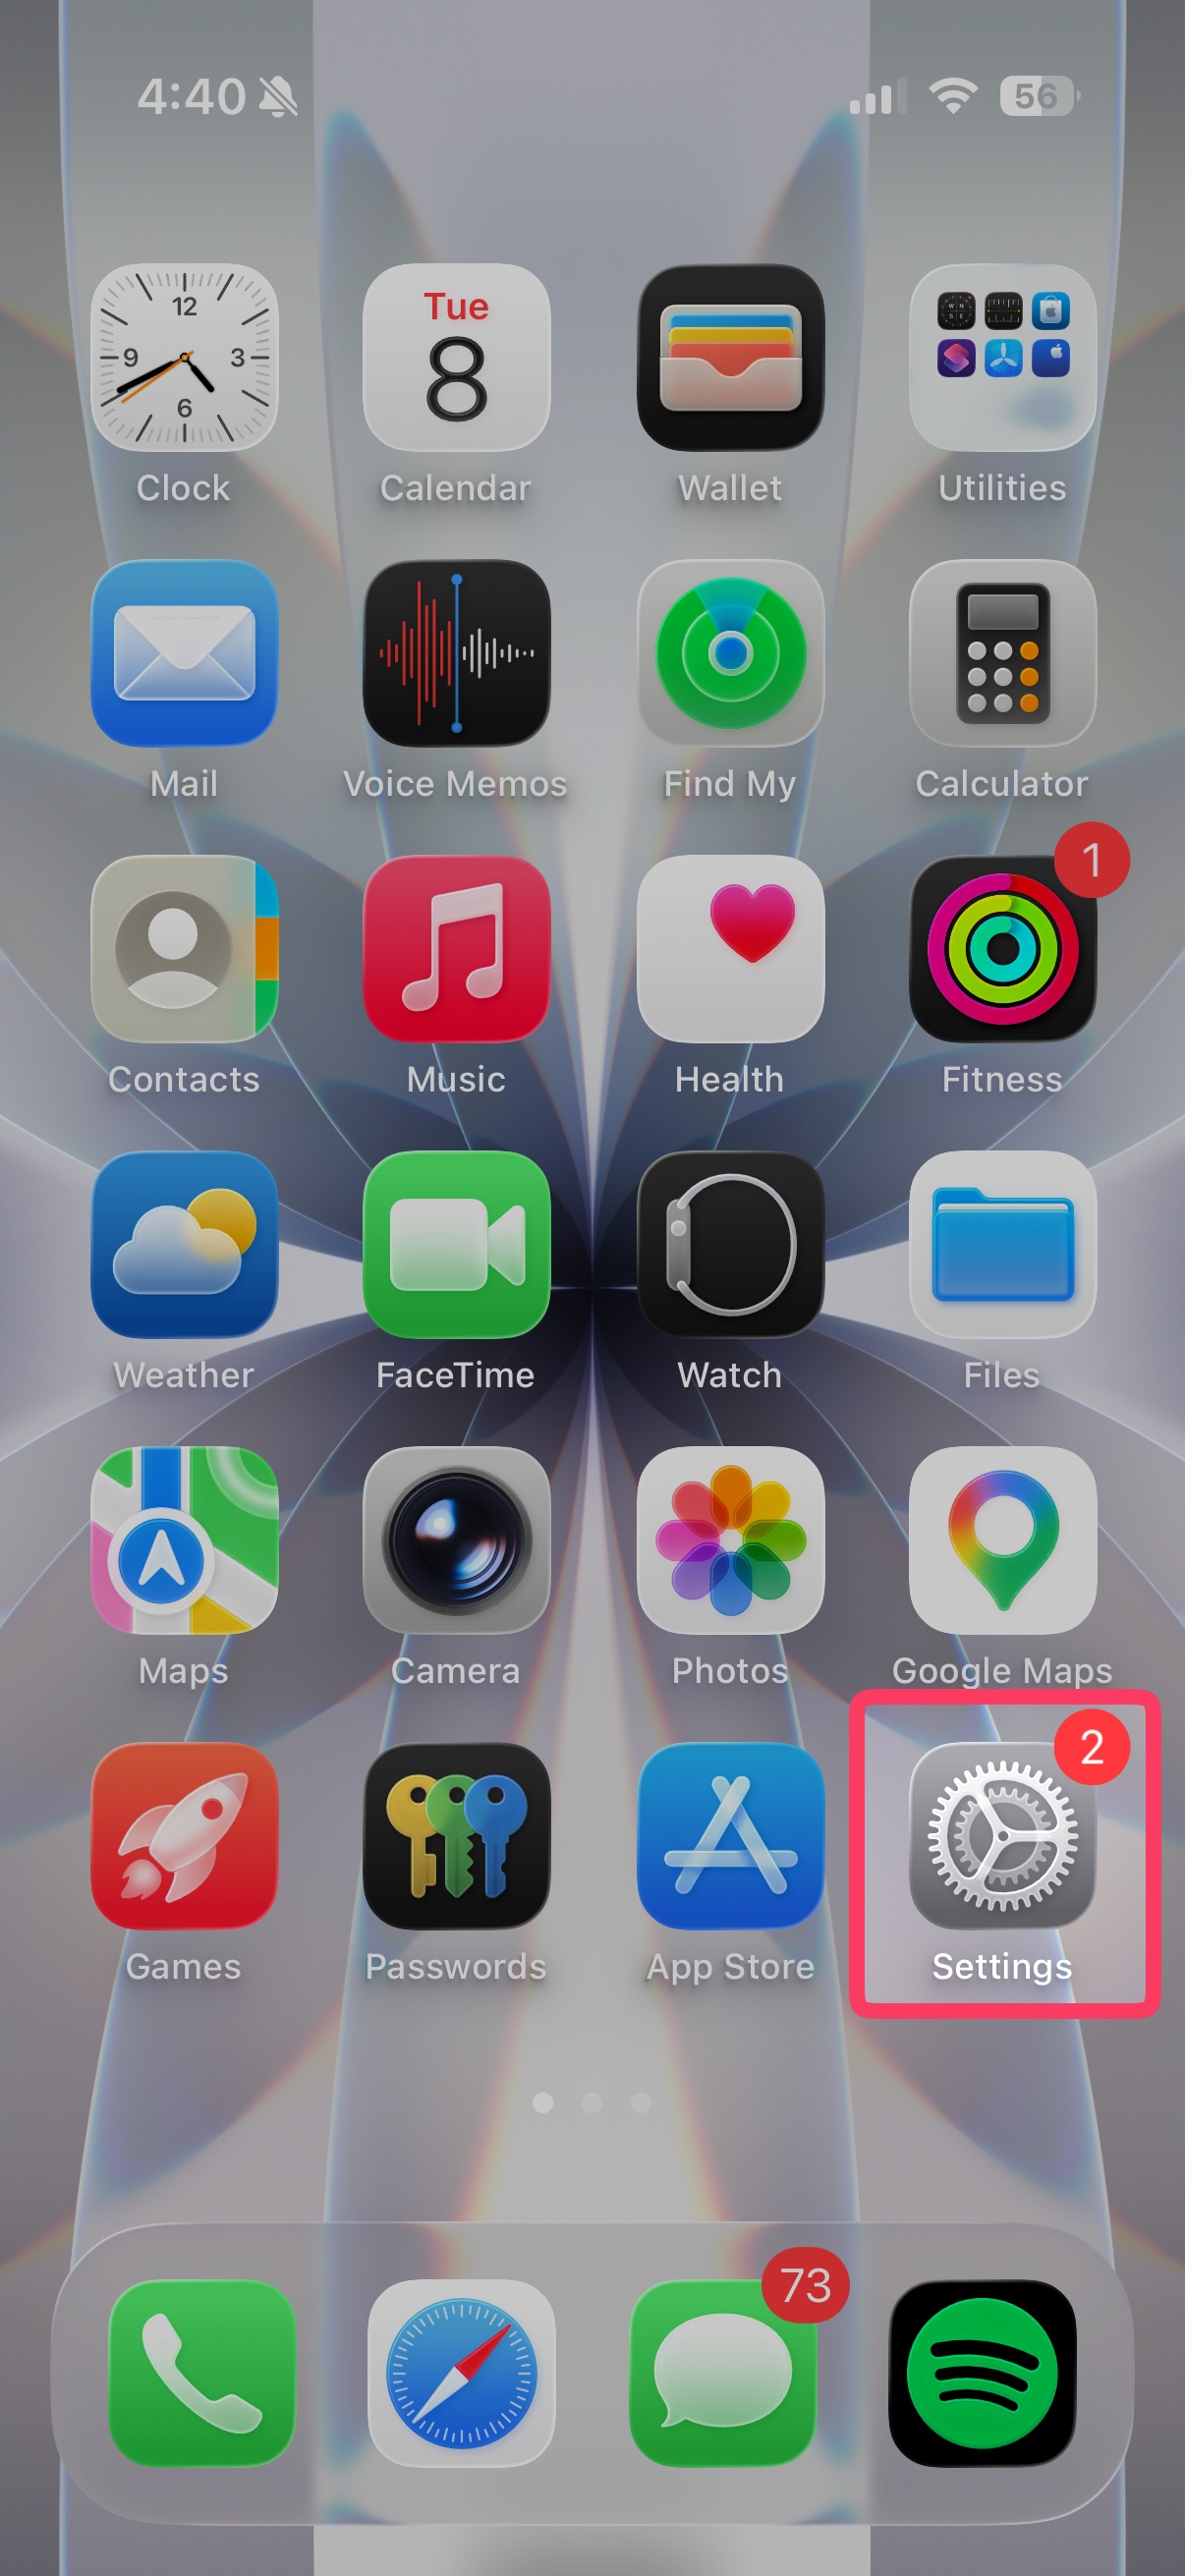
To set up an email account on an iPhone, please press the Settings app.
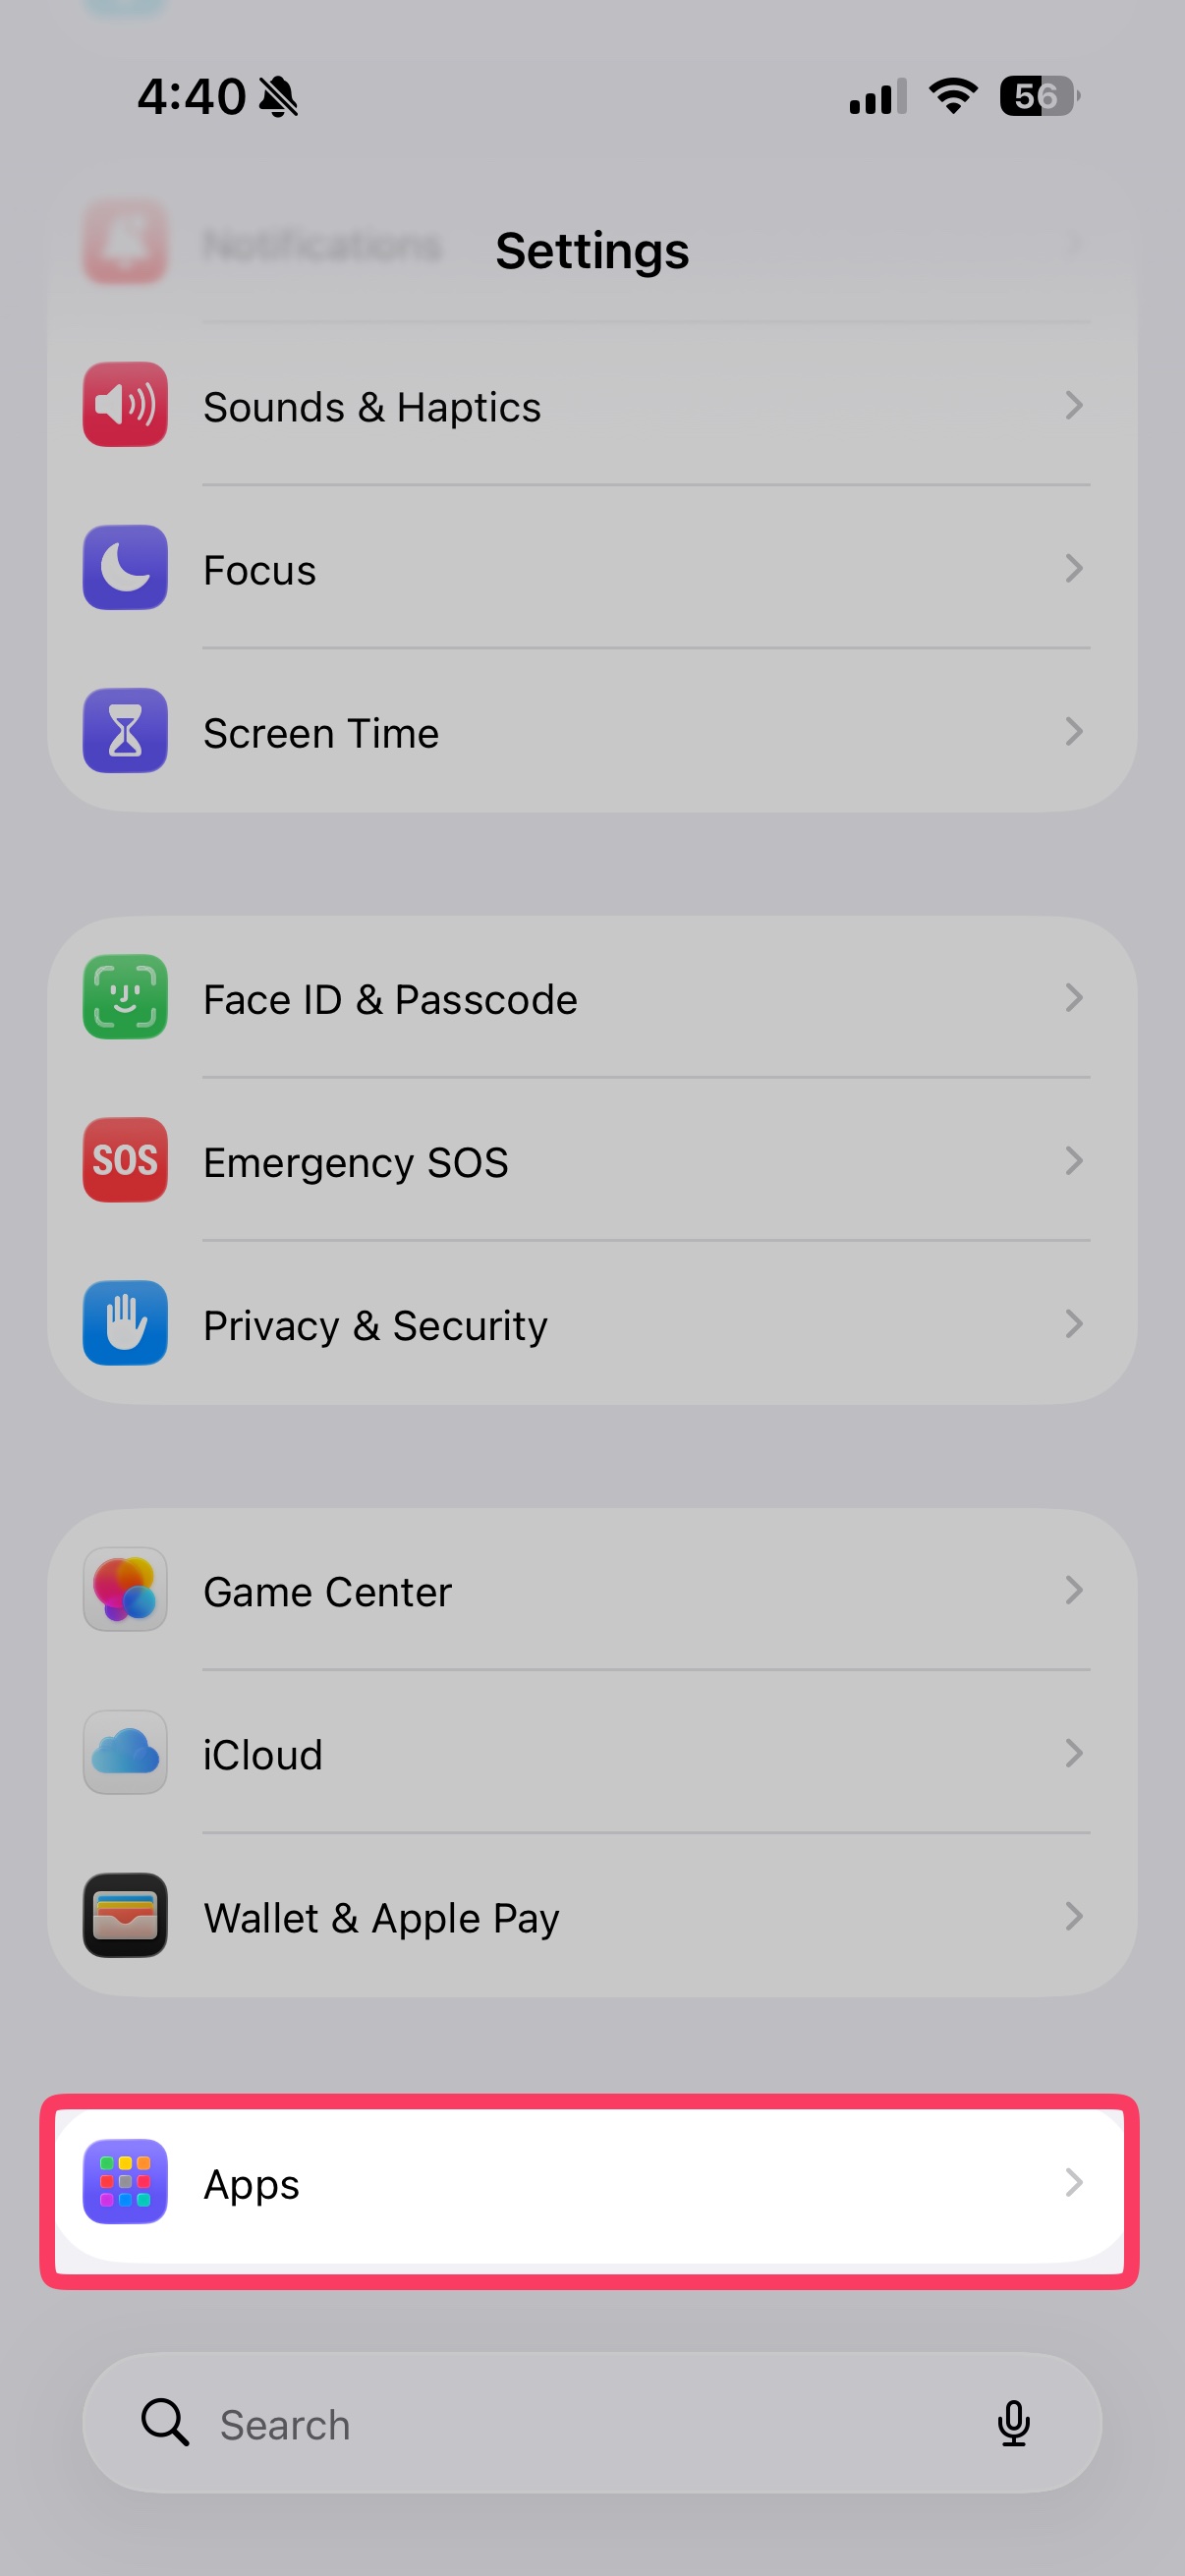
After you tap it, scroll down and select Apps.
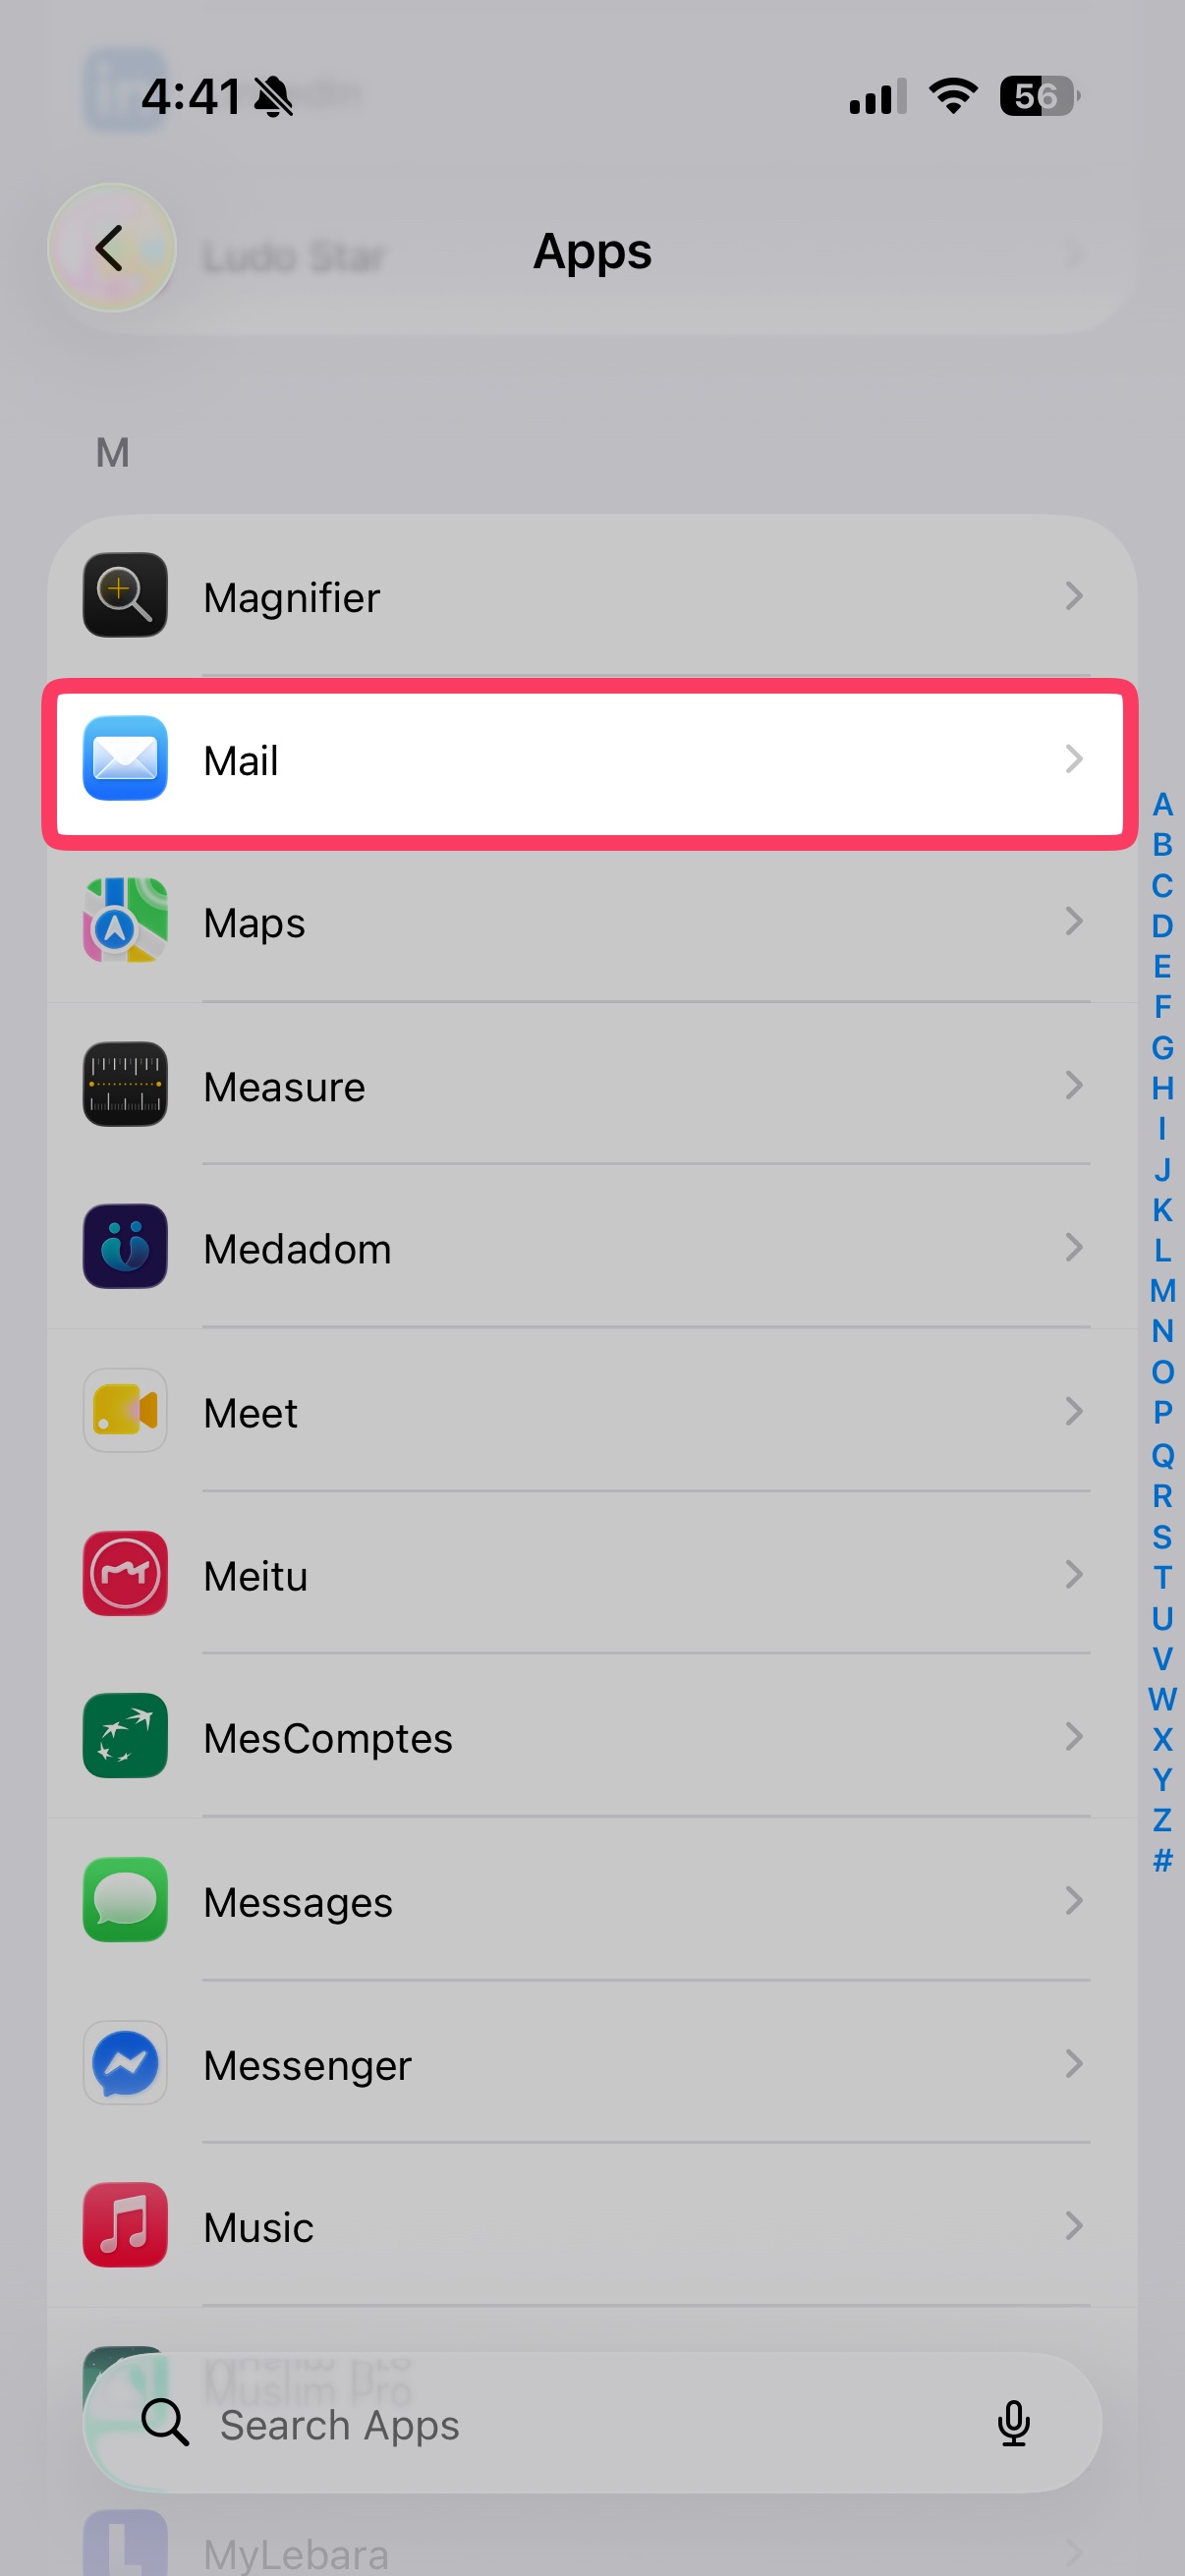
Scroll down and tap on Mail.
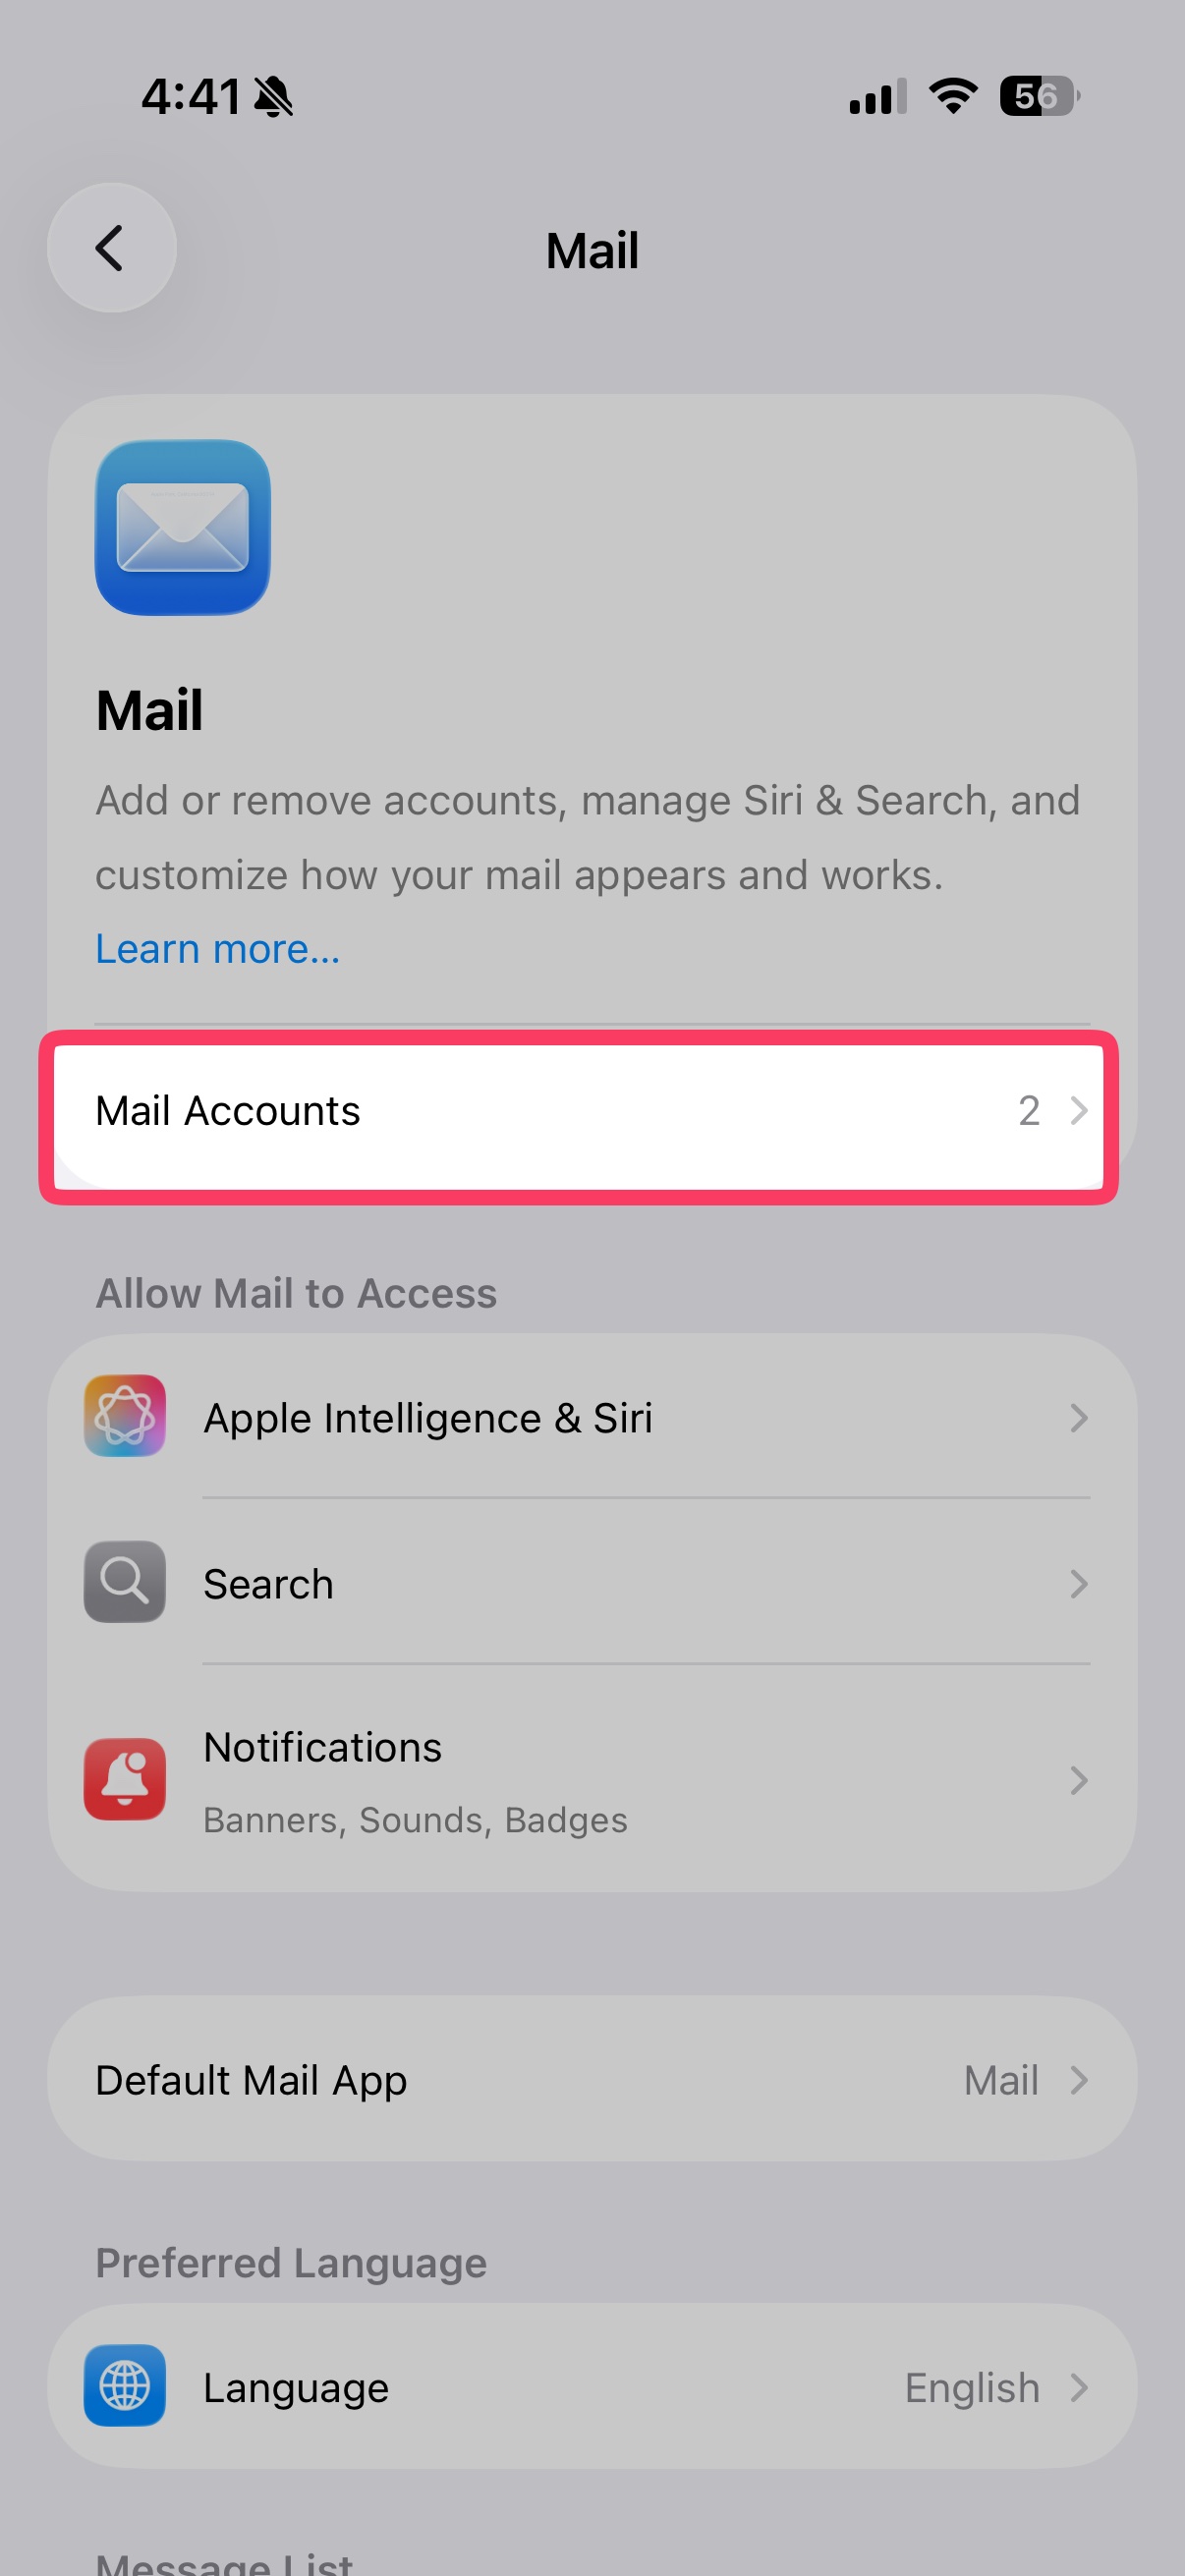
Within the Mail option, tap on Mail Accounts.
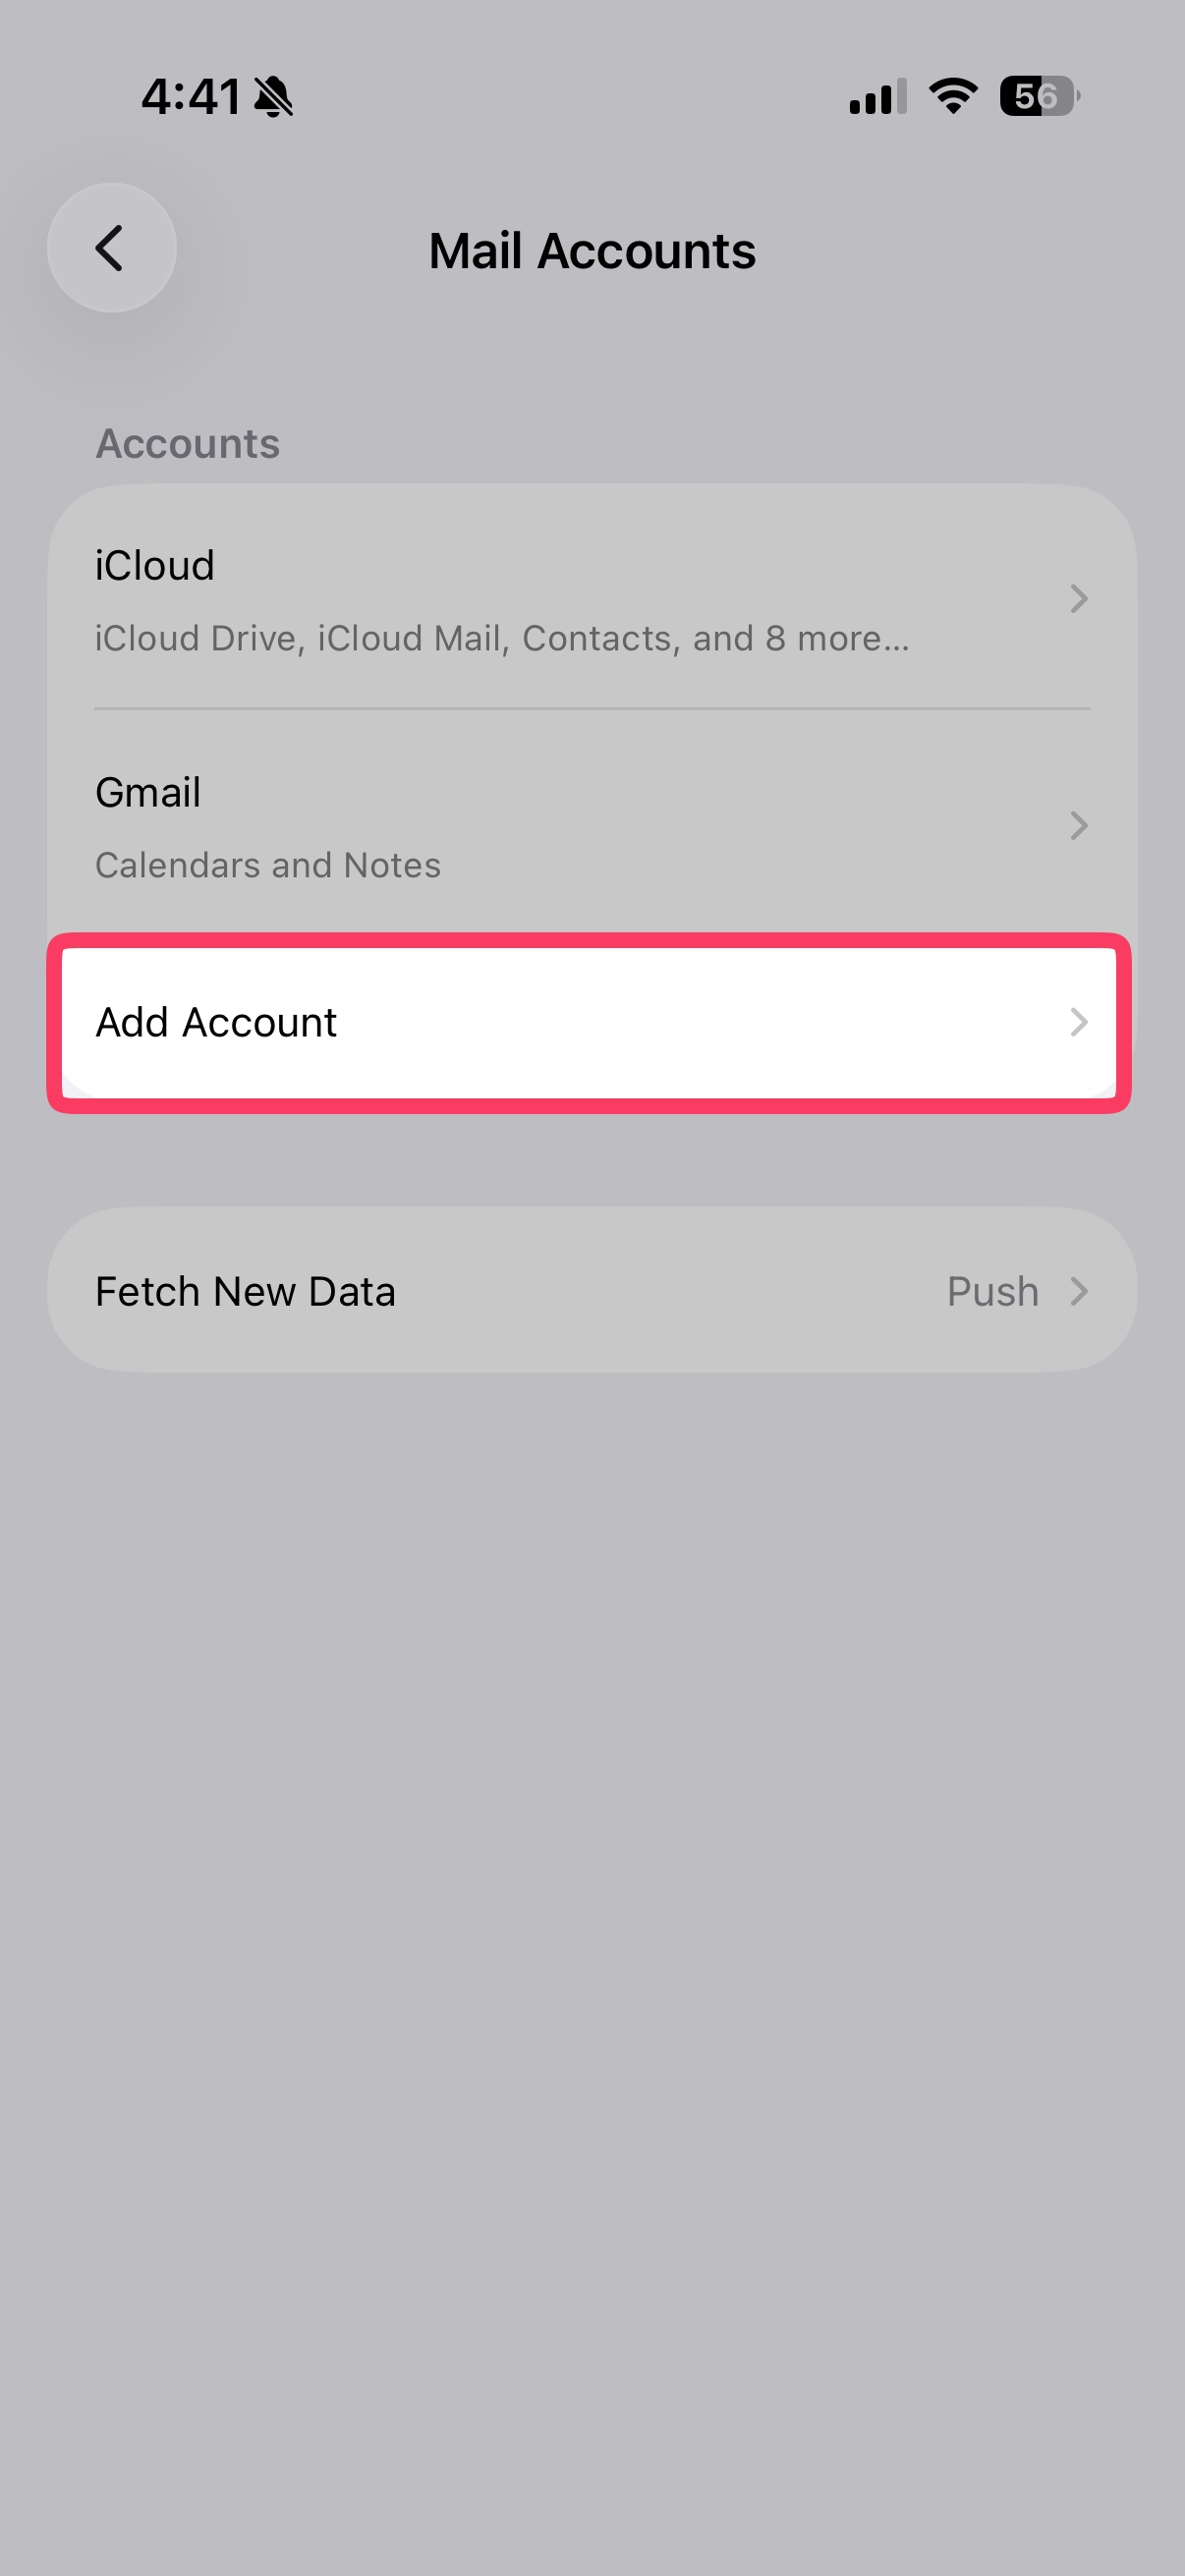
Upon doing so, you will land on a page that allows you to add an iPhone email account. To do so, please press Add Account.
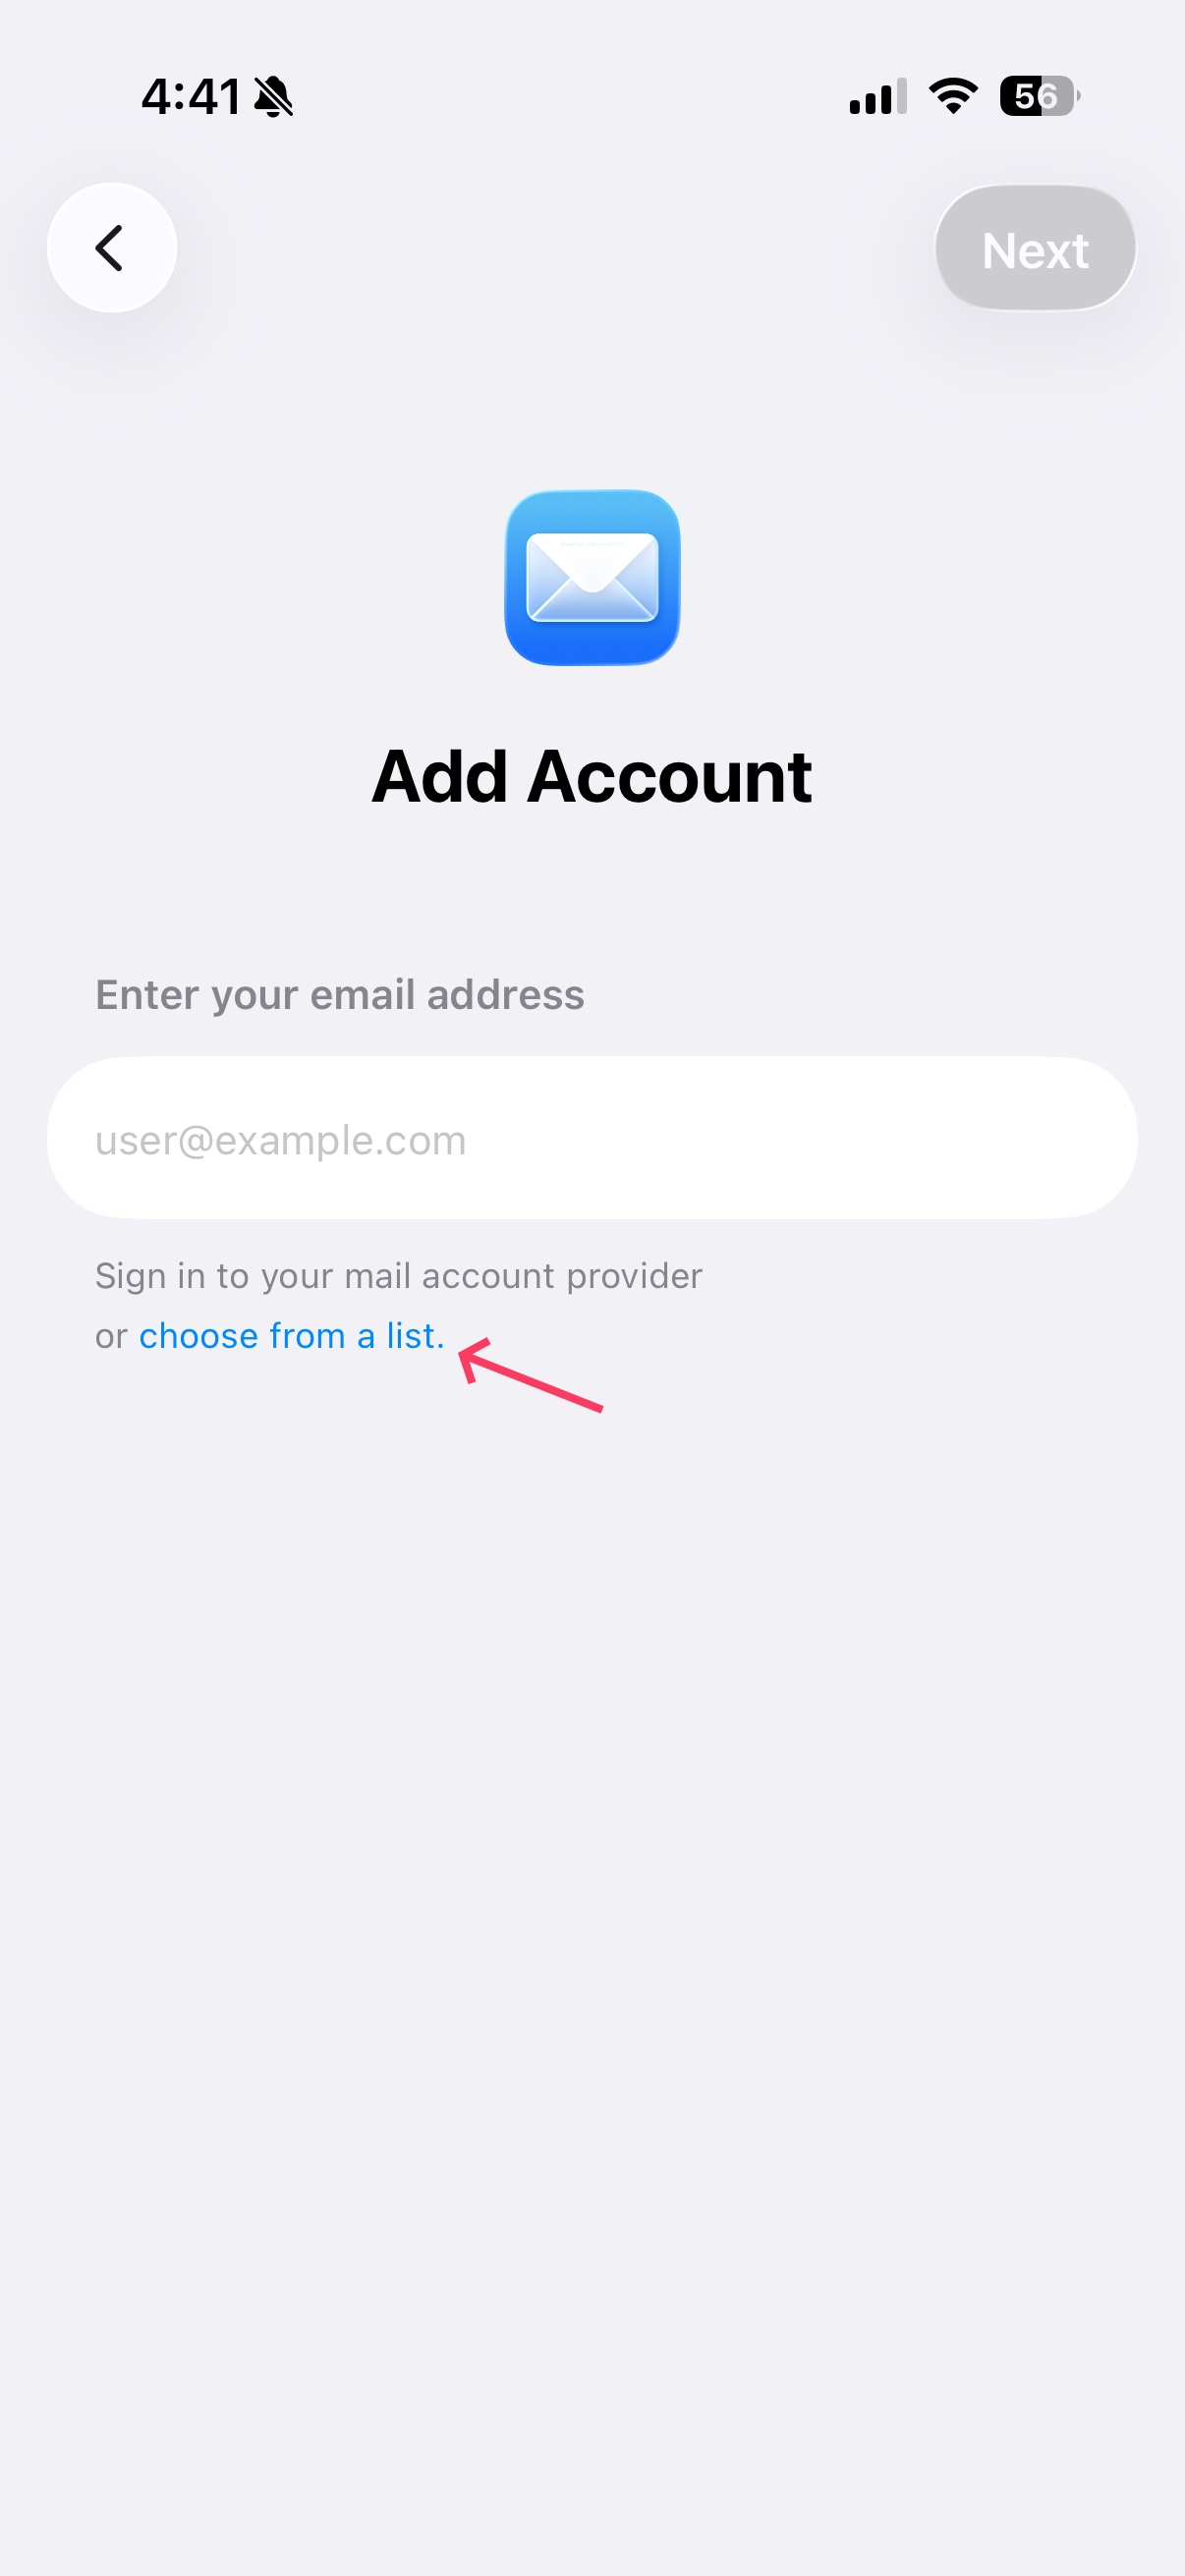
Tap on the "choose from a list" link.
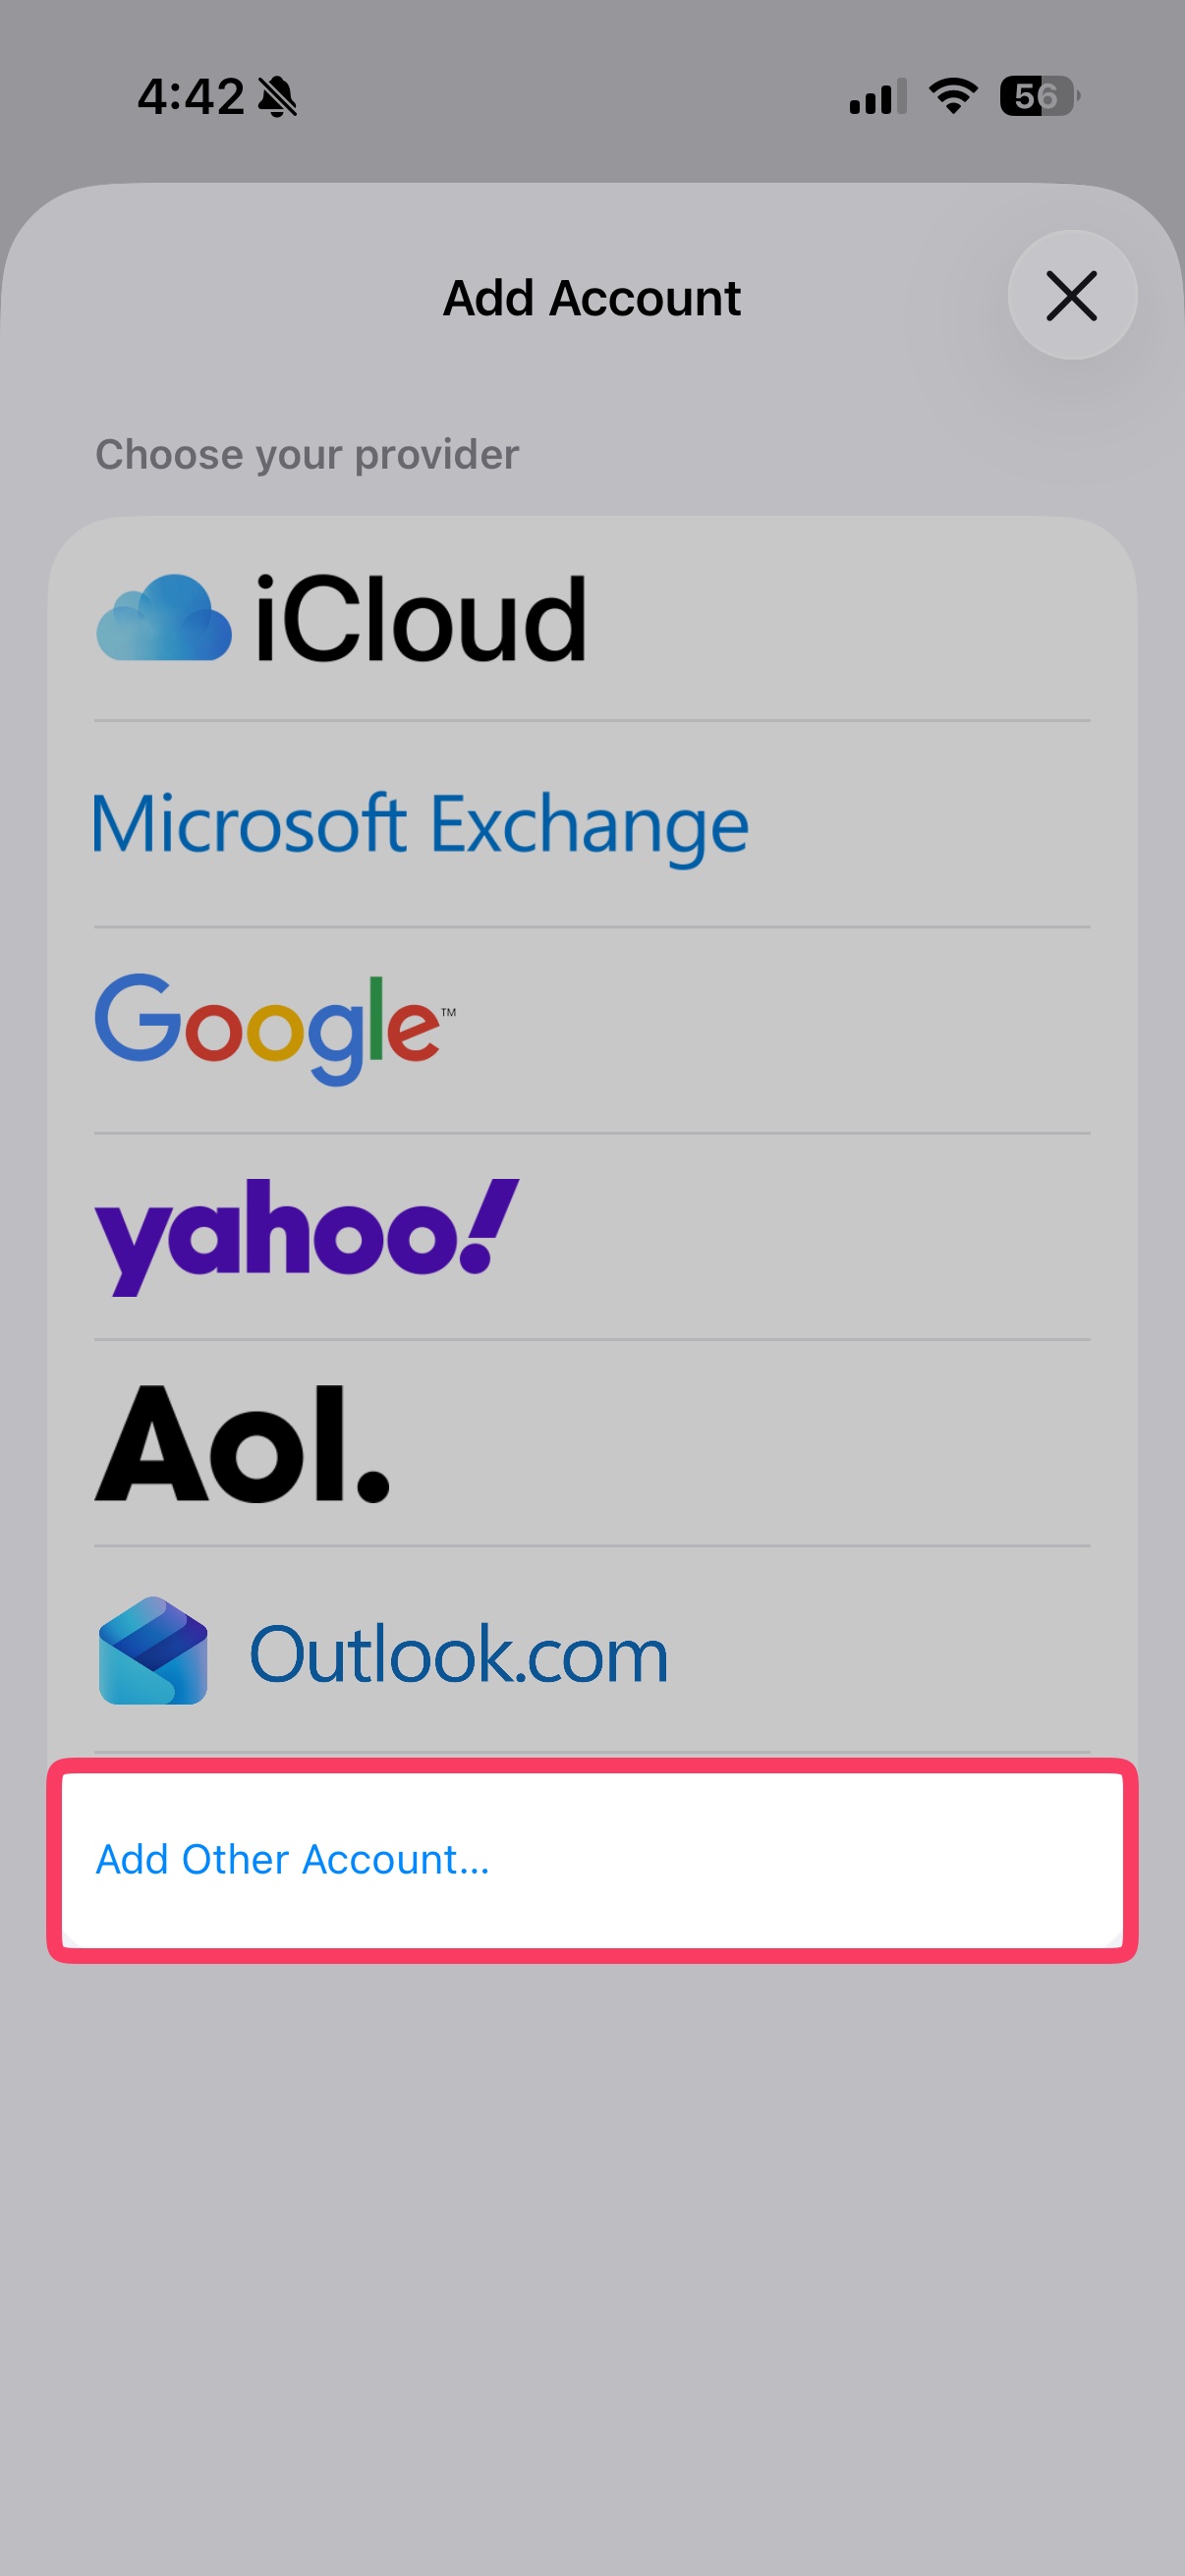
The email app will show a list of email providers you can configure. Please press the one at the very bottom labeled as Add Other Account.
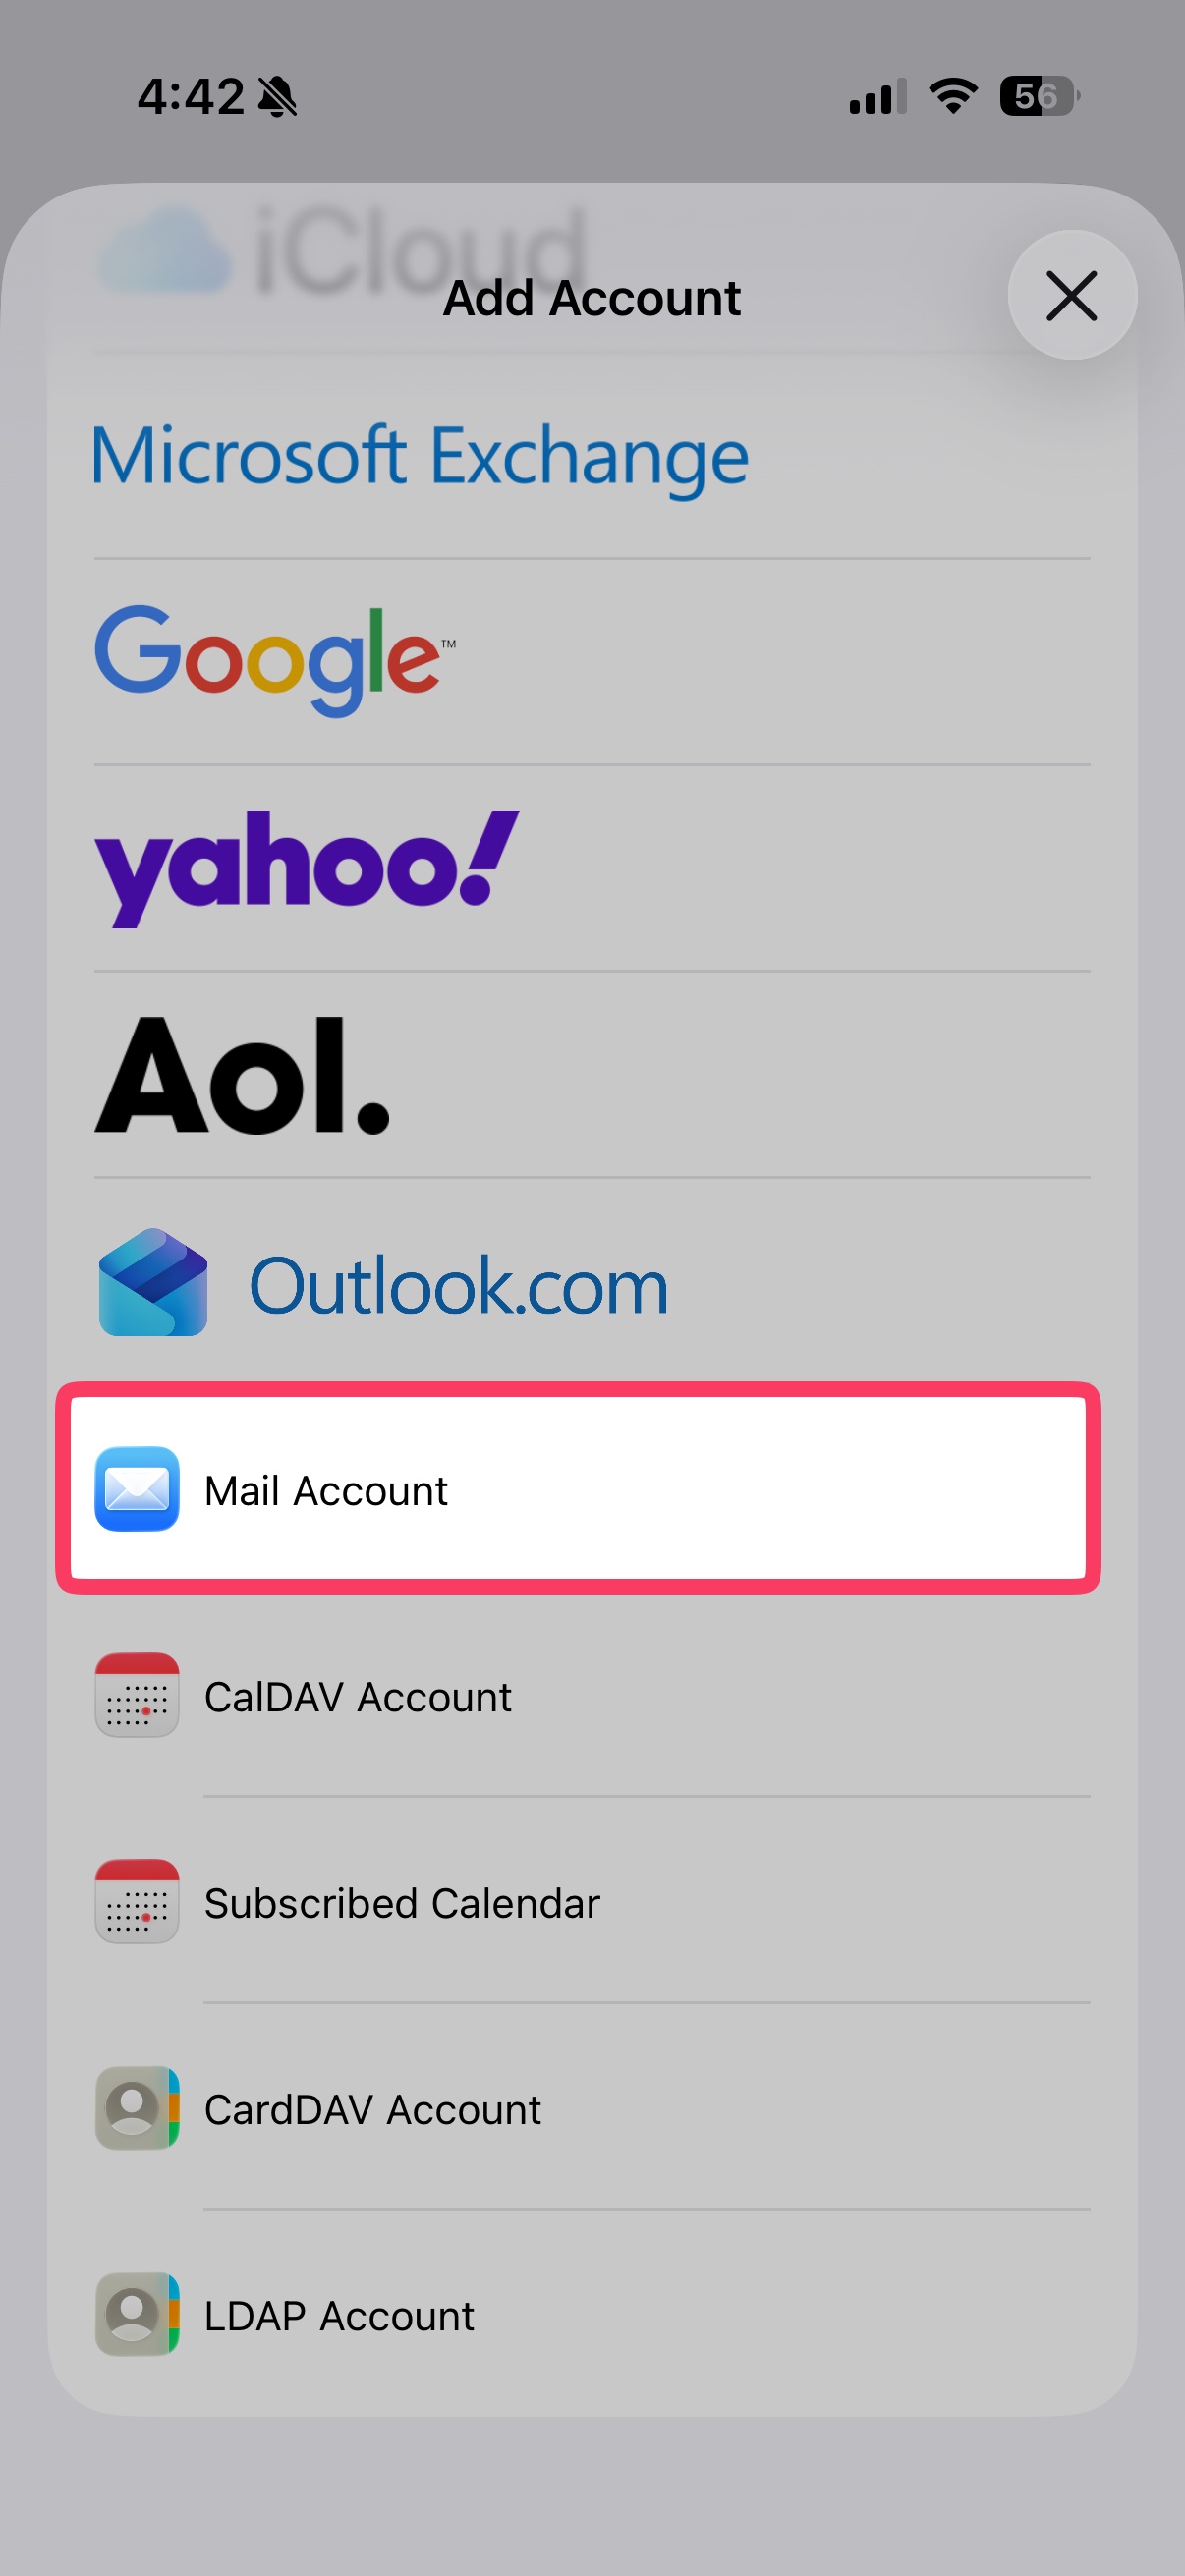
You will land on a page with different account types. Select the option labeled Mail Account.
When the email application redirects you to the "New Account" page, you will need to enter the following information:

Please press the "Next" button on the top right corner after entering the above information. The next screen, which will appear, allows you to choose either an IMAP or a POP3 iPhone email account.

In this article, we will cover both, however, you can understand what the difference is from our What is the difference between POP3 and IMAP protocols kb article.
The IMAP iPhone mail account will be the default choice when you land on the account type selection page. Underneath, you will see the Name, Email, and Description of the account you just added. Below this section, you are going to see the "INCOMING MAIL SERVER".

To set it up, please enter the following information:
Now that you configured your incoming mail server, you need to set up the outgoing mail server for your iPhone's email application as well. Please scroll down to the bottom of the page, and you are going to see the "OUTGOING MAIL SERVER" section.
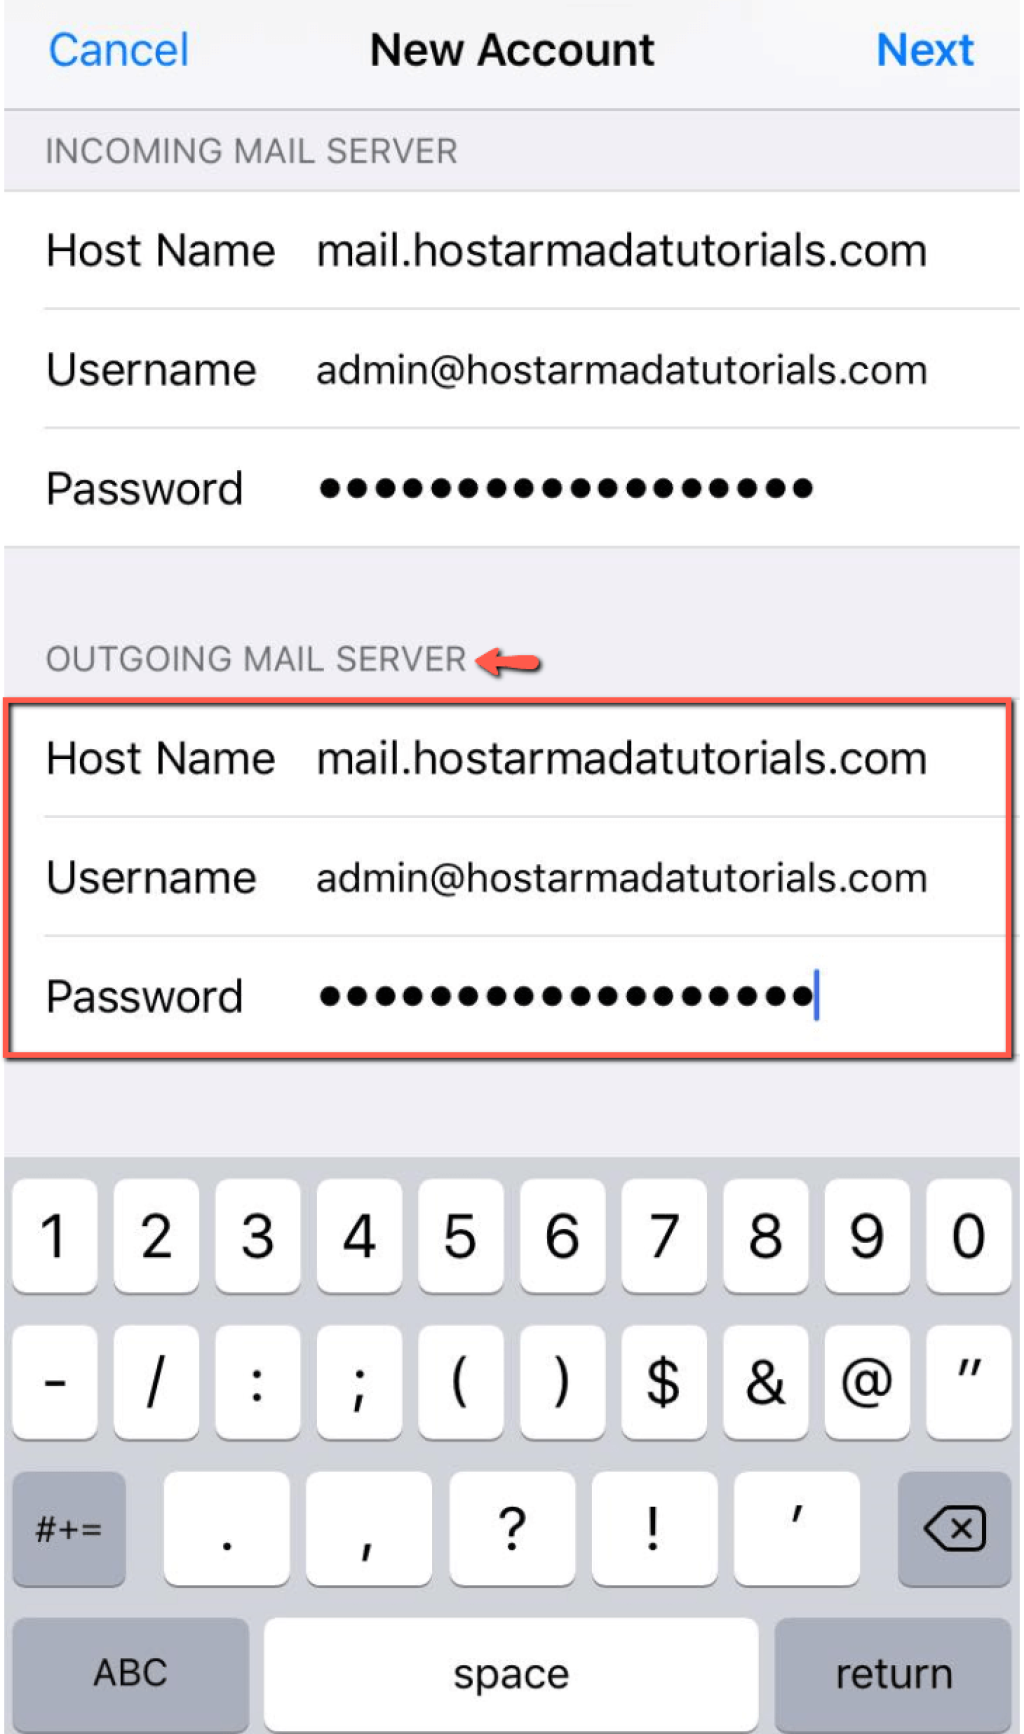
Enter the following information inside the text fields:
Upon doing so, please press the "Next" button located in the top right corner.
The iPhone email application needs a few seconds to connect to the designated server and initiate the email account. After creating it, you can navigate to the "Mail" icon on your device and press it.
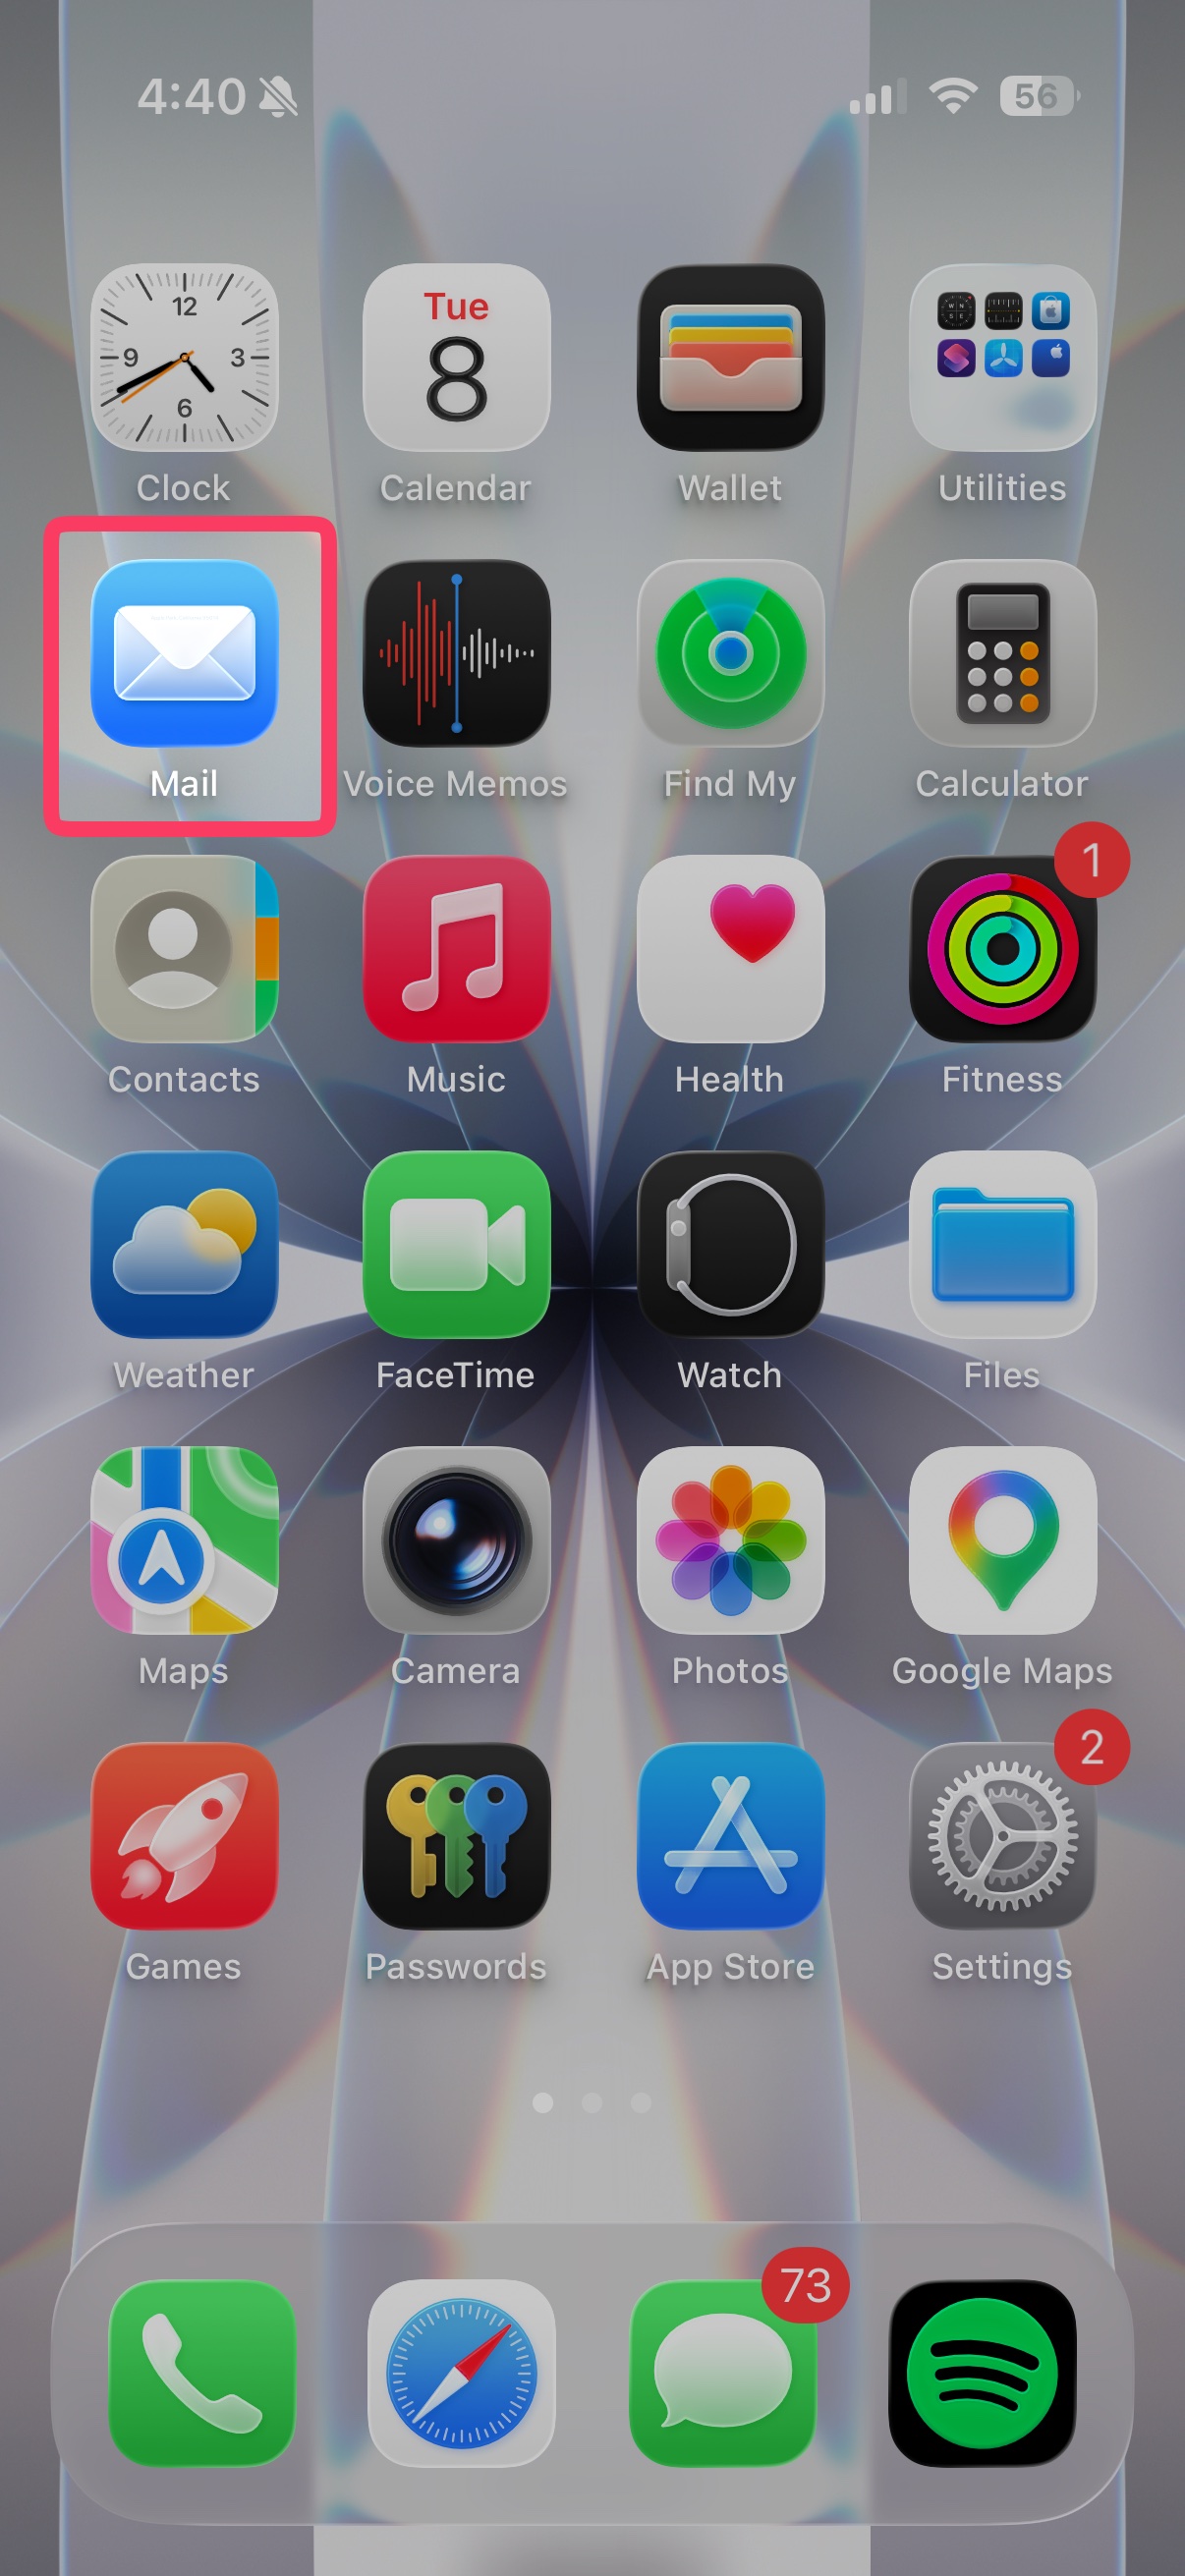
Pressing the "Mail" icon will redirect you to your mailboxes, and you will see the new account on the bottom.
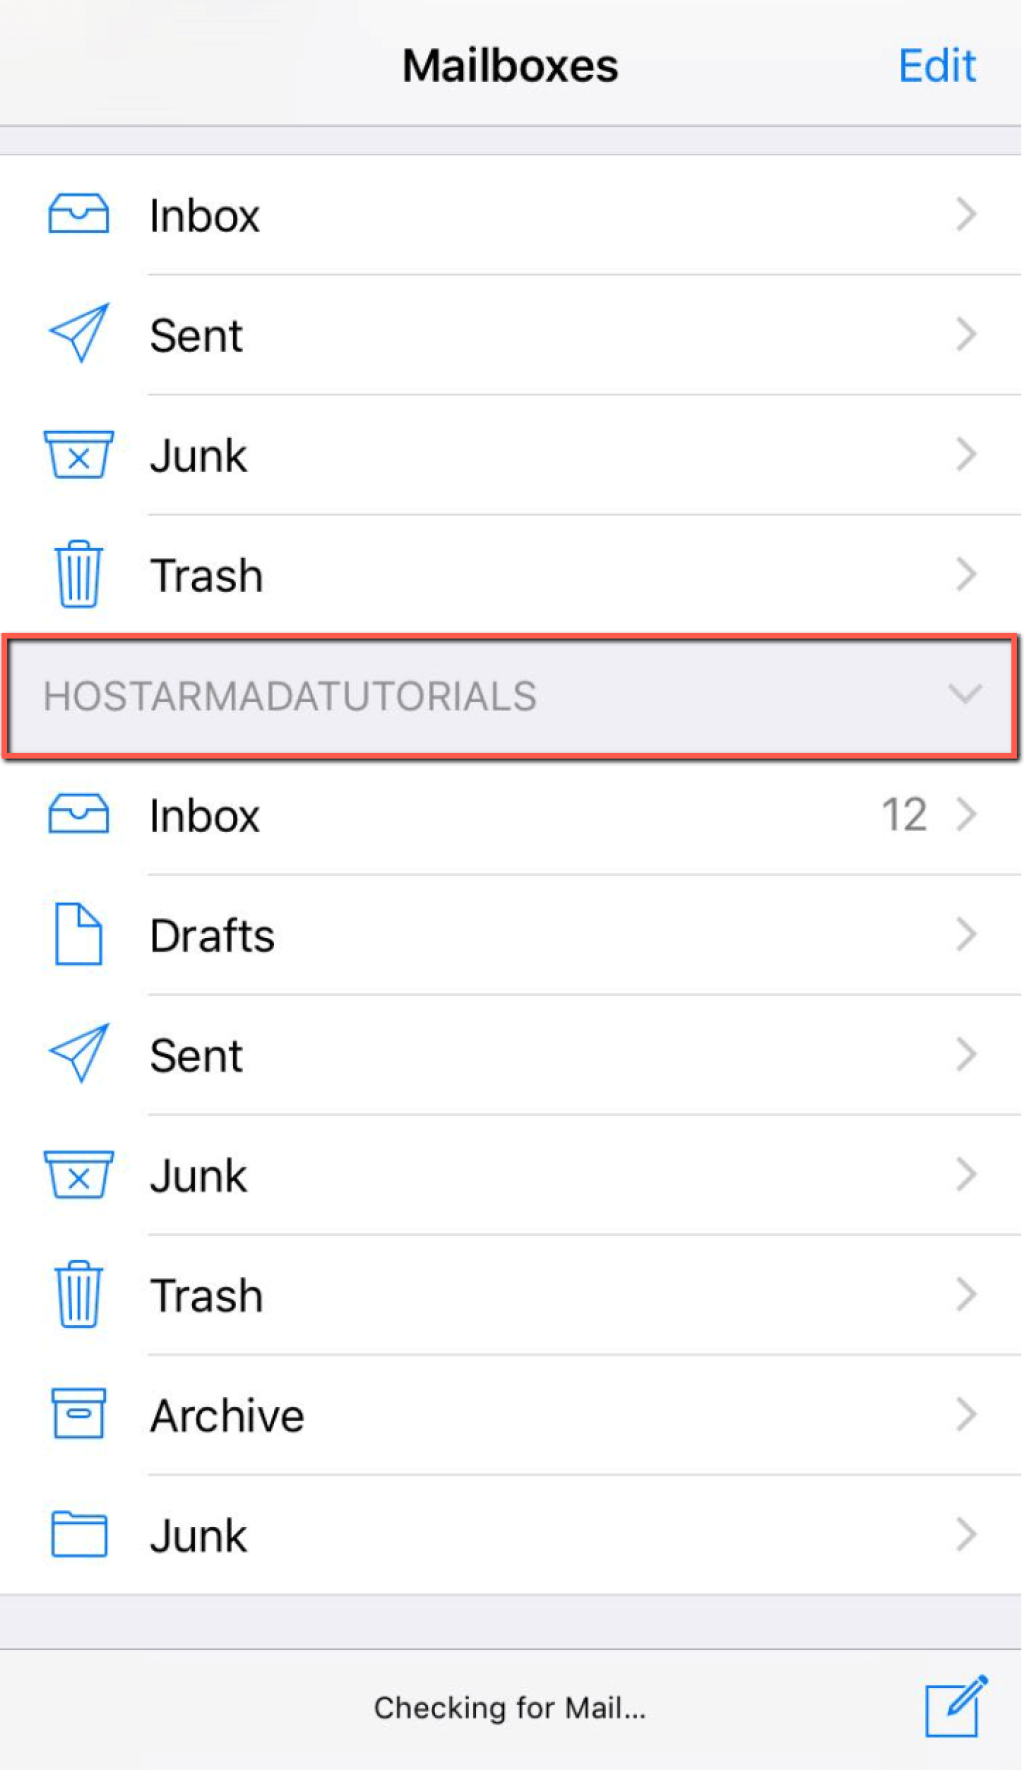
That is it! You have managed to perform the IMAP iPhone Email setup on your device successfully.
Creating a POP3 iPhone email account is analogical, however, instead of selecting the IMAP option on the top, select POP3.
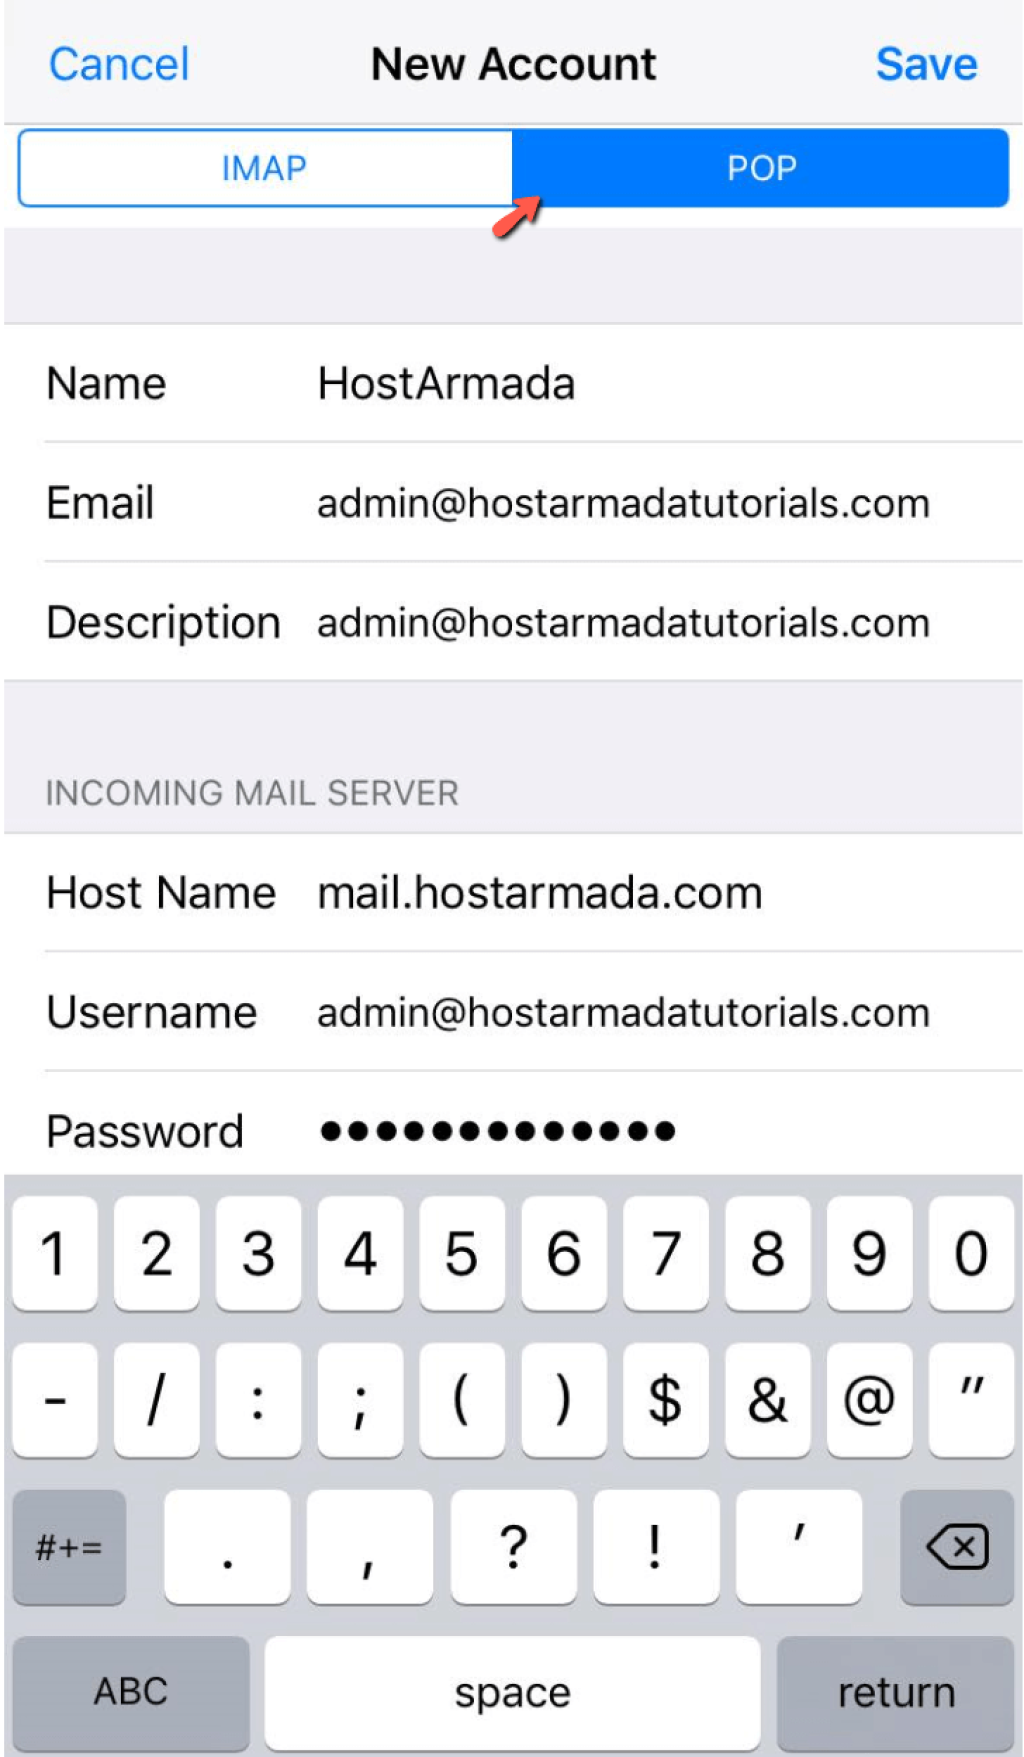
You will need to enter the "INCOMING MAIL SERVER" and the "OUTGOING MAIL SERVER" credentials again.

The email application needs a few seconds to connect to the designated server and finalize your POP3 iPhone email account setup. After the device completes the process, you can navigate to the "Mail" icon on your iPhone and press it.

Pressing the "Mail" icon will redirect you to your mailboxes, and you will see the new iPhone email on the bottom.
That is it! You have managed to perform the POP3 iPhone Email setup on your device successfully.
The process of creating an email account on an iPhone device is pretty straightforward and widely chosen by people because of its simplicity. We hope you did not experience any difficulties, and you have managed to set it the account following our guide. If you have any further questions, please do not hesitate to contact our Support Team.

Emman is a Content Manager at HostArmada where she helps make complex topics accessible for readers around the world. With 5+ years of experience in crafting SEO content, she’s passionate about making tech topics easy to understand. In her free time, Emman enjoys traveling and watching Formula 1/E races.
Learn more about Email in the other tutorials that we have:
