
Learn Website Builder
To provide your website with different functionalities the HostArmada Website Builder utilizes different user-defined configurations. These are preserved on the server and to be able to configure those you can use the Website Builder itself. In the following lines of this tutorial, we will show you the different types of settings you can configure in the HostArmada Website Builder.
Let's start by reviewing the "General" set of settings provided by the HostArmada Website Builder. You can access the "General" settings page by hovering over the "Settings" link located in the let vertical navigational menu.

You will be redirected to a brand new page on which you will find the following settings for you to configure:
When you are ready with the changes, please click on the "Save Changes" button located at the bottom of the page.
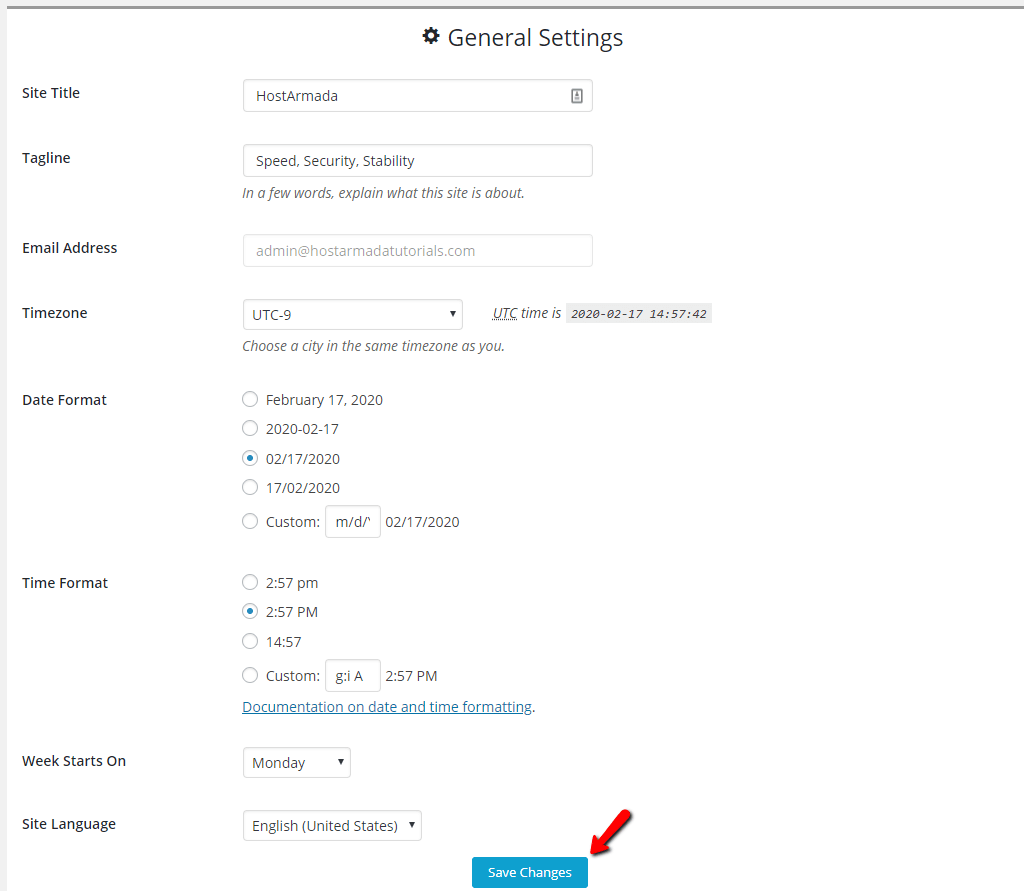
The Website Builder will then reload the page and will inform you about the successful operation with an appropriate message displayed on top of the page.
The "Writing" settings are used only to define which will be the "Default Post Category" on your website. This is the category that will be displayed on the Blog page of your website. To configure this setting you will need to access the "Writing" settings by hovering over the "Settings" link located in the left vertical navigation menu.

Once you are ready with the configuration, please do not forget to click on the "Save Changes" button located at the bottom of the page.
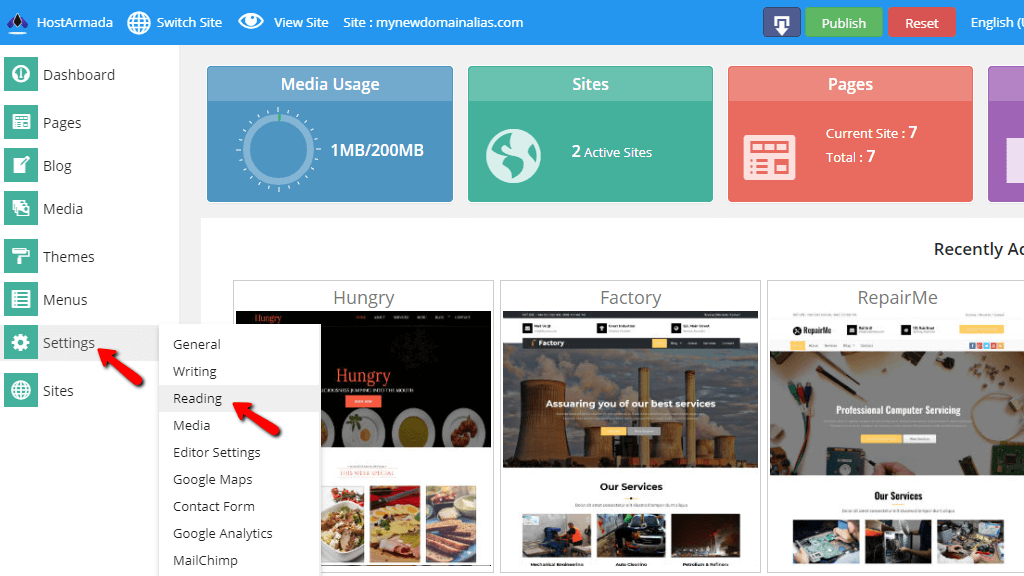
The "Reading" settings are related to how your website will be read by its visitors. To access the "Reading" settings, please hover over the "Settings" link from the left navigational menu and when the drop-down menu appears, please click on the "Reading" link.
You will be redirected to a brand new page on which you will find the following settings for you to configure:
Once you are ready configuring the settings, please click on the "Save Changes" button located at the bottom of the page.

When the changes are saved, the Website Builder will reload the page and will present you with the appropriate message to indicate whether or not the saving was successful.
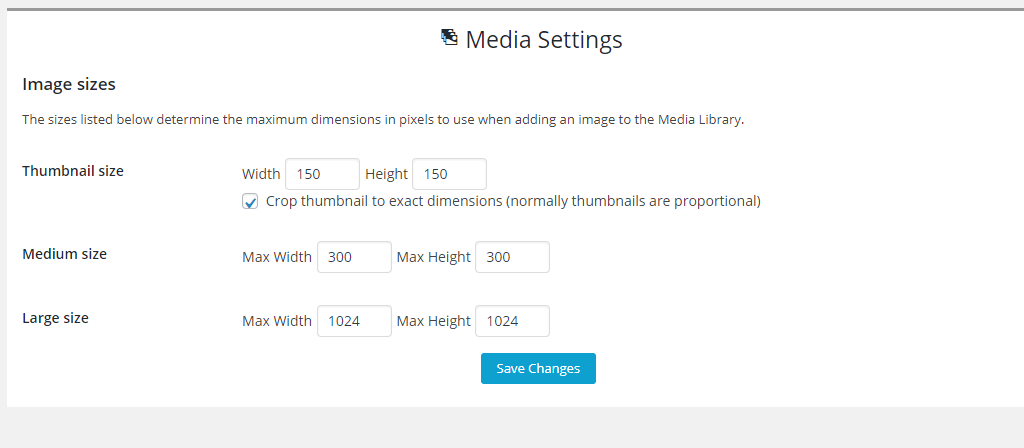
The "Media" settings in the HostArmada Website Builder are for defining the sizes for the images that you will be uploading to your website. Whenever an image is being uploaded, the same is converted to a few sizes which can be then used on the pages of your website. The sizes are "Thumbnail Size", "Medium Size" and "Large Size". By using these settings you will be able to define the exact dimensions for the images to be converted into.
To access the "Media" settings, please hover over the "Settings" link located in the left vertical navigation menu, and from the sub-menu that will appear please click on the "Media" link.

You will be redirected to a brand new page where you will be able to find the already mentioned settings for the different types of dimensions for the uploaded images on your websitе. We strongly suggest leaving the settings as they are since the configured already dimensions are industry standard. When you are ready with the configuration, please click on the "Save Changes" button located at the bottom of the page.
The page will then refresh and the Website Builder will present you with an appropriate message indicating the success of the performed operation.
The "Editor Settings" are a separate set of settings aiming to provide configuration options related to the content of your website. To access these settings, please hover over the "Settings" link located in the left vertical navigation menu, and from the newly presented drop-down menu, please choose the link "Editor Settings".

You will be redirected to a brand new page in which you will be presented with several settings for you to configure. Let's review those, one by one.
Once you are done configuring all the settings, please click on the "Save" button located at the bottom of the page so all the configurations can be saved.

That's it - everything you need to know when configuring the basic settings for your website built with the HostArmada Website Builder. Although the settings we have covered are not that much they definitely require your attention when performing any modifications on the default values. In case you are facing any difficulties performing changes in the outlined settings, please do not hesitate to contact our Technical Support Crew and as for their assistance.

Sebahat is a young and bright woman who has become an invaluable part of our team. She started as a Customer Care Representative, mastering that role and, along the way, growing into a tech-savvy individual who is well acquainted with every support layer of the company. Driven by her aim to improve our customers’ experience constantly, she is committed to enhancing the extraordinary support we deliver.
Learn more about Website Builder in the other tutorials that we have: