
Learn Website Builder
The HostArmada Website Builder provides your website with a fully functional Contact Form. It can be used by your clients to send you short messages with questions, comments and requests pointed to your business or services that you offer. The proper configuration of this feature is the key to ensuring that communication with your customers will be flawless. In the following lines of this tutorial, we will review the common settings of the Contact Form feature included in the HostArmada Website Builder.
To be able to configure the contact form for your website, you will first need to access the correct page where the settings can be found. To do that, please hover over the "Settings" menu, and from the newly displayed drop-down list, please choose the "Contact Form" option.

You will be redirected to a brand new page where you will find different configurations related to the Contact Form functionality.
When you land on the Simple Contact Form configuration page you will be presented with all the available configurations for your to configure. Before we can begin reviewing the options we feel obligated to explain how the Website Builder and its Contact Form in particular work.
The Contact Form page will be provided by default with any of the templates that you will choose for your website. The Website Builder will provide a separate page where the configuration form will be displayed. Typically the page will be called "Contact" and you will be able to see it in the list of available pages for your website. Since this will be a separate page the users will be able to access it as it will be linked in the main menu of your website by default. In case it is not, we strongly suggest checking our tutorial for How to Manage the menus of your website, so you can be able to add it easily.
On the Contact page, your visitors will see the actual contact form and be able to submit it. Afterward, the Website builder will take the information submitted in the form and will send it to a preconfigured email account. This way, you will be receiving a new email for each contact form submission on your website.
Now that you know how the Contact Form functionality work, it is time to configure the settings that will allow for the proper operation of the form. We will list all of the functionalities in different paragraphs below.
The very first configuration is the most important. It is called "Mailing Method" and as the name suggests you will be able to choose the mailing method that the Website Builder will be using for sending the contact messages to you.
The first option is called "PHP Mail" and it is selected by default. With this option selected, you control if the Website Builder will use the PHP mail function for sending emails directly from the Web Hosting Server.
The second option is called "SMTP" and it is used when you would like to configure the Website Builder to send emails from an actual mail server. The mail server can be either remote or local if the same is part of your Web Hosting account.
If you select the first option - "PHP Mail", you will not have to configure anything else in regards to the mailing service. However, if you choose the "SMTP" option, you will be provided with the following configuration options:

The rest of the options we will review further in this tutorial are the same for both the mailing methods.
In this field, you will need to type the email account TO which the emails from the contact form will be sent. This should be your personal email account and we strongly recommend using an existing email account created via the cPanel service for your Web Hosting Account. If you are not certain how to create an email account, please check our tutorial on How to manage the email accounts for your Web Hosting account with HostArmada.
In this field, you will need to type the email account from which the emails will be sent. If you are using the "SMTP" mailing method then the From field should be the very same as the username you have configured. If using the "PHP Mail" mailing method then the From field should for sure be configured to an existing email address.
Here you should configure the subject of the message that will be sent from the builder. As you can see that field is already configured with some sample data which includes the usage of tags. The tags are basically representing different fields from the contact form submitted by the visitor.
In this field, you should configure the message that will be displayed to the visitor if the form is submitted successfully.
In this field, you should type the message that will be displayed to your visitors if there is an error with the submission of the form.
Under the next three fields called "reCAPTCHA Site Key", "reCAPTCHA Secret Key" and "reCAPTCHA Language" you will be able to configure the settings for the reCaptcha human verification feature provided by Google. Basically what this feature does is that it prevents non-human visitors from submitting the contact form thanks to a human verification challenge. We will explain these features and how to configure those in the next paragraphs to come.
In this field, you will be able to configure the allowed file types for upload when the Contact Form is being submitted. Of course, the website builder has pre-configured values for the file types - txt, doc, pdf, docx, ppt, pptx, odt, xls, xlsx, zip, jpg, jpeg, png, gif. If you would like to add some others please simply put those in the designated text field.
Here you will be able to configure the content of the sent emails to you. To do so, first, you will need to enter the name of the email template in the designated text field. Once you are done with that please click on the "Add Template" button so the template can be created. Then you will be provided with a standard text area where you will be able to input the actual template of the email. When configuring the template, you can use the names of the fields from the Contact Form placed within square brackets in order to get the value of the field. For example, if you would like to use the visitor's name in the email template you can type "[Name]" and this will automatically be translated by the Website Builder to the actual name that the visitor typed when submitting the Contact Form.
Finally, when you are done with all the fields, please click on the "Save" button located at the bottom of the page so all of the settings can be saved by the Website Builder.
As we have mentioned earlier in this tutorial, the google reCaptcha service will allow you to filter the legitimate form submissions from those made with malicious purposes by spambots. The way how this service works is by presenting a captcha human verification to the visitor submitting the form. If the challenge is completed then the form gets submitted and if not a message for error will be presented.
To integrate Google reCaptcha you will need to have an active Google account. If that is fulfilled then you will need to access the Admin Dashboard for the Google reCaptcha service. There you will need to create a new website using the plus icon displayed at the top right side of the screen.

You will then be redirected to a new page where you will need to configure several settings before you can start using the reCaptcha feature. Let's review those, one by one:

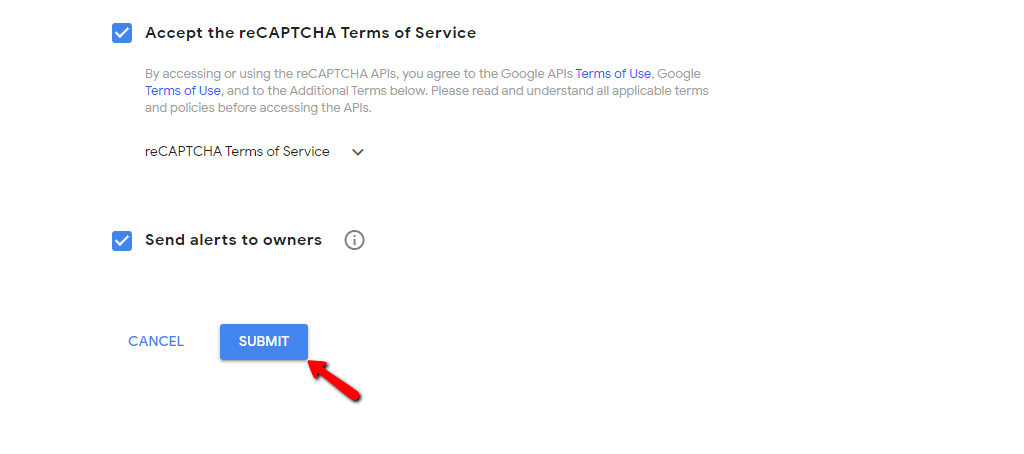
Once you are done with all the fields of settings, please click on the "Submit" button located at the bottom of the page.
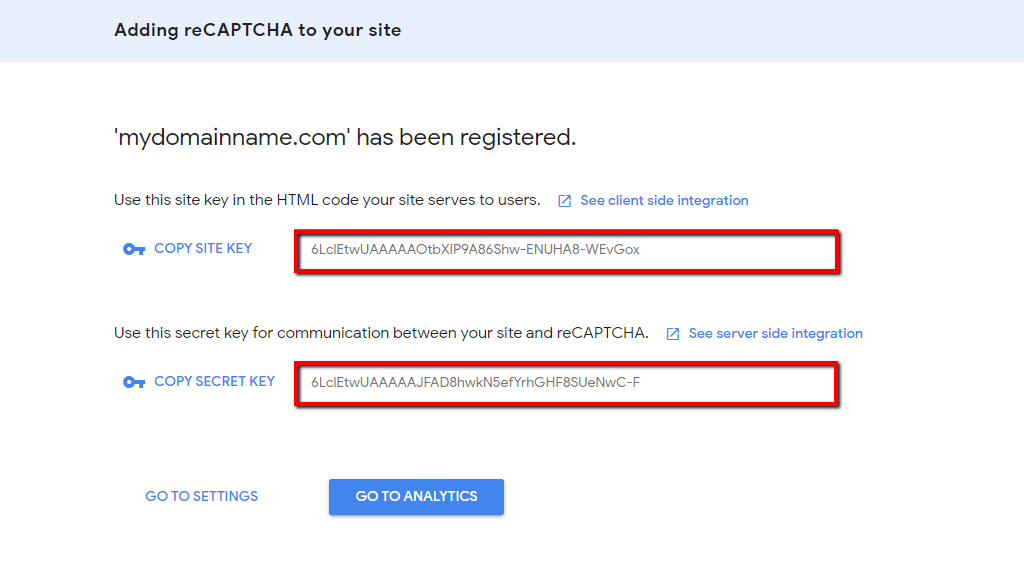
You will be redirected to a brand new page where you will be provided with the "Site Key" and the "Secret Key" needed for the configuration of the reCaptcha feature within the HostArmada Website Builder.
Now that you have everything you need let's go ahead and configure the feature. Please access the Contact Form settings as we have outlined in the second paragraph of this tutorial. Next, please scroll down and locate the "reCAPTCHA Site Key" and the "reCAPTCHA Secret Key" settings. Please copy the Site Key from the Google reCaptcha page and paste it into the corresponding field of the Contact Form settings. Do the same with the Secret Key.
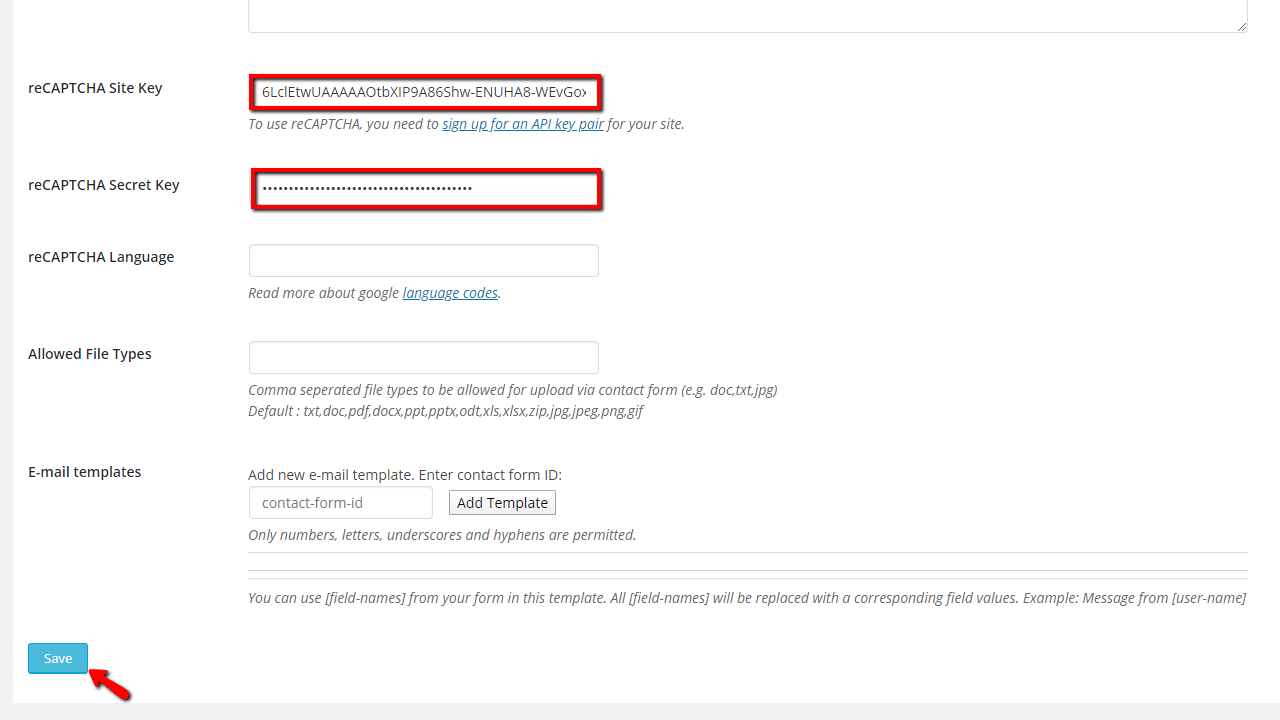
Once you are done pasting the keys, please click on the "Save" button located at the bottom of the page in order for the settings to be saved.
With this, the configuration of your Contact Form is completed. Please bear in mind that this is only half of the job done. The Contact Form is an actual web component that you will need to properly add to the page you would like to have it displayed. Of course, if you would like to use the provided by default Contact Form this will be already done for you.

Sebahat is a young and bright woman who has become an invaluable part of our team. She started as a Customer Care Representative, mastering that role and, along the way, growing into a tech-savvy individual who is well acquainted with every support layer of the company. Driven by her aim to improve our customers’ experience constantly, she is committed to enhancing the extraordinary support we deliver.
Learn more about Website Builder in the other tutorials that we have: