
The main functionality of your Online Store is to sell products to your customers. So every time a visitor decides they want to purchase something from your store, they will have to either register or checkout as a guest. The registered users need to be stored somewhere so your Online Store can remember the visitor and offer login functionality for the already registered users. Fortunately, Prestashop 1.7 offers extended user management functionality which we will cover in the following lines of this tutorial.
In order to create, edit or delete a customer account, you will have to login into the Admin area of Prestashop and from the left vertical navigation menu to look for the “Customers” option. When you find it, please, click on it. A drop-down menu will appear with the following options:

From these two options, please, click the “Customers” one.
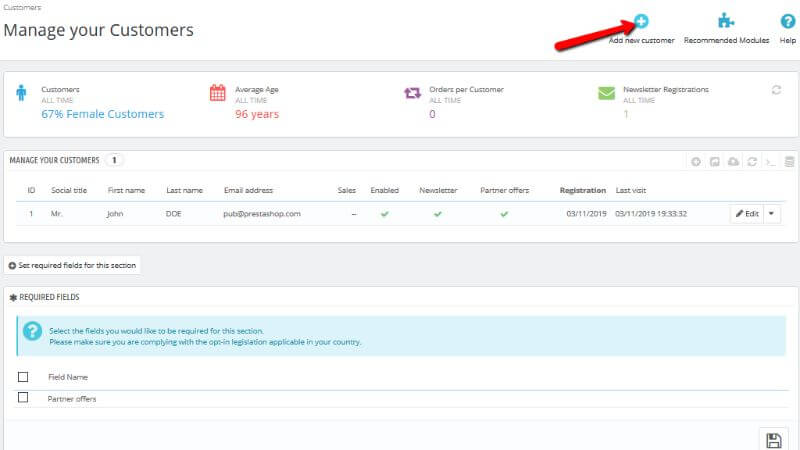
You will be redirected to a page called “Customers”. On that page, you will be presented with a conveniently structured list of all the registered users on your shop.

For each registered user you will be provided with the following information structured in columns:
and a final column that you may consider as “Available actions”.
Please, bear in mind that when installing for the first time with sample data, PrestaShop creates a default user named John Doe.
It is recommended that you either delete that user or change its credentials before you open your store to the public because spam users can use it for fake purchases and more.
Under the “Manage your customers” section you will see a “Set required fields for this section” button.

Thanks to that button you can specify which additional fields should be displayed in the table “Manage your customers” located above.
Now, since you know what the “Customers” page resembles, it is time to learn how to create a customer account by yourself. For that, please, click the “Add new customer” button and the top right of the page.
That will redirect you to a page called “Creating a new Customer”.

On that page, there will be only one section called “Customer”.
To create the new customer account you will have to fill out the information from that section. Let’s start as follow:
Please, remember to click the “Save” button at the bottom of the section once you are done with the configuration of the creation.

Now, the information that you had just entered is saved.
If you want to edit an existing customer account, please access again the “Manage your Customers” page. Next to each customer you will see an “Edit” button.

Please, click it. You will be redirected to a page called “Editing customer and the name of the customer”.

The only difference with the “Creating new Customer” page is that everything here will already be filled out. Please feel free to edit the information and once ready please save the information using the save button at the bottom of the page.
And the last step in order to cover the complete management of a customer’s account is if you want to delete an existing customer.
Please, once again return to the “Manage your Customers” page. Right next to the “Edit” button there is a drop-down menu. Click it and then choose the “Delete” option.
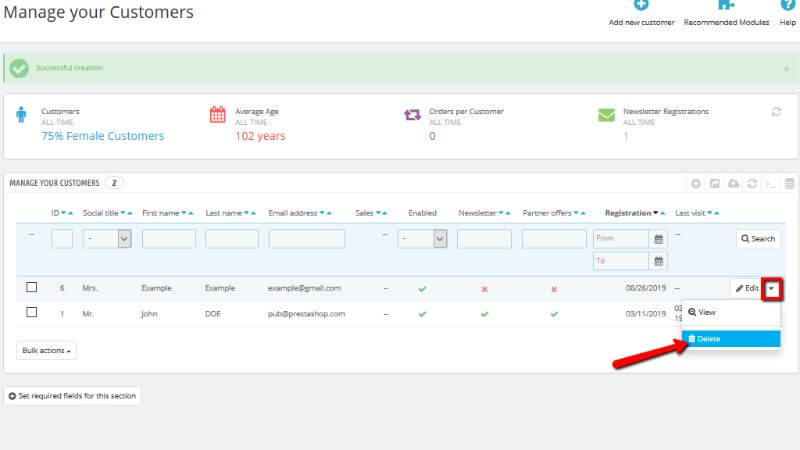
A message letting you know that you are about to delete the current customer will appear.

If you really want to delete the customer, please, click the “OK” button from the message and the customer’s account will be deleted from your Online Store.
Congratulations! Today you learned how to create a customer account, edit and delete an existing one.

Sebahat is a young and bright woman who has become an invaluable part of our team. She started as a Customer Care Representative, mastering that role and, along the way, growing into a tech-savvy individual who is well acquainted with every support layer of the company. Driven by her aim to improve our customers’ experience constantly, she is committed to enhancing the extraordinary support we deliver.
Learn more about Prestashop 1.7 in the other tutorials that we have: