
Learn Prestashop 1.7
No matter how good you have designed your Online Store, it is very important to show your business in a native for the customer language. Enabling that option will allow your customers to gain a better idea of what your store is all about and to better understand it. Setting up different languages is a pretty simple task and today you are going to learn precisely how to achieve that.
It is important to know that before starting the process of creating a language, you first have to check if the specific language you are planning to add is available in the “Translations” page. For that, you, first, have to login into your PrestaShop Admin area. From the left vertical navigation menu look for the “International” option.
When you click it a drop-down menu will appear with the following options:
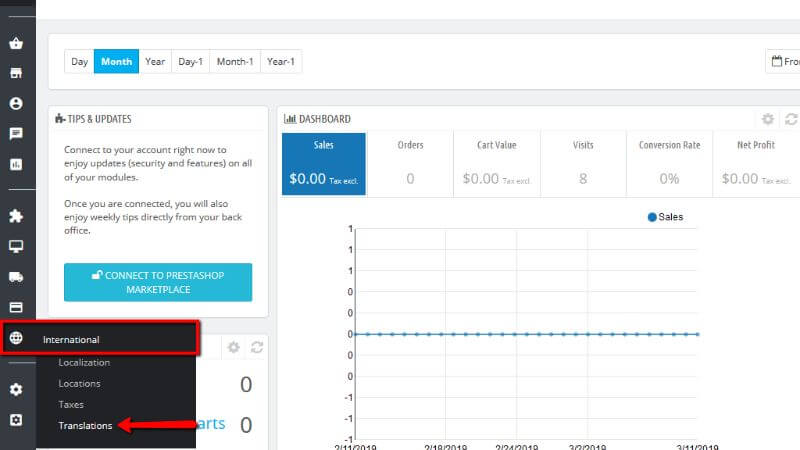
From these four options, please, click the “Translations” one. Once redirected to the page you will see a few sections appearing.

In the section “Add/Update a language”, please, click the drop-down menu to see from the list if the language you are searching for is there.
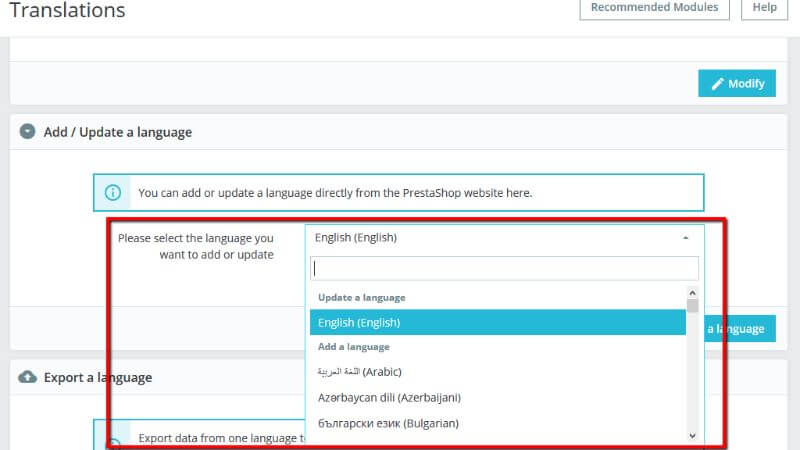
Please, bear in mind, that even if the language is there, it may not be fully translated. Besides, it will still import the official PrestaShop translations for it and you will be provided with a basis for that language.
Now, to reach the “Language” page itself, you will have to click the “International” option at the main left vertical menu, but this time, please, click the “Localization” option from the drop-down menu.

Once redirected to the “Localization” page you will be provided with four tabs - the one that is chosen by default “Localization”, “Languages”, “Currencies” and “Geolocation”.
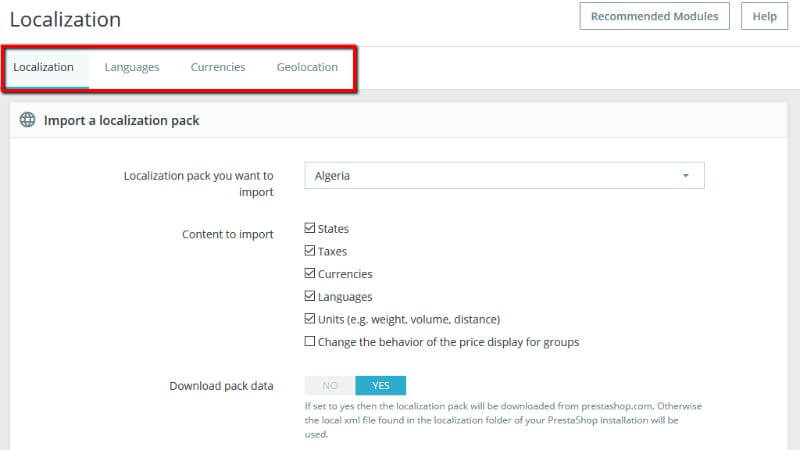
Please, click the “Languages” tab to be able to move forward with the creation process for your language.
You will be redirected to a page called “Languages”. The “Languages” page is the one that configures the languages on the frontend and the back-office of your Online Store. On that page, you will be provided with a list of all the languages that are already installed in your shop.
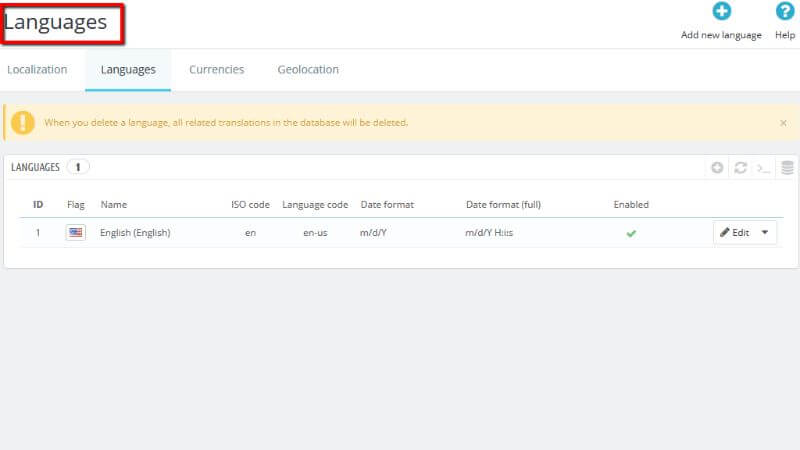
On that list, you will see details such as “Flag”, “Name”, “ISO code”, “Language code”, “Date format”, “Date format (full)” and “Enabled”.
You can always enable or disable a language, by just clicking the button on the “Enabled” column.
Right next to each of the installed languages you will see an “Edit” button if you want to edit the existing language and a drop-down menu for deleting the language if needed.
Now, since you know what the “Languages” page stands for, it is time to actually create a new language. To do that, please, click the “Add new language” button at the top right of the page.

You will be redirected to a page called “Add new”.
Most of the cases, you will only have to import the localization pack from a country that uses the specific language from the “Localization” page. But there are times when this might not work, or you may want to create a custom one. In such a case, you will have to go through the steps described in the following lines.
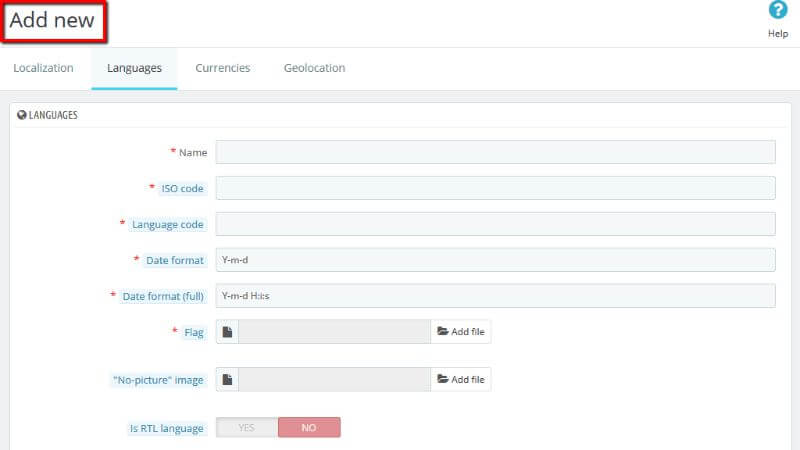
On the “Languages” page there will be only one section called “Languages”.
Many of the options from that section have to be filled in order for you to create the desired language. They are as follow:
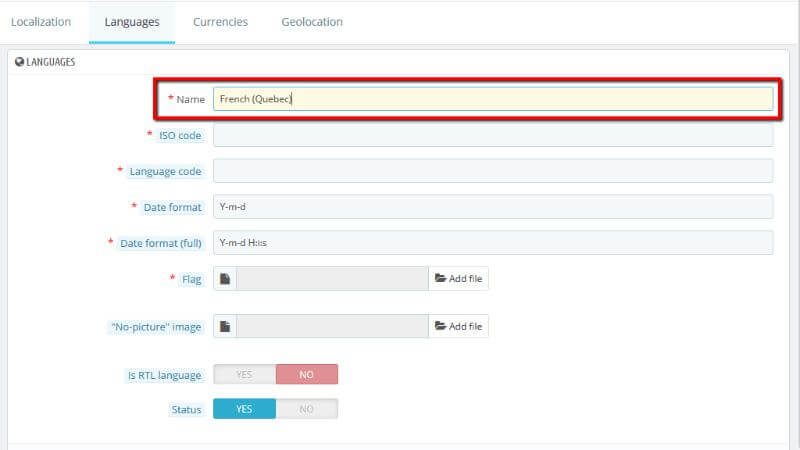
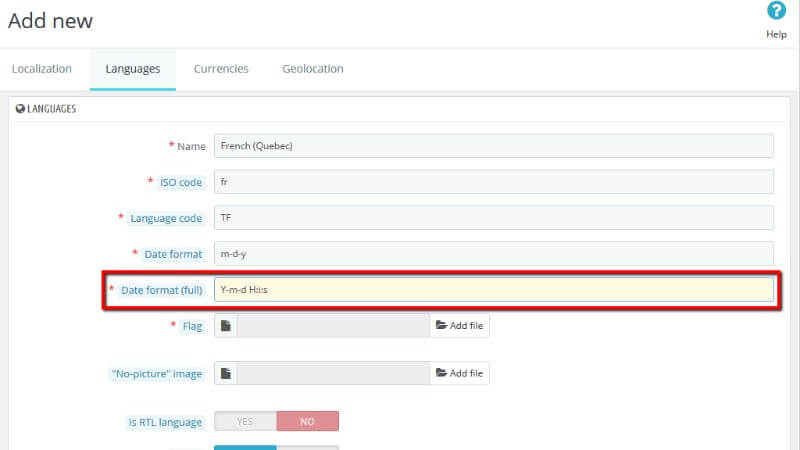
Please, bear in mind, that you have the option to create a language for a specific country region. In that case, you have to indicate that in the name. For example, if you want to create a language for France and more specifically for Quebec, then in the name you have to type “French (Quebec)”.
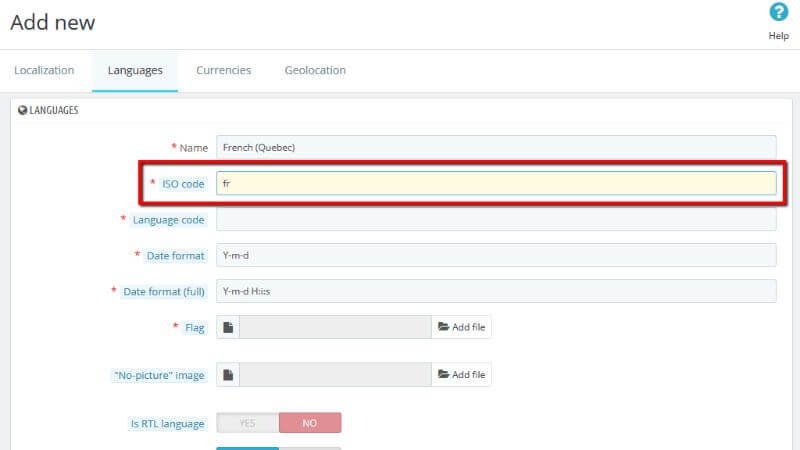
Please, bear in mind, that if you are importing a language pack, then that code should exactly match the one of the pack.

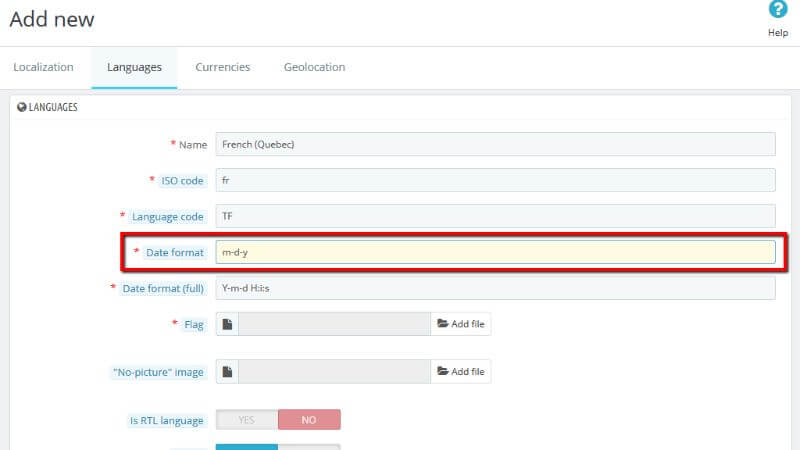
For example, you may want the moth to be first, then the date and last the year. In that case, you have to type in the date format field “m-d-y”.
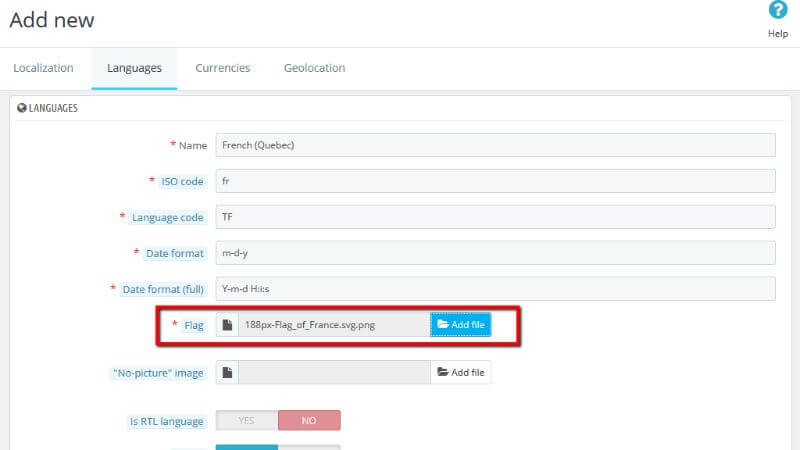
Please, bear in mind that the image that you are importing should be 16*11 pixels.

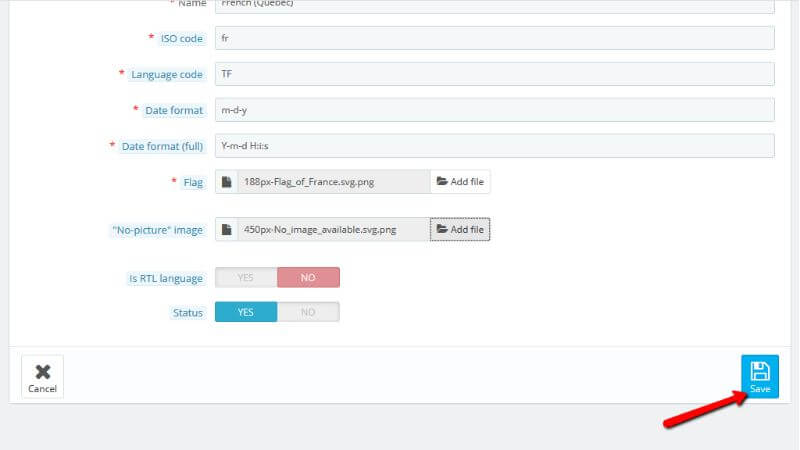
That picture should be 250*250 pixels.


Once you are done with filling the options please, click the “Save” button at the right bottom of the section.
After your new language is created, please, make sure that it is working properly for everything. You can simply go to the frontend of your Online Store and click the flag icon at the top.
Please, bear in mind, that if you want to create a new language, then that means you will have to translate every single text for your Online Store - frontend, back-office, modules and so on.
Congratulations! Today you learned how to fully manage available languages for your store and also how to create your own one.

Sebahat is a young and bright woman who has become an invaluable part of our team. She started as a Customer Care Representative, mastering that role and, along the way, growing into a tech-savvy individual who is well acquainted with every support layer of the company. Driven by her aim to improve our customers’ experience constantly, she is committed to enhancing the extraordinary support we deliver.
Learn more about Prestashop 1.7 in the other tutorials that we have: