
CMS stands for Content Management System and as the name suggests it is used for managing the content of the static pages of your Prestashop 1.7 Online Store. When we say static pages we are referring to any page that is displaying non-dynamic content such as “About Us”, “Terms and Conditions”, “Delivery” and so on. So in other words, using the CMS will allow every PrestaShop 1.7 website administrator to be able to create as many static pages as they need and furthermore, to manage their content in an efficient way. In the following lines of this tutorial, we will show you how to fully utilize the power of the CMS functionality offered by PrestaShop 1.7.
In order to fully manage the CMS feature of your Online Store, you will have to log in to the Admin area of PrestaShop and from the left vertical navigation menu to look for the “Design” option. When you find it, please, click on it. A drop-down menu will appear with the following options:
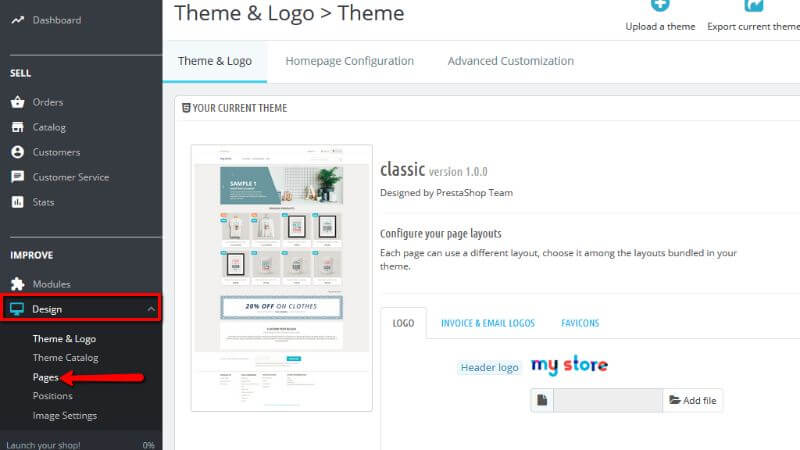

Out of all these options that appear in the drop-down menu, please, click the “Pages” option.
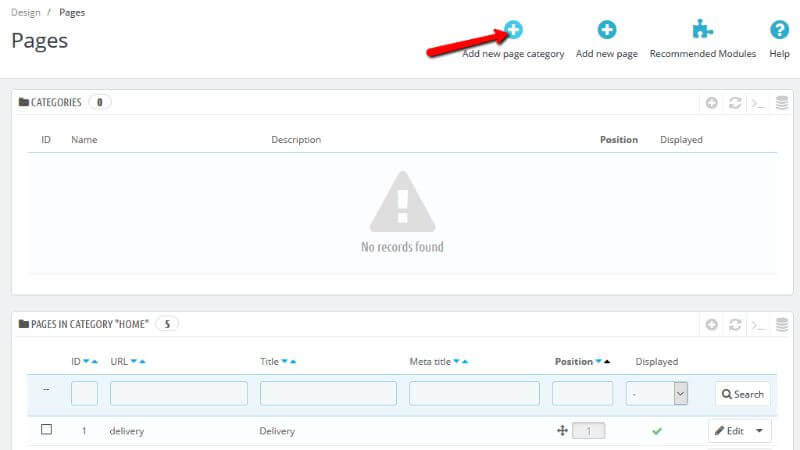
You will be redirected to a page called “Pages”. On that page, you will see two sections - one for the created CMS categories and one for the created and existing CMS pages.

Each one of the sections will have the existing categories/pages structured in a convenient table view. In order to create a new CMS category, please, click the “Add new page category” button at the top right of the page.
You will be redirected to a page called “Pages>Add New Category”.

Please, bear in mind, that the category you are about to create is actually a sub-category of the root category called “Home”. You can create as many categories as you need.
On the page “Pages>Add New Category” you will be presented with only one section called “CMS Category”.
The options that you have to fill out contain basic information. Let’s review them as they follow:

Once you are done filling out the fields for the creation of a new CMS category, please, click the “Save” button at the bottom of the section.
Once the category is saved you will be redirected back to the “Pages” page. The newly created category will be a sub-category to the parent one. If, on another hand, you want to be able to see more sub-categories you have to create some.
Now, let’s move on to creating a new CMS page.
To be able to start the process of creating a new CMS page, please, click the “Add new page” button at the top right of the “Pages” page.

You will be redirected to a page called “Page>Add New Page”.


Just like with the “Add new category” page here you will have again only one section on that page.
The fields that you have to fill in here are as follow:

Please, bear in mind, that it is recommended to translate each page for each of your supported languages, as it is making it easier and more beneficial for you when the user can read it on their own language.
After you are done with all the fields in that section, please, click the “Save” button.
If you have decided to display the page, then after saving it, you can view the results directly on your online shop.
Editing and deleting a category or a page is pretty easy. Let’s start with editing a page. When you reach the “Pages” page you will see that right next to each page there will be an “Edit” button.
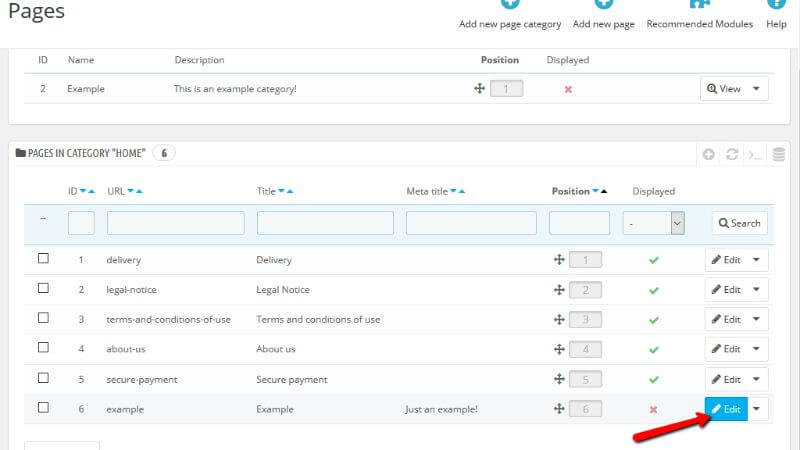
When you click the edit button you will be redirected to a page called “Pages>Edit page: and the name of the page”.

You will see that it has exactly the same options as you had when you were creating a page, but the only difference, now, here, will be that every field is already filled out.
Deleting an existing page is even easier. From the “Pages” page you will see an arrow for a drop-down menu next to the “Edit” button for each page.
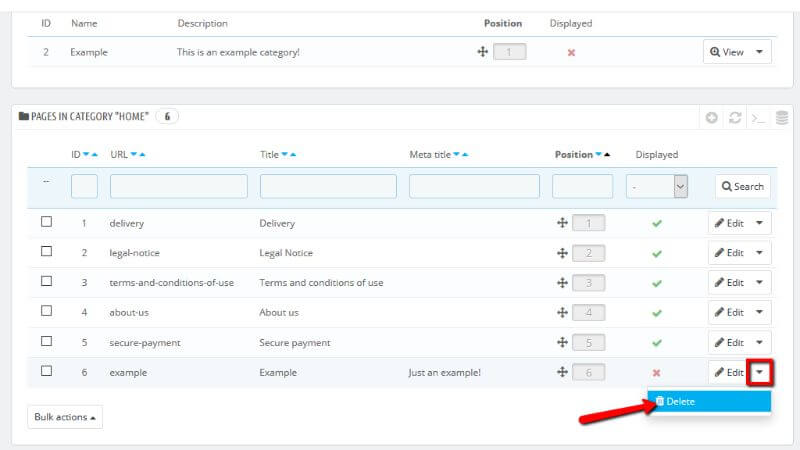
Once you click it a drop-down menu with only one option will appear “Delete”. When you click it a dialog box will appear letting you know that you are about to delete the specific page.

Click “Ok” if you really want to delete the page or “Cancel” if you accidentally had pressed that.
The process of editing and deleting categories is the same as editing or deleting an existing page.
Congratulations! Today you learned how to create CMS categories and pages, how to make them the parent one and how to configure the existing ones.

Sebahat is a young and bright woman who has become an invaluable part of our team. She started as a Customer Care Representative, mastering that role and, along the way, growing into a tech-savvy individual who is well acquainted with every support layer of the company. Driven by her aim to improve our customers’ experience constantly, she is committed to enhancing the extraordinary support we deliver.
Learn more about Prestashop 1.7 in the other tutorials that we have:
