
Learn MCP
 Last
Updated: 11/12/2026
 ( minutes reading )
Connecting VS Code to your HostArmada account takes a few minutes. Once connected, you can check your invoices, hosting services, domains, and support tickets in the VS Code chat while you work. For example, you can open a support ticket about a site issue without leaving your editor, and approve every change before it happens.
You need three things:
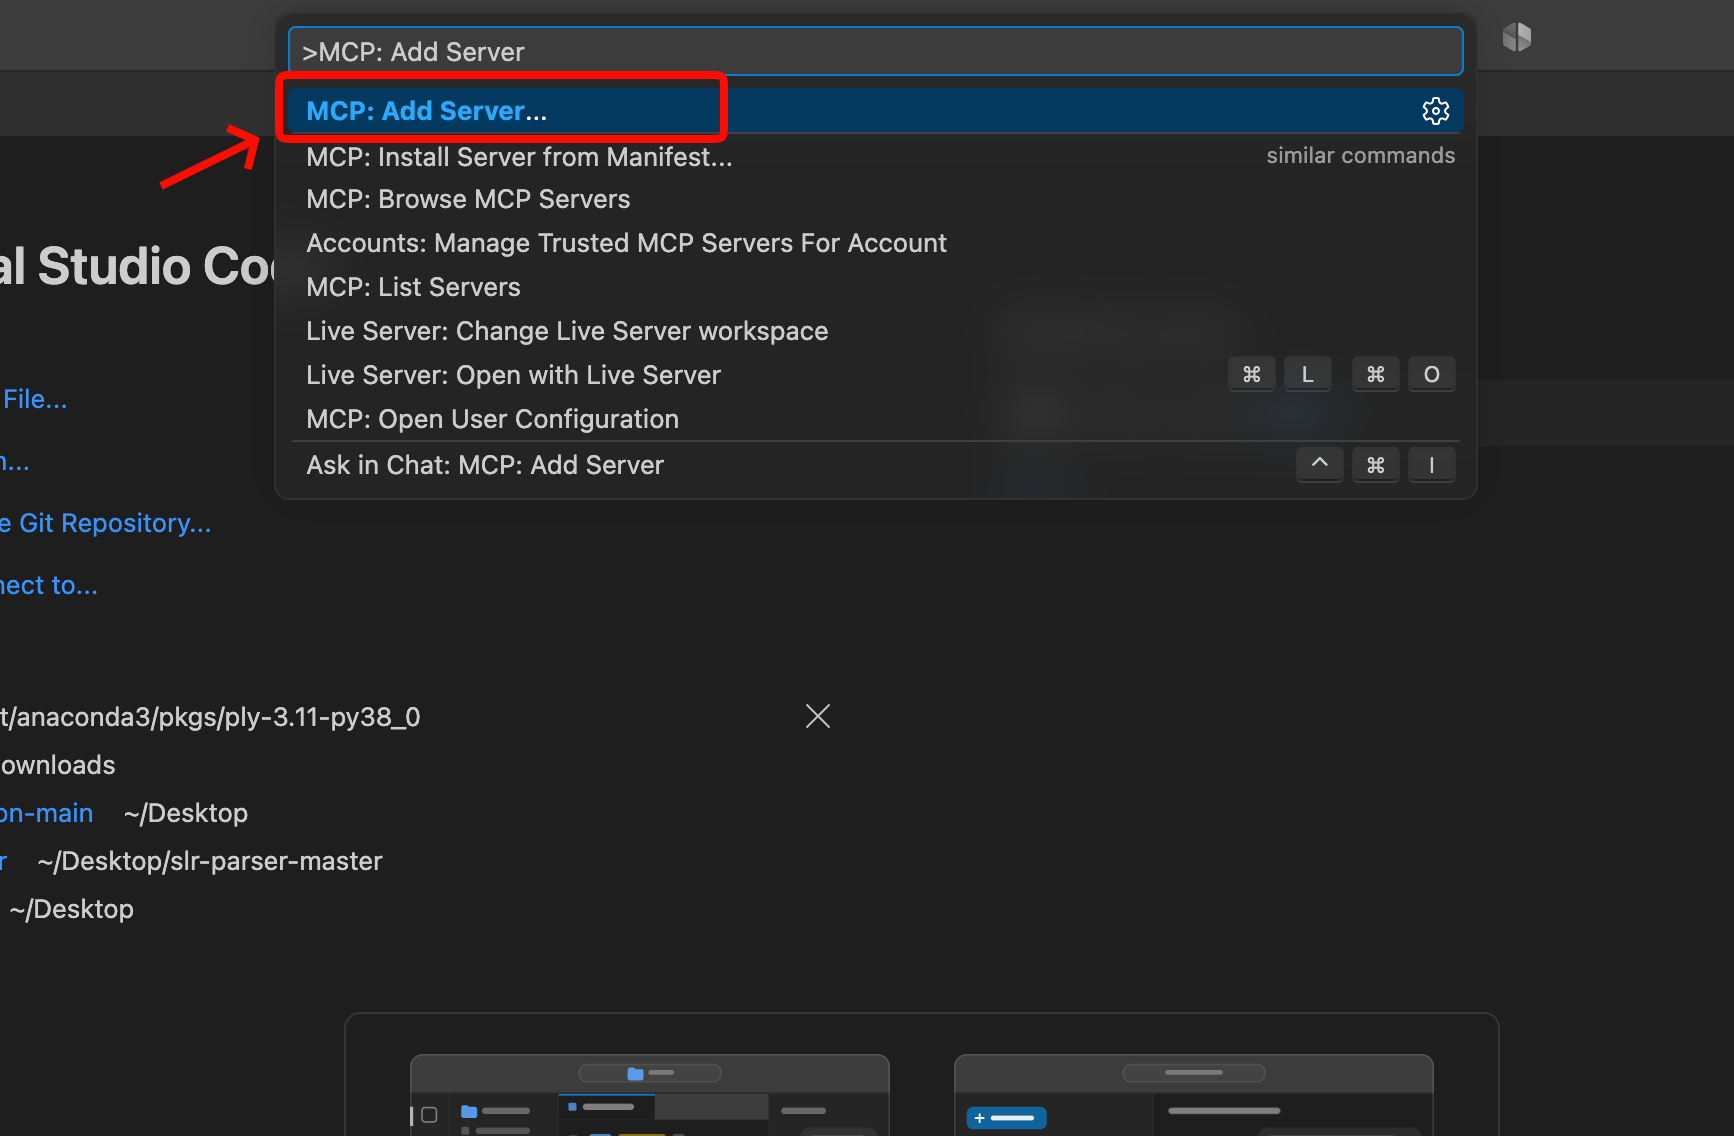
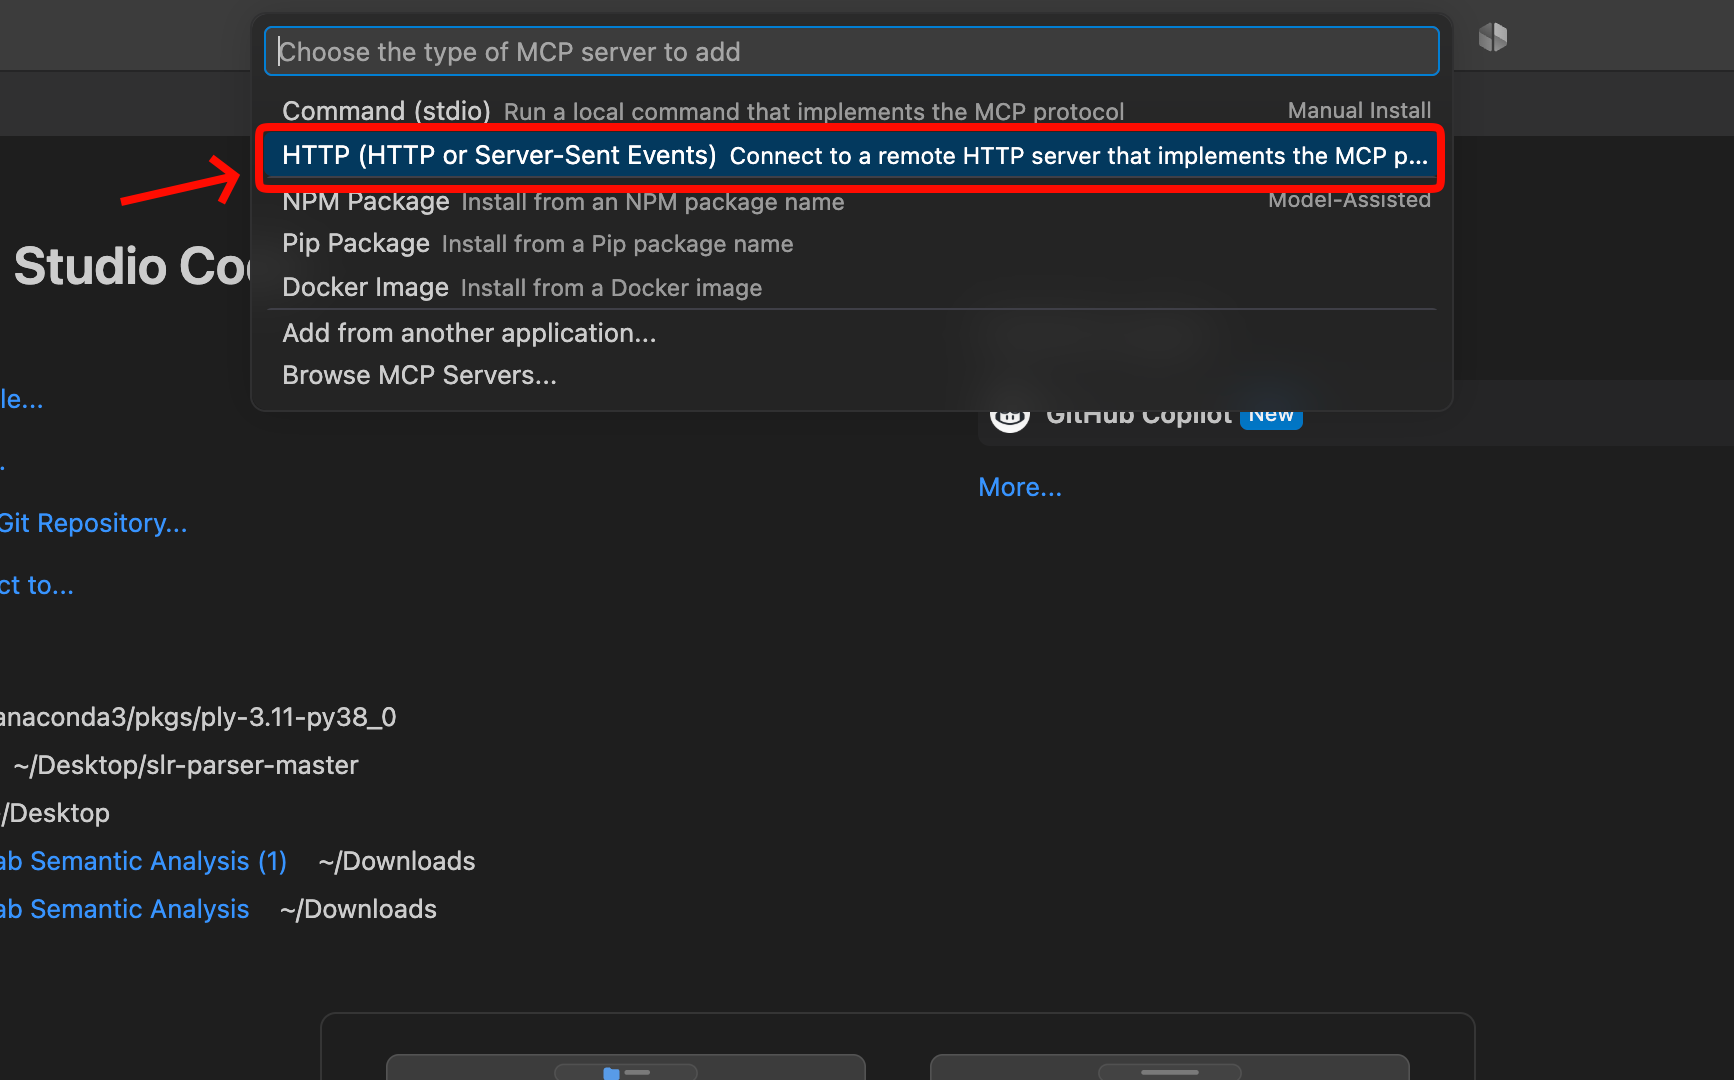
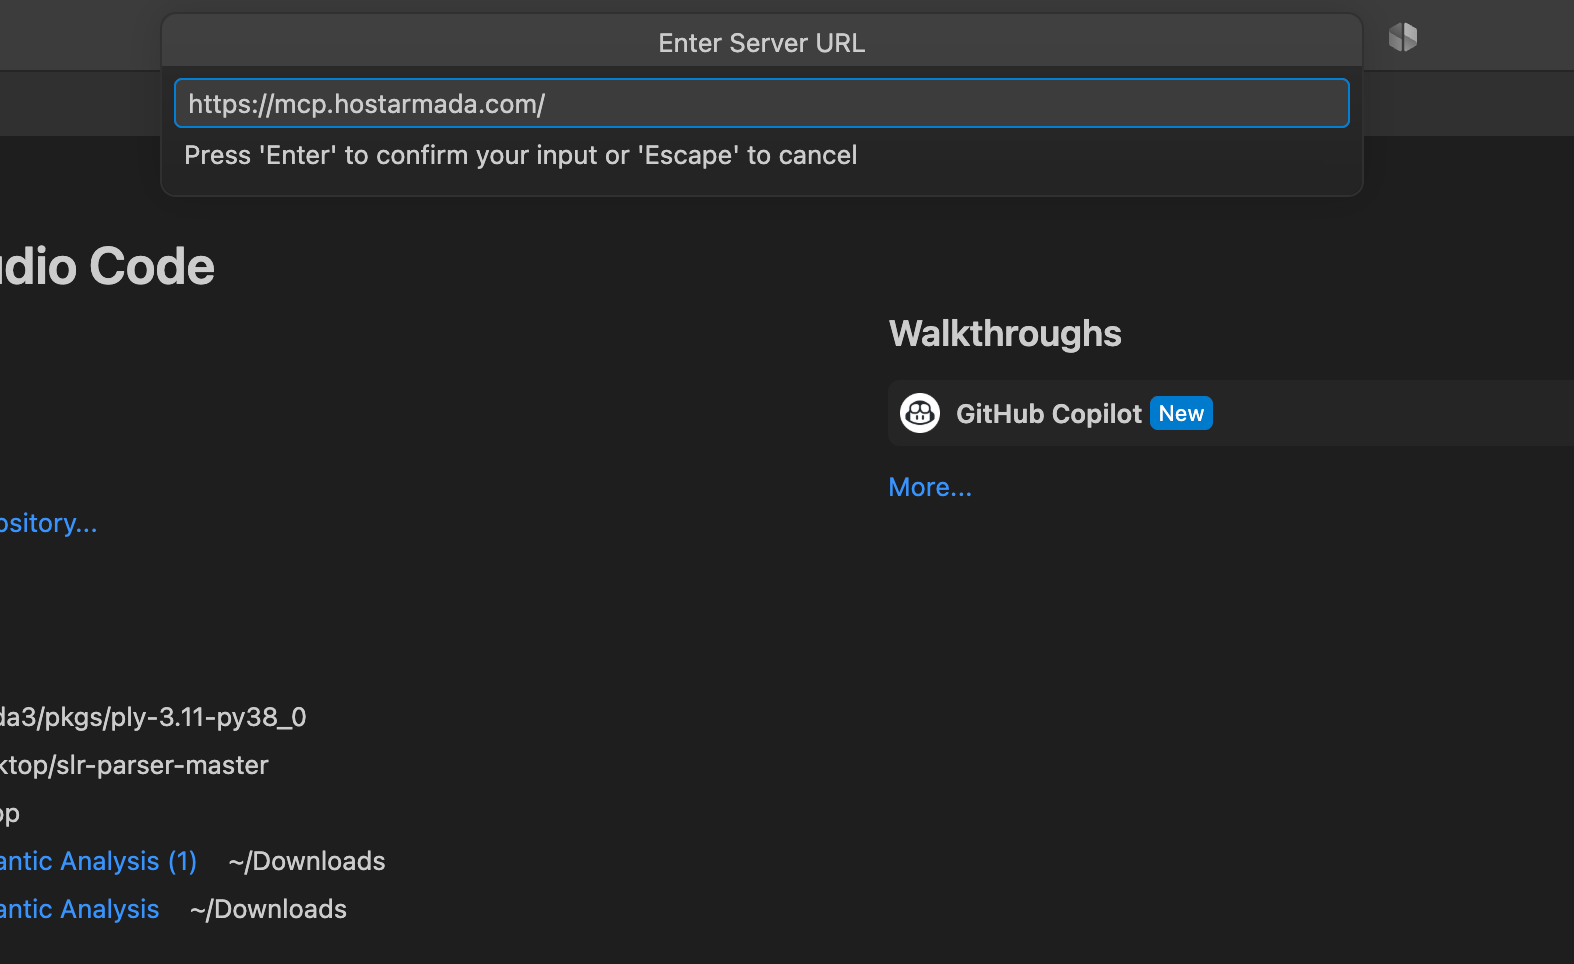
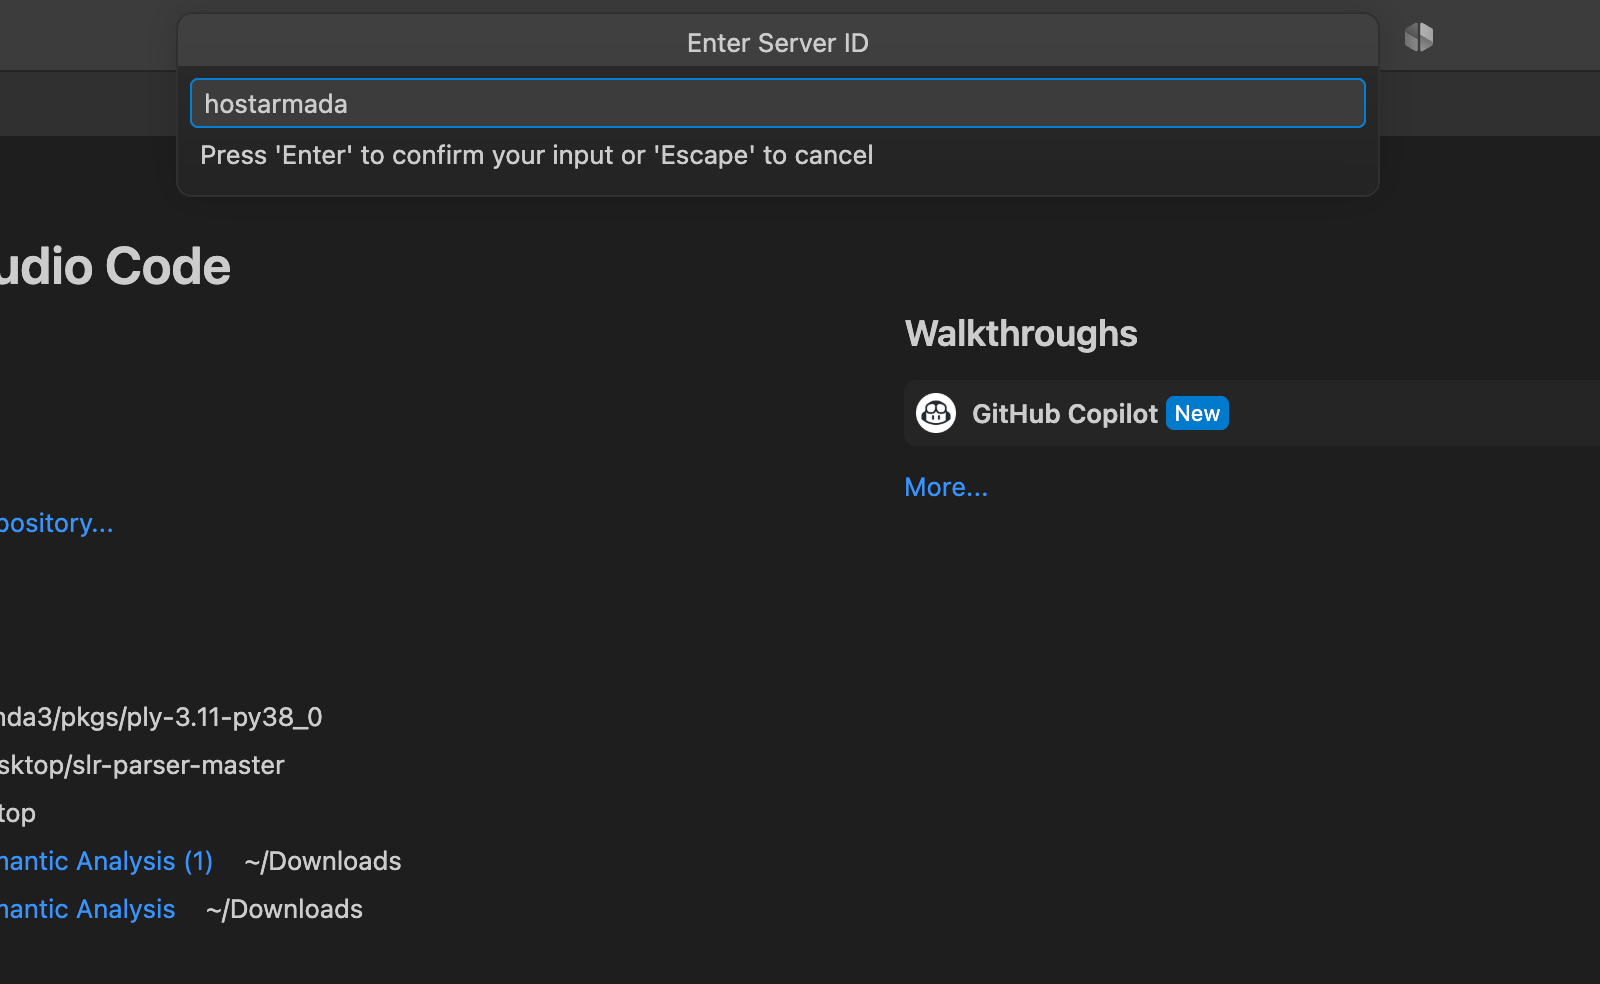
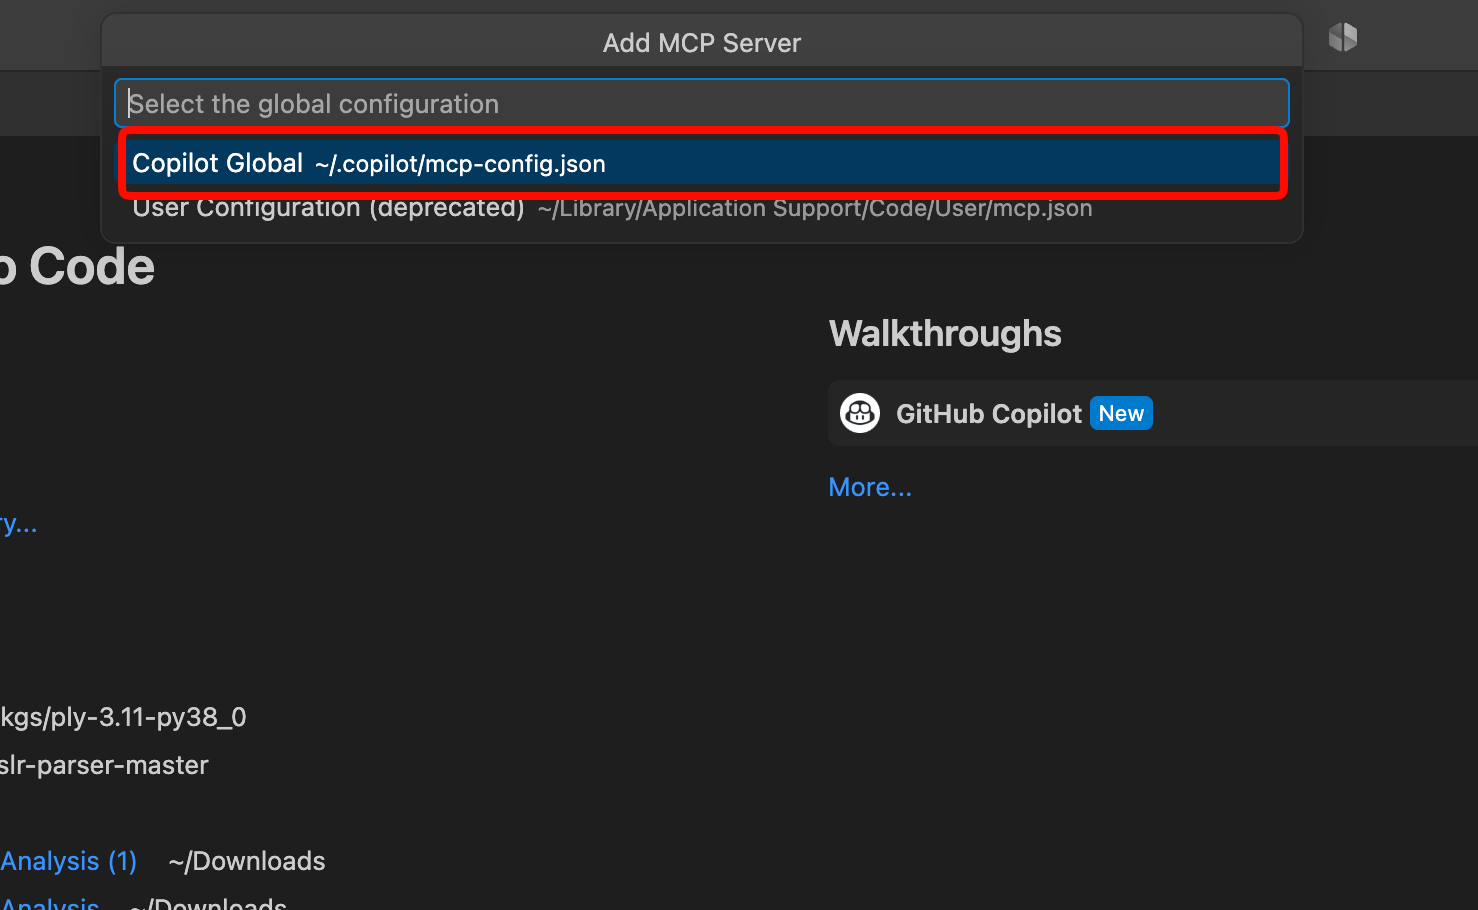
VS Code will then save the HostArmada connector to your settings. You don't need an API key or password. You'll sign in through your browser in the next step.
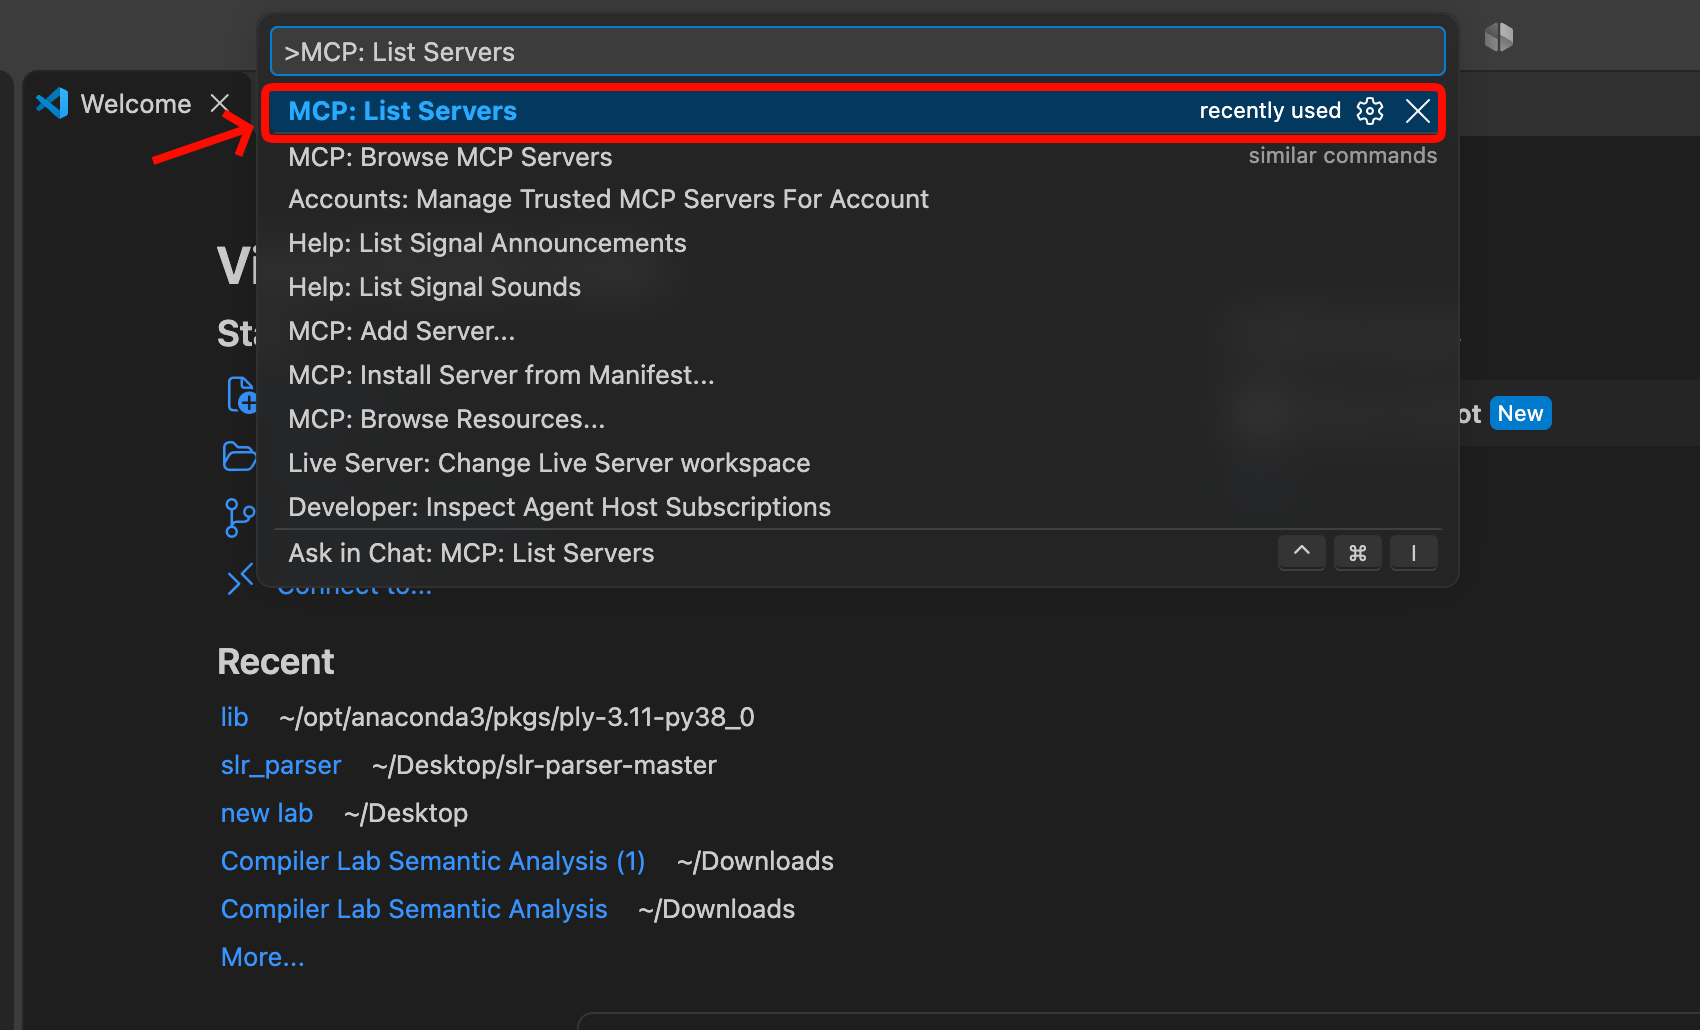
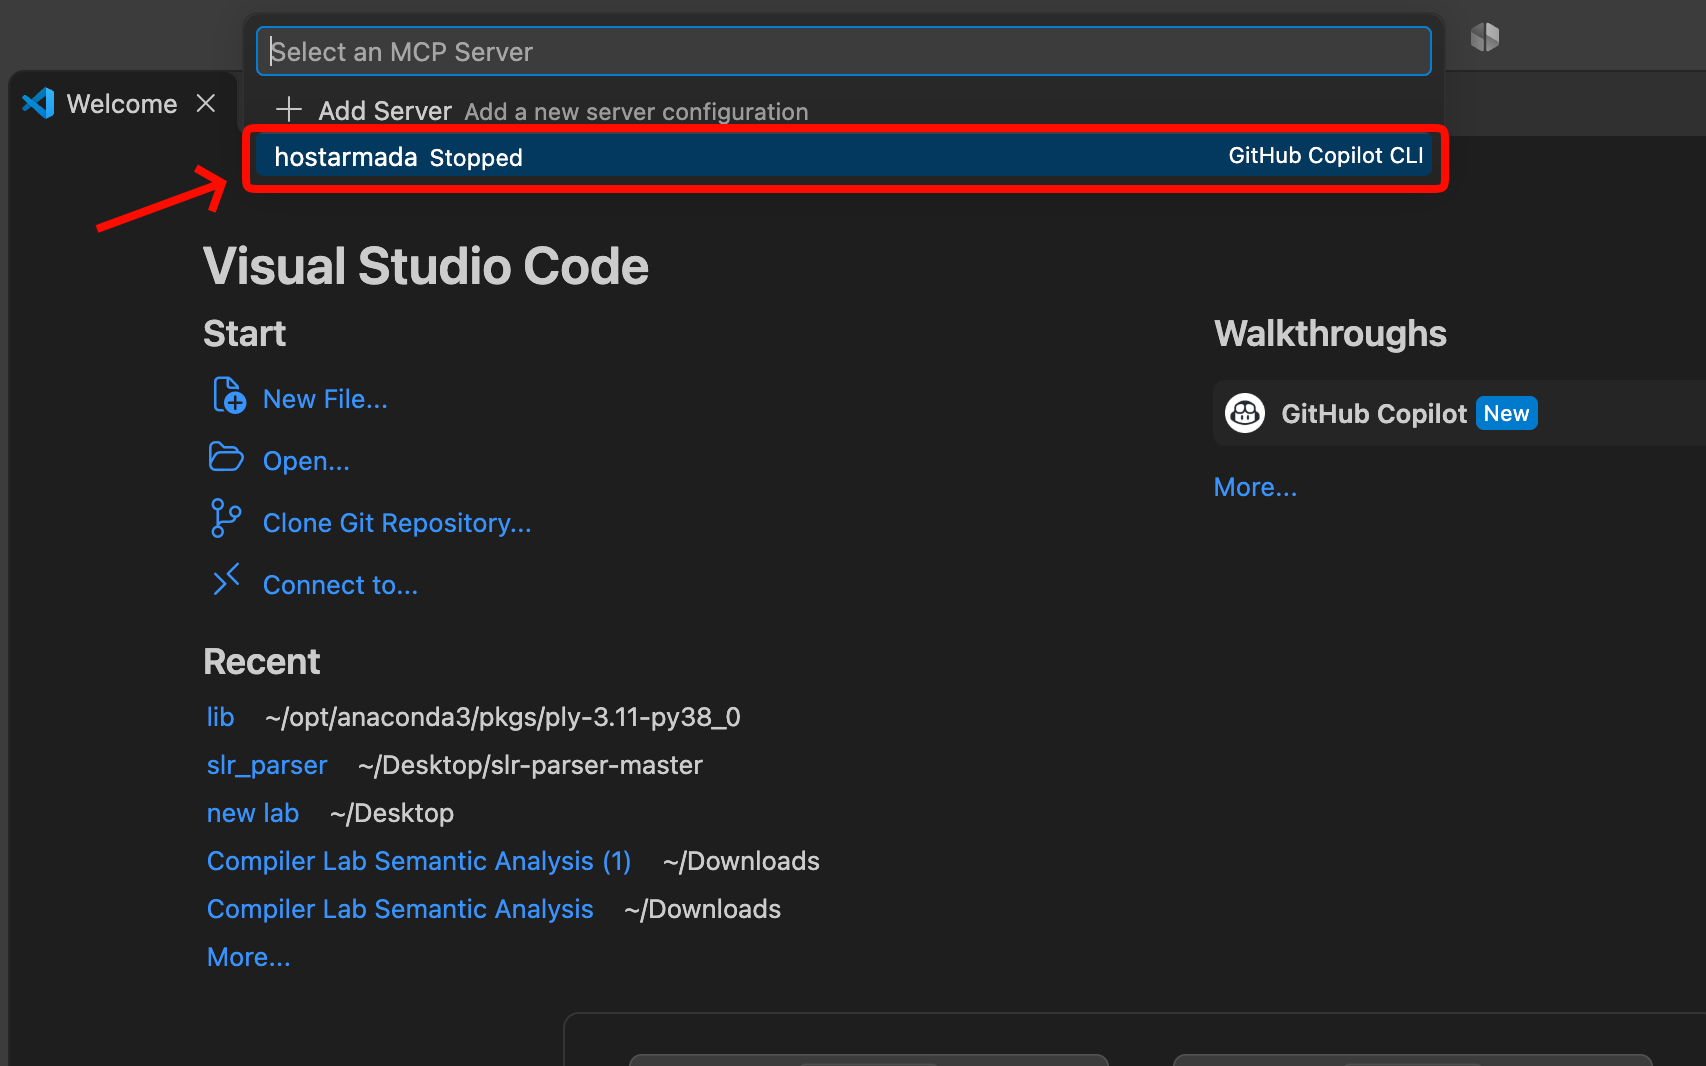
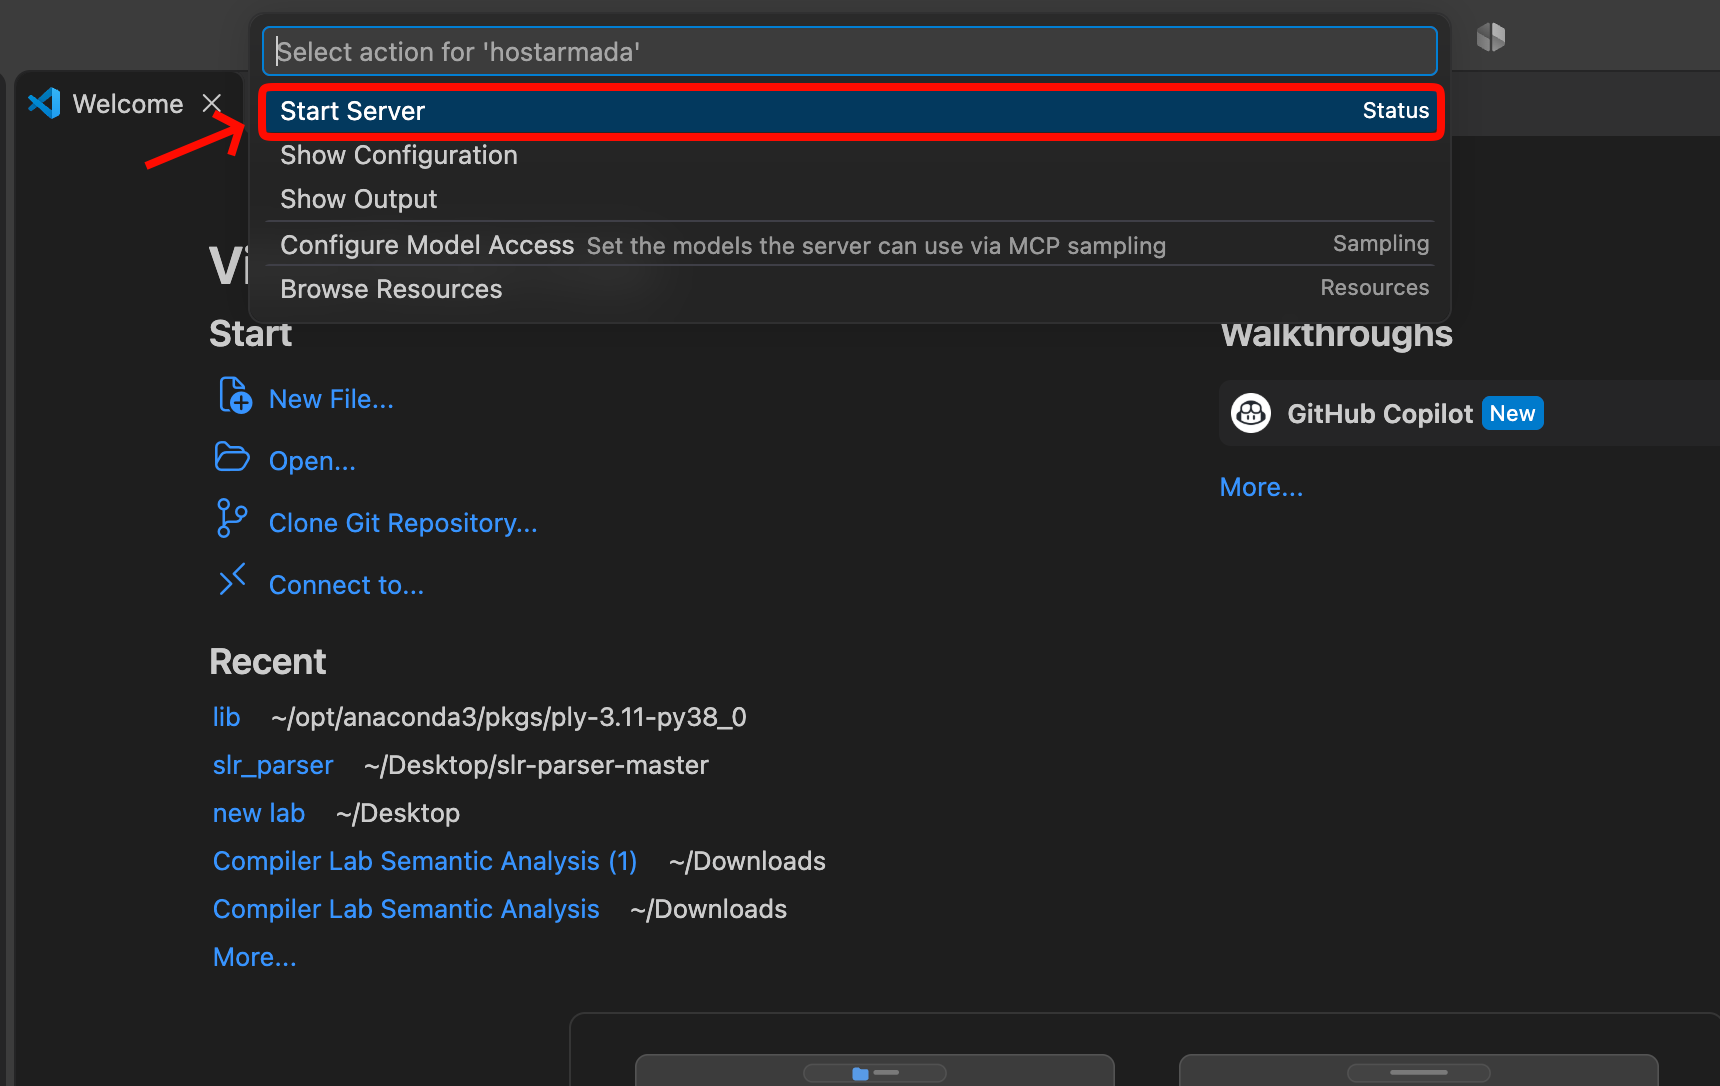
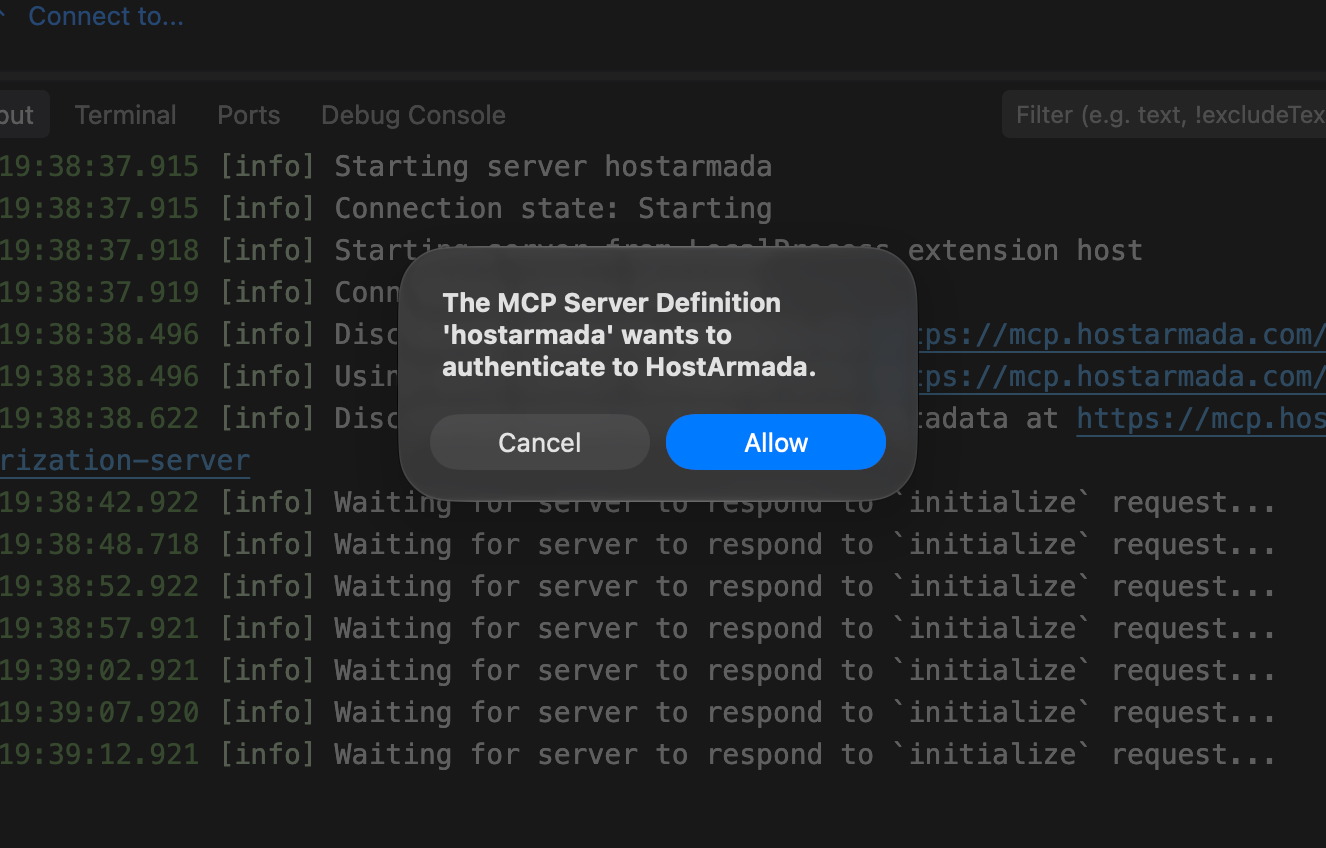
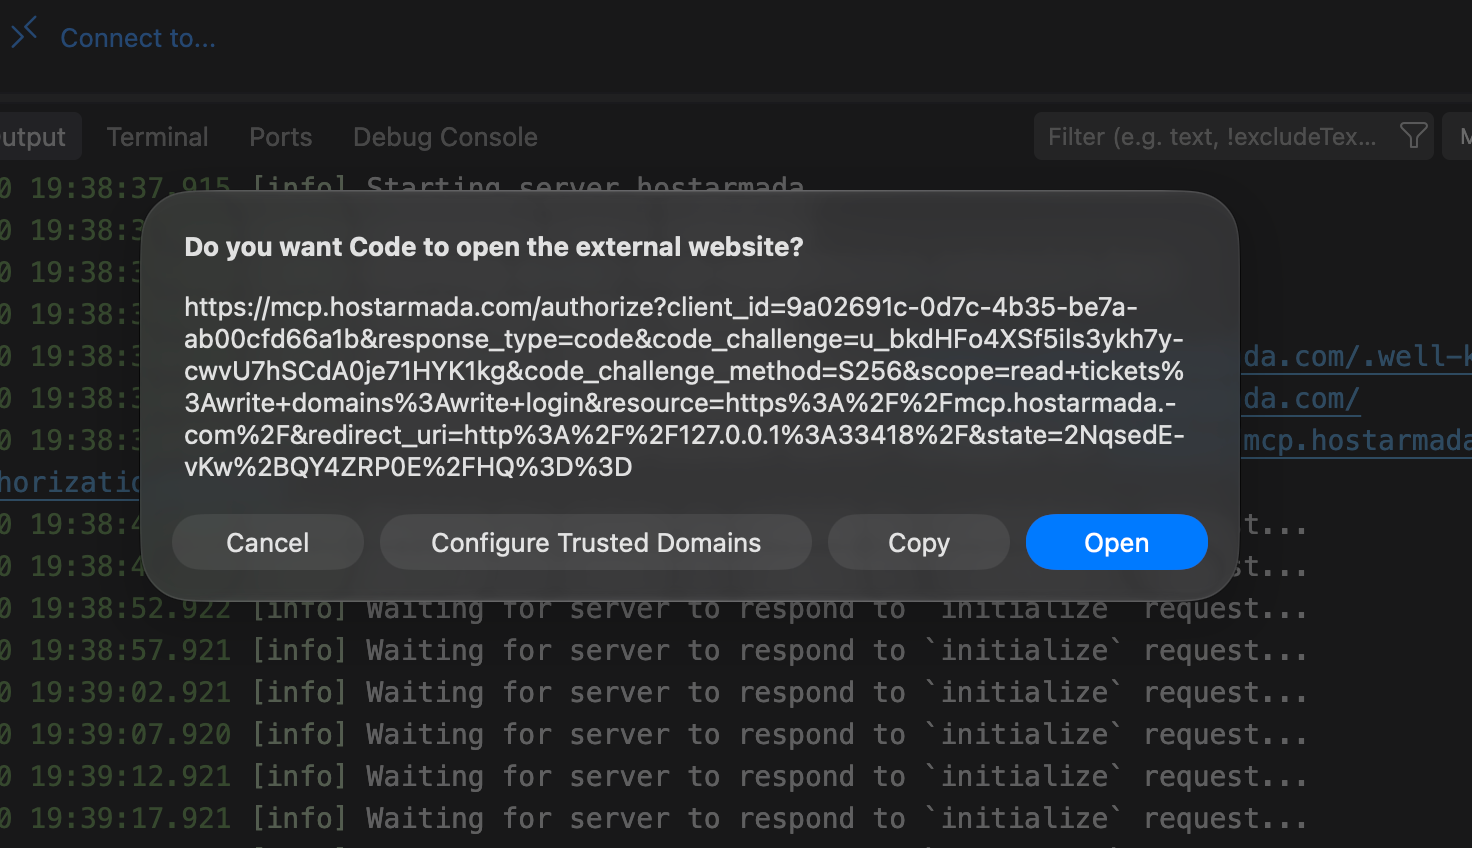
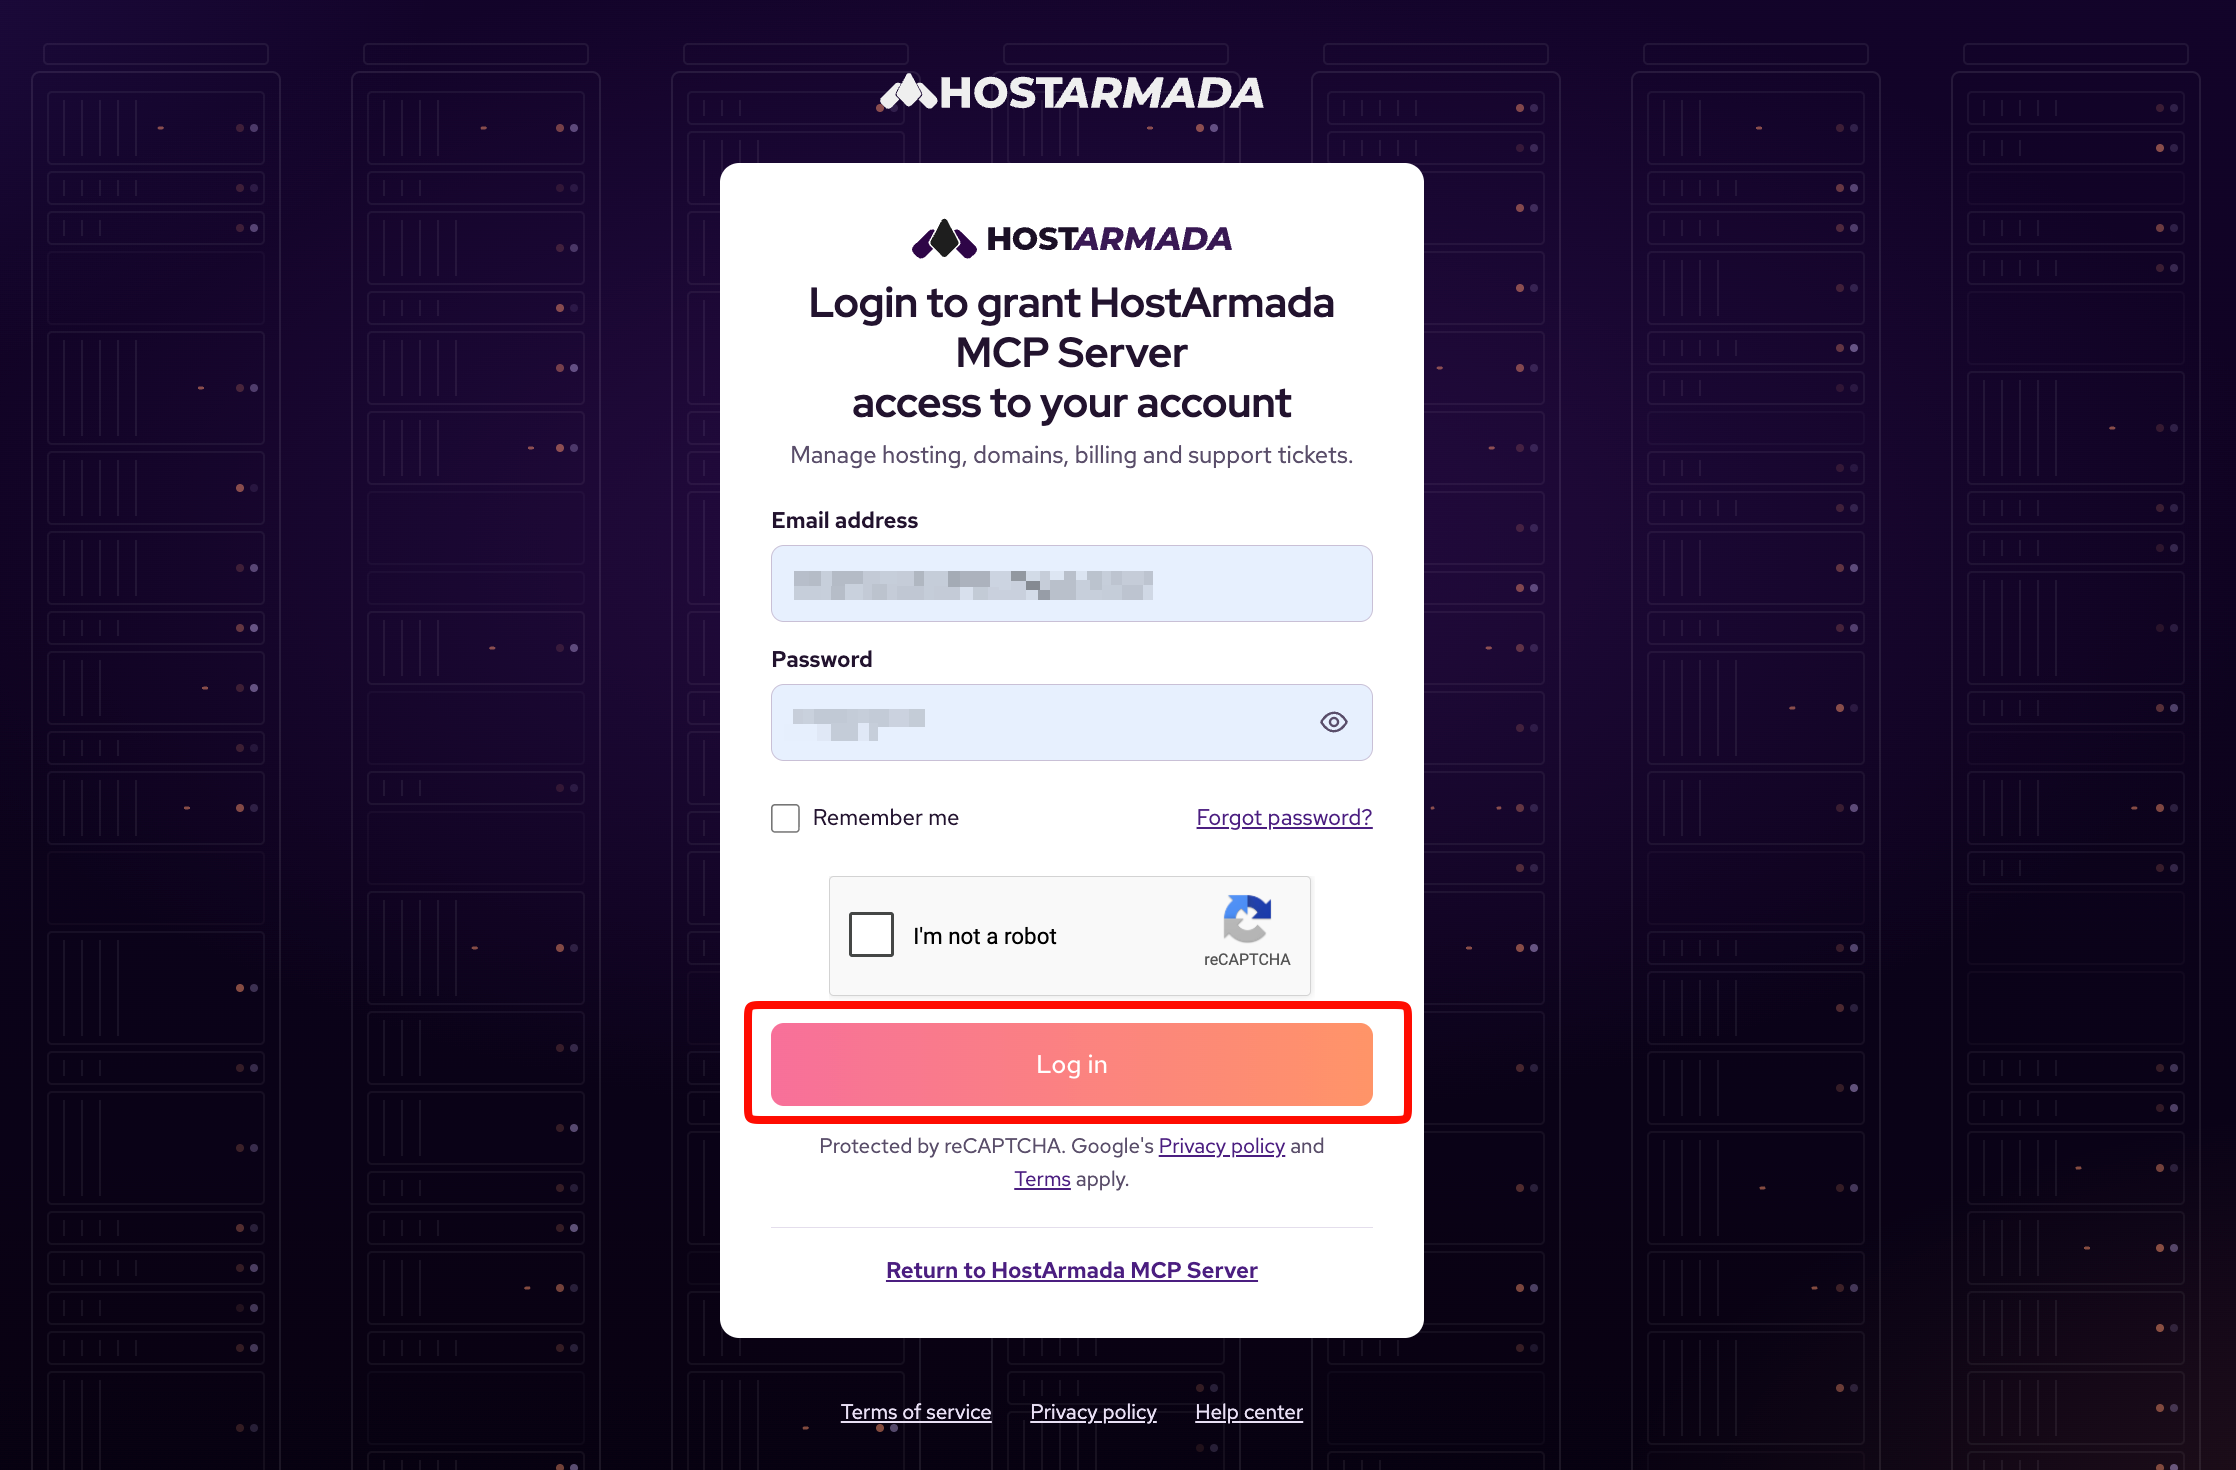
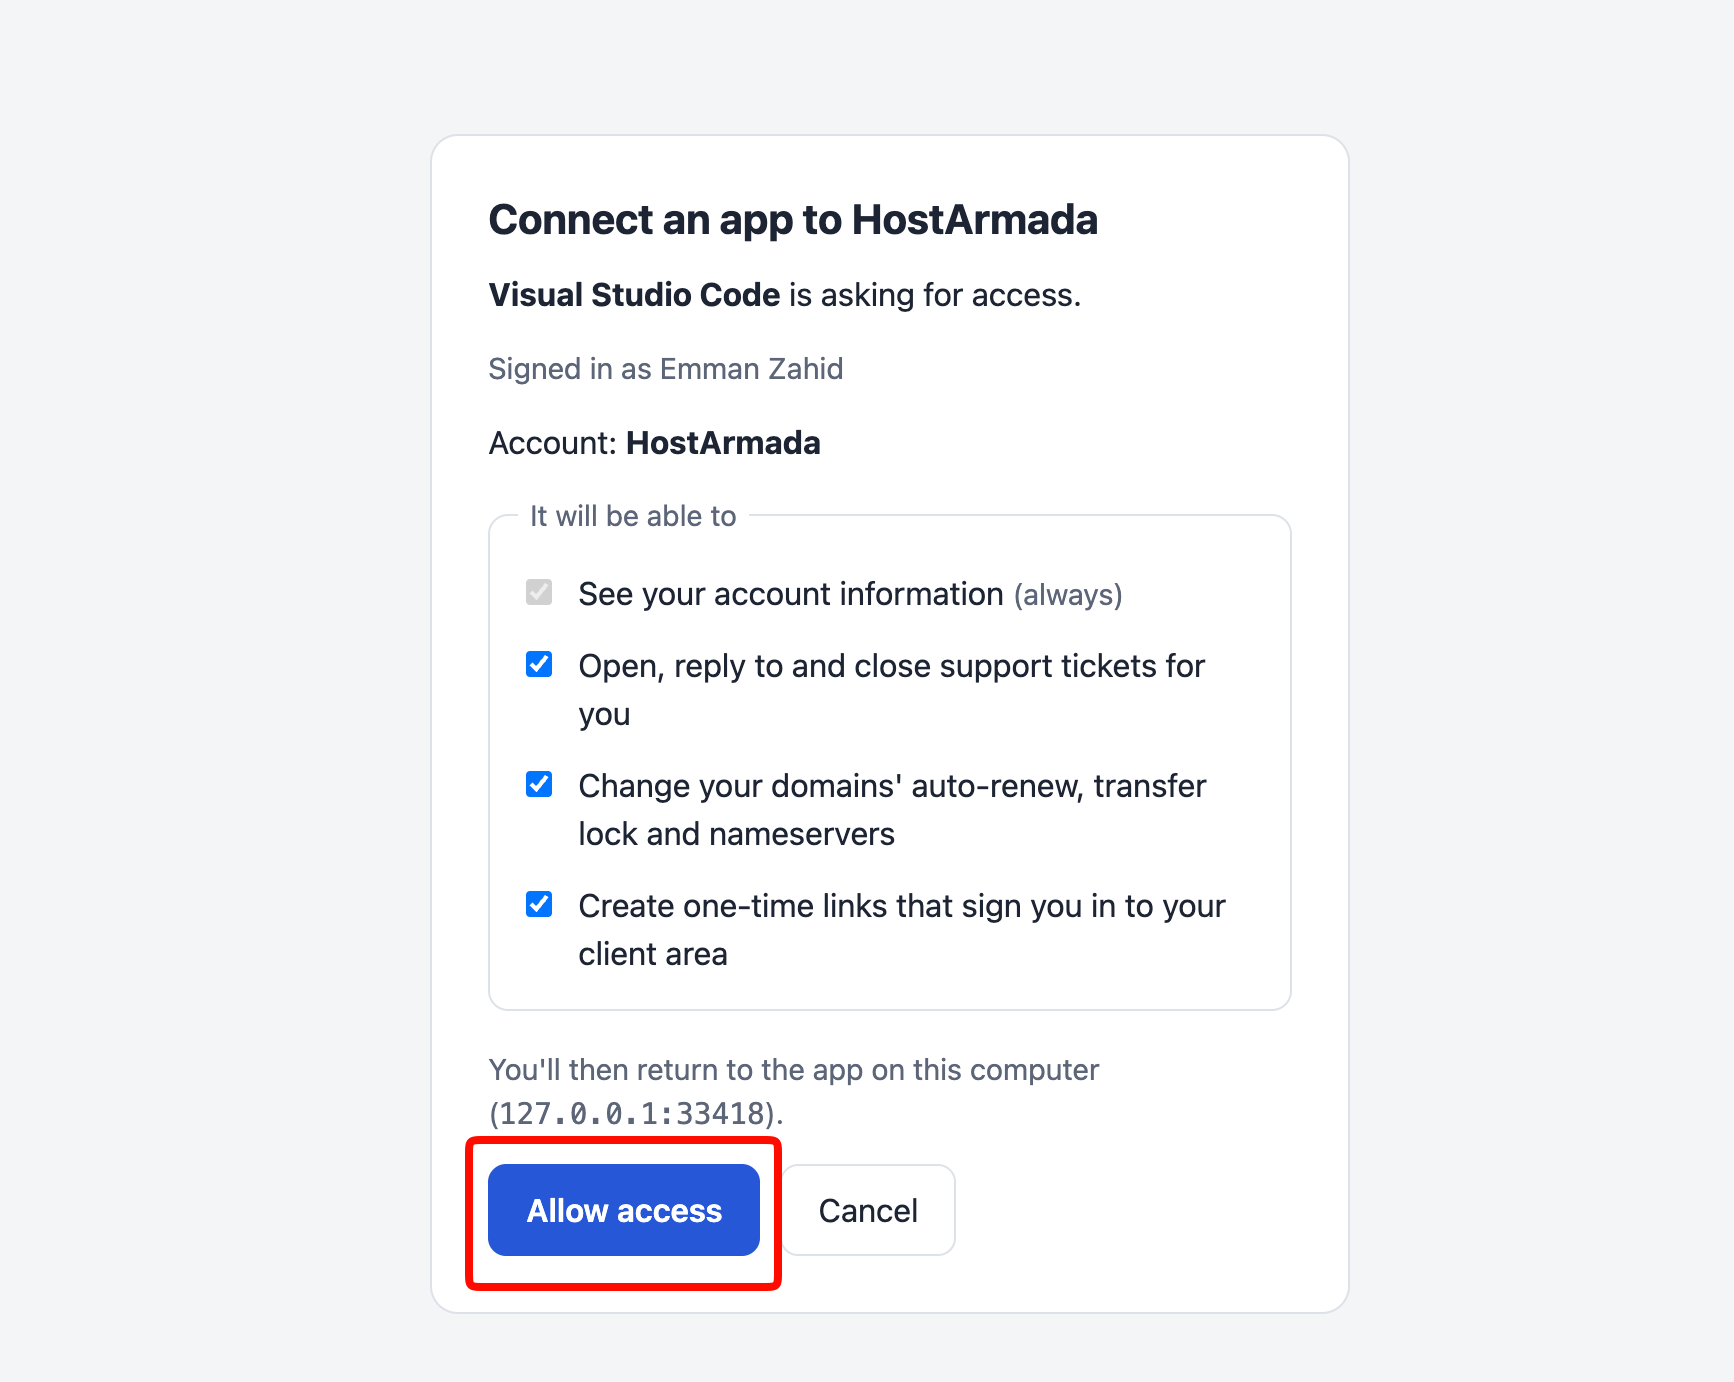
VS Code replies with your profile, credit balance, active services and domains, unpaid or overdue invoices, and open tickets.
|
Where you saved it |
Where the HostArmada connector works |
|
Your user profile |
In every project you open in VS Code. We recommend this one. |
|
The workspace (.vscode/mcp.json) |
Only in that project. |
If you save it to the workspace and share the project with others, for example on GitHub, they'll see the HostArmada entry. That's safe because it only holds the server URL, not a password. Each person still has to sign in with their own HostArmada account.
VS Code can reuse MCP servers you added in Cursor, but this is off by default. If you'd rather not repeat Step 1, turn on the chat.mcp.discovery.enabled setting and select Cursor as a source. You'll still sign in once in VS Code.
If your company manages your GitHub Copilot or VS Code settings, an admin may limit which MCP servers you can use. If the HostArmada connector is blocked, ask your admin to allow https://mcp.hostarmada.com/.
To stop the HostArmada connector without removing it, open the Command Palette, run MCP: List Servers, select hostarmada, and choose Stop. You can also switch its tools off in the chat's tools picker.
To remove it completely, run MCP: Open User Configuration from the Command Palette, delete the "hostarmada" entry, and save. To sign out, open the Accounts menu in the bottom-left corner of VS Code and sign out of the HostArmada connector. You can add it again at any time.
|
Problem |
What to do |
|
MCP: Add Server doesn't appear in the Command Palette |
Update VS Code to the latest version and make sure GitHub Copilot is set up. |
|
The chat doesn't use my HostArmada account |
Switch the chat to Agent mode and check that the hostarmada tools are on in the tools picker. You can also add "Use the HostArmada connector" to your request. |
|
The browser sign-in page won't load or keeps failing |
Check that the URL is exactly https://mcp.hostarmada.com/. Run MCP: List Servers, select hostarmada, and restart it, then sign in again with the account owner's login. |
|
Something else isn't working |
Run MCP: List Servers, select hostarmada, choose Show Output, and send the error message to our support team. |
|
The chat can't find another customer's account or domain |
That's by design. The HostArmada connector only works with the account you signed in with. |
|
The chat says I've hit a limit |
Wait a moment and try again. You can make up to 60 requests per minute, and up to 5 domain lookups per minute (60 per hour). Opening and replying to tickets have their own limits. |
Need help?
If you get stuck, feel free to open a ticket or chat with HostArmada support. Tell us which AI app you're using and the step where you got stuck. Our team is ready to assist you 24/7.

Emman is a Content Manager at HostArmada where she helps make complex topics accessible for readers around the world. With 5+ years of experience in crafting SEO content, she’s passionate about making tech topics easy to understand. In her free time, Emman enjoys traveling and watching Formula 1/E races.
Learn more about MCP in the other tutorials that we have:
