
It is no secret that people are captivated by eye-catching visual media. Humans tend first to observe the images, infographics, videos, and any other rich media. Then, if interested, they step into focusing on the actual content of your pages and posts.
To make the content of your WordPress website more attractive to your visitors, you will often find the use of media content a necessity.
There are two general ways of uploading media to your website. You can do that on the go while creating your posts and pages. There is also a way to simply upload media without the need to create such structural components in the first place. This means that you are given the option to actually upload images, audio, or even video files independently. These files are stored and managed in your Media Library, which will be the main focus of this tutorial.
For a start, please log into your WordPress Admin Dashboard. You can do that by accessing your domain followed by "/wp-admin", i.e., "yourdomain.com/wp-admin", where "yourdomain.com" stands for your actual domain name.
Once logged, please navigate through the left-hand side menu bar to Media > Library.

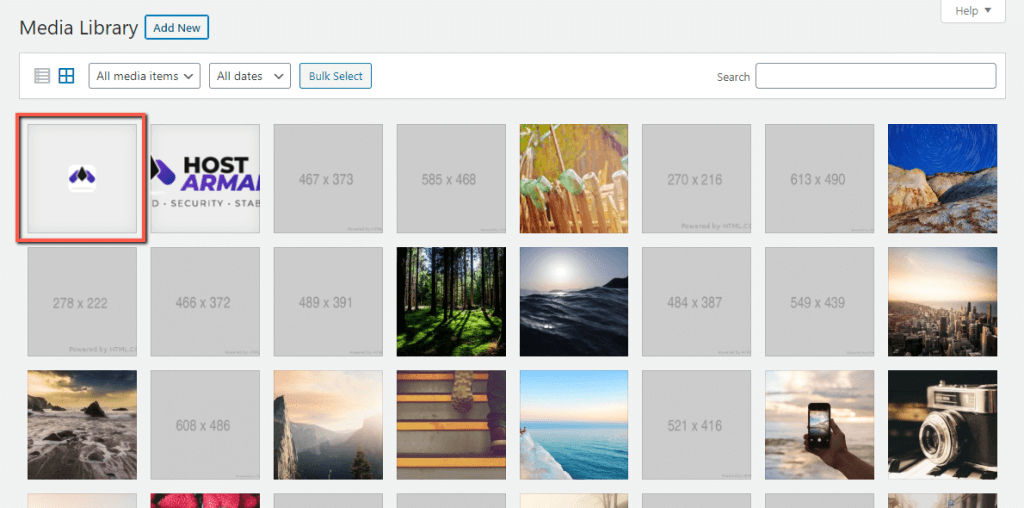
Once you click on that option, you will be redirected to the actual “Media Library” page wherein a conveniently separated table view will be displayed with all existing media files.

By default, you are presented with a list of all files you currently have on your website. If you have been running your blog for a while, that list will most surely be irritatingly long and unorganized. Therefore, let’s see how you can filter and arrange the files in it.
The default view of the Media Library is grid-like. The icons at the top left corner of the table allow you to switch from a "Grid" to a "List" view. Depending on your preferences, you can choose the most convenient one.

Right next to them, you will see the "All media items" dropdown menu. It allows you to filter and list the media item per type. Clicking on it will expand the menu, and you will be presented with a number of options to choose from. For example, if you select the last “Mine” option, only the files uploaded by you will be shown.

The "All dates" dropdown menu, right next to it, is really handy if you want to filter the files by the time of upload. If you need to locate a specific file and you do not remember its name, but you remember approximately when you have uploaded it.

And, of course, there is a Search tool, which allows you to easily filter your media files based on specific keywords.
All these tools are intended to optimize the organization and the process of searching for specific files.
Now that we know where to find all the media content let’s see how to upload new media files. The process is relatively simple.
First, please click on the “Add New” button located at the upper right corner of the page.

Once this is done, you will be presented with a new block right below. You are allowed to directly drag and drop the desired file(s) into the Active Upload Area indicated with the “Drop files to upload” label. You can also click on the “Select files” button, which will let you select the files from your local computer. It will launch a dialog box typical for your OS, showing all files available locally.

When the files are selected, you will see a progress bar that will appear next to each one of the items to indicate the progress of the upload process. After the upload is complete, a thumbnail of the added media will be displayed in the list of the media files.
Please note that while uploading files through your WordPress backend, whether through the Media Library or directly from your posts, pages, categories, etc., the maximum upload file size is limited to 1 GB. In case you need to upload a file larger in size, you can do so via FTP. Detailed instructions on how to upload files using various FTP Clients you can find in our FTP-based tutorials.
Now that you have learned how to upload Media Files using the Media Library integrated into WordPress, it is time to learn how to further edit and configure them. Considering the fact this is an extremely broad topic, we have come to a conclusion to dedicate another separate guide to it, so that we can explain each aspect in detail.
In our How to edit Media Content in WordPress tutorial, you will find comprehensive instructions on every single action you can perform on your media files. Such as renaming files, customizing permalinks, scaling, rotating, flipping, and cropping images, editing image thumbnails, and so on. We have covered every built-in functionality available in WordPress, allowing you to customize your media files.
If you have been running your blog for some time, there will undoubtedly be some old media file you do not need any longer. To keep your Media Library organized and to avoid overburdening your website with unnecessary files, you may want to clean it up from time to time.
Generally, there are several ways of deleting files within the Media Library. They depend on the currently selected view mode and your intention. Considering the fact, manually deleting files is really obvious and straightforward, we will focus on explaining how to delete them in bulk.
First, please switch to the List view mode, following the instruction in the first section of this tutorial.
By default, WordPress always lists only 20 items per page, whether they are posts, pages, media files, etc. With this in mind, you are limited to deleting up to 20 files at once, which is not really practical in case you want to remove a lot more. Fortunately, you are able to modify that number and extend it up to 999 items.
To do so, please click on the "Screen Options" button located at the top right corner of the page. Upon clicking on it, it is going to be expanded, presenting a new block with several settings. Please locate the "Number of items per page:" field under the "Pagination" category and enter the desired value into it.

When ready, please click on the "Apply" button to save your selection.
Now it is time to delete all unwanted media files. To do so, please tick the checkbox in front of "File" positioned in the heading of the table.
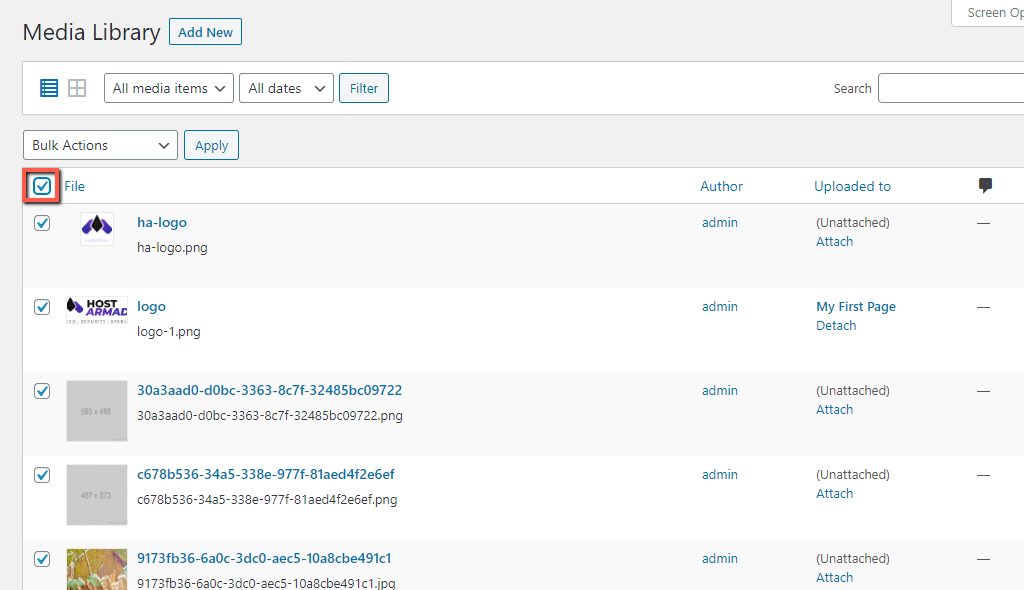
Note that this action will mark all files currently displayed on the page. To avoid deletion of unintended files, you simply need to uncheck the corresponding boxes.
If the files you wish to keep are more compared to those, you would like to delete, it is probably more reasonable to manually marks the respective checkboxes of the unneeded files.
When you are ready, please click on the "Bulk Actions" dropdown above the table and select the "Delete Permanently" option.
Afterward, please click on the "Apply" button positioned right next to the dropdown menu.

Upon doing that, an alert will pop-up, and it will inform you the files will be permanently deleted. To proceed further with the deletion, you have to confirm by clicking on the "OK" button.
Please be extremely cautious which this option, as once the files are deleted, they cannot be recovered unless you have a website backup.
With this done, you know how to adequately manage your WordPress Media Library and keep it neat and organized. We hope this information was useful to you, and it will come in handy in the future maintenance of your website.

Sebahat is a young and bright woman who has become an invaluable part of our team. She started as a Customer Care Representative, mastering that role and, along the way, growing into a tech-savvy individual who is well acquainted with every support layer of the company. Driven by her aim to improve our customers’ experience constantly, she is committed to enhancing the extraordinary support we deliver.
Learn more about Wordpress in the other tutorials that we have: