
A typical website is structured in multiple pages representing different content. This means that in order to edit your website, you will have to actually edit its pages. For that reason, the most important feature that the HostArmada Website Builder has to offer is indeed the drag-and-drop editor for the pages of your website and in the following lines of this tutorial, we will review it in detail.
To edit a page in the HostArmada Website Builder you will have to ensure that:
If both of these conditions are met, then you will need to select the correct website. You can do that by using the "Switch Site" option from the top horizontal toolbar. From the list of websites that will be shown, please pick the one for which you would like to edit a page.

When the correct website is selected and you can see its domain in the top horizontal toolbar under the "Site" option, you can go ahead and access the pages for that website. To do so, please hover over the "Pages" link located in the left vertical menu of the HostArmada Website Builder, and from the sub-menu that will appear, please choose the "All Pages" link.

You will be then redirected to a new page where you will find a complete list of all the pages for the selected website.
Before you can start editing a page, you will need to understand the different types of pages. As you might have noticed already in the list of pages there will be a few entries that are with the names of "Header", "Footer" and "Menu". These are special pages since, as their names suggest, they are actual components included in the other pages for your website. Therefore, editing any of these will change their design or content on all other pages for your website.
To start the editing process, please click on the small pencil-like icon displayed next to each of the pages.

When you click it, you will be redirected to the main interface for editing pages in the HostArmada Website Builder. The page is once again separated similarly to the "Dashboard" page of the builder with the menu containing all the components placed vertically on the left side of the screen and a large horizontal toolbar at the top of the page.
Using the left vertical menu will enable you to drag-and-drop web components on the chosen page while using the top toolbar will allow you to perform different actions with the page globally.
When you select a theme for your website and the same is applied for the pages you will notice that the theme also comes with pre-configured web elements and even sample content. This is done for your convenience and it will enable you to simply change the content per your liking. However in the case when you would like to add a new web component you can always do so by dragging it from the left vertical menu to the location on the page where you would like the same to be displayed.
To better explain the capabilities of the HostArmada Website Builder we will separate the page editing process into two topics - Editing existing page components and Adding new components to a page.
On every page of your website, you will have already added web components with some sample content being added to the same. To edit any of the components displayed on the web page, please click on the element itself.
Here is the place to mention that the general template of your website will follow a typical structure using rows and columns. Rows are used to contain horizontal elements such as Columns. On other hand, the Columns are used to contain the actual web components displayed on the web page.
To edit a row, you will need to select it first. Typically rows can be selected by clicking on the three dots icon displayed on the left side of every row on your website.

For each row, similarly to the other web components, you can edit the general "Settings" and of course the "Style" of the row.
To edit a column, you will need to select it first. Typically rows can be selected by clicking on the three dots icon displayed on the top center side for every column on your website.

Once again, for each column, you will be able to edit its general "Settings" and of course the "Style" of the column.
Please note that the icon for selecting rows is three dots positioned vertically while the icon for selecting columns is also three dots, however, positioned horizontally.
To edit any other web component on the page of your website you will need to simply click on the component itself. Depending on the type of the selected component a dialog box will appear containing different settings and information for the chosen component.

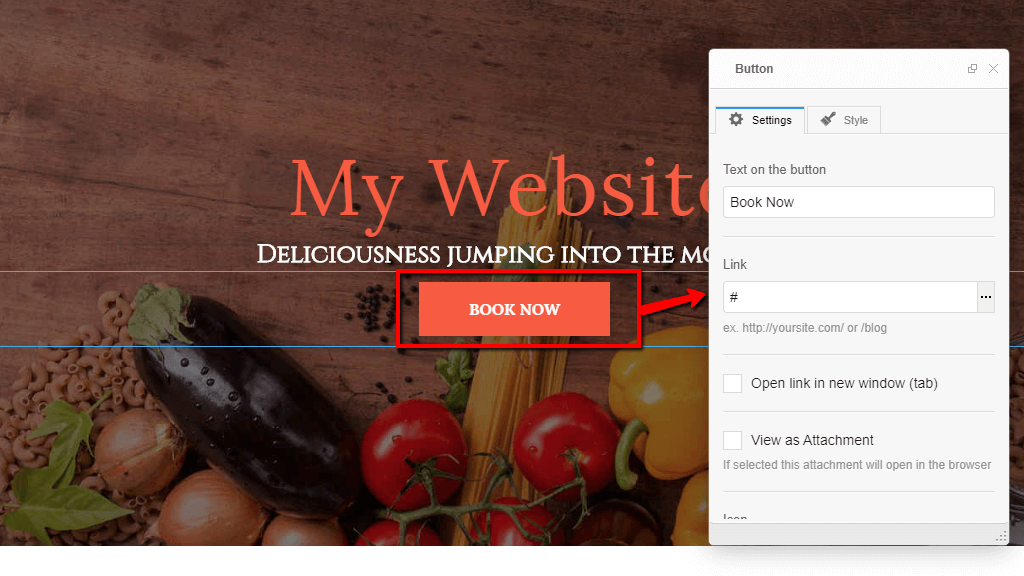
Every dialog box will be separated into two tabs - "Settings" and "Style".

The "Settings" tab will contain a general configuration of the selected component. For example, if the component is an image, you will be able to change it and also manipulate different settings such as "Image Size", "Link to", "Alignment" and so on. If the chosen component is a text, you will be provided with an "Edit Paragraph" button which will allow you to respectively edit the entire text.
The "Style" tab will allow you to easily edit all the CSS styling properties of the component such as "Background Color", "Text Color", "Background Image", "Paddings" and so on. Furthermore, you will be able to edit the component's style for every single resolution enabling you to have a different design depending on the used by the visitor device.
Please feel free to browse the available settings in the dialog box and in case you have any questions, please feel free to contact our Technical Support Crew by submitting a ticket in your Client Area.
Apart from editing already existing page components the HostArmada Website Builder allows you to add additional predefined web components. All of these will be displayed in the left vertical components box. From there, you will be able to choose a component and to drag-and-drop it in a column on your web page.

Please note that when you drag the desired component over the web page different areas of the page will be highlighted when you are on top of those such as rows and columns for you to choose where to drop the selected web component. When you drop the component, depending on its type, you will be prompted to edit the options for the component in the form of either a dialog box or in case the component is text-based a text editor.
When you are ready editing the component you can click anywhere else on the page so the component can be saved.
Now that you know the general concept of editing your web pages it is time to learn how to save the edited page and publishing the same on your website. In this section, we will focus on the top horizontal toolbar and the different actions you can take with it.
Let's begin by saving the updates you have made on your web page. To do so, please click on the green "Update" button displayed on the right side of the top horizontal toolbox.

After a few seconds, the content of the page will be saved and the Website Builder will prompt a message indicating the successful save. Please note that updating the page using the "Update" button will only work for the website builder. To actually publish the edits on the live website you will have to use another button labeled "Publish" and located right before the "Update" button.

Clicking on the "Publish" button will prompt you with a message for you to confirm the publishing since doing so will overwrite your current website with the new content you have edited. Please note that there is no option to restore already published pages, therefore you will need to be certain about that.
Another option you will be given is to publish only the currently edited page in the form of a small checkbox.
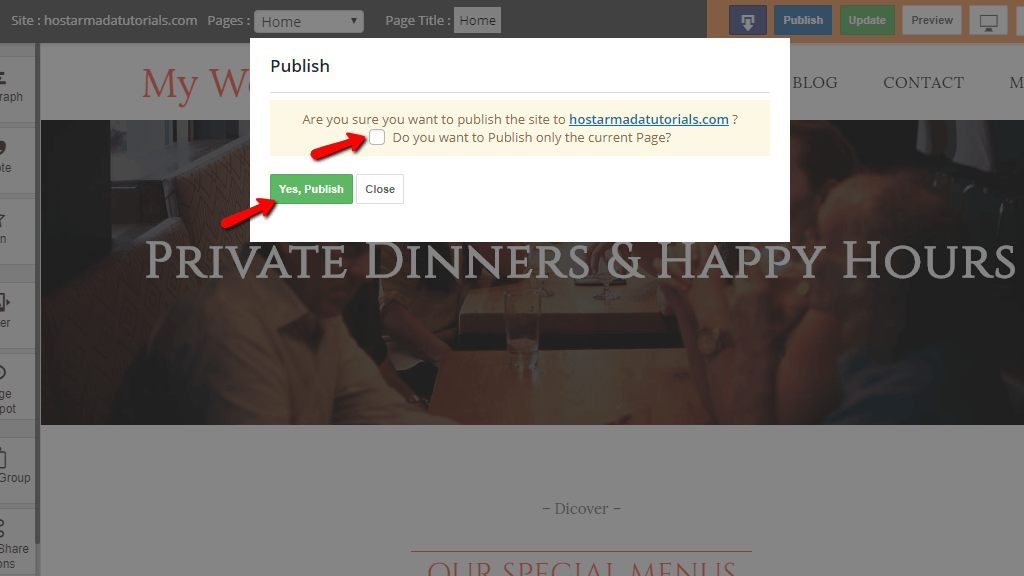
When you are ready, please confirm the publishing by clicking on the "Yes, Publish" button. The Website Builder will take some time to publish your website due to the fact that all the files for the website will be deployed on your Web Hosting Account with us under the domain name that you have chosen for this website. When the process is completed you will be presented with a dialog box from which you can visit your website and check out the changes you have just made.

That's it! You now know how to edit and publish the pages of your website. Of course, this topic can be expanded quite a lot since we have not covered the individual web components you can use on your web pages, however, we will leave that part of the exploration to you so you can see how easy it is.

Sebahat is a young and bright woman who has become an invaluable part of our team. She started as a Customer Care Representative, mastering that role and, along the way, growing into a tech-savvy individual who is well acquainted with every support layer of the company. Driven by her aim to improve our customers’ experience constantly, she is committed to enhancing the extraordinary support we deliver.
Learn more about Website Builder in the other tutorials that we have: